0:00
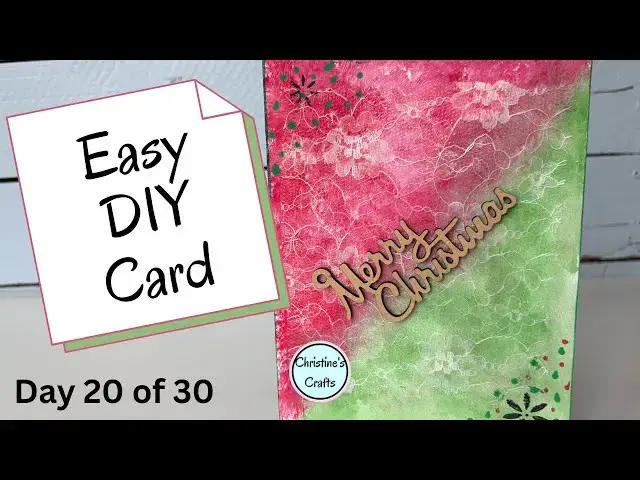
Welcome to day 20 of the 30-day mixed
0:03
media card challenge. Making cards using
0:06
the craft supplies that you've probably
0:08
already got at home. If you want to find
0:10
the other videos on screen description
0:12
below, look on the channel. And this is
0:15
the card we're making today. So, let's
0:20
You're going to need a card blank or a
0:22
piece of card folded in half. Now, I'm
0:25
doing it such that my card is seven
0:27
inches by five inches, but you can make
0:28
it any size you like. It's entirely up
0:30
to you. And I'm using watercolors. Now,
0:33
there's two reasons I'm using
0:34
watercolors. One is because lots of us
0:36
have them. I mean, our children use
0:38
them. Um, and they do give a good
0:40
effect. And I'm using quite a fat brush.
0:43
And I'm literally just stippling it on.
0:45
And I'm just going to cover half of the
0:48
card. And I'm doing it like this so you
0:50
don't get such a flat color. So, the
0:52
idea is it'll be a little bit more
0:54
textured in appearance even though there
0:56
won't be any texture there. Hope you
0:58
know what I mean. And I'm just going to
1:00
say I've just done it with the card as
1:01
it is, but it is a good idea to put a
1:03
piece of paper between the front and the
1:05
back of the card so you don't get paint
1:06
on the back. Now, as I say, I've done
1:08
half of it red and now I'm swapping to
1:11
green. I'm not letting it dry because I
1:13
don't mind them merging in the middle.
1:15
If you want a distinct line between the
1:17
two, make sure that you let it dry
1:21
before you add the next color. So, you
1:23
can see they're sort of going on top of
1:25
one another in the middle. And I'm quite
1:27
happy with that. But it's up to you. And
1:30
with all watercolors, if you add more
1:32
water, you get a softer color, a lighter
1:35
color. If you just have less water,
1:36
you're going to get a stronger color.
1:38
And once you've got all your watercolor
1:40
on and you're happy with it, you just
1:42
got to leave it to dry.
1:45
And then I'm simply taking a piece of
1:47
lace and gluing it on top. I'm going to
1:50
use a PVA based glue. This one's called
1:52
decopage glue, but it's basically just
1:54
like Modge Podge or or similar. Just put
1:58
a layer of it on top. Again, don't get
2:01
too carried away because the glue is
2:03
waterbased, so it's going to try and
2:04
pull your watercolor paints off. Um, and
2:07
then once you've got the lace down, a
2:10
bit more of the glue on top. I'm just
2:12
going to hold it down nicely. It's a
2:14
light piece of lace that you can see
2:16
through, so it's not going to take too
2:19
much to hold it there. It's just giving
2:25
And then it's going to be time for my
2:28
topping in the middle. But one extra
2:31
step you can do is if you've got ink
2:34
pads, you can run them around the edge
2:37
of the card and it just puts a border on
2:40
the edge. And you can do it on just the
2:42
front or you can do it on the front and
2:43
the back. It's up to you. Hope you're
2:45
enjoying this uh video. And if you are,
2:47
could you give it a thumbs up so it
2:49
spreads to more people, please? Thank
2:51
you. So, you can see I'm put decided to
2:54
put green all the way around. And I've
2:55
decided to do it on the front and the
2:57
back. It's all about personal preference
3:00
here, and a lot of people don't like
3:01
doing it at all. Some people will do it
3:04
with um a pad rather than the ink pad.
3:08
they'll use an extra pad with just a
3:10
little bit of ink on it. So then I've
3:13
got a nice little wooden Merry Christmas
3:14
that I'm sticking on the middle. And if
3:17
you're applying wooden ones, um an
3:19
allpurpose glue is really good cuz you
3:21
want it to hold. Um some of these wooden
3:24
toppers can be a little bit heavy just
3:27
for um a paper glue. So I'm just using a
3:32
multi-purpose and I'm putting it in line
3:34
with the line between the red and the
3:36
green paint. I think that'll look best.
3:39
For me, that's not got enough detail
3:41
yet. So, I'm just going to do some
3:42
stenciling, which is another great thing
3:44
you can do on mixed media cards. I'm
3:46
doing it very simply. I'm just using a
3:48
black fine liner, and I'm just making
3:54
Nothing too special, nothing too
3:57
but it should look really pretty. And
3:59
just add that detail. And you could do
4:04
or you can choose just certain areas
4:06
that you want to add a bit of detail. Um
4:09
there are lots of stencils that you can
4:11
buy. I'm just using one that I'd got
4:14
already. Uh another thing you could do
4:16
is do stamps here to add detail. You
4:20
could even go on top of the lace. Um
4:23
I've chosen to just stick to the
4:24
corners. And then I'm going to use Pusca
4:27
pens because they're really good paint
4:30
pens. And they're just going to add a
4:33
little detail. So I'm literally just
4:35
using spots to add a bit more interest.
4:38
And I just think it's going to bring
4:42
you know, give them a bit more
4:43
brightness, make them stand out a little
4:45
bit more. And obviously you could do as
4:47
many different colors as you wanted to
4:50
here. So I'm adding a bit of red on red
4:52
and green on green. And then a little
4:55
bit of green on red and red on green.
4:57
Oh, I don't know whether I've got all
4:58
that the right way around, but I hope
5:00
you can see what I'm doing. Um, but they
5:03
are great for detail. So, I do recommend
5:06
them and they are very vibrant.
5:10
Um, yeah, let's get a bit of green on
5:12
that red. So, I hope you've enjoyed this
5:15
video and that you're going to make your
5:16
own cards using your watercolors, your
5:19
lace, your Pusca pens, stencils,
5:21
toppers, and whatever else. And if you
5:24
are making them for Christmas, have a