Up next in 10

Revolutionize Gift Giving with This 5-Minute Origami Bag
Jan 10, 2025


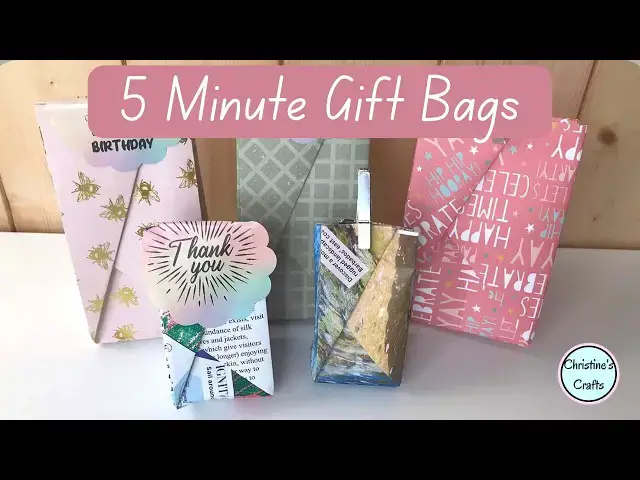
Learn how to make Origami gift bags in minutes, any size you like.
These are the approximate sizes of bags you will get for each square:
12" by 12" - 3" wide by 4.5" tall
8" by 8" - 1.5" wide by 3" tall
6" by 6" - 1" wide by 2" tall
If you want more Origami projects then check out:
https://www.youtube.com/playlist?list=PLJDvtpQDF0PdKXy3TQ-JGGlGPbhmPPX3a
--------------------------------------------
#craftideas #craft #crafting #origami #origamitutorial #origamieasy #origamibag
Show More Show Less View Video Transcript
0:00
how would you like to make some cute
0:01
gift bags today really quick simple just
0:03
use a square of paper no glue no tape
0:06
and look how cute they are you can
0:09
fasten them shook with a little clip a
0:10
little Peg or even a sticker I even made
0:14
this one out of a magazine page and
0:16
how's this for cute to just drop an
0:17
individual chocolate into and then place
0:20
them on your dining table for guests so
0:22
let's get started all you need is a
0:25
square of paper and all that matters is
0:27
that it's Square I'm using a 12-in by 12
0:30
in piece of paper but you can use any
0:32
size you like so fold it in half so that
0:36
one corner goes over to the other corner
0:38
to form a
0:40
triangle and then make a good crease now
0:44
in the description below I will place a
0:47
list of squares of paper and the sort of
0:49
size of bag you're going to get if
0:51
that's helpful so do take a look
0:54
below once you've folded it and made a
0:56
good crease fold it the other way now
0:59
you'll see I'm using a little plastic
1:01
tool that just makes it a really good
1:03
crease don't worry you don't need any
1:05
special tools you can use a ruler your
1:07
fingernail or just rub your finger along
1:09
it I'm just emphasizing you want a good
1:11
crease the thicker your paper the more
1:14
important it is that you make sure that
1:15
crease is holding well so you can see
1:18
we've formed that cross corner to corner
1:21
now turn the paper over that's really
1:23
important and then fold it in half now
1:27
this time you're folding it in half so
1:28
one side goes to the other side so you
1:30
form a
1:33
rectangle and then make that a really
1:35
good crease there's a pattern form in
1:37
here you're going to hear me say that a
1:39
lot and then open that back
1:43
out and fold it the other way one side
1:46
to one
1:49
side you'll notice that I take a little
1:51
bit of time to make sure I've lined it
1:53
up because it's really important that
1:54
everything lines up well you'll get a
1:56
much better finish a much better bag so
1:59
then once you've done all those folds
2:01
make sure you're pretty side up and then
2:04
you're going to let it fold the way it
2:06
naturally wants to so let's do that
2:08
again you're bringing the middle up and
2:11
the sides in and it will form that
2:15
triangle and then that's what's going
2:17
down on your work surface again if you
2:19
want to just make those creases a bit
2:21
stronger but you don't have to and then
2:24
turn it so that the point from the
2:27
center of your piece of paper is
2:29
pointing to you
2:31
you're now going to fold that point up
2:33
now how much is up to you it's going to
2:34
form the Box the square at the bottom of
2:37
your bag so with this big piece of paper
2:40
I'm doing mine about an inch and that's
2:42
on a 12in square paper so obviously if
2:45
you're using smaller paper just make it
2:47
a little bit smaller and make sure
2:49
that's a good crease because that's
2:51
going to as I say set the shape of your
2:54
bag now take the right hand side and
2:57
just the front piece you're going to
2:59
fold fold it across so it's in line with
3:01
the top of the triangle and it's in line
3:04
with that triangle you folded at the
3:06
bottom so you're basically going to make
3:08
a vertical fold
3:12
there and then you can open that back
3:15
up and you're going to repeat it with
3:18
the left hand
3:19
one so you're going to bring it across
3:23
line it up with the triangle you folded
3:24
at the bottom make sure it lines up
3:26
along the top and you should get oh
3:31
excuse me a nice vertical
3:35
fold and you want it nice and
3:40
strong so then open that back out bring
3:44
the right hand on
3:45
across and then fold it back so it sits
3:48
inside that fold that you made with the
3:50
left hand piece because you want it to
3:52
sit there nicely tucked out the
3:56
way just take a moment to line it up and
4:00
then get a good
4:01
crease and then you can bring the left
4:03
hand side over the top so just show you
4:07
you've brought the right hand in folded
4:11
it back and then brought the left hand
4:13
side across and now when we fold the
4:16
left hand side back we're going to do it
4:18
differently we're going to fold it so
4:20
that it lines up with that fold that we
4:23
did before and so that the point sticks
4:26
out of the top so you can see what I'm
4:28
doing we want that point and again a
4:33
good
4:34
fold and that's one side
4:37
done so we're not going to shock you
4:39
here we're just going to turn it over
4:42
and repeat that whole process again on
4:45
the other side so I hope you're enjoying
4:48
making your origami bag and if you are
4:51
please will you give this video a thumbs
4:53
up so it's spreads to more
4:56
people and remember what you're doing
4:59
you're going to fold the right one in
5:01
open it back fold the left hand point in
5:04
open it back bring the right hand one
5:07
back in and then fold it back on
5:10
itself and then bring the left hand one
5:13
back across and fold it back and so
5:16
you'll see you end up with the points
5:17
opposite sides that stick out of the top
5:19
of the bag and that's right that's how
5:21
it should
5:23
look so at this point we're ready to
5:26
make it out into our
5:28
bag so the point you folded up at the
5:31
bottom you just need to unfold that and
5:34
then you're going to poke your fingers
5:35
in the
5:36
top and flatten the bag down so that you
5:39
get that box at the bottom don't worry
5:42
if your sides keep trying to unfold just
5:43
push them back where they should be and
5:45
you'll get there and if needs be just
5:49
tweak and pinch at the bottom just to
5:51
make it sit nicely now the points you've
5:54
got stuck up we're going to feed into
5:56
the little holes so that they hold the
5:58
sides in place so fold it outwards first
6:02
just to get a good crease and then fold
6:05
it and Tu it into the little pocket
6:07
you've got there and it should hold that
6:10
whole side in place and then repeat it
6:14
for the other side and you should then
6:16
have a nice little bag that's holding
6:18
itself together now if you want it to be
6:21
very very robust just add a little bit
6:23
of tape but I don't add any to mine and
6:26
they're great and now you're ready to
6:28
pop your gift in put a peg on or a
6:30
little sticker and enjoy gifting
6:34
obviously you could decorate it if you
6:35
want to or add tags or bows any more
6:38
gift bags check the video on the screen
#Hobbies & Leisure
#Crafts
#Art & Craft Supplies