0:00
in this video i'm going to show you how
0:02
to make the embroidered leaves on this
0:04
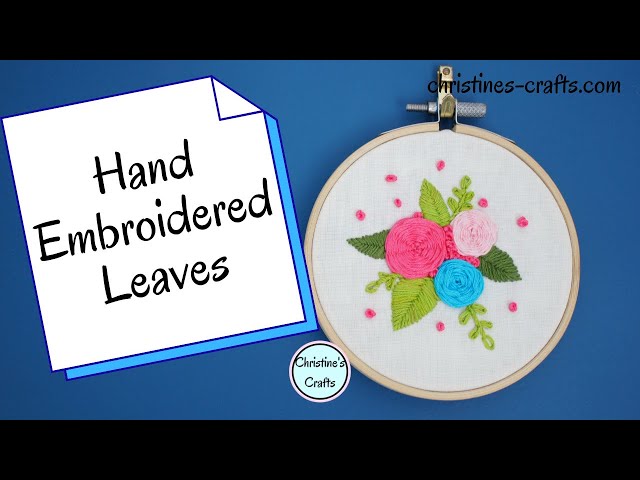
design the solid leaves are the ones
0:06
we're talking about from this design
0:07
they're actually really easy to make and
0:11
so you don't need any fancy equipment
0:13
this channel is dedicated to crafting on
0:17
so all you really need is your fabric
0:19
and your embroidery thread
0:21
i'm christine of christine's crafts
0:24
the first thing i'm going to show you is
0:26
the best way to get a great effect with
0:28
all your embroidery and that's to use an
0:31
and if you haven't got one don't worry
0:33
in this video i won't be using one but
0:35
it is recommended to get beautiful
0:37
stitches that lie perfectly flat so if
0:41
you just need to twist the screw at the
0:44
and pop the inner circle out
0:48
place your fabric over the inner circle
0:51
and then push the outer circle over
0:56
and that'll just hold your fabric fasten
1:01
and then before you get it too tight i
1:04
recommend pulling the fabric
1:06
so that it pulls tight you're aiming for
1:08
a nice tight effect a bit like a drum
1:11
so that it just lies nice and flat for
1:16
and then you can carry on and do all
1:18
your stitches and whatever you want to
1:19
do and then take it out at the end but
1:22
as i say don't worry if you haven't got
1:27
so you need to take wherever you want to
1:29
put your leaves now i've got a flower
1:31
here and if you want to know how to make
1:34
you can simply click on the card at the
1:37
top or look in the description below
1:40
just draw your leaves wherever you want
1:42
them to go now i'm using a pencil so
1:45
hopefully you can see
1:46
but draw the leaf shape and draw a spine
1:48
up the middle you're going to use that
1:50
line up the middle to to work from so it
1:53
is important and draw as many leaves as
1:57
and once you're happy with it get your
1:59
thread thread it up on your needle
2:02
and come up through your fabric probably
2:05
about quarter of an inch three eighths
2:06
of an inch from the tip of the leaf
2:09
making sure you've got a knot on the
2:12
and then take it back in right at the
2:16
and that's it you've started to form the
2:20
now bring your needle back up just to
2:23
one side of where you brought it up
2:27
and whichever side you bring it up
2:32
you are then going to place the needle
2:34
back in on the opposite side of that
2:37
first stitch at the other end
2:40
working your way down that pencil line
2:45
so you'll now have a stitch that
2:47
overlaps the other one
2:52
now you're going to come up on the
2:54
opposite side of that first stitch
2:57
nice and close but still on the side of
3:02
and then take your needle back down
3:06
on the other side of that first stitch
3:09
again sticking to the pencil line you
3:14
that's the basis of what we're going to
3:15
do but we're going to work our way down
3:21
so now you're going to go back to the
3:23
first side that you worked from
3:27
and you're going to go
3:30
slightly further down the spine
3:34
so pop out slightly further down
3:39
underneath where you did before
3:42
and then remember you're crossing
3:52
so then we're going to do the same again
3:55
we're working our way down the spine
3:57
we're going back to the other side
4:04
pop the needle through you can see i'm
4:06
taking my time and i'm taking care to
4:07
make sure the stitches are nice and
4:11
and that will happen to you sometimes
4:15
just loosen it off again and then be
4:19
all the time if you're not on a hoop
4:20
make sure you're not pulling your
4:24
and there we go we've crossed over again
4:28
so make sure you're constantly working
4:30
down your pencil line so you get exactly
4:32
the shape of leaf that you want
4:34
and you should see it's starting to form
4:39
keep working down that spine
4:42
and keep alternating sides and making
4:44
sure you always cross
4:47
while you're above the fabric
4:50
now spread the film up a little bit here
4:53
keep working slowly keep working
4:55
steadily but i just wanted to show you
4:57
the whole process so you can see i'm
4:59
just working doing exactly the same
5:03
and you can see that leaf shape
5:11
the closer you keep your stitches the
5:13
more solid the effect if you spread your
5:16
stitches out a bit you'll be able to see
5:17
some fabric between them and they'll
5:19
look like veins on the leaf
5:21
what effect you want is up to you but in
5:23
this tutorial i'm showing you doing them
5:28
just stop when you're ready because
5:30
you've got a leaf shape
5:32
but if like me you're going up to
5:33
something you're going up to a flower
5:38
until you're right up to that flower
5:42
and i recommend that you actually go so
5:45
that you go slightly underneath it so
5:48
there's no fabric showing at all between
5:50
the flower and the leaf
5:53
will just mean that you get a really
5:57
once you've finished get your thread
6:02
take your thread through a couple of
6:04
your stitches and take your needle
6:06
through the loop that you formed
6:08
and just repeat that just to be sure and
6:11
then it's all nice and secure
6:15
and then you cut your thread off
6:17
and you're finished with your leaf
6:19
so you can use these for lots of
6:21
projects you can make beautiful pictures
6:23
and pieces of tapestry work or how about
6:26
using them for clothing
6:28
you'll see here that what i've done is
6:30
put them on the pocket of a shirt you
6:32
can put them on jeans you can embroider
6:36
so thank you for watching i hope you've
6:37
enjoyed the video please give me a
6:39
thumbs up and subscribe if you'd like to
6:41
see more and remember this is one in a
6:44
series of videos so please check them