Up next in 10


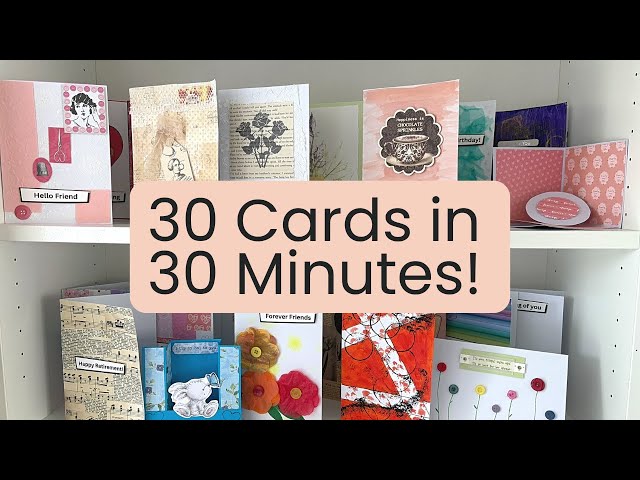
Are you looking for mixed media cards? This video demonstrates how to create 30 unique mixed media cards, with full instructions included. This card making tutorial is perfect for anyone interested in card making, guiding you through various techniques and materials. Learn to create beautiful diy projects with this comprehensive mixed media card making art tutorial.
--------------------------------------------
HOW TO ACCESS MY FREE PRINTABLES:
Simply visit my website at https://christines-crafts.com/enjoy-the-craft-gardening-resource-library/ and sign up to my regular newsletter.
You can unsubscribe at any time
--------------------------------------------
V I D E O S T O W A T C H N E X T :
All the videos in this series are here - https://www.youtube.com/playlist?list=PLJDvtpQDF0Pcah0SvfPemCR4rV7jxClbk
Blue 3D Box Card Full Length Video - https://youtu.be/EIv37WDtu58
Pink Square 3d Card Full Length Video - https://youtu.be/BhBHVvfpo4c
--------------------------------------------
Enquiries: [email protected]
Show More Show Less View Video Transcript
0:00
Are you looking for mixed media cards? Well, here are 30 in 30 minutes. Full instructions included. And in the
0:06
description below, you're going to find links for any of the printables that we use as well. Let's go. So, the first
0:12
card is a heart. And it's really easy. Just stick some nice bright paper. This is tissue paper. Use a glue stick. Stick
0:19
it down onto the front of your card. Use the free template that you can get in the description below. Cut it out the
0:26
size of your card. Obviously, you can see I'm marking it out for mine. And then that's going to stick on the front
0:32
of the card after you've cut the heart out. So, you're just going to reveal it.
0:37
And then that simply sticks on. And obviously, you could have done this in any color you liked. I'm just trimming
0:44
it down a little bit more. And then that's going to give you that heart showing through. And then it's up to you
0:49
what else you do. Obviously, it's nice to put a sentiment on. Again, you can get the ones I'm using in the
0:56
description below. and you've got a beautiful card. And on we go. The next
1:02
card uses book pages and music. And I'm just gluing them on. So, I've cut out
1:08
shapes that I want. These are all simple squares and rectangles. And I'm using a PVA glue to just stick them in place.
1:16
You could make any design or pattern you wanted here. You could use particular music. You could use particular book
1:21
pages. Something special to the person going to receive it perhaps. But you can see I'm just building it up. And the
1:28
glue goes underneath and over the paper that you're sticking on. And then make
1:34
sure you leave it to dry once you've covered the whole of the front. And then you can add anything else you
1:40
want. So again, I'm going to use one of my free printable sentiments.
1:45
And then we should have a lovely card ready to send out. You can see how quick and easy these are. So card three. Well,
1:54
this one we're going to do a little bit of printing, a little bit of stamping. So, you can see I'm just taking an ink
1:59
pad and running it around the edge. And you can do that on any of the cards you make. I'm going to use a rubber stamp
2:05
and I'm going to put a pretty flower on. Simple. I'm also going to use the stamp
2:11
to put the sentiment on this time, but you could print one off just as easily.
2:17
And then I'm going to use tissue paper to do a nice bit of green at the bottom.
2:22
And it just adds that mixed media effect. And you can screw your tissue paper up. You can just make sure it gets
2:27
a little bit bundled up. Or you could do it perfectly flat if that's your thing. And then I'm going to roll some of the
2:33
tissue paper to make a stem. And I hope you're going to agree that we've made
2:38
quite a pretty poppy. And it's just added something. The fact that it's not all flat, I think,
2:46
especially with that stem. Card four. We're going to use pretty
2:52
paper. And what I'm going to try and do is make a little bit of background color. So, I've tried using that start
2:58
was no good. I'm going to use some watercolors just to get a little bit of color and a little bit of detail on
3:04
there. So, you can see I'm just stabbing the brush on. Just using the end of the brush. And the more water you use, the
3:11
lighter the color. The less water you use, the darker the color. Once it's dry, rip up or cut up your pretty paper
3:18
and stick it on. You can see I'm just having a little experiment. I'm just sticking it on with a normal glue stick.
3:24
And that's just going to give me a nice pretty paper with a pretty paper, pretty
3:29
card with a little bit of depth to it. I.e. it's got the paint in the background. And what you can do at this
3:36
point, of course, is go back to your paint and just put a little bit of that background color on the front so that it
3:44
all merges together and looks like a cohesive card. The fifth card, we're going to use paper
3:51
again and also some lace. So, I'm using that ink pad around the edge again. I've
3:56
got a couple of pieces of paper that's got tiny music on it and I'm just going to stick them on the front overlapping
4:03
and they're effectively forming my background. And then I've got some lace I've never really known what to do with.
4:10
So, I'm just going to cut that and stick that on the front. Now, I'm looking at
4:16
that and thinking, what sort of glue? I'm just going to use the PVA glue, and it should hold it in place. It's not
4:22
like someone's going to be trying to rip it off. And I'll also make sure I get the PVA glue over the top and make sure
4:28
all those edges are down. And then that's a really nice sort of old-fashioned style of lace card.
4:36
Should I add a sentiment? Yes, I think I will. And then it's just adding that little bit of detail.
4:44
And there we go. So, the sixth card. Um, this one we're going to use craft
4:50
papers. So, I'm doing an ink pad around the edge. I'm having a go with that pink one again. See if I can get a bit of
4:56
detailing. And then I've got some really nice handmade paper. And I've got the bits
5:02
left from other projects. So, I'm just cutting them down so that they will stick onto that card. You can use all
5:09
your old bits of paper for these cards. Now, I quite like a little background. So, this time I'm just going to use a
5:15
pencil crayon to put a bit of detailing in the back. And then I can stick those down. And you can see I'm leaving myself
5:22
a little bit of background there to put some more detail on because what does this card need? Maybe a little stamp or
5:31
maybe a stick on sentiment. So, this time I'm going to use a stamp.
5:36
It's going to be get well soon. And to add a bit more detail, I'm just going to use some stencils. In this case, a
5:42
little heart. In fact, I think they might look like birds now they're on there, but they are
5:47
supposed to be little hearts. And I think anyone would like to receive that get well soon card, but you could use
5:53
any sentiment you wanted to. So, the next card, I've cut a page out of an old
5:58
encyclopedia. And there's just text that, as you can see, I've cut out different sizes,
6:04
different shapes, and there were some beautiful flower pictures. And you can see the color of the paper. It's aged.
6:10
And I quite like using aged paper for my crafts. So, this one's really simple.
6:17
Find an old book. Stick those down. I mean, you could use old advertisements
6:23
in them, anything, anything you like. And then that's going to make a really pretty card for a gardener.
6:30
Now, I'm going to stencil just some little flowers on top. Just again adding
6:35
some depth and detail, but you don't need to. The next card we're going to start with
6:42
a little bit of paint. So this time I've got some acrylic and I'm just giving myself a purple card. And then I'm going
6:50
to use some yellow bubble wrap to do that. Yellow paint and a bit of
6:56
bubble wrap just added some detail. I'm using a cotton bobbin to just add some
7:01
circles. a stencil to add some flowers. And you can see I'm just building up that depth of color in the background.
7:09
Bit of tissue paper with some decopage glue, some PVA. Stick some pretty paper
7:15
flowers on. Just adding more and more depth, more and more detail. Could do with something
7:21
in the center. Little tiny buttons. Bit of washi tape down the edge. Sentiment
7:27
on the middle. Lovely little card with lots of depth to it. nice and bright.
7:33
The next card I'm going to do is I'm going to use a little bit of
7:38
washi tape down the edge. I quite like my washi tape. You can get all the different colors and you can use it just
7:44
to put a nice edge on. Just works quite nicely. And then with this one, we're
7:51
going to use these circles that I've cut out. Now, you could have circles from anywhere and you can do them any size,
7:57
but I'm literally just going to stick them along the bottom and up this side
8:02
like little flowers. And you can see they match the color of the washi tape.
8:09
And then I'm putting some little buttons on the middle. And I'm using hot melt glue or cool melt glue for that so that
8:15
they stick on well because buttons can be a little bit tricky. But an allpurpose glue will work. And then you
8:21
can see I've got my sentiment all ready. Going to put that up there.
8:26
And then I hope you'll agree. I hope you've noticed I'm putting my sentiments on with the little foam pads
8:32
to give them a bit of depth. They've got a pretty card to give to somebody.
8:38
So card number 10. I'm going to paint again. I quite like my watercolors. So
8:44
I'm just going to watercol the back of this. I'm quite happy with the horizontal stripes. The more water you
8:51
add, the lighter the color will be. So you can add the texture here. Let it dry. Find yourself some sort of cutout
8:58
and we could use that as the main feature. I'm going to put a bit of washi tape on the top and a darker one at the
9:04
bottom. Again, it's just adding a bit of depth and a bit of detail. And then I'm going to use a card topper that I had
9:11
that was just lying around in my supplies. And one of my sentiments to stick on. And these I'm using the foam
9:17
pads. And it's just going to make another pretty little card.
9:23
The next one bit more complex. We're going to do a 3D popup card. So the
9:29
speed we're going to go strap yourself in. We're going to fold our square into
9:35
quarters. Okay. Nice firm folds. We're going to go
9:41
from the center to one corner, center to another corner, and we're just scoring that. And then we're going to cut the
9:47
straight between them. And you can see how I overlap them. And I'm folding them
9:52
back. And then I'm going to glue those one over the other. So watch where the tape
9:58
goes just to make sure. You could use glue. I just find tape's an instant hit. The
10:04
double-sided tape. And then I can carry on. And I've made the card. And you can see how it folds up in the middle to go
10:11
flat. So we have our basic card. Just going to use these papers. You can use
10:16
any papers you like to decorate the card. Now, all these cards I've got full
10:22
length videos where you can do it at your own speed. So, you will find those linked in the description below. So, if
10:29
this is going a bit quick, don't worry. I just trying to inspire you and show you how easy it is in this video. Now,
10:35
this time you only stick it down to half of that square so that it folds up. And then I'm going to add a detail that pops
10:42
up in the middle. Back to my little foam squares. And I'm making a circular one.
10:48
And I've got a little bit of card there just to hold it up. So, I'm going to
10:54
stick it on there. And then I'm going to stick it onto that base. And then that will all fold up and
11:02
disappear inside. And it's worth checking it does before you finish. And
11:07
then the front just wants decorating. So, I'm going to stick with my nice little squares of paper because they all
11:13
coordinate out of that little book, and I think they're really pretty. Add my sentiment, and I've got a beautiful 3D
11:20
pop-up card that you could give to anybody.
11:25
And there you go. The next one, I've used my printer to
11:32
print on book pages. So, the first thing I'm doing is finding a bit of old lace, a really fine lace, and I'm sticking it
11:38
down. And then I've got a book page, and those things that I've printed on them
11:44
there, you can get for free. Link in the description below. Uh, how many times can I say that in one video? And then
11:50
I've just printed it on an old book page. And you can see I'm ripping the edges of the book page, which I think is quite a nice effect. And stick that
11:57
down. And then my sentiment at the bottom. And this is a bit of a more serious card for
12:03
me because I know what I'm going to use this for and it's with condolences, but you could use this idea for any occasion
12:10
whatsoever. And there we go. And let's move on now
12:16
to a really nice bright card. I build up a lot of fabric scraps. This
12:21
is a great way to use them, even the teeny weeny tiny ones. So, just cut your fabric scraps up, use your PVA glue, and
12:28
stick them down. So you've got your glue on the card and then your glue on top of the fabric. And you can build up any
12:35
design you want here. It is entirely up to you. You can see mine's a little bit random. You might have something that
12:42
more structured that you want to do, but it really is easy and actually really
12:48
enjoyable and you get some beautiful bright cards. And then let that dry and
12:54
away you go. You could add a sentiment, you could leave it as it is. It's entirely up to you. I'm adding a little
13:02
sentiment to mine just so I know I can use it for that certain occasion.
13:09
And then we move on. So this time we're going to use some gift tags. Now you could use any gift tags, but I've got
13:15
some free printable ones. And I'm going to use some paper to put as a background. You'll see I quite often
13:22
like doing this. Cut a couple of rectangles and stick them on. But before I put them on, I'm going to put a bit of
13:27
detail in those corners so that the background's not just white. I just want it to have a little bit of color. And
13:34
you can see watercolors. I'm getting it all to merge together. Let it dry and then stick the paper on
13:43
all overlapping. We've got that nice color in the corners. So then that tag's going in the middle,
13:49
but it'd be rather nice to add some lace to the top and the bottom. You build this up however you like. This is all
13:56
about ideas and that you take them, develop them, and make them your own. Still the PVA glue. Let's get that lace
14:02
on. Now, you can just stick your tag on, but I think I'd rather like to fasten mine
14:08
so that it's loose. So, I'm going to put a little bit of lace through the hole. And then I'm going to stick that down so
14:15
that the tag can flap about and just add a little bit of depth. Okay. So, now
14:20
we're going flower pounding. So, I'm using some watercolor paper cuz I think it works really well. Going to put it on
14:27
a piece of wood. Put some leaves or some flowers on it in a pattern that you like. Tape it down using a tape that
14:35
removes really easily like washi tape or, you know, a decorator's tape. Put it
14:42
onto a piece of wood because you're going to damage that piece of wood. And then hit it with a hammer. I put a piece
14:48
of kitchen roll there because it just soaks up any extra dye. Stops me getting in a complete mess and transferring it
14:53
along the paper. And just hit it, hit it, hit it until it transfers. You're
14:59
going to end up with a pretty design on the paper. And you'll see I peeled up a bit of tape and checked. Once it's
15:05
there, peel your tape up carefully and you should have a nice pretty design. If
15:11
you want a bit more, add another flower or another leaf and away you go. Just do
15:17
it again and again. Then you're going to stick that onto your card
15:24
and you've got beautiful card. Now I've stuck it near the top because I'm going to put my greeting at the bottom, but
15:31
then I think I'll probably add another thing that I've got in my mind just to cover that base of the leaves.
15:38
Sorted. Love it. I love that craft. Okay, so the next one I've got all these
15:44
little paint samples from the DIY store and I'm just going to rip those nice sharp edges off so it looks a bit rough
15:51
and ready. Do several of them and I'm going to stick them to my card.
15:57
Again, not too keen on the just plain white card. Bit of watercolor paint. Let
16:03
it dry and then I'm going to stick my paint samples down.
16:09
I'm doing them all at a jaunty angle. You could do them all straight, overlapping, not overlapping. It's up to
16:15
you. I'm using my ink pad to go around the edge. And then I think I'm just
16:20
going to use a Sharpie to draw around them just to add a bit of definition. You can do that with lots of things on
16:26
cards. And I'm now stamping love on there. And you could put anything you
16:33
wanted. All done. Love it. You can see how I've done the edges on the back.
16:38
That's up to you. You can do the whole thing or just the front. So, the next
16:44
one is going to involve washi tape and more washi tape. So, I have this set of
16:51
rainbow washi tape. So, I thought, wouldn't they look magnificent? So, all I'm doing is a strip of washi tape,
16:57
another strip of washi tape, another strip of washi tape, and just bringing that color down the page. Nice bright
17:03
rainbow. trim the edges off. You notice I just made them all a little bit long.
17:10
And then you could add anything over the top of that. It's a perfect background.
17:16
So, you can see I'm doing a little bit of stamping here of a butterfly. Do I like it? Yeah, I do. I think I'll
17:23
do another. And then I'm just going to add my greeting.
17:29
And I think anyone would love to read get that card. My next one, I've cut all these bits out
17:35
of magazine. Now, they're all wedding bits out of this magazine, but you could use this with any theme, but you can
17:41
guess where this one's going. Um, and just stick them on just to give a collage of whatever you want. So, these
17:49
are all wedding. Because it's wedding, I think I'm going to add a little bit of very fine lace over the top. So, I'm
17:55
just going to cut that down approximately. Right. Yeah. And just trim it up. Stick that
18:02
on. And I just think you'll be able to see it's wedding through it, but it also adds another bit of wedding effect. The
18:08
fact that it's lace and a greeting card over a greeting a
18:14
greeting over that that says happy anniversary. Lovely. And then I'm just going to put
18:19
some little hearts where I've got a little space up there. Card number 19. We're going to look at
18:27
our tissue paper again. So, this is just a napkin, a paper napkin, and I'm tearing it up. And then I'm going to
18:33
stick it on the front. So, this is like a background, letting it all crease up.
18:39
Nice 3D effect. And it gives us something to work on. I'm leaving some bits of white around the edge. Doing
18:46
some double layers. So, some of it's darker than others. Play around with it.
18:51
Once it's dry, you can add whatever you want. So, I'm adding some lace down the side.
18:57
Just making sure that's sealed down. And then a little lace flower along the
19:04
bottom and up the side. So you can see that similar design again that we did earlier. And then put a greeting on.
19:13
Nice pretty card. Nice birthday card. So the next card I'm painting again. I love
19:20
my watercolors. So, I'm going to do one half of it this lovely red color
19:27
and one half of it green. Now, if you don't want them to merge together, let one half dry before you do the other.
19:33
I'm happy for them to merge together. So, I've done them both at the same time. Once it's dry, I'm sticking some
19:39
lace on. You can see some favorites coming around, can't you? In these cards, I've
19:45
got ink pads to go around the edge. You could do it in red or green because obviously I've used both colors. I'm
19:50
going all the way around. And then I'm putting a little wooden Merry Christmas on. The colors were a
19:56
little bit of a clue as to where this card was going, but you could do it for anything. That whole idea of the two
20:02
different colors. And then a little bit of stenciling. It's just detail just
20:07
makes it a little bit more special. I'm now using some pens. These are Pusca
20:12
pens, but you could use anything just to add a bit more detail. Bring those
20:17
colors across to each other. Card 21. This is a geometric design. So,
20:24
I'm just going to get my Sharpie and draw some lines. You could use tape to
20:30
do this, but I chose to do it just by drawing the lines. And then I'm going to paint the areas that are not the
20:37
straight lines, if you see what I mean. So, the triangles and the quadrilaterals
20:42
and what have you. I'm just going to paint them all. Obviously, if you did this with tape, you'd get a much better
20:47
edge, but I was quite happy to have a bit of an untidy edge. Let it dry and then you can add some
20:54
more detail. So, I'm just using the roll out of the inside of a toilet roll as a circle to add some nice black circles.
21:02
And oh, the cat's come to help. And I'm doing some little black bits on the bristles of the brush as well. It's just
21:09
added some detail. And then I'm back to my red and doing
21:14
some spots of that. And you could build this up however you like or you could have left it really simple.
21:21
Okay, our next card. We're going to use little tiny buttons to make some flowers. So lay your buttons out how you
21:29
want them. Stick them on. So you have to have a thought about your design before you reach for the glue gun, which I
21:36
have. And I've got my uh sentiment up there. It's uh lost its sticky, so I'll
21:42
use the glue stick. And then simply draw in your stems. And then you can add
21:48
leaves. You can make your stems as thick as you like, or you can leave them very fine. You can add lots of foliage, or
21:55
you can just add some little tiny leaves like I'm doing here. You could even do all your flowers into a vase, bring them
22:02
to a point at the bottom. Lots of different options, but little button
22:08
flowers are just so so pretty on a card. I love it.
22:14
So, we come to the next card and we're back to using some nice pretty papers and some lace. So, this time I'm using
22:22
one big piece of pretty paper and I'm ripping the edges to get that nice
22:28
rough and ready feel to it. Going to stick it on.
22:33
And that's basically our background. So, I've got some lace that I'm just
22:39
going to run up the edge. And I'm using a bit of multi-purpose glue here to hold it on. I like to show you lots of
22:45
different ways if I can because I want you to use the supplies you've got at home. And then I'm going
22:51
to stick that flower on with a little bit of uh PVA glue. And then I've got a
22:57
bit out of my encyclopedia to put on the middle and a sentiment at the bottom.
23:02
Very pretty, I think. And you can even just draw bit detail on.
23:09
Now, we come to another 3D card. This one's a bit more complicated. So, what
23:15
I'm going to recommend is that if you decide when you've watched this, this looks like something you can make. You
23:20
go and find the video. I'll try and remember to put a link on the screen as well as in the description below so you
23:26
can go and find the slower video. um because they really are cute and
23:32
actually really easy to make. But I do think to get these into 30 minutes, I've had to go a little bit too quickly for
23:38
you to be able to follow it and make it along with me. So,
23:44
you can see it's really simple, but really effective. And you could add
23:51
as much detail as you wanted. Mine's relatively simple. It's a great little 3D card.
23:59
All the same principles. Look, I'm adding paper. I'm adding washi tape. I'm doing a bit of stenciling. And there you
24:07
go. A nice 3D card that flattens out. So now, what about some tissue paper
24:14
flowers? I mean, you could make these out of any paper, but I've just got a little template, and I like making them
24:19
out of tissue paper. I think it's so vibrant. You can cut out some leaves, just make a leaf shape. So, I'm starting
24:27
by adding just a little bit of detail on the back using a stamp. And then I'm
24:32
going to have three flowers. So, you can see me laying things out and working out what it looks like. Deciding I need to
24:38
add a bit more detail on the stamps. Seemed a bit plain. And I'm just going
24:44
to layer up three flowers for each one. You could do as many as you want, but it
24:50
does mean they stick out nicely. Look really pretty. And then I'm going to tuck some leaves from behind.
24:59
And that's three pretty flowers and put a sentiment on.
25:05
And then I'm putting little buttons in the center. And what a pretty card.
25:10
So card 26. I'm going round the edge with my ink pad. Lot of familiar things here. And
25:18
I've got lots of little cutouts that I'm using. So, I'm going to put a lace background
25:25
and then think how I'm going to lay out some of my handmade papers that I have and also, as I say, some little cutouts
25:32
that I've had lying around that I'm trying to integrate into this project.
25:37
So, have a look at what you've got and see what you can put in there. So, the paper I've stuck down flat, and then
25:44
these little pop outs that I've had, I'm putting some of those flat, and some of
25:49
them I'm putting the uh sticky pads under. It just gives that effect of
25:56
depth. So, there we go. Let's get that on. What a beautiful card to send to a
26:02
friend. Card 27. Oh, we're sticking with it. So, this
26:08
time I've got some vintage music, which, as you can see, you end up with a beautiful color. Um, so just pick the
26:16
side I want. And then I'm going to just stick that down flat. Again, we're talking about the background. So, I've
26:21
made it too big. And then I can just cut it off and it'll fit exactly onto the
26:28
card. And then I'm going to stencil a word up the middle. So, I'm going to stencil
26:36
love up my card. You could write it. You could print it off on the computer and
26:41
then stick it on. You can do that with any sort of sentiment that you want. I'm
26:46
going to add some washi tape. Nice silver one. And then just a little bit of paint just
26:54
to bring it all together because I can put my little spludges of paint over everything.
27:00
Card 28. We're getting to the end now, aren't we? But we're not running out of steam.
27:05
We've got plenty of ideas left yet. So, here we go. You can see I'm putting some um
27:11
paints into my tray there. And I'm doing some brown and some red and some yellow
27:19
and some green. And I'm merging them together to give that nice background.
27:24
Let it dry. And then add some tissue paper over the top in whatever color you like, but I'm not covering all of it.
27:32
And then we've really got some depth to that color there. Really nice effect. And I've got this lovely sticky ribbon
27:39
here. So I'm going to put a length of that on. I quite like things down the left hand
27:44
side. I think it really is a nice balanced effect. I'm tearing up a book page now. And I'm just going to stick
27:52
those bits on. Just like that. And just torn up bits of book.
27:58
My apologies if you don't like tearing up books, but so many are pulped. I'd rather use them for a craft than just
28:03
see them all go to be pulped. So, I'm just going to go around the edge with my ink pad. And then card 29.
28:11
So, this time I've got some paper and some cutouts just from craft supplies.
28:16
Again, I'm going around the edge with my ink pad. And then just need to stick
28:22
them to the front. So, I've got some brown paper, just ordinary paper here that I'm sticking on one side. And then
28:29
I've got a light colored paper along the bottom. And you can see the cutout with
28:34
the clocks on that I've got from somewhere. I don't even know where. I don't know about you, but I accumulate
28:40
things over the years and never know what I'm going to do with them. These cards are a great way to use up some of
28:45
your supplies in a positive way because you can then gift them to people. and then a sentiment on the top.
28:56
And there you go. Dream big. And the final card that I'm going to
29:02
show you is just involving lots of pretty papers. So, I'm taking different papers and I'm ripping them up into
29:09
different sizes and sticking them on. So, this is just building up different
29:15
pretty papers. Now, you could do all your papers and plan them all out at the start, or you can cut one, stick it on,
29:20
cut one, stick it on like I'm doing here. Depends how you like to work. There isn't a right and a wrong way.
29:26
This is your creation. So, I'm back looking through my little pad again. Quite like those.
29:33
I might be able to use these more than once. Let's get one on there.
29:38
Yeah. And then maybe do another one up there. Maybe another two. Yeah,
29:47
I like that. And then I'm just going to draw some little hearts
29:53
and then a sentiment. And that's just using some pretty papers. And there you have it. Nice card for my mom.
30:02
I hope you've enjoyed all 30 cards. Any questions, drop them in the comments below. And thank you for watching.
#Online Media
#Visual Art & Design
#Crafts
#Crafts