Up next in 10

Buy the full source code of the application here:
https://procodestore.com/index.php/product/android-java-project-to-embed-google-maps-add-markers-using-maps-sdk/
Show More Show Less View Video Transcript
0:00
Uh hello friends, today in this tutorial
0:02
I will be showing you that how you can
0:04
basically use the maps SDK library for
0:07
Android to basically embed a Google map
0:10
inside your mobile phone in Android
0:12
using Java and basically you can uh
0:14
embed markers red markers whenever you
0:17
press the button or simply tap on the
0:20
mobile phone. You can see on the
0:21
emulator we are basically showing you
0:23
this is a demo application we will be
0:25
doing this. You can basically build out
0:28
uh simply embed a Google map here using
0:31
Google API key. You need to enable the
0:33
API first of all and then you can simply
0:35
embed your Google map inside your
0:37
Android phone inside you can integrate
0:39
this simply.
0:41
You can see we are using satellite map.
0:43
You can embed any map of your choice. So
0:45
notification will also be sent here. You
0:47
will see new marker has been there. So
0:49
this you can simply integrate how to
0:52
integrate Google maps inside your
0:54
Android application. So all the source
0:55
code is given in the description of the
0:57
video guys. I have written a complete
0:59
blog post on my tutorial website. The
1:01
link is given in the description of the
1:02
video. So basically I have shown you
1:04
step by step how to achieve this. So now
1:07
let's get started. So the very first
1:09
thing I will do I will delete all that
1:11
stuff guys and start from scratch. So
1:13
what I will do? Let me just delete all
1:15
this code
1:18
and start from scratch.
1:24
Let me also delete that
1:33
implements
1:35
combat act.
1:44
So the very first thing guys we need to
1:46
do is that let me just show you uh
1:51
you need to first of all go to activity
1:53
sorry Android manifest.xml. So here you
1:55
need to add these two permissions guys
1:57
which is Android permission access
1:59
course location and the second
2:01
permission is Android permission access
2:03
find location. So I have given that and
2:06
also you need to add this meta tag guys.
2:08
So here you will copy paste your own API
2:11
key from Google developer console. So if
2:14
you have your account here you need to
2:16
simply enable that API. So this is very
2:19
simple process. So just go to Google
2:22
cloud console and uh enable that API
2:25
Google maps SDK API for Android and get
2:29
your own API key. So don't copy my API
2:31
key but I will delete this API key after
2:34
this video. So basically inside this
2:37
dashboard you will be go to library
2:41
section and enable that API maps SDK you
2:44
will see that for Android I've already
2:46
enabled that and then basically you need
2:49
to get your own credentials
2:52
and uh click on that tab here and uh you
2:56
need to create your API key here. Click
2:59
on this API key. So this will create
3:02
your own API key. So simply copy paste
3:04
this API key right here inside this tag
3:06
here. So that's all you need to go to
3:09
now your uh activity main.xml.
3:13
So here you simply need to paste this
3:15
fragment guys. We have given this
3:17
fragment and ID which is map fragment.
3:20
So this is basically the name of the
3:22
fragment. You will see that. And one
3:24
more thing guys we need to have external
3:26
dependency which we are using for this
3:29
tutorial. So you need to go to your
3:32
build.gradal gradal dotfile
3:34
your app level file which is
3:37
build.gradal module app. So here you
3:40
just need to copy paste this line here
3:42
which is implementation
3:45
com.google.android
3:46
gms play services maps 17.0.1.
3:51
After that you just need to synchronize
3:53
your
3:56
just
3:58
just click this button synchronize now
4:01
and now this will download this
4:03
dependency that's all. So now after this
4:06
guys we will we can simply write the
4:09
code inside our main activity on Java
4:11
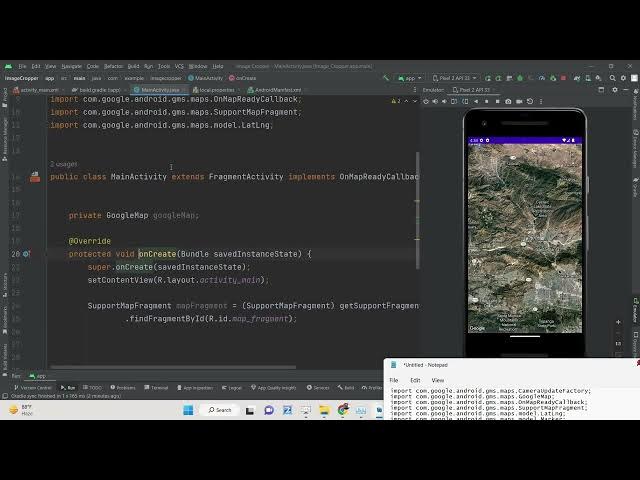
file here. And right inside this file
4:14
guys we will basically have a reference
4:17
for the Google map.
4:22
So we can simply at the top we can say
4:25
private and then we can import this
4:28
Google map dependency and we can call
4:32
this as Google map.
4:35
And here guys we can simply get the
4:37
reference of the support map fragment.
4:41
This will be imported map fragment
4:46
and we can type cast it.
4:51
So this will a slight complicated code
4:54
but still you need to do it.
4:57
So here we are simply getting the
5:00
reference of that element guys which we
5:02
have declared inside activity
5:05
XML file. Here you will see we are
5:07
getting get support fragment manager and
5:10
we are finding this using the id that we
5:12
have given. So if you check the id we
5:13
have given the same id map fragment. So
5:16
we are getting it id here that's all. So
5:20
this is simply creating we need to
5:22
implement the methods which is on map
5:24
click and on map ready. So these two
5:26
methods. So whenever you click inside
5:28
the map and whenever the map is ready.
5:30
So these two methods are there. And now
5:33
if you basically stop this application
5:35
and if you try to run this application
5:37
once again. So what you will find out
5:39
that your map is ready here. You will
5:41
see that the map is ready. You can zoom
5:44
in inside this map. You can't place
5:46
markers here. So you can see if I click
5:49
this inside the map the markers are not
5:51
placing. So for that we need to add the
5:53
code inside whenever we click inside on
5:56
map click. And we also need to just uh
6:00
show the notification as well. So when
6:03
the map is ready guys what we need to do
6:07
we need to simply say this dot Google
6:10
map is equal to Google map that's all
6:13
and then we need to set some properties
6:16
first we need to set the map type so
6:18
here you can change the map type guys
6:20
let's suppose I need a different map
6:22
type so we will say Google map type
6:25
hybrid
6:27
or you can see now if you refresh it so
6:30
what you will
6:32
There is a button out there apply
6:33
changes. So it is some functioning hot
6:36
reload without having to rebuild the
6:38
entire app. So
6:42
if you click the button you will now see
6:44
a different app.
6:48
Okay sorry I need to finish this. So
6:52
what we need to do is that we need to
6:53
set the location.
6:58
We need to move the camera to a default
7:00
location. So whenever
7:03
So you will see that guys basically we
7:05
are providing a latitude and the
7:07
longitude here to a fixed location and
7:10
this we need to import this class camera
7:12
update factory and basically it will
7:15
import we need you can see we are
7:17
providing the zoom level to 10. You can
7:19
provide any zoom level and then we are
7:21
setting this listener which is whenever
7:23
we click
7:25
the map.
7:27
So now if you again run this
7:29
application.
7:34
So if you see what happened. Let me
7:43
check the terminal here. And here we
7:51
let me run this application.
7:58
on map ready.
8:01
I think some problem is there guys. I
8:05
think what is
8:08
Okay, sorry.
8:11
This need not have to be non-null. So
8:15
just remove this.
8:19
And when we click the on inside the
8:22
marker guys whenever we click inside the
8:24
map we need to add this code. So we need
8:27
to basically add a marker. So for adding
8:29
this marker guys we will use this marker
8:31
options class. Here you will see that we
8:34
need to import this class. And here we
8:37
are simply having this title of the
8:39
marker which is new marker. The color of
8:42
the marker will be red. Here you will
8:44
see we are passing this options marker
8:46
options. And then also with the help of
8:49
toast class we are simply showing a
8:51
toast notification that's all.
8:54
And here also basically after you do
8:58
this we need to load the map
8:59
asynchronously. So we need to paste this
9:01
line. I think that's why the error was
9:04
taking place. Map fragment get map
9:07
async. Just paste this line guys. And
9:10
this is basically now the code. And now
9:12
if you refresh it
9:18
uh let me just copy the code guys inside
9:21
my blog post. Sometimes it can
9:25
let me copy this.
9:28
So you also need to copy the same code.
9:30
Uh this is the correct code now. And now
9:34
if you refresh it,
9:45
let me run the app inside my phone,
9:49
guys. Let me run this image cropper
9:54
screencast.
10:11
So I think some internet is gone here on
10:14
my phone that's why it is not starting
10:16
this application. So in this way guys
10:19
you can embed this uh Google map. So
10:22
thank you very much. All the source code
10:24
is given in the description of the
10:26
video. Thank you very much for watching
10:27
this video.