Up next in 10

Javascript Reverse Geocoding API to Convert Latitude & Longitude to Real Address & Plot Google Maps
Dec 11, 2025
Buy the full source code of application here:
https://procodestore.com/index.php/product/javascript-reverse-geocoding-api-to-convert-latitude-longitude-to-real-address-plot-google-maps/
Show More Show Less View Video Transcript
0:00
Uh hello friends, today in this tutorial
0:02
I will be showing you a new tool that I
0:04
added on my website freemediatools.com.
0:06
So basically this is a reverse geocoding
0:09
tool here which lets you find out the
0:11
real address from latitude and
0:13
longitude. So basically this is the demo
0:15
of the application you can see here on
0:17
your screen. So here you need to submit
0:20
latitude and longitude and click on this
0:22
button reverse geo code and then it will
0:24
pinpoint the real address which is it
0:26
will extract the address from the Google
0:28
API reverse geocoding API and then it
0:31
will display the real address on the
0:32
screen alongside it will also plot the
0:35
address on the Google map as well. So
0:37
this red marker you can see this window
0:40
is also shown to you this is the actual
0:42
address then you can search this address
0:44
on Google to accordingly. So this is a
0:47
real application. You can just uh copy
0:49
paste latitude and longitude. You can
0:51
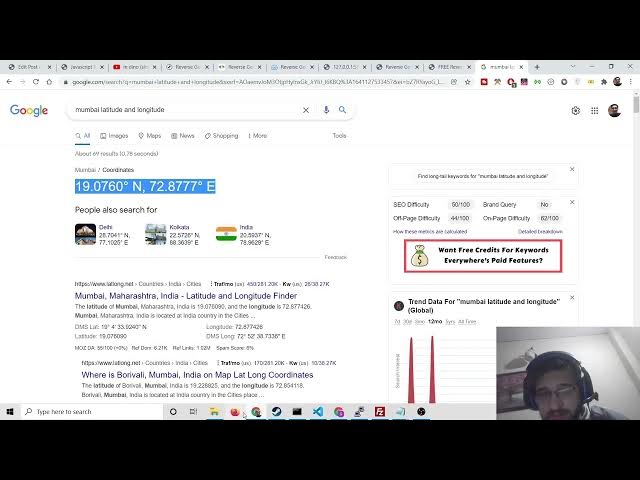
search for any area on in the word. You
0:54
can just search latitude and longitude
0:57
and Google will tell you the latitude
0:58
and longitude. Simply you need to
1:02
right click, copy this and paste it
1:04
inside this tool and paste it. And now
1:07
click reverse geo code.
1:09
Uh sorry let me
1:17
Sometimes some locations don't work.
1:21
So simply copy this and now paste it.
1:25
So you should be don't have some space
1:28
here. You can see this uh you can see
1:32
now it is pinpointing the address. So
1:34
you can see this is the address here
1:36
[snorts] and also it is pinpointing it
1:38
on the Google map as well. So you can
1:40
try it with your own location as well.
1:43
Let me now
1:45
choose a different latitude and
1:47
longitude. Simply copy and paste it
1:49
inside this tool.
1:53
And now you will see exactly the
1:56
location that I you can see that. So
1:59
this is very much useful in those
2:00
situations when you want a specific
2:02
address from a latitude and longitude.
2:05
Then you can go to my video description
2:07
link. This is the tool that I added
2:08
here. Simply go to this tool
2:10
freemediatools.com.
2:12
Simply copy paste your latitude,
2:14
longitude, reverse geo code and then it
2:16
will tell you the exact location and
2:18
also it will pinpoint it on the Google
2:20
map. So we will be building this
2:22
application from scratch using the
2:24
Google reverse geocoding API. If you
2:26
want the full source code regarding this
2:28
application, I have given the link in
2:30
the video description. This is my
2:32
step-by-step blog post. I have written
2:34
this and the link will be there inside
2:37
video description. So only a single file
2:39
is there index html. Simply copy paste
2:42
all the source code and here you need to
2:45
replace your own API key instead of you
2:47
can see API key. So you need to replace
2:49
your own API key. I will tell you the
2:51
process. So you will need a Google cloud
2:54
console account for that. So first of
2:56
all if you just search on Google here
2:59
simply go to google.com and search here
3:01
Google cloud console. So just create
3:03
your own own account. Simply add uh some
3:07
credit card or debit card information
3:09
and simply create it. After creation it
3:12
just go to Google Maps here
3:15
and uh create a new project and inside
3:17
this there is a section out there where
3:19
you can create credentials and then you
3:21
need to create a brand new API key. You
3:23
can see API key created. After that
3:26
simply copy paste your own API key. So
3:29
don't use my API key. I will delete it
3:31
after this video. So don't use my API
3:35
key. So now we will be making this
3:38
application. So just reverse your
3:41
coding. I will change the title
3:45
in JavaScript.
3:47
So here guys, what we first of all want
3:49
to do is that we will take the user
3:51
input. So we will have uh the div here
3:55
which we will give it a id of floating
4:02
uh panel. So we will style it as well.
4:06
Inside CSS we will give write some
4:08
custom styles. So inside this we will
4:11
have latitude and longitude input field
4:13
input type text and we will be attaching
4:16
a default value which will be of 40
4:19
point. So this you can attach the
4:21
default value any latitude and
4:24
longitude.
4:27
So put a comma after latitude and then
4:30
for the longitude this will be -73.96
4:37
1452.
4:39
So after that this input field. So
4:42
basically if I open this you will see a
4:45
simple input field with the default
4:46
latitude and longitude. And after that
4:49
what we want is that we want a simple
4:53
submit button input type of submit. So
4:56
when we click the submit button we need
4:57
to uh pinpoint the location. So this
5:00
will be our button and the value will be
5:03
simply it will be saying that reverse
5:07
geo code the latitude longitude and
5:10
convert to actual address so that we can
5:12
plot this on the Google map. So after
5:15
that we will have a div which will have
5:17
the id of result. So here we will
5:19
display our uh Google map or sorry
5:21
address and then after that we will have
5:23
another div which will be having the
5:26
class or sorry id of map. So here we
5:28
will display our map. So this is all the
5:31
HTML that you will need here. So now we
5:33
will also write the stylesheet as well.
5:36
So for that we will target our uh
5:41
floating panel ID which we have given.
5:44
So as you will see we have given this uh
5:47
ID. So we will say h has symbol
5:52
floating panel. So for this we will
5:55
attach these property. Let me just copy
5:57
paste it. So I don't want to waste time
6:00
just writing static CSS. So if you go to
6:03
the video description link, you will
6:05
find the stylesheet code for this
6:07
floating panel. So just paste it here.
6:10
So this is all the code that you will
6:11
need. If I copy, if I refresh it, you
6:13
will see this will place at the center
6:16
of the screen. So this is the style that
6:18
we have given here. That's it. And for
6:21
the submit button
6:24
if you see floating panel if oh no sorry
6:27
that styling is complete. Now I will
6:29
just move to the uh script part. So
6:32
basically you need to go to the video
6:34
description and here you will find the
6:36
script tag at the bottom. So here this
6:39
is a script tag. So simply copy this
6:42
script tag. So this is for the Google
6:44
API reverse geocoding API. Simply paste
6:46
it after the body. So here you need to
6:48
replace your own API key. So I will go
6:51
to my this one simply copy the
6:53
credential. Copy it and paste it. So
6:57
here you need to replace your own API
6:59
key. Simply paste it. And then the
7:02
second argument you can see that in the
7:03
callback function we are calling this
7:05
function which is init map. So we need
7:07
to create this function. So basically it
7:09
will be finding this function. So we
7:11
need to create it. So we will say
7:13
function init map. So basically we will
7:16
load a simple map on the screen. So this
7:18
is very easy. So now to load the map we
7:21
will create const map and here we will
7:25
say new google.m mapaps dot map and here
7:31
we will pass the element. So we will
7:33
pass document getelement by id and map.
7:36
So here in this element we will load the
7:38
map and the second argument is the
7:40
object with some options. So here we
7:42
need to have the zoom property which
7:44
will set to eight. You can change the
7:46
zoom property to any property of your
7:48
choice. And then we will say center. So
7:51
here we will provide the center
7:52
coordinates which is latitude. So here
7:55
we will say latitude will be equal to
7:57
document dot getelement by id lat and
8:00
the value attached to it. So we have
8:03
given the latitude input type.
8:06
Oh sorry we need to provide it manually
8:08
because it is there inside.
8:13
So manually if you want to write it you
8:15
can say 40.731
8:19
and comma the longitude
8:21
will be -73
8:26
997 that's it. So after making this map
8:31
variable guys now we need to convert
8:33
this uh coordinates into real address.
8:35
So for that we will initialize our
8:38
geooder geooder
8:40
and this will be equal to new dot google
8:43
dot
8:45
maps dot
8:47
uh geooder library
8:49
and after that what we need to do is
8:51
that we need to just make a info window
8:55
info window so where it will be shown
8:58
the full address so here we will say new
9:00
dot google dot info window
9:08
info window
9:10
and after that guys what we need we need
9:13
to call this custom function which we
9:15
will make here geocode lat long and
9:20
inside this we need to pass our geooder
9:22
that we have made here and the second
9:24
argument we will pass the actual map and
9:27
then we will pass our info window that's
9:29
it so these three things we will pass
9:32
here so we will call this function fun
9:35
inside this. So we need to create this
9:37
function at outside here function
9:41
geocode lat long and geooder
9:46
then we have map then we have info
9:48
window. So these three things we are
9:50
expecting in this function. So now we
9:52
need to just plot the map here. So first
9:55
of all we will get the input element. So
9:57
input document dot uh
10:01
get
10:02
element by id. So we have given the id
10:05
of lad long
10:08
dot value. So basically you can see we
10:11
have given this id here which is latl
10:13
long. So we are just getting the value
10:15
from it and storing it inside input. So
10:18
as you can see it is having some comma
10:20
here. So now we need to split this
10:21
comma. So we need to split this comma.
10:24
So for this splitting this and getting
10:27
the value. So there is a method inside
10:30
this uh we will say conl long
10:35
string and we will say here simply we
10:38
will say input dot we will use the split
10:40
method of JavaScript and inside the
10:43
first argument we will say comma and
10:45
then the value we will say input that's
10:47
it
10:49
after that what we say oh sorry we need
10:51
to provide the second argument as two
10:54
and then we will say
10:58
we need to construct the latitude
11:02
and longitude object.
11:06
So we will say const
11:10
lat long. So here inside curly brackets
11:13
we will just write latitude will be
11:15
equal to
11:20
and where here here we will convert the
11:22
string to number by using parse do.flat
11:24
float and here we will pass our latitude
11:30
longitude object. So now latitude
11:33
longitude string.
11:36
So
11:37
we will pass the first element which is
11:39
the in the array we will access it using
11:42
uh square bracket zero put a comma and
11:45
then longitude will be equal to parse
11:47
float again and here once again we will
11:50
pass latitude longitude string
11:55
the first element that's it.
11:58
So now after that guys we can now place
12:01
it on the screen. So we can say geocoder
12:05
dot geocode.
12:08
This is a method where we just place
12:10
this the on the map. So here we will
12:13
provide the location property which will
12:15
be equal to the latitude longitude
12:18
object. That's it.
12:21
And this returns a promise guys dot
12:23
then. So we need to handle this. So this
12:25
the response will be coming in this
12:27
variable. So first of all we can say
12:29
console log the response
12:32
just to check if all the things are
12:34
working properly. So basically if I
12:36
format the element or sorry if I open
12:39
this with live server
12:42
if I check inspect element go to console
12:44
you will see we have received the object
12:46
and this contains the address properties
12:49
here. So we are loading the page for the
12:51
very first time. So you can see this
12:53
coordinate is this longit latitude and
12:56
longitude is passed here and we are
12:58
seeing the object. So basically if I
13:00
change these coordinates and uh if I see
13:04
these coordinates here
13:07
if I change this and uh change this to
13:09
this you will see once again if I hit
13:11
the button once again the results will
13:15
be different. Here
13:18
you can see
13:22
and uh I think it is not working because
13:25
we haven't binded the
13:29
button. So we have given the button a I
13:32
think we have not given the button the
13:34
ID.
13:36
So input ID submit sorry this needs to
13:40
be ID not type. So input ID submit. So
13:44
here inside this function init map just
13:47
after this we need to add a event
13:50
listener inside this function only
13:52
document.getelement by id submit and
13:56
here we need to add a event listener. So
13:58
whenever we click this button we need to
14:00
execute
14:06
we need to execute this function which
14:08
is
14:15
uh this function which is geo code
14:23
latl long and here once again we need to
14:25
pass the same information geooder
14:28
map and info window that's it so now
14:32
this will work guys so if I change
14:35
so if I refresh it two arguments
14:38
required but only one present so where
14:40
it was let me just see
14:46
there is some kind of error has taken
14:48
place let me just see guys
14:55
if you just go to the video description
14:57
link you will find it all source code.
15:00
Let me just see what has happened here.
15:03
So inside this you will see let me paste
15:07
this here.
15:12
So paste it. Now you can see we are
15:15
calling this function. Let me just
15:16
refresh it. If I change the coordinates
15:19
here
15:20
to different coordinates here. Let me
15:23
pass these coordinates. If I paste it
15:27
again. So it is saying info window is
15:30
not defined. So sorry we need to change
15:33
W here which is small W. So this needs
15:37
to be capital W.
15:42
So once again if you refresh it
15:47
change the coordinates click. And now
15:49
once again you will see uh just this
15:51
object has been written. Now we simply
15:54
need to display the address here which
15:56
is present inside this. You can see the
15:58
address formatted address. So we need to
16:01
just uh display the result. So for
16:05
displaying the this uh address guys it
16:08
is very easy.
16:11
First of all we will check here in the
16:13
if condition that if response
16:16
dot results
16:18
exist in that scenario only we will
16:20
execute it. So the very first thing we
16:22
will say we will say map to set zoom
16:26
level to 11. We will zoom the map and
16:30
then we will place the marker. So for
16:32
placing the marker on the screen red
16:34
marker that you see you will say
16:36
google.m mapaps dot
16:38
marker and this will take the object
16:42
position will be equal to
16:47
position will be equal to the latitude
16:49
and longitude
16:51
and then the map will be the actual map
16:54
which will which is passed to the
16:57
then this method here and that's it. So
17:00
this will place the marker
17:03
basically. Now let me just see if the
17:06
map is loading on the screen or not. So
17:08
you will see nothing is present now
17:10
because we haven't written the sorry the
17:13
CSS for the map. So the actual map
17:15
element. So we have given the map the
17:18
ID. So we can now go to the stylesheet.
17:20
We can write the style here which is we
17:23
have given the ID map. So we can change
17:26
the height of the map to let's suppose
17:28
60%. just to see on the map on the
17:30
screen. So basically if I refresh it
17:34
you will see it is still not seeing
17:36
here.
17:40
So basically if you just go to the video
17:43
description you can just copy paste all
17:45
the styles which are there
17:48
just to see the map on the screen. So
17:51
just copy paste all this stylesheet.
17:54
Simply copy and paste it.
18:02
And now you will see we are seeing the
18:04
map on the screen. So if I change the
18:06
coordinates to this one. So if I change
18:09
the coordinates you will see now it is
18:12
changing
18:17
uh it is not updating it. So it is
18:20
receive. We are receiving the object but
18:21
it's not updating it. It is totally
18:24
fine. We now need to
18:28
after placing the marker what we need to
18:30
do is that
18:36
after placing the marker we also need to
18:40
set the info window as well. So
18:43
which will actually tell the actual
18:47
info window dot set content this is a
18:50
method this will contain the full
18:52
address which will be response dot
18:55
results
18:56
dot0 dot
18:59
formatted address. So this is a
19:02
property.
19:09
So now if you refresh the application
19:11
now you will also see
19:16
the full address is also shown to you.
19:22
And lastly inside the heading we will
19:25
also show this address. So we can just
19:27
say document.get
19:29
element by id
19:32
result dot inner HTML.
19:37
So this will be equal to
19:40
the heading.
19:42
So inside this heading we will place the
19:44
variable which will be response dot
19:52
results
19:57
dot formatted address. So in order to
20:00
place it in the center we can just say
20:02
text align to center.
20:07
So now you will see the address in the
20:09
center position here.
20:11
So if you change this coordinates here,
20:14
latitude and longitude, you will see
20:18
you will see that it will change this
20:22
full address here
20:26
and I think this also
20:30
completes the application. So in this
20:31
way
20:34
you can just copy paste all the source
20:36
code. The link will be there inside
20:38
video description. This is reverse
20:40
geocoding and you need to just place
20:43
your API key here. Simply go to Google
20:45
cloud console and simply paste your own
20:48
API key. And if you try if you want to
20:51
try out this tool, the link will be
20:53
there inside video description. This is
20:54
my website free mediatools.com. You can
20:57
try this tool here. Please hit the like
20:59
button, subscribe our channel and I will
21:01
be seeing you in next video.