Up next in 10

Buy the full source code of application here:
https://procodestore.com/index.php/product/build-a-responsive-google-search-engine-landing-page-ui-clone-in-html5-css3/
Visit my Online Free Media Tool Website
https://freemediatools.com/
Buy Premium Scripts and Apps Here:
https://procodestore.com/
Welcome Folks My name is Gautam and Welcome to Coding Shiksha a Place for All Programmers. You can learn Web Development and Programming Tutorials.
Donate to Our Youtube Channel at :
https://www.instamojo.com/@geekygautam1997
Subscribe for more Videos: https://www.youtube.com/channel/UCR6d0EiC3G4WA8-Rqji6a8g?sub_confirmation=1
Show More Show Less View Video Transcript
0:01
foreign
0:08
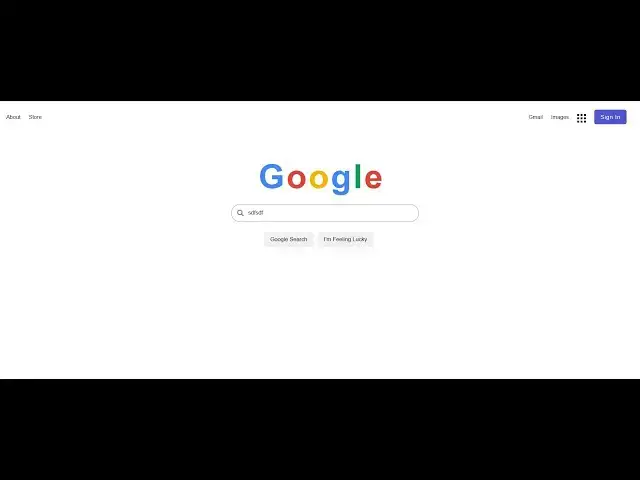
I will be showing you that how to create this responsive Google landing page
0:13
inside your HTML and css3 so basically inside your browser so you can see
0:18
whenever you visit Google search engine it's a popular number one search engine in the world and basically we will be
0:24
showing you how to replicate the design here using this material design input field these buttons whenever you hover
0:30
onto these buttons you will see nice little box Shadow effect will be there this is a search field this is a simple
0:36
logo we will design it inside HTML and css3 so there will be the sign in button
0:42
this is a simple logo Gmail images about store you can see this is a footer
0:47
section here you can see the country of which wherever we are browsing google.com advertising business how
0:54
search engine works it is completely responsive if you are viewing it on mobile phone it will look something like
0:59
this on tablet it will look something like this so it is completely responsive like this you can now see
1:08
so you can see that guys it is completely responsive
1:14
so if you make it responsive all the elements are lining up in a very good manner inside
1:21
your mobile devices tablet devices or you can say inside your PC devices so I
1:26
think it's a very good uh [Music] landing page that we will be developing
1:31
in this side this tutorial so keep watching this tutorial guys if you're watching it for the very first time then
1:37
please hit the like button subscribe the channel as well so you can see we will be building this Google landing page
1:42
inside HTML and css3 so if you are watching it for the very first time
1:48
please hit the like button and for this guys I have written a complete blog post
1:53
on my tutorial website coding siksha so if you want to get all the source code
1:58
of this we will I will give this link in the
2:03
in the description so get the full source code you can basically I have given the source code
2:11
in the live chat guys so basically this is uh uh Google
2:17
landing page that we will make inside this tutorial so if you are watching it for the very first time then please hit
2:24
the like button subscribe the channel so let's start building this uh landing
2:30
page from scratch guys so I will make it side by side so that you you can clearly
2:35
see what we are building so just do it like this
2:45
so here guys you need to create a brand new file which will be called as google.html so here
2:53
we will just write the basic HTML so here we will be giving a title which is Google landing page UI clone
3:03
and here guys you will write your basic HTML which is required for this
3:09
so the very first thing we will do guys we will need to import the font also icons so all the icons that you are
3:16
seeing right here simply include the CDN for this so this is a script tag that we have included after this we will have a
3:23
navigation bar first of all inside this navigation bar we will have a list of
3:28
items so these are the anchor elements so basically this will be for about
3:34
so if you now open the skies inside your browser if you open with live server you
3:41
can see there is this about section out there which we have developed out there after this we will have another Ally tag
3:48
and this time this will be for store
3:54
and next again we will have another one which will be for Gmail
4:00
and this will be on the right hand side guys so we will be attaching a class to it of navigation right side
4:07
that's it so after this guys we will have another Ally tag and inside this we
4:13
will have a div section and inside this we would be attaching classes to it so this will be having
4:20
this class box grid and this will be of having class of box item and basically
4:27
guys here there will be a list of items so you can see
4:32
we have a series of div items here so each having the class of box item so
4:39
simply just paste it here simply paste it here so this is a
4:44
each div is having this class which is box item and after this guys we will
4:50
have a simple Ally tag basically this a light tag will have a button which will
4:55
be called as sign in so here you will be giving a class to it of sign in button
5:04
that's it so this is the button guys we will have so now your navigation bar is complete
5:11
guys this is HTML so now we need to style this so we will go to our
5:18
google.css we will create a file in the root directory for holding all the style
5:23
sheet code so just create this and right here first of all we will style the navigation bar
5:29
for starting the navigation bar first of all we will Target all the elements guys so for this we need to remove the margin
5:35
so margin is zero padding is also zero
5:40
and then we will say box sizing to border box so now you can see all the margins and
5:47
the paddings are removed and now we will Target the body we will
5:52
change the font family to this aerial helvetica sensorif so now you can see
5:58
the font is changed so now we will be starting the navigation area guys so for
6:04
styling the navigation area we will Target the navigation tag and UL unordered list first of all we will
6:11
change the display property to flex so now if you change the display it would be appearing in the horizontal Direction
6:17
and then justify content we will just say Flex start so if you do this it will have some
6:24
space in between the items so align items we will say this is equal to Baseline
6:31
and after this we also need to have some margin in between the items so 20 pixel
6:36
in between this like this 15 pixel in between the items and zero
6:43
and also we will be changing the font size guys to 13 pixel it will now have 13 pixel phone size so
6:51
now we will be having the Ally Target the list items so here we will be
6:57
removing the bullets that you see guys you can see black bullets so this will
7:02
be list style Type To None So now your bullets will be removed and also we will
7:08
be giving a margin to it of 020 pixel 0 0 so there will be some spaces in
7:15
between the items so after this guys we will say that text
7:21
transform and basically we will be changing all the characters to capital letters so to capitalize so this will
7:28
change to all the first character of each list item
7:33
will change to capitalize that's why now we'll be targeting our Ally tag anchor tag guys
7:41
so first of all we will change the text decoration to none so this will remove
7:46
the underlying that you see right here now we also need to change the color to
7:52
Black so this is a black color for hexadecimal
7:57
you will now see the text color is successfully changed to black color
8:02
and whenever we want to hover onto these list items guys we need to attach a
8:07
pseudo class which is which is a unders hover
8:12
colon hover and this text decoration we need to change it to underline so
8:18
basically what will happen if you hover onto this it will change to underline that signifies that this is a link
8:25
element that's it so now you will be targeting the sign in button guys which is having this a nice
8:33
little class of navigation right so basically we will say that we will
8:38
margin left to Auto this will shift this element to the extreme left
8:45
sorry extreme right you will now see it will move to the extreme right here
8:50
which is Gmail sign in about store so basically guys if you are watching it
8:55
for the very first time then please hit the like button subscribe the channel as well and if you're watching it for the
9:01
very first time so this is our navigation menu which is complete guys so now we will be moving to the next
9:07
section which is pretty much very easy which is the actual sign in button
9:13
basically if you see we have given this class which is called as sign in button so we
9:21
need to style this class here so we will simply say here which is sign in
9:28
sign in button so here guys first of all we will change
9:34
the background color to this color which is 555
9:39
CF this is the color blue color and basically we will change the color
9:45
to white and we will also be giving some padding
9:51
to it of 10 pixel 15 pixels so this is the you can now see
9:56
it is somewhat elongated and also we will change the cursor to pointer so whenever we hover on to this the cursor
10:03
will change to pointer we just need to make it somewhat round so we will give a border radius to 5
10:10
pixels so now it will be slightly rounder and also
10:16
the space between the letters you will say letter spacing one pixel so it will have some spaces in between
10:22
the characters so now guys this is the navigation part is complete for Google home page it is
10:29
you can now see this is now complete here
10:35
this is the section which is showing here guys so now it is complete so basically guys you will see we have
10:41
given this box grid class here if you clearly see here we have given
10:47
this Diva class of box grid so now basically we will be targeting this so
10:55
for each box grid class guys we will be changing the display property
11:03
to grid so here you need to change the display to grid
11:09
and the grid template columns will be equal to 5 pixel 5 pixel 5 pixel
11:17
and grid template rows will be equal to 5 pixel 5 pixel
11:26
5 pixel and the gap between guys there is also a
11:32
gap property great column Gap so this will be equal to three pixels
11:38
and the grid row Gap will be equal to 3 pixel
11:43
so in between that guys we will have given the Box item classes so you just
11:49
need to put a background color basically the background color is black so if you
11:55
put this you will now see your grid like structure this is exactly the icon that we developed guys you can see this is
12:00
icon that is showing here so we have developed this icon from scratch so if you are hitting the please
12:07
hit the like button guys only two people watching so please hit the like button subscribe the channel as well
12:14
and right here if you see here we haven't given the images tags so what I will
12:21
need to do just go to the HTML part here
12:28
yeah this is we are remaining here uh after this Gmail we need to also give
12:34
another Ally tag which is this will be for the images so just put
12:42
here images so now you can see now it is complete
12:47
so after this guys we will have our
12:53
after this navigation is complete we will have a separate div tag so this will be having the class of Google
12:59
function so inside this guys we will have a set of span tags each having a
13:06
class of Google name so here you will be designing the Google logo guys which is very simple
13:12
so we will have a simple G tag if you clearly see
13:19
G and then each will have a class name of Google name this will be o
13:34
this will be again of so now you can see
13:42
this will be G this will be l
13:53
this will be e so we have written Google here inside each span tag here you can
13:58
see that Google is written now so now to style this it's very easy just go to the CSS part here and basically what you
14:05
need to do is that we will Target this class which we have
14:10
given to the span tags which is Google function and here you will first of all change
14:17
the display to flex so change the display to flex and flex direction will be column
14:25
we will align the items in the center position
14:30
and margin top will be 80 pixel so it will be right here in the center
14:35
position and here we will have given this each
14:40
span tag you can now see Google name class so now we need to style this Google name class
14:47
so here we will be changing the font size to 80 pixel
14:52
and we will also be changing the font weight to bold so now it is somewhat bold here like this you can see that
14:59
Google so right here guys first of all we will Target this G tag so basically
15:05
in order to Target this G tag we will say Google name and basically in order to Target the
15:11
first element inside CSS guys we have a selector called as nth child so here we
15:17
will be targeting the first character which is the first span tag
15:23
which is holding this G element so here we will pass one here and here we need to change its color to
15:30
this color which is four to eight five
15:36
F4 this is the G color you can now see it is changing to the
15:44
blue color and also we need to transform this so text transform capitalize so it
15:51
will be changed to capital letters so now you can see that so now guys in the same manner we will
15:58
be targeting some more elements here Google name and there is another selector out there
16:04
which is NH child this time you will say 2N Plus 2. so this will I think select
16:11
uh this G tag this G tag it will select and here you
16:17
just need to change the color to DB 4437 this is a red color
16:25
so now you can see that and Google name and a child
16:33
the third element we will style it and for this the color needs to be F4
16:40
uh b f 0 so now you can see this is the logo guys
16:45
of google.com as you know basically this is the logo and we also need to
16:53
also give here Target the NH child four
16:59
and for this we just need to say 4 to 8
17:04
5 F4 this is a color
17:11
and similarly Google name and a child fifth character
17:17
and for this we need to change the color to 0f
17:22
9 d 5 8.
17:28
so I think the last character is Google
17:34
name and a child this time this is the last character
17:40
here so here you just need to change the color to DB
17:48
4437 this is red color so you can now see we have constructed
17:54
this logo guys of google.com Google search engine like this using plain CSS
17:59
and HTML we haven't used any sort of Icon this this is entirely built inside
18:04
HTML and CSS so I think you have got the concept how
18:10
we did this it is very much very useful six people are watching the stream guys please hit the like button subscribe the
18:16
channel as well I am seeing that people are not liking the content so hit the like button so this is our logo guys now
18:22
after this we just need to put our input field out there
18:28
so after this
18:34
we will have a simple form so inside this HTML guys so basically whenever
18:39
this paragraph is over we will have a simple form so this is a form guys so inside this we
18:46
will have a div element and here we will be showing a simple icon this will be FAS fa search this is a search icon we
18:54
will show and here we will have a simple input field of types text I will be giving the
19:01
ID to it of G search which is Google search name is also G search
19:08
this is a simple input field guys you can now see we need to now style this so it's very simple so we will be targeting
19:15
this class which is first of all we will Target the input
19:22
field type is equal to text
19:30
so now to Target this input field guys so first of all we need to attach some
19:36
padding to it of a 12 pixel so it will have some padding here so you
19:42
can now see and 40 pixel from the top you can now see
19:48
we also need to give some margin which is 20 pixel from the top 0
19:54
25 pixel from the left and zero
20:00
you also need to give it a border radius of 25 pixels to make it somewhat round like this
20:06
you will be giving a width of 450 pixels so it will be long here like this you
20:12
can now see we also need to remove these outline guys which is appearing right here so there would be no outline here
20:19
and we also need to change the border to this color which is one pixel solid
20:24
and the color is eight eight eight eight eight eight eight this is a color the
20:31
gray color you can now see this here you can write something here and also when we hover onto this we also
20:38
need to show some box shadow for showing this we will be using the pseudo class that you all know which is
20:46
input type text and hover this is a hover class and here we need
20:52
to attach the Box shadow which is 2 pixel 2 pixel 8 pixel and the
20:58
color is this again so now if you have this guys you can now
21:05
see a nice little box Shadow is showing here you can now see
21:13
so now we just need to align this icon guys search icon so here we can Target
21:18
this by its own class which we have given fa search so here we will say Position will be
21:25
relative to the input field we will make it left 35 pixel so it will
21:31
move it from the 35 pixel like this and then basically you will say bottom
21:37
is equal to 2 pixel so like this from the top we also need to give two
21:43
pixel and the color we need to change of this search in icon which is the gray eye
21:51
gray color 888 so now guys you can see the perfectly
21:58
our input field is also ready here this is icon this is a search input field you
22:04
can now see now we just require the simple two buttons which is Google search and I am feeling lucky these two
22:10
buttons we require it so simply we need to add this so inside your basically
22:16
HTML we will write these two buttons each having a class of we need to surround this so after this
22:24
Dev is over we will have a div basically it will have a class of button group
22:29
so in this div class guys you will have two buttons first this will be for Google Search
22:38
this is the first button and the second button is for
22:43
it will have this text which will be I am feeling lucky so this is I am feeling lucky
22:53
so these two buttons are there guys you can now see we need to attach the classes
22:59
to each of these buttons which is Google button and also to this class as well
23:04
Google button so now we can style this inside our CSS
23:11
so so first of all we will Target the
23:16
button group class surrounding these two buttons so we will change the display to flex
23:23
and justify content to Center so if you see now it will be coming in the center of the
23:30
screen justify content Center so each of these buttons have this class which is
23:36
Google button so now to do this guys inside these
23:42
buttons first of all we need to give some padding so 10 pixel
23:47
and then 15 pixel so now it will have some spaces here you can now see you
23:53
also you need to remove this border as well before that we need to give margin from the right position 10 pixel
24:01
so now it will have some spaces in between this also we need to say border radius to 5
24:07
pixels so it will now make these buttons somewhat round and also we need to remove the border so
24:14
there will be no border here like this so you can now see there is no border so
24:19
now we need to attach some hover effect guys so whenever we hover onto these buttons we need to attach some effect
24:25
so there is a hover class hover effect pseudo class we will attach this so
24:31
inside this we will first of all change the cursor upon pointer so whenever you hover onto these buttons the cursor will
24:39
change to pointer the next property is we need to also change this background to this
24:46
hexadecimal color which is equal to E8 e 2 e 2 this is a color the grayish
24:54
color you can now see the background is changing here and also we need to also have a border which will
25:01
be one pixel solid and this is a color a38
25:06
383 this is a color so it has some border effect as well you
25:12
can now see and also at last guys we also need to show some box Shadow as well so 2 pixel
25:19
2 pixel 10 pixel and then we will have eight
25:25
eight eight eight eight eight so now you can see nice little box
25:30
Shadow effect is also there you can now see
25:36
so almost this Google search engine landing page is complete guys you can now see we have this input field we have
25:42
this logo we have this navigation bar we have these two buttons and we just required the footer guys to
25:49
allow the footer so if you're watching it for the very first time guys then please hit the like button subscribe the
25:55
channel only one like is there guys please hit the like button increase it to 10 likes
26:02
Target 10 likes please hit the like button subscribe the channel as well if
26:08
you're watching it for the very first time so now to add the footer guys it's very
26:13
simple in order to add the footer
26:19
we will go to the HTML part here so basically
26:27
we will have the foot attack so inside the footer guys we will have
26:33
the footer country and basically this country you can
26:39
change it to any country of your choice United Kingdom this will be written right here in the footer section
26:48
and after this guys we will have an unordered list we will have the footer
26:53
details so Ally and basically this will be for
26:59
advertising
27:04
and the second one will be for business
27:11
the next one will be for how search works
27:26
the next one will be in the right hand side guys this would be for the Privacy
27:31
so for this we need to give it a class of navigation right
27:37
so we have already written this class guys it will move it to the right direction navigation right
27:45
so then we also need to say guys which is Ally the next one would be for the terms
27:55
and the last element here will be settings
28:01
so this is complete guys this is a footer HTML this is complete now we just need to go to the CSS part here and
28:07
write the actual CSS so here first of all guys we will Target the footer so footer tag will Target you
28:16
will say position to be absolute this time absolute and bottom we will move all the elements
28:22
to the bottom you will now see it will appear right here at the bottom of the screen using bottom to zero we will make the
28:30
width of the footer element to be complete hundred percent so it will take the entire percent of the screen
28:37
font size will increase to 14 pixel it will be slightly smaller
28:43
and the background will be changed to this color wise F2 F2 F2 this is a grayish color
28:50
and we also need to give a border 1 pixel solid d a d c e zero this is a
28:57
color so right here guys it has got a nice little box Shadow sorry border effect of
29:05
gray color like this so now we need to put the
29:13
after this we also need to change the color text color to this color which is
29:18
zero zero zero zero point fifty four so it would be slightly lighter
29:27
and now guys we will be targeting this United Kingdom this footer country
29:33
we will be giving a border from the bottom position one pixel solid d a d c a
29:41
zero so now you can see it has got a border and padding also 10 pixel 0 10 pixel 20
29:50
pixel so now you can see it has some padding as well you can now see
29:56
so footer details you will Target the footer details
30:03
so here we will change the display to flex guys so it will now be appearing in the horizontal Direction you will now
30:09
see all the list items and for this we also need to say that
30:16
justify content to flex start
30:22
and we need to also give padding which is 10 pixel 0 10 pixel 20 pixel
30:30
so it will have some spaces you can now see
30:37
so here we will be targeting the list item guys which is list Style Type To None So this will remove the
30:44
bullet signs here and also we need to give margin in between the items 20
30:49
pixel zero zero
30:55
so now you can see it has some spaces in between the items if you
31:00
clearly see here so if you're watching it for the very first time guys please hit the like
31:06
button subscribe the channel as well so after this guys what we need to do is
31:12
that we will be targeting the anchor element here so what we will do is that
31:19
footer details Li a you will change the color to this color
31:26
which is 0 comma 0 comma zero comma 0 54.
31:32
and text decoration we will remove the underline text decoration to none
31:40
and also footer details Ally when we hover on to this
31:46
this is a pseudo class then we need to change it to underline so text decoration
31:54
to underline so if you do this now it will change to
31:59
underline that's it so I think that is this is your
32:06
it is almost complete guys you can now see
32:12
one thing is remaining we need to move it to the
32:20
if you see if we have written the navigation right class
32:25
and I have right class so margin left Auto so we have defined
32:31
this class we will see navigation right
32:38
and navigation right if you see clearly in the HTML we have
32:43
defined this class
32:55
so now you can see these two elements will move to the right hand side here privacy terms settings so that was just
33:01
a problem in writing HTML so we now we need to make some slight
33:07
adjustment guys basically inside the footer section you can now the footer is not responsive
33:14
to make it fully responsive guys we need to write some media queries here inside CSS
33:22
so in order to write a media query it's very simple you just put a add the right symbol
33:27
media only screen and here you need to put the
33:33
maximum width so maximum width will be exactly 650 pixel and here
33:39
we need to Target the footer details section so here you will change the display to
33:45
grid section you can see it will change to grid structure so
33:50
let me change it so here display grid you can now see it
33:55
changes automatically because it is equal to 650 pixel and here now we will be having great
34:03
template columns this will be Auto Auto
34:11
so now you can see grid template rows this will be again Auto auto
34:18
the gap between the items which will be gripped column Gap
34:24
which will be equal to 15 pixels so each item Gap will be having 15 pixel you
34:29
will now see the grid row Gap also
34:34
will also be 15 pixel justify content to be Center
34:41
so now you can see it will appear right here in the center position for the mobile devices
34:47
so now you can see it is completely responsive the footer section as well if you see
34:53
foreign this input field as well whereas the
34:58
search icon is it is not appearing well for doing this we just need to say
35:06
we need to write another media query for this so this is complete for the footer section
35:12
so lastly we will write media only screen and the maximum width here
35:18
needs to be 520 pixel and this time this input field
35:24
input type text needs to be we will change the width to
35:31
350 pixel so now you can see the width has been successfully changed to 350 pixel guys
35:38
whenever the mobile devices are come here if you elongate to higher devices the bit will change
35:45
so how you can see that this is Media queries are at its best guys you can now see this is all about media queries
35:53
you can control the sizing of each element whenever it appears in shorter devices this is very
36:00
much useful whenever you are developing mobile friendly websites so these media queries are very much
36:07
important so exactly whenever it reaches up to 520 pixel this width will
36:14
you can even change this to 200. it will again be elongated even more
36:19
like this so like this so you can control all
36:26
these factors guys using media queries so it's a very powerful concept I will definitely make more videos on
36:32
this on this channel so please hit the like button guys
36:38
subscribe the channel as well if you're watching it for the very first time and if you have any sort of doubt you
36:45
can ask in the comment section and you definitely please hit the like
36:50
button subscribe the channel I am seeing people are not liking the content only four likes are there
36:57
please yeah like the corona video
37:04
hit the like button foreign
37:30
likes if you are a true fan of me so please
37:38
hit that like button if you want to see more videos like this guys please hit the like button
37:45
subscribe the channel as well please hit that like button and
37:52
subscribe the channel as well so if you have any sort of doubts you can ask in the comment section about this video
38:22
so 12 people are watching the stream guys please hit the like button subscribe the channel as well if you're
38:28
watching it for the very first time only four likes are there so let me tell you should I make videos on media queries or
38:35
not media queries if you are interested
39:06
you are saying that basically whenever you are typing a phone number inside input field it should automatically turn
39:14
the format to one two three one two three one two three basically it's a phone number input field that you're
39:19
trying to have so there is a attribute inside HTML which allows you to make input Fields related to phone number
39:27
there is a good little attribute out there basically if you see there is an
39:32
attribute called as input type phone I think it is called as number
39:39
or phone if you see let me so there is a attribute here which is
39:45
allows you to enter phone numbers
39:51
input type phone number input type phone number and HTML
40:03
yeah there is attribute called as telephone so there is this element here which is
40:08
telephone which allows you to here you can specify the pattern here basically there is a
40:14
pattern here so whichever phone number you are entering here this
40:20
is the pattern here from 0 to 9 3 0 to 9 2 characters zero to nine three
40:26
if you see here now this is your character
40:47
so there is specific attribute called as telephone this is the but it doesn't add
40:53
The Hyphen yode you need to write some JavaScript for this so
40:59
you can just search for example which is formatted phone number
41:09
phone number auto format I think you are talking about this
41:17
this is the you can now write your number uh two five four six four nine this is a
41:24
number you can see selection is 11. there are 11 characters so nine eight
41:30
two one two five four six four nine selection is 12.
41:37
now she it's this is the code guys you can see that
41:44
phone formatting
41:58
would you like to get the code it is present inside code pen or should I give the code in the live chat
42:06
this is the example you can copy paste it
42:22
so this is the actual code basically this automatically formats your phone
42:28
number whenever you try to write any sort of number and basically it prevents you from writing any sort of garbage
42:34
value let's suppose you're writing a string value it will prevent you from writing you
42:39
so I think it's a complete example you should definitely enjoy it it is basically built inside
42:45
JavaScript a single JavaScript function is running continuously just checking
42:51
the input whatever input that you are supplying whether should be that input should be a number
42:56
if that input is integer or string then this input will not accept the value
43:04
that exactly is a can now see this is the actual
43:09
format you can specify the format accordingly
43:14
three characters three characters and four characters
43:46
so if you're watching it for the very first time guys then please hit the like button subscribe the channel as well and
43:52
let me just start a new poll here which is your CSS framework
43:58
which is your popular CSS framework
44:04
either it is dairy wind or it is balma CSS
44:11
or is it bootstrap foreign
44:20
guys and tell me whichever framework you like either Tailwind balma CSS or
44:25
bootstrap
45:14
foreign
45:33
mm-hmm
46:05
probably done
#Online Media
#Programming
#Web Design & Development
#Education