Up next in 10

Build a Next.js Apple iMovie Clone Video Timeline Editor Using FFMPEG & Remotion in Browser Using TS
Mar 3, 2026
Buy the full source code of application here:
https://procodestore.com/index.php/product/build-a-next-js-apple-imovie-clone-video-timeline-editor-using-ffmpeg-wasm-in-browser-using-ts/
Show More Show Less View Video Transcript
0:00
I will show you a nextjs video timeline
0:03
editor that I developed directly in the
0:04
browser using ffmppg and reotion
0:07
library. It's similar to Apple iMovie
0:10
software where you can actually
0:14
edit your videos. So iMovie as you all
0:16
know it's video editing software from
0:19
Apple or Mac. So it's similar to this uh
0:23
if I show you the demo here. I've given
0:25
all the source code in the description
0:26
of the video. You can directly purchase
0:28
the full source code. The link is given.
0:31
So once you purchase it, you will get
0:32
this directory structure. All the
0:34
components are divided into its
0:36
appropriate file. It's coded inside
0:39
Typescript. As you can see, it's a fully
0:41
fledged project. If I show you the
0:43
package.json file, this is coded
0:45
directly inside Nex.js
0:49
the latest version as you can see. And
0:51
for this we also using ffmppg and
0:54
remotion library as well. And I simply
0:58
started this npm rundev which started
1:00
this on localhost 3000. So I can simply
1:04
show you the project here. So once you
1:06
open this you will be granted with this
1:09
welcome screen. Click on get started.
1:11
And here you can add multiple projects
1:13
as well just give it a project name and
1:16
click on create. After that you simply
1:19
click on that and now the timeline will
1:21
open. So with live preview and here you
1:24
basically add whatever media files that
1:27
you want to add. So this is a single
1:29
page application. It all the processing
1:32
is happening directly in the browser. So
1:34
no serverside code is involved in this
1:36
project. It's a fully fledged front end
1:39
nextJS project. Now we first of all add
1:42
the video.
1:42
>> Hello guys offline editor that I
1:44
developed inside. After that we can even
1:47
add images to the click the and now the
1:51
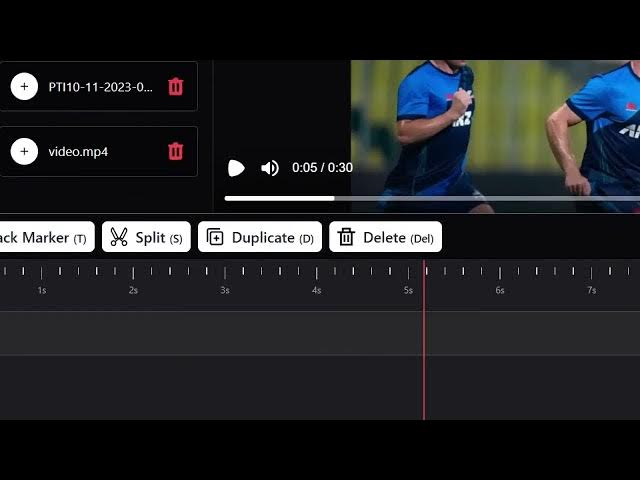
image will also add it. So there is also
1:54
this option to split or cut the video
1:56
directly in the timeline. So right here
1:58
you simply select this portion I want to
2:02
split. You click the split button and
2:05
now the video is splitted successfully.
2:09
So now you if you no longer need this
2:11
you can click the delete button and same
2:13
thing for the image as well. Click the
2:15
split.
2:17
It's really simple using the timeline
2:19
here. It will save you a lot of time.
2:21
After that, you can see the
2:23
>> Hello guys, welcome to this.
2:24
>> This is the image. Now, if you want to
2:26
adjust the image, you can basically
2:29
adjust the visual properties of this
2:31
image like opacity.
2:34
And here you can adjust
2:39
the width of the image and the height of
2:40
the image. Really simple.
2:56
>> [snorts]
2:56
>> So in this easy way you can even add
2:59
images to the timeline and same goes
3:02
with the text as well. You can actually
3:04
click the text button. Just
3:10
you click the add text button. Your text
3:12
will be added.
3:14
Just select it. And these are all the
3:16
visual properties. Again
3:18
change the color, position, everything.
3:23
You can see that. So
3:26
all the things are customizable.
3:31
After that you added this. Now just want
3:33
to export this. I also want to show you
3:35
the export button as well.
3:39
So now if you are happy you want to
3:41
export this you click the export button
3:44
and everything will be exported. So now
3:47
you click the render button.
3:49
So you can even adjust the processing
3:53
speed quality of the video as well. So
3:55
[sighs]
3:56
now this will hardly take uh 5 to 10
4:00
seconds. So after that your output video
4:02
file will be created. So as you can see
4:05
it's using ffmpg web assembly library.
4:08
And for the libraries if you don't know
4:10
ffmppg web assembly allows you to use
4:13
fmpp directly in the browser. So one
4:16
library that we are using this one.
4:21
[snorts] So this is the very popular
4:23
library. And then secondly we are using
4:26
remotion.
4:28
So with the help of this we can make
4:30
videos programmatically.
4:32
So it's a basically
4:39
so we are using this as well. So
4:43
if you are interested guys in this you
4:45
can purchase it. The link is given in
4:48
the description. And if I now the output
4:52
file is created. You click the save
4:54
video button and your video will be
4:56
downloaded. So with the help of this you
4:58
can make edit your videos really easily
5:02
in the browser without downloading any
5:04
sort of third party software. All the
5:06
it's a fullyfledged video editor. I
5:08
shown you the demo. The link is given in
5:10
the description.
5:12
You can purchase it. You can even
5:15
control the timeline as well using the
5:17
zoom. As you can see this is
5:22
you no longer need the timeline to be
5:24
big. You can you just use the sliders
5:28
zoom slider.
5:31
So the link is given in the description.