Up next in 10

Angular 13 ngx-quill WYSIWYG Editor Example to Embed Images,Text,& Video in TypeScript
Dec 22, 2025
Buy the full source code of application here:
https://buy.stripe.com/3csdUaaVr54AczScdP
Show More Show Less View Video Transcript
0:07
Uh hello friends today in this tutorial
0:08
I'll be showing you that in this
0:10
tutorial that how to embed uh text video
0:13
and audio inside your angular 13
0:15
application. So we will be building a
0:18
visig advanced text editor. So inside
0:21
angular and we will be using this
0:22
dependency which is called as ngxql.
0:26
So this is kind of advanced uh visig
0:28
editor where you can embed uh your text.
0:32
You can also advance you can also do
0:35
advanced formatting. You can also
0:39
uh highlight your code as well.
0:42
You can embed images, videos, all those
0:44
stuffs you can do. All those widgets are
0:46
present. So this is a library that we
0:50
will be using here which is ngql.
0:53
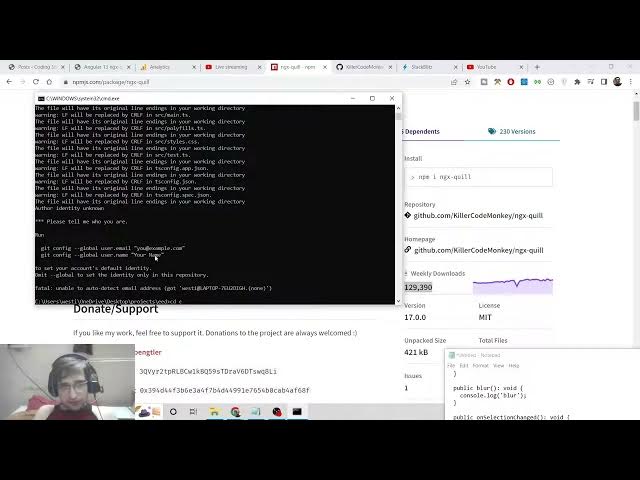
And you can just see the weekly
0:54
downloads 129,390.
0:57
So we will be using this dependency in
0:59
our angular application to do this
1:01
process. So they also have their demo
1:04
available. So if you see here advanced
1:07
demo on the screen here.
1:11
So I think they have the demo available.
1:15
If you just type here ng quill this is
1:17
the library here. And if you just type
1:20
here stat blitz.
1:22
So they have the demo available. So let
1:24
me just show you the
1:27
editor.
1:30
So now you will see that simply there
1:32
will be widgets out there. So you can
1:34
type the heading, you can change the
1:36
formatting,
1:38
you can bold the text, you can also
1:40
change it to itallic, underline the text
1:43
as well
1:45
like this. You can also see a live
1:48
preview of the screen as well. So you
1:50
can bold it, change to itallic, put
1:53
underline as well, strike through and
1:56
also you can put some code as well here.
1:59
So let's suppose you want to put some
2:00
code,
2:02
you can also put some code here like
2:04
this. So this is code formatting.
2:09
So just if you want a simple headline
2:13
that is uh
2:17
let me change it to a headline. So you
2:18
will see this is H1 headline. If you
2:20
want to change it to H2, you can see
2:22
that you can also put a bulleted list
2:25
route here. You can see that.
2:30
So this is bulleted list
2:34
and instead you can also have unordered
2:36
list as well like this dot symbol.
2:40
So various features are there and you
2:42
you can also embed some links as well if
2:44
you want to.
2:49
So if you want to embed some link here
2:51
simply select this and enter the link.
2:55
So I need to redirect this to
2:56
google.com. So I will simply save this.
2:59
So whenever you click on this you will
3:01
be redirected to google.com. So and also
3:04
you can embed images as well. So in this
3:07
simply you need to uh add this widget
3:10
which is called as image. So if you add
3:13
this widget, you now have the capability
3:16
to add images as well. So if you want to
3:19
embed images, you will see that it will
3:22
be embedded. You also have the facility
3:24
to embed videos as well. So simply write
3:27
videos.
3:29
So now you will see there will be a
3:30
option where you will select videos. So
3:34
if you select you can embed any sort of
3:36
video. So from any social media website.
3:40
So if you want to embed some YouTube
3:43
video, you can embed this. So
3:48
let's suppose copy link address,
3:52
paste it.
3:54
So now you can see the video is
3:56
successfully embedded. You can also play
3:58
the video as well right here. So in this
4:02
way guys, uh this is the ngql editor. We
4:04
will be building this from scratch
4:06
inside our angular application. So let's
4:08
start building this application. So we
4:10
are inside our projects folder. Let me
4:13
create a folder.
4:21
I will cd into this and I will be
4:25
creating a new project which is editor.
4:27
So this will ask some questions to you
4:29
that if you want to allow routing or uh
4:32
which
4:36
I will not allow routing. So we will use
4:38
only CSS. So this will install the
4:41
packages that is needed for this
4:42
application.
4:44
So just wait. If you are new to the
4:46
channel then please hit the like button.
4:48
Subscribe the channel as well.
4:51
So this will hardly take 15 to 20
4:53
seconds and it will install all the
4:55
packages.
5:22
So now you can see that the packages are
5:24
installed. So now we can go to the uh
5:27
project folder and open this inside the
5:29
visual studio code text editor. So you
5:32
can see that uh we can enable this
5:34
simply. So now you need to install the
5:37
module. So we will install it by ng ngx
5:43
quill. This is the module here. So
5:45
simply install this.
5:48
So now the module has been installed. So
5:52
now in order to include this just go to
5:54
the app folder app.module.ts TS and
5:58
simply you need to
6:02
include this. So right here
6:06
in this file we will import the module
6:08
which is uh this module which is quail
6:11
module
6:13
from ngxql.
6:15
So now you need to add this into the
6:17
imports array. So we will add this
6:23
which is quail module. That's it. So now
6:26
you can close this files and uh now you
6:30
need to go to app.component html file.
6:33
So right here simply what you need to do
6:35
is that
6:38
you need to write uh inside the div we
6:42
need to include
6:43
so first of all we need to include the
6:47
form group.
6:50
So this will be equal to the actual form
6:52
element that we declare inside
6:54
typescript file. So inside this we will
6:56
have our quill editor widget which will
7:01
be placed on the screen. So this will be
7:03
having some options. First is the
7:05
placeholder.
7:09
So here we will simply say enter text
7:14
and form control name. So this will be
7:16
equal to text and then we will have
7:19
modules. So this will be equal to quill
7:22
config. So these options we will
7:25
initialize in the typescript file. So
7:28
when you on blur is a option whenever
7:31
you this is the blur function which will
7:34
execute and when you select any sort of
7:37
file on selection changed this call back
7:41
function will execute.
7:47
So this function will be totally up to
7:50
you which
7:52
function you need to write here. So this
7:54
function you need to make in the
7:55
TypeScript file. So that's all that you
7:59
need to do and going back to
8:01
app.component.ts file. So now you need
8:04
to write all these functions. So right
8:07
here first of all we will declare the
8:09
form which will be of the type form
8:12
group.
8:14
So this will be imported you will see
8:15
from angular forms
8:19
and just put a
8:23
this symbol and HTML of the type string.
8:29
So now we will declare this property
8:31
which we initialized in the app dot
8:33
component. You will see quil config.
8:35
These are all the configuration options
8:37
that you need to attach to the editor.
8:40
So this is an object. It takes the
8:43
toolbar object as a nested object and
8:46
then it takes the container. This is the
8:49
array.
8:51
So inside this array the first will be
8:53
an actual array itself. These are the
8:55
different types of widgets that you see
8:57
on the screen in order to bold the text.
9:00
Italic underline.
9:03
So these are some of the basic widgets
9:04
that you see inside every editor. So
9:07
then we have a strike.
9:12
Now put a comma. Then there is a set of
9:17
objects. So here you can initialize the
9:20
size.
9:22
Just configure the size.
9:24
So it can be extra small,
9:30
small,
9:32
medium,
9:34
large.
9:37
So these are different sizes that you
9:39
can have for the text. So I am just
9:42
showing here large and extra large.
9:45
So just put a comma and extra large.
9:50
Put a comma and then the alignment
9:53
purpose. So for the alignment of the
9:55
text there is a align property. So this
9:58
will be empty for now. So you don't need
10:02
to do anything for this. put a comma and
10:05
the next property will be clean. So if
10:08
you delete everything then the text will
10:10
be deleted and lastly for embedding
10:13
links we will have a link property like
10:15
this. So that's it inside config.
10:21
So after this we will have the ng on
10:25
init
10:29
this dot form.
10:32
So this will be new form group.
10:37
So text.
10:40
So this will be new form control.
10:47
And inside this we can for default we
10:52
can show something on the screen. So we
10:54
can simply show a
10:58
message
11:00
inside hello.
11:04
We can also close the paragraph. That's
11:07
it.
11:09
So all these functions you can see that
11:12
uh on blur on selection changed. So let
11:17
me also write these functions.
11:20
So if I start this application for now
11:22
which is ngserve. So now you will see
11:25
the uh vivic editor will be seen on the
11:30
browser. So it is starting this
11:32
application. So just wait.
11:47
So all the source code I have guys I've
11:49
given in the video description. So if
11:51
you face any sort of problem you can go
11:54
to the video description link. Simply
11:56
copy this and paste it.
12:16
Just put these symbols here.
13:00
So I think there is some kind of problem
13:02
building locally for this dependency.
13:04
Once again there are some dependencies
13:07
which you cannot build with the latest
13:09
version of angular. So that's why you
13:12
are seeing this problem. So the best
13:14
scenario will be to look at this example
13:17
which is hosted on stack blitz.com. I
13:19
have given all the source code in the
13:21
video description. So just look at this
13:24
example look at the angular version that
13:26
they are using and simply update it to
13:29
your own local version. So all the
13:32
source code will be there inside video
13:33
description. So just go to the edit
13:36
option and in the description of the
13:39
video you will find all the source code
13:41
and I will be seeing you in the next
13:43
video. Until then thank you very much.
#Jobs & Education