Up next in 10


BUY - http://trank.us/gcm12sd
ToolRank reviews the cool new Bosch GCM12SD Axial Glide 12 inch miter saw. Because of the new glide system, the saw has a much smaller footprint and takes up much less space on the workbench. http://www.tool-rank.com/listing/search-results/keywords:gcm12sd/
Show More Show Less View Video Transcript
0:05
hello this is Chris with touring comm
0:07
and today I have for review the Bosch
0:09
GCM 1/2 SD gliding miter saw this is a
0:15
saw that does away with your standard
0:18
rails and uses a an articulating arm
0:21
mechanism it's basically two hinges one
0:27
on the horizontal and one on the
0:29
vertical and allows the sada moves very
0:32
smoothly
0:33
forward and backwards so let's take a
0:36
look at that
0:47
[Music]
1:21
[Music]
1:35
[Applause]
1:46
you know as you just saw the the gliding
1:49
mechanism is really smooth so much so
1:52
that box added a resistance adjustment
1:55
right here on the top for people that
1:57
don't like the action to be so easy and
2:00
they're like a little bit of resistance
2:01
so it can be adjusted using the tool
2:04
that is stored on board here at the back
2:07
of the tool you can see where that on
2:09
board tool storages just slides right in
2:13
a little hole here and clips on with a
2:15
nice clip so you don't lose that you
2:17
have this adjust the flight tension and
2:22
resistance and this is also used for
2:25
changing the subway
2:28
now obviously the gliding mechanism is
2:31
the new feature of the saw but Bosch
2:33
also included some of the features that
2:35
we have grown to like over the years
2:39
obviously the front control for bevel
2:45
release this lever and the socket tilt
2:50
to the left by turning this knob here
2:59
this way you can release it to bevel to
3:03
the right and if you turn it all the way
3:06
counterclockwise
3:08
you can go past 45 in either direction
3:12
also up front obviously is the controls
3:19
for saying the miter and you have the
3:22
detent lever right here when you slide
3:25
this off it's in any detent and locks
3:29
into place one nice thing they did the
3:32
older saws had an awkward said it to
3:36
hold this up to allow for detent
3:39
override but the new mechanism is much
3:43
simpler
3:43
you just hold us up push to switch
3:45
forward and you have detent override and
3:48
you could slide it to any the half
3:52
degrees or whatever and then you lock it
3:55
into place by spinning this
3:58
and there's a release it you just push
4:01
pull up on the bottom lever and this
4:03
brings back like what the saw is that
4:06
Bosch really thought things out when
4:08
they designed it they made everything
4:10
really easy to use you have the the
4:15
table extension just flip this out and
4:19
it slides out really easy you can lock
4:22
it in place
4:24
really simple to use also on the back of
4:27
the saw is the adjustment for the back
4:31
fence with another red lever slides out
4:36
easy and it stops so doesn't pull all
4:39
the way out which is handy you just do
4:42
it really quick lock it into place
4:44
by pushing that back if you do need to
4:49
remove this back fence for whatever
4:51
reason you look at the back of the saw
4:54
there just stop right here take this and
4:57
spin it that locks into place you gotta
5:00
lift it up and spin it pull us all the
5:03
way out and this simply lifts up so it's
5:08
really a nice idea a nice way to do it
5:10
so when you do need to remove it simple
5:13
when you don't need it there's slide
5:18
leading to the top of the saw you have
5:22
your release or obviously the plunge
5:28
mechanism again with the red indicator
5:34
push that in locks into place
5:36
pull it out and next to that is a depth
5:42
adjustment for doing dedos or whatever I
5:45
really don't use this feature that much
5:48
but it's here it is it's solid there's
5:51
adjustment screw up here
5:53
to adjust the depth turn this turns
6:01
plunge hits that and can stop when
6:08
you're using this feature you might want
6:11
to have it locked into Chop mode you
6:14
take this off so you can see but there's
6:16
a little latch right here to lock the
6:19
saw from moving forward so basically you
6:23
just have a chop saw no slide unlocking
6:31
it you can slide it forward easy enough
6:36
and if for whatever reason maybe for
6:38
transport you can lock it in the floor
6:40
position as well so you can look up
6:42
forward or you could look up backwards
6:49
Bosch added adjustments for everything
6:52
which is nice if the saw gets out of
6:54
alignment for whatever reason you can
6:55
realign it the detents can be adjusted
6:59
there's little Allen holes right here
7:03
and they're just the detents on the
7:05
bottom you can slide those over this all
7:10
came calibrated perfect now go over more
7:13
that later
7:14
but just to show you the adjustments for
7:18
for the detents they have I don't you
7:22
could see this there's a little allen
7:26
screws this one right here and there's
7:29
one on the bottom and that just how much
7:32
to saw the stops for when up stop and
7:40
also
7:40
that down stop in the back behind here
7:45
there's adjustments for the bevel forty
7:49
five and zero to adjust those on both
7:53
sides
7:55
Barcia has really nice pins you know I
7:58
talked about how smooth it is but they
7:59
also there's holes on the bottom for
8:02
mounting an auxiliary fence and there's
8:05
also holes on the top so if you need to
8:07
you know make a offense for doing crown
8:11
or
8:12
clearance fence for you know cutting
8:14
smaller pieces there's that so let's
8:18
look at the accurate of this accuracy of
8:20
the saw I have the one of these digital
8:24
gauges turn it on set zero and if we put
8:34
it up here you can see again we're at
8:40
zero the saw out of the box was came
8:45
perfectly aligned everything was at zero
8:49
another great feature that most
8:52
manufacturers seem to you know skimp out
8:55
on is the clamp mechanism I don't use
8:58
this a whole lot but when I am using it
9:00
I mean you mean you want it to be fast
9:02
and the easier it is to use the more
9:04
you're gonna use it for this one you can
9:07
see it has all these little teeth and
9:10
the whole teeth slide into the hole so
9:16
it's really easy to just in you
9:18
basically you just drop it in and spin
9:21
it
9:23
alright I'm gonna show you how easy it
9:24
is this is a 2 by 4 on the side there
9:28
just clamp down let's screw it a couple
9:32
turns pull that off turn it upright
9:42
again couple turns and it's down because
9:48
of the teeth on this you can set the
9:50
height really easily without having to
9:52
spend a lot of time adjusting this this
9:55
is a little different than their older
9:58
sauce they're older saws had the same
9:59
teeth in the back but there was a quick
10:03
action lever so this is probably a
10:05
little cheaper to manufacture but you
10:07
know it only baby takes a couple seconds
10:09
longer and this method kind of gives you
10:16
when you can dial in how much pressure
10:18
you want really simply
10:22
and of course you can turn to this site
10:25
and use it here as well one thing I
10:38
noticed up here in the top
10:39
this plastic deal it doesn't it doesn't
10:43
do anything it's got two screws four
10:45
screws
10:46
to me it's got four screws two on each
10:49
side this may be a possible place for a
10:52
box to add on a laser accessory down the
10:54
road but right now they don't have a
10:56
laser accessory other than something you
10:59
mount on the blade itself but maybe they
11:02
just thinking ahead in case there is
11:04
something there's this piece doesn't do
11:07
anything but maybe a laser in the future
11:10
now to some of the issues with the saw
11:12
you'll notice right here there's a
11:14
pretty big space for cutting you know
11:17
large material when you're at 90 degrees
11:22
however you come on this side you can
11:27
see that where the motor connects to the
11:31
blade there's a belt here
11:34
this is kind of large and can get in the
11:38
way
11:40
this is noticeable when you come to do
11:44
45 so you're doing baseboards standing
11:49
up this piece is three and a half inches
11:53
okay and if you look you bring the slide
11:57
down there's barely enough clearance
12:01
okay
12:02
so say this was like a four inch piece I
12:06
don't think you can get much more than
12:08
four inches if you do base standing up
12:12
another negative as I saw is the height
12:19
you can see the motors mounted on top
12:21
bosch really didn't have anywhere else
12:23
to put it
12:24
I mean from the saws in the up position
12:30
the motor you know it can't fit in here
12:32
so I don't know where else they could
12:34
put
12:37
but the saw is tall which makes it
12:40
top-heavy so when you're doing bevels I
12:42
mean this law is heavy so you might
12:46
notice that over time also my father and
12:49
I knows what we try to put it in his
12:50
truck he has a tonneau cover the flat
12:53
covers the saw was too tall to fit in
12:57
the bed of his truck missed it by about
13:00
an inch or so so we had a transport to
13:03
saw on 45 degrees which is not ideal so
13:07
that's another thing to consider I
13:11
measured it was about 22 and a half
13:14
inches I believe another issue is
13:16
waiting the weight of the saw this this
13:21
whole gliding arm mechanism weighs a lot
13:25
and therefore is this always a lot this
13:29
is I mean they wanted to get this right
13:31
and make it sturdy and sturdy means
13:34
heavy unless they go with you know some
13:37
some of their high strength material
13:40
that cost a lot more so they could
13:42
either make this all cost more or it
13:45
goes wait so there's that as well
13:49
bosch like has done a few demos I don't
13:53
know if you've seen him in the stores or
13:55
at a trade show or something but they'll
13:57
hit this mechanism with a 2x4 to prove
14:02
how strong it is so you know it's strong
14:04
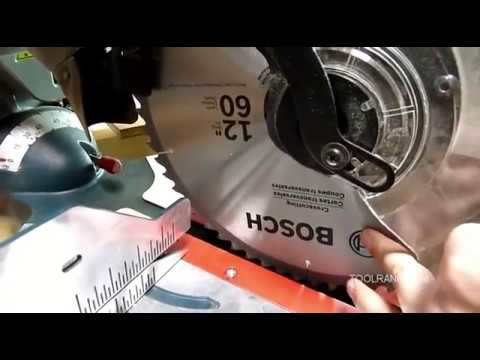
but it's also heavy this all includes a
14:08
Bosch blade 12-inch 60 tooth you know
14:11
this is good for you know general
14:14
two-by-fours and stuff like that but for
14:15
fine finish you probably want to put a
14:18
80 tooth or 100 sheaths
14:19
finishing blade on that comes with the
14:22
dust bag one thing people like to know
14:26
is the dust collection I don't really
14:28
have a disc collector I wish I tried it
14:30
with a shop back you know you get around
14:32
75% dust so with it and this just it
14:36
really it's not a very good you know it
14:40
doesn't have very good suction power for
14:42
this kind of testing so I would I would
14:46
guess you'd get probably 80% I've
14:48
online people are saying about 80% for
14:51
dust collection and I think that's about
14:55
right so this is a video review of the
15:01
Bosch GCM 1/2 SD blighting compound
15:09
miter saw
15:12
[Music]