Up next in 10


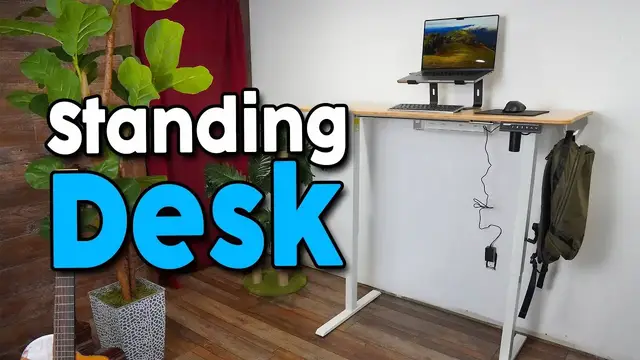
In this video, I assemble and check out the ErGear Standing Desk
Check it out here https://geni.us/t6GPmE
DISCLAIMER: This video and description contains affiliate links, which means that if you click on one of the product links, I’ll receive a small commission. This helps support the channel and allows us to continue to make videos like this. Thank you for the support!
Show More Show Less View Video Transcript
0:00
The R here sent me there stating this
0:01
So in this video, I wanna do a quick assembly and give my first impressions of this. And here's all the pieces that come in the box
0:06
So the first thing I do is to attach the motor to leg R right over here and make sure
0:11
this part is facing downwards and then we can place it just like so
0:16
And now it's time to screw in this to this. So put the wire right through here and spin that around
0:23
and align it against the two holes just like this. And we can screw in bolts B
0:28
Alright so with that done now it's time to attach the crossbar and make sure you use the correct side with these two holes here
0:35
This way these two screws that are poking out can go right through it and then we can screw in the same small bolts right over here
0:42
Now with that done we can go all the way to the other side and we're going to attach the other leg which is going to be the left one right over here
0:50
Now going up over here it's time to attach the leg bases just like so and then make sure that the rubber part is facing upwards
0:57
and we're going to be using the longer A bolts. And now we can flip this over
1:04
and the sides plates can be installed right over here using the small bolts
1:09
Now it's time to add the rod coupler right over here and make sure these holes stick out
1:14
They can put it right there, put it all the way in. Now it's time to grab the transmission rod
1:19
and insert it on the other side. So it's going to be right over here
1:23
and then push it all the way in and now let's go back to over here And we're gonna attach both of these together
1:28
And if it doesn't attach, then we have to twist this rod a little bit so I have the wrench All right now it good so I could slide it in place Then we can screw in the caps right over here Now it time to install the tabletop
1:40
but first make sure that these black rubber parts are placed right here
1:45
And then we can flip it upside down to the table. And then I also have a foam piece at the bottom
1:49
just to protect it. And now everything can be screwed into place. Now it's time to add this cable management part
1:57
right over here. and we're going to be using these small flat head screws
2:02
And now we can fold the cable management tray just like this, and this goes screwed in right over here
2:08
And now we can screw in the storage hooks on both sides, and the controller
2:14
And now time for a little bit of cable management. So I found the perfect spot for the standing desk
2:25
and this looks beautiful over here. This is gonna be a nice one piece of bamboo, which was a little bit grainy at first
2:31
But I wiped it down and it feels a lot smoother now And I do like the fact that this is one piece and also let me take this off in the meantime
2:39
So this is gonna be 48 inches by 24 by 28 for height now
2:45
Let's take a look at the controls itself So there's gonna be six buttons and if I hold the bottom button
2:49
We're gonna be at the lowest setting at 27.9 inches and if I want I can hold and I'll go raise up
2:55
and let's go all the way to the highest setting and that's gonna be 46.8 inches
3:02
which is gonna be pretty tall and this is gonna be more than high enough for me to use it while standing and if I want to save this height as a preset I just have to hold one of the buttons down So I hold down four for five seconds And afterwards it going to blink on and off three times And there now it saved
3:17
So if I go down, let's say I stop and then I press four
3:24
It'll go all the way to the top. Now there's going to be more you can do with these buttons, such as set height limits
3:30
So let's say right now, I want 41 inches to be the upper height
3:34
I can't go any higher than that. All I have to do is hold one and the up button at the same time for a few seconds
3:40
And then here you can see it's going to go and say hyphen up, hyphen high
3:47
So that's going to be the highest setting. So now if I try to go any further up, I hold up
3:51
It doesn't go. It tells me that's going to be the upper limit reached. That's the highest point
3:55
And here, let's try that again. I go down 40.5. I hold it
4:00
There, 40.9. And if I go one more high. so I can't go any more than that. Now if I want to reset that just press the same thing I hold one
4:09
and the up button again and this should yep it's good so now I can go higher than that and the same
4:18
thing applies if we wanted to set a lowest setting as well too and if you have kids and you don't
4:22
want them to accidentally press any of the buttons and change the setting well you can actually lock
4:26
this by holding the one and two button for a few seconds and then right here it'll say lock just
4:31
Just like that. So now when we try to go down, when we try to go up
4:35
when we try to change one of the presets, nothing happens. And the only way to get out of this lock mode
4:39
is by holding one and two again And there now we free to use it Now by default we gonna be be in the imperial system so this is going to be 42 inches but if you want to change it to the metric system just hold the one and three
4:53
button and after a few seconds it'll change from 42 inches to 106 centimeters and the last thing we
4:59
can do with this is change the collision detection sensitivity simply by holding the one and four
5:03
button for a few seconds and right here it's going to say 500 and then we can go up all the way to 503
5:09
and as low as 500. And once we change to whatever one we want, we can hold the 1 and 4 button again
5:17
And there, it's good to go. Now if you want to go back to the way it was and reset it
5:21
we actually have to go all the way down to the lowest level. And once it reaches all the way down, we can hold the down button again for five seconds
5:31
and then this should change. There. And now it's reset, so just hold the down button one more time
5:39
it's gonna go down and then go back up a little bit and there now everything is
5:46
reset and in case you're wondering how long it takes to get from the lowest setting all the way to the highest setting it's gonna be
5:57
just a little over 45 seconds so overall I'm pretty happy with this ER
6:01
gear standing desk it looks really clean I love the aesthetic of it especially
6:05
especially with the bamboo one top. It just feels a lot higher quality
6:09
especially with the wall being white. It contrasts it nicely. And I do like the fact that the legs are white
6:14
so it matches with the white wall as well too. But overall, if you're looking for a stylish
6:18
and functional stintiness, definitely check this one out by ERgear
#Computers & Electronics
#Computer Hardware
#Consumer Electronics
#Home Improvement