Up next in 10


In this video, I do a quick unboxing of the TP-Link Tapo D225 Smart Video Doorbell and go over the app control options.
Check it out here https://geni.us/GXs4s
DISCLAIMER: This video and description contains affiliate links, which means that if you click on one of the product links, I’ll receive a small commission. This helps support the channel and allows us to continue to make videos like this. Thank you for the support!
Show More Show Less View Video Transcript
0:00
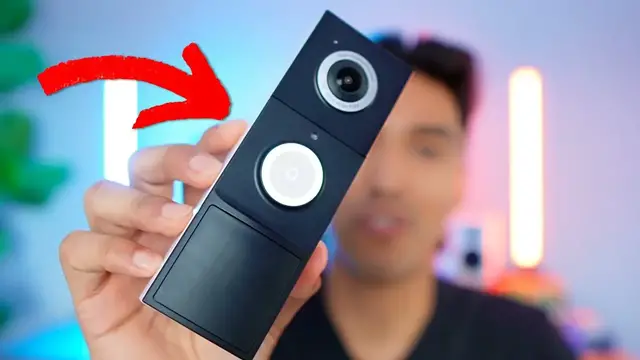
Tapo sent me their smart doorbell, so let's check it out
0:02
So before showing you what this smart doorbell has to offer, I want to do a quick unboxing of this
0:07
And the first things I see up front is going to be some paper followed by this quick start guide
0:12
We're also going to have some hardware if you want to install it directly to your door, followed by the chime, which is going to be pretty small
0:18
And it has a reset button on one side and then the volume and ringtone button on the other
0:22
In this baggie, there's going to be the hardwire if you want to connect it directly to your current doorbell
0:27
And finally, the video doorbell itself. And let's not forget about the mounting plates, followed by some adhesives
0:34
And lastly, there's the USB-C to USB-A charging cable. So now it's time to set this up, and according to the instructions, it says I have to plug this in, and then an LED should light up
0:46
And let's see if anything blinks. Yep, we got a couple blinks here. So I just downloaded the app, and then created an account for Tapo, and right here it's time to add a device, so just press the plus button
0:56
Add device. and I already did this so I can go here and then this is going to be a doorbell and the
1:03
Tapo D225. Yep, this one. All right, it says press and hold the on off button to power up
1:12
your device. Wait 30 seconds until the LED blinks red and green. This is the on off button on the
1:17
backside. Doorbell on. All right, so now it's time to connect to my smart doorbell and I have
1:26
go to my Wi-Fi and then it shows up right here and now it's connected so I'm
1:32
already connected and that's looking for the device you can I could choose my
1:40
network I want to use it's gonna be this one and then let me just put my password real quick all right so now I can name my device and I'll just leave
1:49
it as is and click next and then next and then location name I'll just put a room and then any
2:00
icon here so I'll go all the way to the bottom and here this one here and now it's complete and
2:08
ready to be used so right here it talks about cloud services but I'll skip this for now and
2:12
then it talks about a firmware update so I'll just leave it as is press got it all right set
2:18
up local storage so I can put a micro SD card here on the back and it's going to be right next
2:23
to that USB-C port but I won't put one in now so I'll just click no micro SD and then continue
2:29
without SD card. All right select power supply so I don't have an existing doorbell
2:35
and then it'll show me exactly how to put it so it has to be that's to be placed four feet above
2:44
the ground and of course avoid some obstructions like plants or anything in the front avoid
2:48
Avoid pointing the doorbell directly at swaying trees. Avoid pointing at vehicles
2:53
Avoid direct sunlight. Keep away from metal doors to avoid affecting the signal
2:57
And then, yeah, that's good. So next, next. Check the porch depth
3:05
Next, next. And then it talks about the different mounting brackets. So there's going to be a wedge, a vertical wedge, the horizontal wedge
3:15
Now test Wi-Fi and signal preview. Alright perfect so now it's working and here we can see what the live camera feed looks like
3:26
So as you can tell this is going to be ultra wide and you can even see it on the camera right here 180 degrees ultra wide FOV and that looks good So next
3:37
And then I can choose which installation method I want to do. So I would probably just stick it to the wall with the adhesive since that's going to be
3:43
easier to do. And click next. Next. Next. And finish
3:55
so add chime hub so in this case yep it's going to be the chime
4:02
so I connected the chime so I can click next and now it's going to pair with the chime
4:07
so I'll give that a few moments I think that should be good
4:12
add new chime wait about 30 seconds until the LED blinks red and green so yep
4:21
the chime is red and green and it found it. And then same thing, I had to connect with my network again
4:28
And I'll leave the name as is. And check firmware. Alright, sounds good
4:34
Got it. And there, now it's all good to go. And now I can click on room one
4:41
and we can also see what the battery life is. So since it is currently charging, it does have that little charging indicator
4:47
Otherwise, it looks to be around 50%. Alright, now it says, Welcome to smart doorbell
4:53
All right, 2K, 4 megapixel video, 4 megapixel resolution with 4 to 3 aspect ratio offers a larger viewable area from top to bottom
5:03
Customizable AI detection and smart night mode. So got it. All right, tap once to show our hide icons
5:09
Pinch to zoom. Double tap quickly to zoom in. Okay. And then it does say update required, so I'll go ahead and update that now too
5:16
And then I'll give it a few minutes to finish updating. All right, so that's all good to go
5:22
and here we can see the battery is currently at 56% so in theory I can just take this off
5:27
so here's a better view of the image and you can see it has a very wide angle
5:31
and once again this is 180 degrees so you can see you can even see my monitor right in front of me
5:36
my plant on this side the window on the other side and then even the camera and the tripod too
5:43
so you can see a lot with this and at the bottom here when I click into the screen
5:47
we can see more settings I can take a picture if I just press this button I can take a video too
5:53
now it's currently recording and so this is going to be the video
5:57
that's recorded and I'll show it on the screen too and right now I have the microphone
6:12
set to mute and this is so I don't hear anything but if I put it back
6:16
now I can hear myself talk So as I talk into this, you can hear it coming out from the phone
6:25
Yeah, so I'll just mute this for now, just so it doesn't interrupt here
6:29
And then there's also an option for call. So I'll allow the microphone
6:35
Tap the call. Test. Test, test. And yeah, that was just a lot louder and a lot higher quality
6:48
and that's because it's coming from here. So I can delete that, and I'll go back to muting
6:53
just so I don't hear myself again. Now when I do click onto the screen
6:56
you can see more options so let click this button here And this gives us access to other cameras So if we have multiple cameras we could see everything that going on And as you can see a lot of cameras from Teipo can be added
7:13
But right now, since I just have one, I could just click into it. I'll just click this button here
7:18
And then that's the one camera that's being shown. Now for the video quality, it's currently at 2K QHD, or I can do 960p
7:26
but I'll leave it for 2k for now and then this is set to auto mode so if it's day or night it'll
7:33
just automatically set up depending on the light settings and then I can also increase the screen
7:39
size so we can see everything that's going on and in the upper left hand corner we could see the time
7:44
and date in the bottom corner we could see the logo tape over here and then more settings on the
7:51
right and bottom side. Now if I quickly double tap somewhere, it'll just zoom into it as you see
7:58
or I can just slide my fingers just like a phone and then I can get a better view of what's going on. Now let's go down here. We got playback and download
8:09
So I don't have a microSD card, so I'll close that and let's see if anything shows up
8:14
So right now no recordings and let's see if we're downloaded. And this would be the ones that I took
8:19
which would be the images I took and the video. And unfortunately there's no sound for this video
8:30
and that's going to be because I muted the microphone. So now let me just take another video and this time not mute the microphone
8:35
All right, so this is a test recording. I'm currently about two feet away from the camera itself
8:41
Now I'm about a foot away and probably a couple inches away
8:45
And let me do the same thing but this time going even further back. So now I'm about five feet away, and now all the way across the room, this might be about
8:56
ten feet away, so hopefully you can still hear the audio. And then as I go closer, you might hear the audio a little bit better until I'm all the
9:03
way up here. So I just took another video, and it shows up right here, so now let me just play that
9:09
so you can get a better listen to it. All right, so this is a test recording. I'm currently about two feet away from the camera itself
9:16
now I'm about a foot away and probably a couple inches away and the same thing
9:23
even further back so now I'm about about five feet away now all the way across
9:30
the room this might be about 10 feet away so hopefully you can still do the audio and as I go closer you might hear the audio a little bit better until I'm
9:38
all the way up here all right and we also have other options too for talk so if I
9:42
want. I can hold this and talk. Hello? Hello? And it shows up right here. And then there's also
9:56
privacy mode. So I'm guessing, yeah, this will just turn the camera off. And as you can see with
10:00
the camera, there's nothing glowing. There's no lights here. And I want to turn it back on. You could see the doorbell is glowing. Let us know that it is on. Quick response. So tap to play
10:11
quick voice message okay that's pretty cool so let's listen to this one no one
10:17
can answer the door right now we are notified you stop by please leave the
10:22
item by the door I'll be there in a minute sorry not interested you are
10:29
trespassing police have been notified so this is pretty cool and I could even leave a custom voice message And this would be my voice recording so tap
10:41
I'm currently not available, please leave it by the door. And then I have 15 seconds to leave my message
10:47
And here you can hear what it sounds like. I'm currently not available, please leave it by the door
10:54
And then I have 15 seconds to leave my message. And I can either save it or just go back and I'll just delete that
11:00
I don't want to save that message. And let's see what else we have. There's also an option for light. So if I click light, yeah, this lights up and then I can turn it off
11:09
And you can't really see it well on camera, but it does get brighter. And now tag on
11:15
So it could show me the parts that are moving. Yeah, so see if I move
11:20
Yeah, it'll put me in the frame. and it's just going to follow me and it also lets it know what it is and as you get closer
11:30
here you can see it identifies me as a person so that's correct and now let me move my plant to see
11:35
if anything no i can't even notify that okay that's actually pretty cool so i'll turn that off
11:47
and then there's also table care and this just lets me know options if i want unlimited cloud
11:51
storage for 30 days. Now that's about it for this part and I can also go to settings and let's see
11:57
what else we have. We have the name of the device, the room it's in, I can see device info, detection
12:02
power options, doorbell. So doorbell ring is on. Oh and it gives me different options for ringtones
12:21
Yeah, so for the holiday spirit, I think I'll leave it under doorbell ring one
12:40
There's also paired chimes. So let's see, ringtone settings, duration as ringtone
12:49
Okay, so I can have it set to however long I want, 5, 10, 30, or custom
12:54
In this case, it's set to 5 seconds as custom. Or I can have it as long as, yeah, as long as 30 seconds seems to be the max
13:01
And then the status LED light. So it's currently on. And if I press this, yeah, it'll turn off
13:06
And this is going to be that shows up on the chime itself. There's doorbell video call
13:11
And I'll leave it as is. Spoken language, auto response. So set the doorbell to automatically respond to visitors with a pre-recorded message
13:18
if not immediately answered. Then anti-theft alarm. So this is currently off
13:24
but when enabled, an alarm will be triggered once your doorbell is removed. Okay, that's pretty cool
13:29
All right, so when the doorbell is installed, this button is going to be pressed like this
13:34
And if the doorbell is just taken out, this will depress, and in theory, it should start ringing
13:40
You have been recorded, and the host has been notified. Please return the doorbell immediately
13:48
Let's see if I press it again. It gives me like a warning
13:58
And yeah, that's about it for the app. So that's a quick overview of the Taipo smart doorbell
#Computers & Electronics
#Home Automation
#Home Alarm & Security Systems