Up next in 10



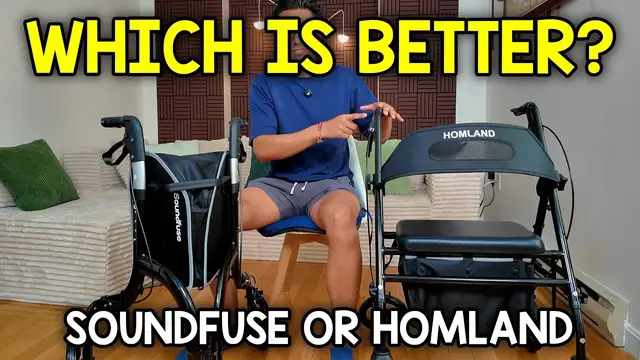
In this video, I compare the Soundfuse 3-Wheel Rollator and the Homland Rollator.
Check them out here
Soundfuse - https://geni.us/KsvSrTI
Homland - https://geni.us/CK84D
Want FREE Shipping With Amazon Prime? Get a 30-DAY FREE TRIAL by signing up here http://www.amazon.com/tryprimefree?tag=thechrisreview-20
DISCLAIMER: This video and description contains affiliate links, which means that if you click on one of the product links, I'll receive a small commission. This helps support the channel and allows us to continue to make videos like this. Thank you for the support!
TIMESTAMPS
0:05 Assembly/Adjustments
1:48 Weight
2:16 Storage
5:13 Braking
6:30 Folding
7:52 Ease Of Use
Show More Show Less View Video Transcript
0:00
In this video, I'm comparing the three-wheel rollator by SoundFuse and the four-wheel rollator by Homland
0:05
Now, both these are going to be very easy to assemble, but one of them is just going to be a lot easier
0:10
and that's going to be because of one thing. Now, the thing that makes the SoundFuse unique with assembly is the fact that it has these pushpins
0:16
If you look at the bottom right over here, all you have to do is push, and it pulls right out
0:21
which makes assembly extremely easy. And the same thing can be done over here
0:26
And because of these pushpins, this makes adjusting it a lot easier. So if this height was too small for me and I want it higher up
0:33
All I have to do is just push at the bottom, pull up, and it'll lock into place. And similarly, I could do that
0:40
If I want it to be even lower to the ground and assembling this one took under 10 minutes
0:45
Now when you look at the Hamlin that this one was pretty easy too, but it was hard just because of this right over here
0:51
So this piece is gonna come with three things We're gonna have the bolt
0:56
We're gonna have the washer and then we're gonna have this cap. So I'm gonna start with the bolt and this goes through the bottom
1:02
just like that and then the washer can be placed and Then it's time to screw it in with this
1:09
Now screwing that in one time is gonna be fine But you're gonna have to do this six different times
1:14
Four for the wheels and then two up top over here for these handrails and that's gonna be a bit more time-consuming
1:20
Now the second hardest thing to install in this is gonna be this backseat because you do have to put a good amount of pressure on here
1:27
But once you do, it's fine because there's also going to be a screw that you put in here
1:31
so you can't accidentally take this off. And another thing I forgot to mention about this one
1:35
is going to be the adjustments. Because of the way we assemble this with this bolt
1:40
the screw and the washer, you're going to have to do the same thing if you want to extend the rod or push it more inside
1:46
So this is going to take a lot longer. Now let's take a look at weight. And I think you already know
1:50
that this one's going to be lighter than this one just because of the size. but how much lighter is it exactly? So right here I have this luggage scale
1:58
and when we put it to the test, this is going to end up being 9.92 pounds
2:04
And when it comes to the Hamland one, whoops, this one's going to be a whopping 19.84 pounds
2:14
which is going to be more than double But what about storage So both these options have storage but they going to be a little bit different For starters on the SoundFuse one we going to have this baggie up on top and this one actually is going to be removable
2:29
All you have to do is just give it a pull with this strap and it pulls right out
2:34
And then installing it is going to be fairly simple too. Just give it a push on the inside and then same thing on the other side and it locks in place
2:43
Now this is going to be zippered so right over here just pull this out
2:46
and then you're going to have a fairly deep pocket and this is going to be
2:51
about 11 and a quarter inches from over here and if you look at the highest setting this one's
2:59
going to be roughly 14 and three quarters inches so this is going to be tall enough where you can
3:04
fit something like a gallon of milk in this case I have half a gallon but this stores very easily
3:09
too and if you're storing shoes here's a size 12 shoe it fits right in there and then I can just
3:16
zip it back up just like this and then you also do get additional storage at the bottom here
3:25
if you see there's going to be two pockets so you can fit something like a phone in here
3:29
or maybe roll some paper up roll up a newspaper and put it right in there too
3:34
all right so pretty good storage but what about the homland now this one's going to be a little
3:39
bit different and that's because the storage for this one is going to be underneath the seat so if
3:43
You see right here, you have to lift the seat up for the storage to be exposed. And unlike the other baggie, this baggie doesn't come off that easily
3:51
If you pull the strap, this is actually going to fold it, but we'll go over that folding mechanism a little bit later
3:57
If you do want to remove the bag, it is possible, but you are going to have to go through a bit more work
4:01
So there are these straps here, which you can unbuckle, and it's going to be easy for the front side
4:07
but the backside is going to be a bit harder. It's going to be a bit more involved because you are going to have to remove the seat
4:12
and as you see over here there's going to be some screws on this seat that you'll have to remove if
4:18
you do want to remove the baggie so this baggie is pretty much going to always stay there now the
4:23
depth of this is going to be a little bit less than the other one so it's going to be roughly
4:28
10 inches and if we go all the way from the bottom and we push down we can get like about
4:34
a foot of space but keep in mind that's not going to be consistent because that's going to be in the
4:39
middle but even so let see what can fit in here so here that half gallon of milk I can fit it in the middle I can fit it on the side and this is still going to close down But what about a shoe So again this is size 12 If I put it here against it I still able to do it And I can even lean it to the side so I have a bit more space
5:01
although I will say it did get caught a little bit over there. And the other thing to keep in
5:06
mind is because this storage is going to be at the bottom, it is going to be a little bit less
5:10
accessible than this one over here. Now another thing to look at is going to be braking. So let's
5:15
start with the sound fuse one. So the brakes are going to be right over here. You have two ways you
5:22
can brake. You can either actively brake by pulling it upwards or if you want it to stay still, just
5:28
push the handles downwards and they're going to stay still. Now the same thing is going to be on
5:34
the Homland one. We can actively pull it to break or just push it down like so. So they're both
5:42
going to be the same thing but there is going to be a slight difference and to see which one is
5:46
easier. So when I pull this one versus pull this one. So it feels like I have to use a little bit
5:52
more force on the sound fuse rollator versus the Homland rollator to lock it in place. But another
5:57
thing to consider too is the distance between these two. So as you can see here, the distance
6:02
from the longest point is going to be a lot less, about an inch and a half when compared to the
6:08
Hamlin's about two and a quarter inch. Now the handles themselves are fairly similar. So if you
6:14
take a look over here, it's going to have like this curve here and that's where your palm goes
6:18
And then same thing on the other one. Yeah, they honestly, they feel pretty identical. If not
6:24
they actually might just be identical handles. Yeah, these honestly look like identical handles
6:29
so they're probably the same thing. Now let's take a look at folding. So the folding mechanisms for
6:34
both these are going to be a bit different, and when we start with the sound fuse one
6:38
there's going to be this metal post over here at the bottom, and we have to push it. Now you can
6:42
either go down and use your hand and push it like this, or what I think is the easiest is first lock
6:48
it in place so you don't accidentally move, and then just give it like a slight push with your
6:51
foot and then close the handles inside and it closes and here let me do that from this
6:57
angle, push it in and then close it and there it is
7:01
This is going to be fairly thin and of course just lock it in place just to prevent it from
7:05
sliding So this one is going to be a bit different because we going to have to start by lifting the seat upwards And there going to be this strap at the bottom We just pull it up and it locks into place Now there is an extra step involved here and that going to be the Velcro strap
7:19
So there's going to be a Velcro on the side somewhere. In this case, it's going to be on my left side here
7:24
So I could just lock that. And this is to prevent it from accidentally unfolding again
7:29
now the space of this is going to be a lot more when compared to the sound fuse one that's mostly
7:37
because the handles are going to stick out a lot more like this but this also does stand in place
7:42
and when it comes to unfolding just pull it out like this and then unbuckle this one and then
7:48
just give it a push downwards put the seat down and we're good to go now how about actually using
7:54
both of these what do they feel like and I'm going to start with the sound fuse one so one
7:58
thing you should know about this sound fuse is going to be that this is going to be narrow. So
8:03
if you're going to be a bit bigger bodied, then this one's going to be probably harder to use
8:08
And then here you could see how it looks like on me. So this just fits my hips. I can't go any
8:13
closer. I'm going to be like this. And if you have a wider stance, then you may have a problem
8:18
with the wheels being over here. Although you could might be able to back up a little bit
8:23
Now, the reason you'd go for a three-wheel roll later is if you want to go through some narrow
8:28
hallways if there's tight spaces around your house or apartment this would be the one to go to and
8:35
on top of that it also does help with turning so you're going to have a better turning radius just
8:40
because of the three wheels so moving around is going to be pretty easy and you're still going to
8:44
have good support but it's not going to be as much support as you get with the homlin one and that's
8:50
because this one is just going to feel like a bit more robust you just feel more solid using this one
8:54
and if you are somebody a bit wider it'll also be easier to use this one since there's going to be
8:58
more space in between over here. But when it comes to turning and making those like tight turns it is
9:04
going to be a little bit more trickier with this one and if there are narrow hallways around you
9:08
then this one probably won't be the best suited. But I think the biggest advantage of this one is
9:12
going to be the fact that you do have the seat. So if you're moving around a lot and you want to
9:17
rest a bit just lock it in place sit down and there you go it's comfy and on top of that you
9:23
also are getting that back support over here so you can just lean a little bit here. So both
9:28
these relators are pretty easy to use and hopefully this video helped you find out which one is right for you
9:33
Thanks for watching
Computers & Electronics