Up next in 10


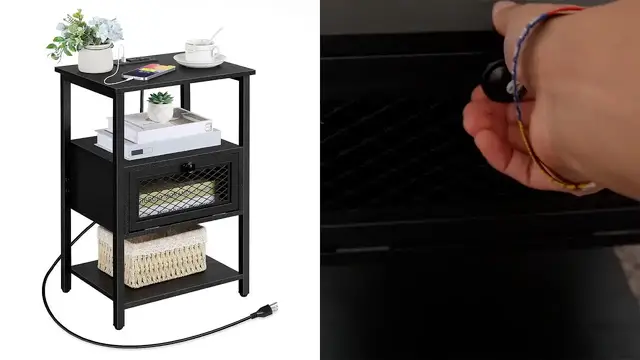
In this video, I review the OYEAL Black Nightstand with Charging Station.
Check it out here: https://amzn.to/3tix1yX
DISCLAIMER: This video and description contains affiliate links, which means that if you click on one of the product links, I’ll receive a small commission. This helps support the channel and allows us to continue to make videos like this. Thank you for the support!
Show More Show Less View Video Transcript
0:00
Hey, Chris here, and this is my nightstand with a charging station, so I want to do a quick build and overview of it
0:06
And I was sent this for the purpose of this review, but I'll go ahead and give my honest first impressions and opinion of it
0:12
So right here, here's all the stuff that it comes with. Right here, this is going to be a baggie filled with hardware, it feels like
0:20
Yep, here's going to be all the hardware needed. And it does come with a screwdriver, so that'll make it a lot easier
0:27
Although I wish I had a drill but hey, this is still good And then yeah
0:34
And yeah, he's gonna be all the pieces that are needed and then here's the Allen wrench
0:37
Here's the charging cable the metal pieces the wooden pieces and most importantly the instructions
0:43
So I know how to build this so first thing I got to do is grab these metal pieces and these screws with a little plastic pick up on top
0:51
And this is gonna go ahead and be for the feet and I just got to screw these into place
0:55
So now these metal pieces can be flipped upside down and I'm gonna grab these over here
1:01
Just place it right inside here Just like that Grab the screw and then just tighten it for all of the four legs
1:09
So one thing I forgot is actually to put these washers in between this
1:13
So I just gonna have to put that there now all right now that these are done over here
1:17
I can start by grabbing these other legs Just putting them right over here Just make sure it the same orientation just like this And then again screwing them in here with the washers So I finished with the legs over here and now the next step would be to grab this wooden shelf
1:37
along with four of these B-screws, and it's going to be put right over here
1:44
There, now that this is done, we can put this out of the way and grab these wooden pieces, 5, 6, 7
1:50
as well as the screws. And the way it has to be done is
1:54
these indentations have to face towards me and these holes have to face opposite of this
2:02
So just like this. And it would be like this. Because the holes have to be facing upwards
2:09
So just like that. And I can start screwing them into place right over here
2:15
And there, now that this is done I can go ahead and grab this piece. This is piece number four
2:20
and then place it right here. And same thing, just screw them in over here
2:24
All right, now that this is done, this can be put away. And again, we can grab a different shelf
2:29
and this is gonna go ahead and be number three. And then right here, this is where this magnet part's gonna go
2:37
with these tiny screws. All right, that's all set. Next thing to do would just be grab these screws
2:44
and then just put them on all four corners over here And there now we can put this away Grab this metal part as well as the knob and the screw and washer and this just has to be placed right over here and then grab the
2:58
screwdriver and tighten it even more there that's all good now that that's done we can go ahead and
3:03
grab this part again and then right here where those little indentations are that's where this
3:09
is going to go ahead and go and then right there once again the little screws and screw it into
3:13
right here. And there, this is all set. And now the only thing missing would be the part on top
3:19
And we can grab this that was done beforehand and just put right on top like this
3:25
And now the magnet goes ahead and holds that onto place. And now these little A pieces can be grabbed
3:30
and these are going to go ahead and be screwed on the inside over here, just so it prevents these
3:36
from opening back up. And there, now it's not lifted anymore and then same thing for the other three sides
3:45
And there, that's all set. Alright now we have to grab this part and just turn it to the side and then this can
3:53
be placed right in here and that will make it a lot easier to go ahead and screw it into place
3:58
And now the same thing can be done on the other side
4:05
All right, and there. And now this can go ahead and be lifted up just like this
4:12
And now we need the next piece to put right up on top And that would be this right here And the end piece has to go on the opposite side just like this and then we have to screw it in from down below All right and there that done
4:28
now the next thing to do would be to go ahead and actually put that uh the part for the outlet here
4:33
so I gotta stick it right in there just like so and then I have these two little screws and here's
4:40
the finished charging station and I think it ended up looking real nice. And of course, my favorite
4:45
part is going to be the actual charging parts. Not only does it have two outlets, but also two
4:51
USB ports here. So it'll make a lot easier to charge multiple things at a time. Here's what
4:57
the shelf looks like. And then right here. Yeah, I'm a fan of this. This definitely looks really
5:02
cool. And it's empty right now, but I'll go ahead and just fill it up with some stuff. And I do want
5:07
to go ahead and just check out these ports. So right here I just have my cable, my charging
5:12
cable for my AirPods. Make sure it's all working nicely. And then right here just gotta..
5:23
There. Yep, it's glowing so it's working. And now let me test that out with the USB part here
5:32
the other way same thing alright perfect but yeah it's all working it's all good
5:40
and yeah that's a quick overview of the charging station
#Computers & Electronics
#Home Furnishings
#Home Improvement