Up next in 10


In this video, I test out the Mooryan Astronaut Starry Sky Projector
Check it out here https://geni.us/Np8P
DISCLAIMER: This video and description contains affiliate links, which means that if you click on one of the product links, I’ll receive a small commission. This helps support the channel and allows us to continue to make videos like this. Thank you for the support!
Show More Show Less View Video Transcript
0:00
Welcome to the Chris Review
0:00
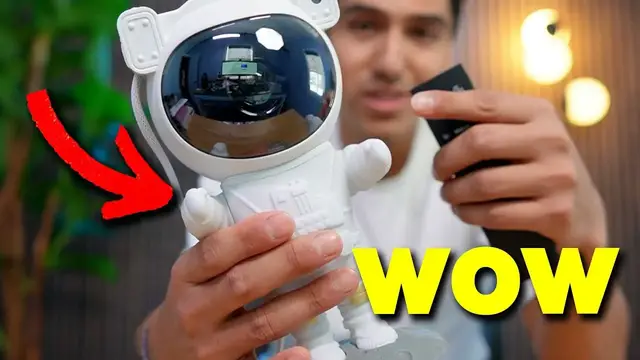
Today, I'm taking a look at this astronaut starry sky night projector. So I want to do a quick unboxing and test this out
0:06
So inside the box, we're going to have the remote control, which is going to have a bunch of different buttons
0:10
And this is going to take two AAA batteries. There's also the user manual, the moon base, a power cable
0:17
and the astronaut itself. So this is a pretty cool looking astronaut
0:21
And since the majority of the stuff electronics is going to be on the top side, this is going to be top heavy, which is why it's good that it does come with the base
0:28
So the feet just attached to the bottom, just like so, and it's held by friction
0:33
And if we want, we can reverse it to the other side, just like that
0:37
Now the head can be moved, it can be rotated, and it can actually just be completely taken off
0:41
And that's because this is going to be placed via magnet. So we can rotate it all the way up
0:46
So this way the projector is facing upwards, or we can face it to a wall, to a side, and so on and so forth
0:52
just as long as the wire still stays in place. followed by three buttons on the backpack
0:57
and then the outlet for the power. Now, the arms themselves can be moved up and down
1:03
just like so, and then the feet stay in place. And then yeah that pretty much it for that So let get everything connected and it set up so I can show you how this works So here a closer look at the astronaut I have everything set up I attached the cable to the back And now when I turn it on the lights immediately turn on And it just a wonderful
1:21
view right in front of me, which I'll show you in a little bit. So it's going to be a mix of
1:24
nebula and stars. And this can all be shut off. And there's a bunch of different settings as well
1:29
too. All right, so now let's take a look at some controls. So the power button is going to be on the left side here. And when I turn it on, here's the image we get. We have a beautiful nebula in
1:38
the center, followed by the green stars all around. And if you're noticing right now, the nebula is
1:43
currently rotating, moving, and then just changing colors. But we can change all that with these top
1:48
settings here. So just clicking this here, change the setting. So right now, it's going to be a
1:53
mixture of three colors. And then this is just solid red, solid green, solid blue, red and green
2:01
my favorite one, red and blue, and then blue and green. If I go once more, this will just be a mixture
2:10
of all the colors, it'll just cycle through all of them. So we have red to green to blue
2:16
and then just repeat that whole cycle. Now it currently rotating but we can change the speed of the rotation with S here So right now this is the fastest setting and if i want to slow it down i can just press the minus and now it currently
2:29
fully stopped and the brightness can also be changed here so this is going to be the brightest
2:36
it is and let me actually change this setting to a solid color so let's go for green so this is the
2:42
brightest the green it can get and then this is the dimmest it can get now moving on to the stars
2:48
and that's going to be the green around them. So these stars can be turned off simply by holding
2:54
this button and then the stars completely turn off, but let me turn them back on
3:02
And there. Now similarly, the speed of these stars can be changed and this is going to be
3:08
the breathing, which is going to be basically just dimming in and out. So right now it's dimming in
3:13
pretty slowly, but if I want, I can increase the speed all the way up
3:19
And this is going to be the fastest it'll go. And if I go all the way down, this is going to be the slowest, which is just going to
3:28
basically just stay still like this the whole time. And now we can also change the brightness of this with this So right here this is currently the brightest setting And then this is the dimmest setting And then the last button is going to be a timer
3:42
And when I press the timer, there's nothing really that happens on it. So you don't really see a physical change on top
3:48
Besides down here on the backpack, the blue is going to indicate 45 minute timer
3:52
and the red will be 90 minutes and turn this off, simply hold that timer again
3:57
and the light will completely turn off. So overall, I'm pretty impressed with a starry sky projector. It lights up the ceiling and this would be my favorite mode although
4:05
one thing I do want to change is turning off the stars so we can just see the nebula in the center
4:11
and it looks very mesmerizing to look at but if you don't want to put in the ceiling you can of
4:15
course just tilt the head of the astronaut and here's what it looks like on this wall
4:19
and on the blind which looks pretty cool because that kind of reminds me of a portal kind of and
4:27
similarly on the other wall here and then on the bottom of this table now the
4:33
astronaut itself is also going to have some buttons on the backside of the
4:37
backpack so holding the one in the center will actually turn it off then the
4:41
other ones will be some other settings but yeah that's a quick look at the
4:46
astronaut starry sky projector
#Computers & Electronics
#Home Appliances
#Gadgets & Portable Electronics
#Other