Up next in 10

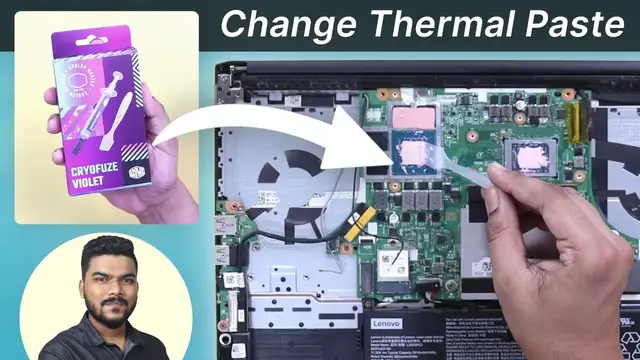
In this video, we'll tell you how to change thermal paste in laptop.
Check Out the Mentioned Products
THEMISTO Screwdriver Kit:
https://www.amazon.in/THEMISTO-Themisto-Precision-Screwdriver-Electronics/dp/B07NY2WXPH?th=1
Cooler Master CryoFuze Violet:
https://www.amazon.in/Cooler-Master-Cryofuze-Violet-Thermal/dp/B0B6VR7V6Z
Chapters
00:00 Introduction
00:06 Why to Use Thermal Paste
01:21 Thermal Paste Buying Guide
03:50 How to Change Thermal Paste in Laptop
09:01 How Often Should We Change Thermal Paste?
09:14 How Many Times We Can Reuse the Same Thermal Paste?
Follow Tech Countless on
Instagram:
https://www.instagram.com/techcountless
Facebook:
Show More Show Less View Video Transcript
0:00
In this video, we are going to give you a detailed guide on how to change the thermal paste on a laptop
0:05
But before that, let's talk about why should we use thermal paste
0:09
When we use a laptop, the CPU and GPU heat up. Through the heat sink, the heat is released from the laptop through the fans
0:18
But the surface of the CPU and GPU is uneven at the microscopic level
0:22
There are gaps there too. So heat dissipation cannot be better. But when we apply thermal paste on the CPU and GPU, there are gaps at the microscopic level
0:32
The thermal paste fills all those gaps. And the thermal conductivity of the thermal paste is also good
0:38
So it helps in quickly delivering the heat to the heat sink. This will improve the heat dissipation and your laptop will cool down quickly
0:46
That's why thermal paste should be used in a laptop. In new laptops, thermal paste is mostly applied
0:52
And if the laptop is under warranty, then don't open the laptop at that time anyway
0:57
If something goes wrong, then the warranty can also be void. And anyway, the thermal paste that was already applied will last for 1.5 or 2 years
1:05
So after that, if you change the thermal paste, it will be good. What is the benefit of changing thermal paste
1:10
The temperatures of the CPU and GPU will not go too high. Secondly, the lifespan of the laptop will increase
1:16
And thirdly, you will get to see better performance in the laptop to some extent
1:21
In the thermal paste buying guide, I will tell you some points. Which will help you buy good thermal paste
1:26
The first thing you have to look at is thermal conductivity. It is written in Watt per meter Kelvin
1:32
The higher the thermal conductivity, the better the thermal paste will help in removing heat
1:40
So for example, there is a thermal paste whose thermal conductivity is 8 Watt per meter Kelvin
1:46
And the other one is 10 Watt per meter Kelvin. The thermal paste with 10 Watt per meter Kelvin will be better for you
1:51
The second thing you have to look at is what extra things you get with thermal paste
1:55
Most of the thermal paste, the old thermal paste, to clean it, you get a grease cleaner
2:00
And to apply thermal paste, you get a spatula with the thermal paste
2:04
With that, you can spread the thermal paste very well. So if these two things are in the box, you don't have to buy separately
2:12
The third thing you have to look at is whether the thermal paste is electrically conductive or not
2:16
If you want to be on the safe side, then buying a thermal paste that is electrically non-conductive will be good for you
2:23
If you apply a thermal paste that is electrically non-conductive, and it will go a little on the side, other than the CPU and GPU
2:30
then there won't be any problem. Your laptop won't break down. In the fourth point, I will tell you the difference between the normal thermal paste and liquid metal
2:38
The first thermal paste is electrically non-conductive. It is safe to use and is less expensive
2:45
Their thermal conductivity is also of a decent type. So for most of the users, it is good to use such a thermal paste
2:51
The second is liquid metal. These are more expensive. Their thermal conductivity is also more
2:57
And these are also electrically conductive. If it goes a little on the CPU and GPU
3:03
then there are more chances of your laptop breaking down. So if you are a beginner, don't buy this
3:09
But if you have a lot of knowledge, you can also buy liquid metal
3:12
Those users who want better thermal conductivity or are going to overclock
3:17
then liquid metal will be right for you. In this video, we are going to apply the electrically non-conductive thermal paste
3:24
And there are thermal pads in the laptop. These are mostly NVMe SSD, RAM, and GPU VRAM
3:33
And don't apply these thermal pads on the CPU and GPU. Because those gaps on the microscopic level won't be able to fill up properly
3:41
And the heat transfer will not be as good as it is in the thermal paste
3:46
So thermal paste is better for CPU and GPU. Now let's talk about how to change the thermal paste
3:52
This is Lenovo IdeaPad Gaming 3 laptop. You can see this model
3:55
Your laptop's model may be different. And the process will be similar
4:00
For this, you have to open the laptop's back panel. You have to place the laptop on a flat surface like this
4:07
And let me tell you an important note here. I will try my best to show you everything
4:12
But if you are not comfortable with opening the laptop, then first see everything properly and then do it
4:18
To open the laptop's back, I am going to use Thamestow Screwdriver Kit
4:23
It has different attachments. So you can easily open the laptop's back panel with this
4:29
You will get the link in the description. Attach the attachment and open all the screws
4:34
Then you will get two openers with the screwdriver set. You can use that to open the laptop's back panel
4:42
Before doing anything, take a photo of the laptop from the inside
4:46
So you can have an idea of where the part is. The most important thing you have to do is disconnect the battery
4:51
After that, press the power button 2-3 times for 5-10 seconds. Now you have to open all the screws of the heatsink
#Computers & Electronics
#Computer Components
#Laptops & Notebooks
#Other