Up next in 10



https://www.proshaper.com
Our Amazon Storefront: https://www.amazon.com/shop/proshaper
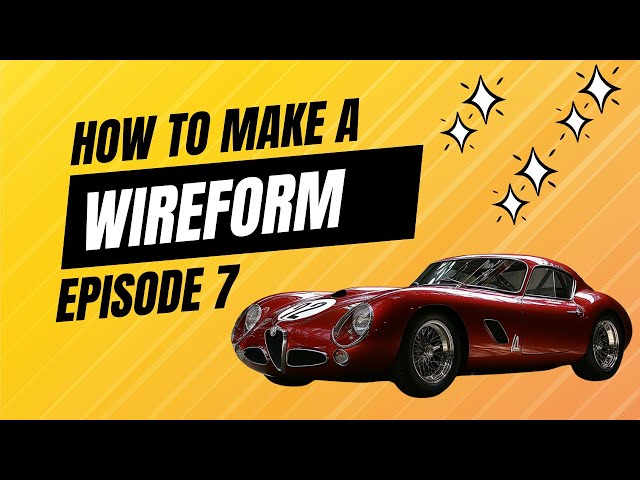
How to build a Wireform: AI Designed Alfa Romeo (Episode 7)
AI Alfa Romeo Scratch Build Series:
Episode 6: https://youtu.be/JQyErUQ9TXU?si=EtC56r0C2tdFb_qJ
Episode 5: https://youtu.be/UjhfVy3v7NA?si=ir4bNcDGe3WWbUOw
Episode 4: https://youtu.be/7tqW1T9h-ZE?si=9S0EK_F7ENNg_R20
Episode 3: https://youtu.be/4yMznAPvzUc?si=CZ0kgO_r3qx-oDCq
Episode 2: https://youtu.be/PYjL-wc3nNg?si=Ri6qafYgl01Fy-IZ
Episode 1: https://youtu.be/ZDhw39NwezU?si=aixpztZaRJh4Glac
How to design your own AI Car: https://youtu.be/PG3VM0JxMlE?si=QftZq899Bt7ImHdP
Email: [email protected]
Website: https://www.proshaper.com
Facebook: https://www.facebook.com/ProShaper/
Instagram: https://www.instagram.com/proshaper/
Twitter: https://twitter.com/ProshaperM
Linkedin: https://www.linkedin.com/company/pros...
Show More Show Less View Video Transcript
0:00
hi it's Ray from Pro shaper Workshop in
0:02
Char Massachusetts I got super volunteer
0:04
Charlie working tonight Mark's running
0:06
the camera we're going to try to do the
0:08
best we can we're going to try to put
0:11
this wheel well opening in to match the
0:14
front one the first thing we're going to
0:16
do is try to get this wire in we'll do
0:18
that right now all right
0:21
so I'm looking at that back and it looks
0:24
like the line comes up straight and then
0:27
comes over with a radius here so sort of
0:30
straight a radius and then a soft radius
0:34
straight stronger radius soft radius and
0:38
then I'm looking at the front and I know
0:41
I've got that one wrong that has to come
0:44
up like this too and then go over so
0:47
we'll do this one and probably cut the
0:49
other one out and correct that is I got
0:52
it I got it going at an angle like that
0:54
and it should come up straight and then
0:56
do the jump over so let's start right
1:02
here see if I can come
1:06
up and then do a
1:08
[Music]
1:14
curve something like
1:19
that we'll cut that out
1:35
I'm liking
1:37
that all right so that's our starting
1:40
point nothing set in Sone until we get
1:43
further on down the road so Charlie can
1:46
bend that one I'm going to mark it
1:51
top and I'm going to Mark the spot where
1:54
we're
1:55
at it goes in right
2:01
right about there so looking down the
2:04
car and observing that picture closer I
2:08
noticed that I had made this one with a
2:11
nice curve going this way but I think
2:13
it's supposed to come up more like this
2:15
make a turn and then go back that's what
2:17
I'm doing in the back so I'm going to
2:19
make an alternate wire
2:22
trajector alternate wire
2:26
trajectory put that like that
2:38
that way there we're matching the back
2:40
more I'll bend that wire have Charlie
2:43
bend that wire up and then we'll cut
2:46
that one out and try it we might have to
2:47
adjust these other ones
2:49
too but this is just setting the uh the
2:53
counter
2:55
Stones before we uh progress and and do
2:58
a whole bunch is it today was a good day
3:00
in New England Massachusetts here we
3:02
were at 71° the sun was out spring is
3:06
sprung awesome supposed to get some rain
3:09
but we'll live with that it's supposed
3:11
to be in the 50s or
3:12
so
3:14
so is my new line I'm going to try this
3:18
one and see what that looks like well
3:20
Charlie's bending up those wires uh I'll
3:23
make another wire for the back we'll
3:24
have the two wires on that rear fender
3:26
and that'll stabilize the solder red
3:28
foot it
3:30
right about here so let's mark it with
3:32
the
3:35
tape I hope uh some of the people out
3:37
there in the audience are buying their
3:40
wire and trying something because it's a
3:43
lot of
3:44
fun let's take about this right very
3:47
good
3:48
act I'm going to put that in there like
3:52
that
3:55
and we're going to come up with it see
3:58
how that looks
4:24
yep that b yeah it's still going to come
4:27
down doesn't it I believe so
4:58
you
5:09
now oh let's put that front wire
5:17
in and would you look at
5:21
that on the back I don't know was the
5:24
tire migrated or whatever it was in
5:26
board before uh we had it send it on
5:29
this WI but it needs to come out a
5:30
little bit it's in line with the front
5:32
wheel which is what we want send it in
5:35
the wheel well here but uh somehow it
5:39
might be uh pull back and yes no forward
5:44
pull it back so I'm going to have to cut
5:46
two of these loes and move this whole
5:49
assembly
5:50
back all right got those two wires in uh
5:53
I think this one's going to be a little
5:56
too strong here but now when you have
5:58
something set
6:00
uh it's very easy to determine what you
6:02
need to do all right so we we made some
6:05
preliminary wires here to establish this
6:08
outer uh Fender wheel opening and this
6:12
one at close observation of the picture
6:15
I noticed that this was coming up
6:17
straight and then coming over so now
6:19
I've made a new line and without cutting
6:22
this one out I'll put this next to it
6:25
and then you can do an AB to see which
6:27
one looks better and I Mark that with my
6:30
marker and then cut that off and then
6:32
weld that in and then cut that off we
6:36
might have to uh redo this one might be
6:39
okay this one we might have to redo and
6:42
the rear ones we might have to
6:44
redo it's no big deal to redo them and
6:47
these can be recycled for something else
6:50
too so there's no waste at all or very
6:53
little
6:54
waste so I'm going to mark this cut it
6:57
and then put it in
7:05
so now we can see if that wire looks
7:07
good I do that
7:09
over yeah
7:13
uh it's a little high I
7:15
think all right so I put this in
7:18
preliminary eyeballing it it looks to me
7:21
to be a little high can cut it out and
7:24
redo it really easy I can also leave it
7:27
in it's obviously an improvement over
7:29
this one this was our first one going to
7:31
cut that out the nice thing about the
7:35
wires is you can grind
7:38
them to half their thickness and they'll
7:41
still do their job so that gains you a
7:44
quarter of an inch so you can lower that
7:46
line by a quarter of an inch but say you
7:48
want to even go lower you just marry up
7:51
another piece underneath here with a
7:52
couple migs that'll strengthen it again
7:55
and you can totally grind that out if
7:57
you want or you can change the wire
8:00
either way so you have a lot of options
8:02
so I'm going to leave that one in there
8:03
for now I'm going to probably put
8:06
another one over here the goal to finish
8:09
up for this video is to maybe get these
8:12
two door lines in next Charlie's working
8:17
on the rear fender again these are all
8:20
preliminary wires and we'll keep
8:22
refining them by eyesight and then we
8:25
have to refine him with the 1/8 1/8
8:30
316 Rod that we'll put on there and see
8:33
how it all flows and then we adjust it
8:36
as needed uh this is really important
8:39
right now uh and this is U meticulous as
8:43
opposed to say this
8:46
line uh you know we probably had about
8:48
five iterations on this line but that
8:50
was all about raising and lowering it
8:53
and then putting a little bit of curve
8:54
to it wasn't a big deal these it's hard
8:59
to see uh because of the pitcher exactly
9:02
how the flow goes so we can rely on the
9:05
pitcher only so much and then we're
9:08
going to have to rely on our eye and
9:10
then uh our I is not the last word again
9:13
we're going to use that Rod to check the
9:16
continuity of the curve and I'll go over
9:19
that when we get to it but right now
9:21
we'll put a couple more wies which are
9:23
strengthen it up I'll do them in the
9:25
front Charlie will do them in the back
9:27
and then we're going to concentrate on
9:29
getting those door lines in once we get
9:32
the door lines in we can go with a
9:34
straight line
9:36
here and the fender comes out just a
9:39
little bit it fattens out here just a
9:41
little all right so I did a preliminary
9:43
line in the cardboard and then I'll
9:45
translate that into the quarter inch
9:49
wire how do you want me to reshape this
9:51
rear wire Ray which one this this front
9:54
one right here uh we'll cut it out and
9:55
just cut outo it so again we go sister
9:58
next to it
10:00
yeah I just wonder like more gradual or
10:03
oh the shape EXA exactly well uh did you
10:06
get that one in yes this one right here
10:08
okay kind of like this a little bit more
10:10
prolific yeah it needs to be a little
10:12
stronger right in here I think okay yeah
10:16
a piece of comes up sort of leaning in a
10:18
little bit but straight and then and
10:20
then rounded there rolls right into it
10:23
yeah here yeah you can use the Cod wood
10:25
to correct it let me see let me let me
10:28
you so it comes up good
10:38
here little ster right in it
11:07
the actual door opening line will come
11:09
forward like this and then
11:12
down and it's going to be down here
11:15
somewhere that will get put in later
11:18
what I want is a cross-sectional profile
11:21
line so it'll probably put that about
11:24
right here I put this tick here showing
11:27
how far we off we're off this wire here
11:31
so going to eyeball that in that colors
11:35
from
11:38
here so there's our line for the front
11:41
that's a preliminary line we might have
11:43
to adjust
11:49
it this is the
11:52
top all right
11:56
so I just made another uh wire for the
11:59
front fender Charlie can bend this up
12:02
don't cut it you don't have to cut just
12:04
bend it to that all right we'll bend it
12:06
to that and then the it slopes down so
12:09
the one in the back is just going to be
12:11
similar but
12:13
shorter now where do I put my wire now
12:16
I'm looking this right here and this is
12:18
a little high right here now one way I
12:20
can correct that is uh we can cut that
12:25
right there and then pull that down and
12:26
then reweld it which I probably do on
12:28
that
12:29
we're going to verify whether or not
12:31
it's too high when we put that 3/16 Rod
12:34
going across right now I'm going to just
12:36
cut that off and I think this will be
12:39
pretty close we'll put that in and we'll
12:42
have a good portion of that front fender
12:44
done Charlie is doing the door profile
12:47
line right
12:49
now we try to uh make these at 90° with
12:54
no slope on them like that or anything
12:56
so just hold them in play
13:00
give him a quick
13:06
tack you can see how that front fender
13:09
is going together another wire will be
13:12
required down here but um the separation
13:15
of the wires right now is fine for
13:18
making the panel um these are probably
13:21
like 8 in apart or so and this might be
13:24
10 10 or so that's good but I'll go get
13:28
that wire and you'll see what we got all
13:30
right I got two wires here I got a 3/16
13:32
wire and I also have a 1/8 in wire um
13:37
these are both cold roll what we're
13:39
working with here is hot roll and some
13:42
people don't know what hot roll and cold
13:43
roll mean Hot Roll is a less refined
13:46
product cold roll is a more refined
13:48
product cold roll is hotter and has more
13:51
spring to it so you really couldn't do
13:54
this with the hot roll wire you have to
13:55
have cold roll I think a 12T section of
13:59
this uh uh cold rolled 1/8 sells for
14:03
about 12 bucks or 10 bucks or something
14:05
like that whereas uh the hot roll is
14:08
like
14:09
$310 for 20 ft or so so let's try it
14:13
with the 1/8 and see if that works first
14:16
we're going to put that in there like
14:18
that and then we bring it
14:21
around and you see we the idea is this
14:25
will do a perfect flow and we're a
14:28
little low right here it's not
14:30
horrible
14:32
um and we want to be uh in in the ballp
14:37
with this wire too so that preliminary
14:40
that's not too bad now we're going to
14:42
bring it about here and see how that
14:46
goes that one looks low right there that
14:49
this one here is reading a little low so
14:52
we'll have to adjust these to get these
14:55
perfect and then we bring it here
15:03
and that's pretty close too I got to
15:07
come around on the other side it's going
15:09
to come down and then it then it makes a
15:11
re reverse going to across over the hood
15:15
so in this case here the 1/8 wire worked
15:17
really good the 316 is a little bit more
15:20
stiff we'll try that
15:23
one put that in
15:25
there yeah that's working okay too
15:30
so again see that's showing this little
15:33
Gap right here so there's not enough
15:37
Bend right
15:39
here so we could either cut that wire
15:43
out and change it but we know exactly
15:45
what we need to do now uh it's possible
15:49
that these might be a little high right
15:52
here so we could grind that a little bit
15:54
grind it right here um again we're going
15:57
to be doing a lot of eyeball from
15:59
different angles plus the wire and if we
16:02
grind that then this might touch so we
16:05
made some pretty good guesses using that
16:07
cardboard as a guide Charlie's making
16:10
the door line let's see what he's got
16:12
going on it right Charlie that's looking
16:14
really good um what we want now is a
16:17
straight edge
16:18
here uh you know the big uh straight
16:21
edge of the aluminum ones against the
16:22
wall there bring one of those over
16:30
how's that look uh Mark you're looking
16:33
from that angle how how's this is it
16:35
tapering is it parallel what is it
16:39
doing the rearend tapering into the rear
16:41
fender a little
16:44
bit let's
16:48
see
16:50
okay so we no we want that little flip
16:53
up on the rear fender though you're
16:56
still going to have a flip up but yeah I
16:58
think it's little too much yes all right
17:01
so okay a little bit come in yeah I'd
17:04
say right about there that's
17:07
parallel all right so we got to add 3/4
17:10
of an inch to each one of these we can
17:11
either yeah probably best to just weld
17:13
on sure qu inch tab Zone just use the U
17:18
the little um copper piece with this
17:20
spice tiip yep and I'll start bending
17:24
another one I'll make the other one uh
17:28
well
17:29
I can redo the drawing that's all I'll
17:31
do redo the
17:33
drawing so I'm going to set that off a
17:35
little
17:39
bit and set that off a little
17:43
bit all right a little interlude in this
17:46
video while Charlie's making up the uh
17:49
the door wires uh this is a fender made
17:53
by Scott Bellamy and he works at RM auto
17:57
restoration in blend
17:59
uh Canada it's a premier restoration
18:02
shop I think they've won uh Pebble Beach
18:05
like seven times and r&m send two of
18:08
their employees down uh Scott and
18:12
Cameron and they're working on a 24
18:15
Hispano SOA and they had to make these
18:18
uh
18:19
fenders um actually cam made a wire form
18:24
was the first wire form he had made and
18:27
they brought pictures of uh vintage
18:29
pictures of the car from probably like
18:32
24 or 25 or 26 showing a side view of
18:36
the fenders this is the rear fender and
18:39
there's also a heavily forged a heavy
18:42
bracket that's forged that supports the
18:45
fender and uh they had to spend a couple
18:48
days just straightening those out they
18:50
were so bad and I decided I think that I
18:53
think the best course of action was to
18:55
make a new wire form to make the correct
18:58
shape fend it was off a little bit so we
19:02
we spent a lot of time doing analysis of
19:05
that pitchure and we had to make a few
19:08
guesses and this is 063 30003 aluminum
19:12
and uh Scott's a pretty accomplish
19:14
shaper but he came down here to learn a
19:17
few new skills which I think he did and
19:20
he actually taught me a few little
19:21
tricks too which is pretty cool and you
19:24
can see this is the inside of the fender
19:27
it's a beautiful job insisted we make it
19:30
mirror finish so we spent a little extra
19:32
time on it and then we buffed it out
19:34
today uh my help of Fred came and he
19:37
buffed it I buffed a little bit the
19:39
other day and uh we'll be getting this
19:42
all mounted on the bracket and
19:44
everything we'll be doing an elaborate
19:46
video which we'll put on my Facebook
19:48
page and we'll probably put it on
19:50
YouTube too but I just thought you'd
19:52
like to see the quality of the work that
19:55
you can do if you follow the rules of
19:58
the metal and uh it's really not that
20:01
difficult uh once you learn the rules uh
20:04
you can pretty much make anything and
20:07
this is what you see here is what you're
20:09
going to see on the panel work on this
20:11
Alpha it's going to look like this this
20:13
is what I insist on and it's not that
20:16
hard to do as long as you take the few
20:19
extra minutes here and there to make
20:21
everything just right it's got a wired
20:23
Edge on it there's a steel wire in there
20:26
and uh once you've done 6 in of wire
20:28
iring the edges it's all the same uh
20:32
it's again it's not that difficult it's
20:34
done with a a little special Hammer I
20:36
use a door skinning hammer and I have a
20:38
special pair of pliers that I crimped
20:40
with and um you know Scott just did an
20:44
exceptional job I told him I wanted it
20:46
ready for the Tiffany window so when he
20:48
goes back to r&m uh auto restoration
20:52
they'll be really happy with the results
20:54
watch for that video it should be coming
20:55
up uh later next week or something
21:01
all right with the help of super
21:02
volunteer but he's been upgraded to
21:04
Super Apprentice now that's charie from
21:09
Michigan comes all the way out to
21:11
Michigan to learn and to just be a
21:13
member of the crew here he loves being
21:16
here and uh he helps out tremendous
21:19
amount so we got these door uh wires in
21:23
the front one and the back one we've got
21:25
some of the front fender in we got some
21:26
of the rear fender in and now we're
21:29
getting that 3D depth on on this whole
21:31
side of the body and this will start to
21:33
get pretty strong now uh we still have a
21:37
whole bunch of wires to put in we'll put
21:39
a whole bunch going here every 8 in or
21:42
so we'll put another one coming down
21:44
we'll check the continuity of the curve
21:46
we need another couple more on the front
21:48
fender and a couple more on the rear
21:50
fender and on this rear fender as you
21:53
can see this wire is out here and
21:55
there's going to be a little bit of
21:57
reverse coming out here like like this
22:00
and um it's barely noticeable on the
22:02
fender on the pitcher on the on the wall
22:05
there but it's going to have that so we
22:08
still have to put a little more curve in
22:11
this but it's coming along good now and
22:14
maybe we can uh next week maybe we can
22:16
put a couple hour uh into it and get a
22:19
little bit more done but uh Charlie
22:21
thanks for helping out and Mark does a
22:23
great job as usual he's going to do the
22:25
editing and upload it and it'll go on
22:28
tomorrow tomorrow at Friday thanks for
22:30
watching it's Ray from Pro shaper
22:32
Workshop in Charlton Massachusetts
22:34
please tell all your friends we've got
22:36
to get more views on this and try to
22:39
share the video as much as possible
22:41
thanks again it's Ray from Pro shaper
22:44
Workshop
Hobbies & Leisure