Up next in 10



https://www.proshaper.com
Our Amazon Storefront: https://www.amazon.com/shop/proshaper
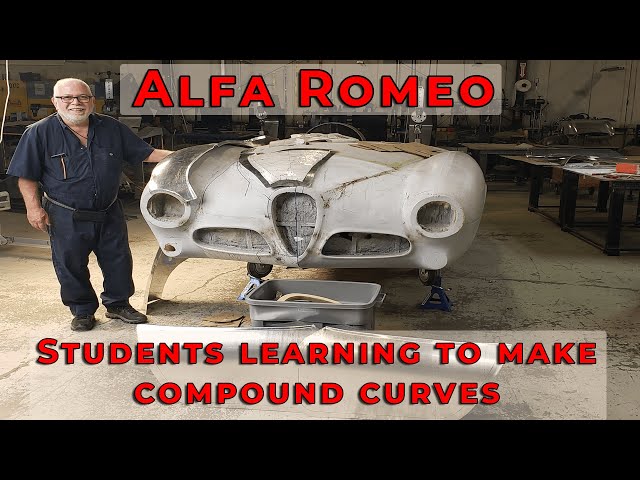
Alfa Romeo Students learning how to make compound curves
After the 4-day metal shaping class where the students helped Ed in building the panels for is Alfa Designed car. We had 6 students total, some had a little bit of metal shaping knowledge while others had none. The panels that were created from our students turned out great! With the help from Ed making all the gages and flexible shape patterns a few days prior to the class, the students were able to jump right in.
Email: [email protected]
Website: https://www.proshaper.com
Facebook: https://www.facebook.com/ProShaper/
Instagram: https://www.instagram.com/proshaper/
Twitter: https://twitter.com/ProshaperM
Linkedin: https://www.linkedin.com/company/pros...
Show More Show Less View Video Transcript
0:00
quiet on the set
0:18
[Music]
0:20
hi it's ray from pro shaper workshop in
0:22
child massachusetts i'm here with ed
0:24
he's the designer of this
0:26
beautiful uh 1954 alpha herself 55 ed's
0:30
a collector of alphas this is part two
0:32
of this uh
0:34
series on building this alpha ed came to
0:37
my class for 130 hours which included
0:39
the four day class this past
0:41
weekend and i think there was uh seven
0:44
people in the class total
0:46
and we made a ton of panels i just want
0:48
to show you some of the panels
0:51
uh now ed this was your first experience
0:53
of doing any panel work whatsoever
0:55
correct
0:56
absolutely yeah and as far as the other
0:58
guys are at the class now let's see it
1:00
was uh
1:01
jesse from washington state
1:04
and uh brian from virginia
1:08
and mike and joe were from ohio
1:12
and their younger brother i believe uh
1:15
rob was from colorado was there anybody
1:18
else is that it
1:19
i think that's that was the whole crew
1:21
wasn't it yes about it yeah that was the
1:22
whole crew i guess
1:23
it was six ten not seven so they were
1:26
all beginners except for jesse
1:29
up in washington state who's in the uh
1:32
navy i believe and he's a
1:34
an english wheel hobbyist he's done a
1:36
little bit
1:37
on aircraft too very simple panels never
1:41
anything complicated
1:42
i assigned everybody a different panel
1:45
to do
1:45
actually i asked them what they wanted
1:47
to do right off the bat
1:48
that option of doing something that they
1:51
wanted to do specific but they really
1:53
just wanted to learn
1:54
general knowledge and i said this is no
1:56
better opportunity than to take this
1:58
surface information
1:59
that ed has done which has taken
2:02
years to get to this point here the slow
2:05
organic process
2:07
and we use my flexible shape pattern
2:10
system which makes
2:11
uh the two tape flexible shape pattern
2:14
off of each one of these uh
2:17
sub panels and i broke the body down
2:19
into doable panels
2:22
and nice welding locations and i do that
2:25
with this 1
2:26
8 inch blue vinyl tape which we sell in
2:28
our website
2:29
and the other tape we do also and
2:33
then i asked people okay which one do
2:36
you want to do
2:37
this one's a super difficult one this
2:39
one's unbelievably difficult one this is
2:40
a more simple one
2:42
and they all chose a panel to do and for
2:45
example
2:46
uh jesse chose this panel here
2:50
and it's got a seam right here and this
2:52
is a really complicated little panel
2:55
it has this is the hood rest right here
2:58
part of the hood
2:58
rest and then there's a pretty severe
3:01
reverse curve up in here and this is a
3:03
standard compound curve here
3:05
and this fits right over in here and
3:08
i'll let mark take some pictures of this
3:09
panel
3:12
and the process is first
3:16
make the flexible shape hat and all the
3:18
gauges which takes some time
3:20
but that's the information that you need
3:22
in order to
3:24
develop this panel so that it'll be very
3:26
accurate
3:27
if you make the gauges off of this
3:30
meaning these profile gauges
3:32
and you make the flexible shape pad and
3:34
the flexible shape pad does
3:35
a bunch of different things one it tells
3:38
you the area value
3:40
how much you have to puff stuff up
3:44
how much it needs to be expanded with
3:45
the wheel and then
3:47
also uh where you're going to be let me
3:50
show you the flexible shape pattern
3:51
it provides the the perimeter value of
3:55
the panel
3:56
and also this will be the weld
4:00
index mark so this right here is where
4:03
this panel
4:04
is going to be welded to the next panel
4:08
what's the next panel look like
4:10
this was made by mike from ohio
4:14
and i started this panel off showing the
4:16
shrinking techniques and stuff and
4:18
uh we did a bunch of different shrinking
4:20
techniques this is the thumbnail die you
4:22
can see
4:23
the thumbnail die we only did it in the
4:25
little section it's still
4:26
a little bit of residue here and then i
4:29
actually use
4:30
my power hammer with my thumbnail die in
4:32
that and those cleaned up really nice
4:35
but the the shrinks that we made in my
4:38
shrinking facilitator they go completely
4:40
away that's why i really like them and
4:41
not hard to do at all
4:43
and this pot was started by me
4:47
but mike and ed himself
4:51
finished it up by knocking some of the
4:52
shrinks down and and then expanding it a
4:55
little bit
4:56
and then wheeling it smooth and i i
4:58
teach how to do the
4:59
really nice surface quality so that the
5:02
panel is as
5:03
flawless as you can possibly get it and
5:06
then there's the secondary operations of
5:08
tipping this flange before this is the
5:10
headlight uh
5:11
uh mount point there and this
5:15
is going to be the peak this peak right
5:17
here
5:19
and this this has been tipped we've got
5:20
to change the angle just a little bit it
5:22
needs to be refined and then this is the
5:24
wheel opening
5:25
arch and this is all done with the
5:27
tipping wheel a lot of people say well i
5:29
could do that on my pull max with
5:31
with a set of dies but the problem with
5:34
the pull max is they're all parallel
5:36
dies
5:37
and this isn't parallel so that's what
5:40
happens when you do it with the tipping
5:42
wheel you have that freedom of making a
5:44
non-parallel
5:46
uh little enhancement like that not not
5:48
a problem
5:50
so this has to be adjusted a little bit
5:54
a little bit of shrinking
5:55
and then what will happen with that weld
5:58
index mark
6:00
this has been welded together already
6:02
here
6:03
then that's going to get welded onto
6:05
here and you can see it doesn't match up
6:07
yet because this needs to be shrunk and
6:09
that'll
6:10
will even up those radiuses and that is
6:12
going to get and then you have the whole
6:14
fender almost right there
6:16
and this back section was made by
6:19
mike one of the guys from not mike that
6:22
was made by joe
6:23
for one of the sons from ohio mike was
6:26
the father
6:27
and he did a beautiful job on it too a
6:29
lot of tipping wheel
6:31
uh stuff and then there's a nice little
6:33
roll here where it goes into the cockpit
6:36
all right so it is rob's panel that's
6:38
the flexible shape pattern he made
6:40
and this is going to have a peak put on
6:43
it yet we've got the
6:45
the wheel opening flare in and the
6:48
flange underneath
6:50
and then this is another little feature
6:53
it's a this cutout here and we we
6:56
basically pounded this in
6:57
by hand from the back side with a
7:00
caulking tool
7:01
and now that has to be all uh planished
7:04
out nicely again you can't use a pull
7:06
max to do that
7:08
we can roll this in with a special
7:10
linguist wheel roller
7:11
that will be narrow and then we can kind
7:13
of walk around it a little bit
7:16
and probably planish it pretty nice but
7:19
rob did a really nice job on the panel
7:22
he's got all the
7:23
radiuses really close and
7:27
what we did is when we made this panel
7:30
we also made the
7:31
opposite side it's a blank so here's the
7:35
blank
7:36
for that that's jesse's panel here
7:40
that's the blank so that's what jesse
7:42
started out with right there
7:45
and then he ended up with with this
7:47
piece here
7:48
so this is yet to be done on the other
7:50
side
7:51
and ed right now is finishing up
7:55
the flexible shape pattern underneath
7:58
here
7:58
and i'm trying to get a goal of getting
8:02
at least one
8:02
quadrant of the car all shaped and
8:05
hopefully maybe welded together
8:08
we've got some of the the top of this
8:12
hood
8:12
section here and jesse also did that
8:15
that's going to go
8:16
there and then the other section was
8:19
being done by brian
8:21
and brian also did these beautiful door
8:24
skins
8:25
brian from virginia and he
8:29
he took the really good to it he made
8:31
these beautiful radiuses
8:33
showed him how to do that with the
8:34
english wheel and bending it over a pipe
8:37
and stuff
8:37
and did these beautiful tips on the on
8:40
the
8:41
flipping wheel so
8:46
these still need some edge tipping that
8:48
hasn't happened yet there's this one
8:50
here
8:51
you can see that's going to look pretty
8:52
slick now you see a lot of people
8:55
on youtube or a facebook or
8:58
a website or whatever and you see their
9:01
work and they have some really nice work
9:03
now the thing is that
9:07
what a lot of people don't understand is
9:09
somebody that makes
9:10
repetition parts for instance if
9:14
ed was going to make this uh over and
9:16
over and over again
9:18
he would reinforce this and you could
9:20
use this as a hammer form buck
9:22
if this was made back at an italian
9:24
coach building firm back in the 50s
9:27
and they expected maybe the potential
9:29
for selling 50 of these or so
9:31
this would all be made with like three
9:33
inch thick
9:34
hardwood it could be maple it could be
9:36
oak
9:37
and it'd be almost full surface where
9:39
all the complicated stuff was
9:41
and that enables you to anneal the
9:45
aluminum
9:46
and it depends on what thickness they
9:47
use too if it was going to be a race car
9:49
sometimes they use as little as 40 000
9:51
thick or one millimeter effect for the
9:54
uh
9:55
for the skins because they really didn't
9:56
care they just wanted to make the shape
9:58
and they wanted to be lightweight and
10:01
oftentimes they made the skins out of 50
10:04
we've chose to use 60 000 stick it's
10:08
actually 63 thousands
10:10
and that gives you uh great identities
10:12
that's a
10:13
really really strong panel and a lot of
10:17
these panels there's very little uh area
10:19
change in them you don't have to wheel
10:20
them that much
10:22
most of the detail is all in this
10:24
tipping and stuff
10:26
so you have to have a good tipping wheel
10:27
set up in order to do that now you can
10:29
do it manually with little caulking
10:31
tools and everything
10:32
but the tipping wheel is probably the
10:34
most efficient
10:36
but if they were doing this back in
10:37
italy
10:39
they would have a hardwood buck they'd
10:40
make a panel and if they need this flare
10:43
here they would be able to hammer it in
10:45
like this so they use this as a hammer
10:47
form
10:48
so that's one technique and that's
10:50
probably the best technique as far as
10:52
doing
10:53
limited production method and that's
10:56
that was worldwide the way people did
10:58
that
10:59
but what you see in a lot of
11:03
pictures on facebook and and and
11:06
websites are these station bucks that
11:08
are made out of plywood
11:09
mdf or whatever and if you have those it
11:12
doesn't have all this information
11:15
so i'm really not an advocate at all
11:18
that type of buck
11:19
but a lot of people fall into that trap
11:21
they get the cad file and they make the
11:23
thing and oh boy you got a whole buck in
11:25
less than a week or so
11:27
but you're going to be struggling for
11:29
all this information
11:31
so you have to come up with a plan
11:34
ed chose to go this way and he only did
11:37
this because
11:39
he he really wanted to prove the design
11:41
out so he could live with it for a while
11:44
he could put a layer of bondo on it sand
11:46
it one night come back the next day and
11:48
say oh boy
11:49
i gotta go a quarter of an inch more i
11:51
don't like that line
11:53
so what he was doing exactly what the
11:55
designers do with the clay modelers
11:58
when they when they make these
11:59
production cars they have to clay model
12:02
it up
12:03
so that's one of the big mysteries of uh
12:07
making your own car body is what method
12:09
to go and a lot of people it's monkey
12:11
see monkey do they
12:13
they see these wood station bucks and
12:14
they go oh that's the way to do it
12:16
and then they find out it's not so easy
12:19
doping out what you have to do to that
12:21
panel to fit it on that wood station
12:22
buck
12:23
that you can't see the back side and it
12:25
doesn't have all this detail
12:28
now as everything has its drawback now
12:31
ed's project this is the actual surface
12:34
so
12:35
we can't set the panels on here and
12:38
camera form them on here
12:39
because it's one thickness removed plus
12:42
we don't have room to put the
12:44
the flanges all in so if you had a
12:47
situation
12:48
where uh it was the correct
12:52
size so that you could hammer form on
12:55
and then you
12:55
would able to fit flanges down where
12:58
they needed to go
13:00
then that would be the ideal but it
13:01
takes a lot of time to do
13:03
a full surface buck like this you might
13:05
have saw that earlier video we did with
13:07
spencer
13:08
who did the gemund coupe
13:11
and he doubted his ability to do a wire
13:14
form so he went the route of
13:16
routing out all the the mdf stations
13:20
and he came up here and tried to make
13:22
some panels and we found all the
13:23
shortcomings
13:25
so then he kind of integrated a wire
13:27
form in here and now he's integrated a
13:29
super lagera system in it too but there
13:32
was still
13:32
shortcomings because he didn't have the
13:34
wires exactly where he needed him
13:36
most but i i'm an advocate of the wire
13:40
form
13:40
and if you're going to do little details
13:43
like this you have to make an
13:44
accommodation for that
13:46
you can use angle line or something so
13:48
that it becomes a hammer form
13:50
and you can you can make sure all these
13:52
little details are right
13:54
exactly where they're supposed to be
13:56
every situation is going to be
13:58
determined by the actual design
14:00
how you're going to make that buck but
14:04
there's no easies it's a lot of work but
14:06
it's a fun
14:07
process the process is as much fun as
14:10
owning the car
14:11
after you get it done and if you get
14:13
started you'll see what i'm talking
14:15
about because it's
14:16
been a labor of love for ed for a bunch
14:18
of years now he's not working on it 40
14:20
hours a week he goes out when he can
14:23
and and he's got a big collection of
14:25
alphas and this is probably
14:28
going to be his most prized car once he
14:30
gets it done absolutely
14:31
you know so i'll have a modern drive
14:33
train alpha drive train in it and
14:34
everything will drive beautiful and
14:36
it'll be
14:37
super appreciative of the whole process
14:40
so we made some really nice panels and
14:42
ed's staying here for a bunch of more
14:44
days and maybe extend it we don't know
14:47
and we'll keep you keep you up to date
14:51
and we'll follow up with the next video
14:53
we got a class coming up this weekend
14:55
we'll probably do a bunch more work on
14:56
it
14:57
hopefully get some of these panels
14:58
welded together and you'll see
15:01
that this this panel work that comes out
15:03
of my class is as good as anywhere in
15:05
the world
15:06
we do tig welding we don't have to do
15:08
gas welding we could gas weld but tig
15:11
welding is more realistic
15:13
and you watch some of my tig welding
15:14
videos and remember
15:17
you know i just don't have one video or
15:19
whatever or two videos i got 197 videos
15:22
now so
15:23
go to my youtube library on the pro
15:25
shaper
15:26
and there's a wealth of information
15:28
there and sometimes you have to watch
15:30
them a couple times before you really
15:31
understand them if you're considering
15:33
taking a class
15:34
watching the video is the best thing you
15:37
can do because it really preps you for
15:38
the class really well
15:40
now this is a complicated craft and
15:42
there's a lot of things you need to know
15:44
and you never stop learning
15:46
so hope to see you at a class and
15:50
ed's having a lot of fun here he's
15:52
becoming one member of the shop and
15:54
he'll be he'll be here staying here
15:56
hopefully for two or three weeks we'll
15:58
see
16:00
depends on how his wife cuts him some
16:01
slack uh one more thing i just want to
16:04
say my daughter put out a new single
16:05
she's in her band is called love
16:07
crumbs uh check it out on youtube just
16:10
look under love
16:10
crumbs and she's got two singles there
16:13
their original music and they're on
16:15
spotify and
16:16
put it in your song list if you can i
16:19
hope you enjoyed the video remember to
16:20
like subscribe
16:22
and share and leave us the comments and
16:25
i think there's a little bell still with
16:27
something you're supposed to hit that
16:28
tells you when the new videos are coming
16:29
in
16:30
and remember metal is clay it's ray
16:33
chaleen from
16:34
pro shape a workshop in charlton
16:36
massachusetts and i i'm the guy that
16:37
talks funny
Hobbies & Leisure