Up next in 10



https://www.proshaper.com
Our Amazon Storefront: https://www.amazon.com/shop/proshaper
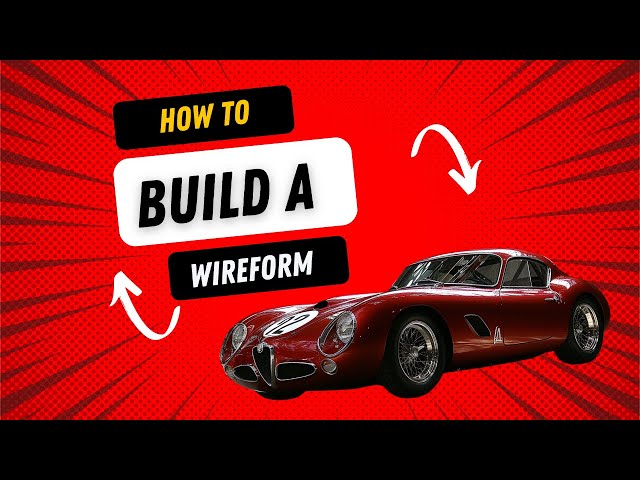
AI Alfa Romeo Scratch Build Series: Initial wires for the wireform
AI Alfa Romeo Scratch Build Series:
Episode 3: https://youtu.be/4yMznAPvzUc?si=CZ0kgO_r3qx-oDCq
Episode 2: https://youtu.be/PYjL-wc3nNg?si=Ri6qafYgl01Fy-IZ
Episode 1: https://youtu.be/ZDhw39NwezU?si=aixpztZaRJh4Glac
How to design your own AI Car: https://youtu.be/PG3VM0JxMlE?si=QftZq899Bt7ImHdP
Email: [email protected]
Website: https://www.proshaper.com
Facebook: https://www.facebook.com/ProShaper/
Instagram: https://www.instagram.com/proshaper/
Twitter: https://twitter.com/ProshaperM
Linkedin: https://www.linkedin.com/company/pros...
Show More Show Less View Video Transcript
0:00
hi it's Ray from Pro shaper Workshop in
0:02
Charlton Massachusetts there's Frank
0:04
again with us he's the super volunteer
0:06
we lost him last July and this is the
0:09
project we're doing I'm putting a ton of
0:11
pictures up probably over 300 now of AI
0:15
designs and this isn't is a spectacular
0:18
AI design but I have my doubts every day
0:21
because I'm making better designs every
0:24
day if you're not following me on
0:26
Facebook get on Facebook and see what
0:29
I'm putting out from mid Journey these
0:32
incredible designs so everybody the
0:35
comments on Facebook which are
0:38
repetitive they go yeah but it's not
0:40
real okay it's not real it's just a
0:42
picture but you learn from them and you
0:45
can learn from a picture like this
0:47
because that's a potential build and
0:50
that's what I'm trying to encourage to
0:52
bring the hobby up to a new level is to
0:55
go from restoration to scratch building
0:58
and to expand the potential of the Hobby
1:00
and somehow bring young people in what
1:03
we're going to start today we've made
1:05
three episodes of this video series so
1:08
far we're going to start episode four
1:10
which what we're doing today we're
1:12
actually going to start the wireform
1:14
process a lot of the criticism often
1:17
times is yeah but you know it's just a
1:20
2d design you got to make it 3D and
1:23
that's where all the work is and that is
1:26
what we're going to do is show you the
1:28
process of how you turn this little 2D
1:31
picture without having to know a really
1:34
elaborate CAD program but the programs
1:37
that they use uh for software for COD
1:41
designing often times like $50,000 a
1:44
seat or so nobody's going to do that
1:47
essentially what you're doing in CAD is
1:50
you're creating lines and you're you're
1:53
at a scale and you can create those
1:56
lines and move those lines all around
1:59
and adjust system where you can do the
2:01
same thing with wireform and that's why
2:04
I like wireform and it's so inexpensive
2:06
I bought this bundle of uh wires qu inch
2:10
hot roll wire they cost me
2:13
$36 for a 24t length so it's not an
2:18
expensive proposition to do this wire
2:21
forming process if you go to a wood
2:25
supplier we we use Home Depot here in
2:27
the US now it's like they've wiped out
2:29
all the the small of suppli is pretty
2:31
much so you got to go to Home Depot and
2:34
plywood prices uh they've been rising
2:37
and stuff and then they were higher I
2:39
think they might have dropped back I
2:40
don't know but if you bought you know 20
2:43
30 sheets of plywood that's a pretty big
2:45
investment now you start cutting them up
2:47
with a jigsaw and you screw up that's a
2:51
costly error there's a lot of time
2:53
involved and the cost of materials and I
2:56
don't think you could recover the
2:57
materials this you bend it wrong you
2:59
just straighten it out and rebend it
3:01
again it's not a problem the main tool
3:04
that we use I mean we can use rollers to
3:06
make nice circles and stuff but two
3:08
little pins like this drill them in a
3:11
drill press put two steel pins grade A
3:14
bolts or something something a little
3:15
hard you weld them on the back we've got
3:18
about five or six of these little tools
3:20
and you just bend and you make sure when
3:22
you bend you keep it all on one plane if
3:24
you don't it's not the end of the world
3:26
you can straighten it pretty easy so
3:30
what we're going to attempt to do today
3:31
in today's video we're looking at this
3:33
view here up the hood up to the cowl and
3:37
that will probably be one piece of wire
3:40
so basically that's a nice flowing curve
3:43
and uh we're going to guesstimate on
3:45
that and we're going to take I have
3:47
clamps rubber clamps we'll clamp that
3:49
wire once we bend it onto here and uh
3:53
then we'll put the windshield wire in
3:56
we'll we'll have a little Crown in that
3:58
windshield and then we'll put the roof
4:01
in the roof might take two or three
4:02
pieces and I have no vision of the back
4:06
of this there's no view there so I get
4:08
to uh design the back end of the car so
4:11
uh that's a little bit of a challenge
4:13
and this is the fun of uh the process is
4:18
using your artistic abilities to try to
4:22
integrate a design that's flowing with
4:25
the rest of what you have here it uh has
4:28
to have a continuity in the design
4:29
design all the way through so it's
4:32
really a really simple elegant design
4:35
like I said we're going to do the center
4:37
profile line we'll clamp it to here
4:39
it'll be a/ inch off because Center is
4:42
in the middle of this 1in tube that we
4:44
made this out of and then uh I think
4:47
we'll do is we'll make these wheel well
4:50
openings and those as I mentioned in the
4:53
last one would be one two three four
4:56
pieces of of wire bent and then Mig
4:59
welded together we'll have to get the
5:01
MIG welder over here so that's eight
5:03
pieces and then probably eight pieces
5:05
here in the back wheel well opening and
5:08
we'll get those mounted by projecting a
5:11
piece of tubing over here to hold those
5:13
wheel well openings and we'll be able to
5:15
slide the tubing forward and back and up
5:18
and down so have adjustment on it now
5:22
normally the way I do this is I have a
5:24
drawing board that's in the back it's a
5:26
20 foot long drawing board and I use
5:28
this magnetic uh strip that's a quarter
5:31
of an inch wide it's same thing as a
5:33
refrigerator magnets which is a plastic
5:35
that has iron embedded in it and I can
5:38
take that plastic just like a cadline
5:41
and I can move that plastic line
5:43
anywhere I want then after I get and
5:46
look at it from 20 ft and I like what I
5:48
see then I just ink the line in on the
5:51
piece of U I use tyvec because it's
5:54
really strong and then I can bend the
5:56
wires to the tyvec but in the interest
5:59
of
6:00
Simplicity because not everybody's going
6:02
to be building that big drawing board
6:05
they can make this though as I mentioned
6:07
I think it was like a 100 bucks to make
6:09
this with all the materials and not a
6:11
big deal it's like two or three hours to
6:13
make it we're going to bend the wires
6:16
and we're going to make some mistakes
6:18
it's going to we we're going to use the
6:20
20 foot or the 30 foot look to see if it
6:23
looks like the pitcher so we bend the
6:26
wire we clamp it on and we make
6:28
adjustments just like we would with that
6:30
plastic line or just like you would do
6:32
with the cad line and we're using the
6:35
gtv6 uh outside dimensions and wheelbase
6:39
and track and all that and we we're
6:41
hoping that that's going to look good as
6:44
we interpret it uh using those
6:46
Dimensions onto this totally different
6:50
vehicle try to concentrate on getting
6:52
one side done so the first thing I'm
6:55
going to do is I'm going to cut a piece
6:57
of that quarter inch wire and I'm going
6:59
to bend from here to here I got to
7:02
guesstimate how long that's going to be
7:04
from here to here I'm going to leave it
7:06
a little bit long I can always cut it
7:08
later all right so I I guesstimated here
7:11
about that much because I know there's
7:12
more than I need I'm just going to cut
7:15
this off with the hacksaw here so this
7:17
is our first
7:19
wire we're going to attach it right here
7:21
and we're going to attach it
7:23
with these are the Home Depot 99 cent
7:27
clamps still at Home Depot Tractor
7:30
Supply for the rubber you got to cut it
7:31
up with a band saw put one bolt in them
7:35
and they last for years and years great
7:37
for holding the sheet metal panels on
7:39
when you make the sheet metal panels and
7:41
they hold it on to the wire for and
7:43
we'll use them for this too all right I
7:45
got my wire cut but now I got to bend it
7:49
but what I'm going to try to do is
7:52
establish some Heights which might be
7:54
off it doesn't matter cuz we got super
7:56
adjustability here same as CAD CAD all
7:59
about adjustability but we needed some
8:02
kind of guide to show us what that curve
8:05
is going to look like so uh we're going
8:08
to put some tape on each one of these
8:11
uprights and I'll
8:13
represent uh this low point I'm going to
8:15
go from about this point here because
8:17
I'll catch this uh around down to the
8:22
bottom that'll be one wire here and then
8:24
another wire here so that'll be two
8:26
wires that'll be later and that's going
8:28
to be off on on the edge here can't to
8:31
leave it out so we do have the GTV uh
8:35
height number which will measure that
8:38
and put that there and that gives you a
8:40
lot of the ergonomics you got to fit in
8:42
this thing so if you make it too low
8:44
it's going to be very difficult to get
8:45
in it you make it too high it looks kind
8:48
of a little goofy the front of that
8:50
Alpha could be about right about that
8:53
height so I'm going to put that about
8:55
right there I might be an inch high or
8:59
an inch low I don't know we're going to
9:01
do an imaginary line coming up
9:04
here so let's go to about here and then
9:07
we're going to go to
9:09
here and this might actually be
9:13
Beyond where the windshield is I don't
9:16
know yet so there's my third line right
9:19
there and technically I think there
9:22
should be an upright probably about here
9:25
because that front section in the hood
9:29
up to the cowl uh will probably go to
9:32
here but that'll be a a like a
9:34
construction line coming over to here
9:37
and then our wind windshield line is
9:39
going to be up here but what I need now
9:41
is a total height here which I can put
9:44
on this one and this up right here we
9:47
can put the total height that'd be the
9:49
top of the roof so there all specs from
9:52
the
9:53
gtv6 so I'm going to get a tape measure
9:55
now and measure up from the floor to 52
9:59
uh in a third inches here we might make
10:02
this car a little bit lower than the GTV
10:04
it might be 49 in or something we'll see
10:07
what works all right so there's our our
10:09
top of my roof line I put it almost at
10:11
53 in there that looks pretty low so I
10:15
think 53 will probably work the
10:16
windshield's going to have about that
10:18
much drop let's see so let's measure
10:21
with my two fingers I measure with my
10:23
fingers right so that's like 15 16 in
10:26
tall on the windshield if this line is
10:29
is coming up like this I need 15 in here
10:33
I got it sloped back here like this this
10:36
line is going to have to come down I got
10:38
this a little too high probably so let's
10:40
put this down here and we'll bring this
10:43
one down just a little
10:45
bit but remember we have to have the
10:47
motor in here too let's um measure the
10:51
motor because it is quite tall motor has
10:54
a big sump let's see what that motor
10:56
measurement is and we're going to need
10:59
uh typically a car has to have at least
11:01
5 in of uh Road clearance from the
11:04
bottom of it to the to the ground you
11:07
can get by with four if you get it
11:10
closer uh anytime you're going to hit a
11:12
curb I I once hit a speed bump on my
11:14
Alpha Back in 1970 blew the oil pan
11:18
right off on the speed bump so I'm going
11:20
to go measure the motor next all right
11:23
here's the GTV motor and you can see the
11:25
wheel pin is is pretty down there and
11:28
this is the fuel injection we're
11:30
probably going to put carburetors on it
11:32
let's see what we got for height on that
11:34
see 20 28
11:36
in that needs plus another 4 in so
11:40
that's uh 32 in look at that we got 35
11:44
in there so there's our
11:48
28 and that gives us about 6 in for
11:52
ground clearance so I could come down
11:54
with that maybe just a little bit for
11:56
now so now we essentially got a nice
12:00
line
12:01
here right here to here the question is
12:07
is that dropping enough in the front so
12:09
you got to imagine a line on there the
12:12
alpha Grill would be about that tall
12:15
I'll give it 13 Ines tall maybe
12:18
14 because that's that's a nice tall one
12:21
and then then we got uh probably 8 in so
12:27
14 and 8 that's
12:31
22 22 to the top of that to the ground
12:35
and then we're going to be picking the
12:37
line up over here so it's right 24 let's
12:40
see where we're at that was a
12:41
guesstimate before I'm at
12:45
20 8 in so I probably could come down a
12:49
little bit with that let me try going
12:51
down with that a little so that's what I
12:52
want to do I want to connect those three
12:54
dots with a nice uh single plane curve
12:59
Cur meaning when I bend the wire I want
13:01
the wire only bending on one plane so
13:04
typically we use this little
13:09
Bender I showed you earlier with the two
13:11
it's about a u at least a 3/8 gap
13:14
between the two pins the pins are half
13:16
inch and they're just grade A bolts and
13:19
you just mig weld them or TIG weld them
13:21
on the bottom drill it out on a drill
13:23
press so I could Bend this on that
13:27
little Bender but but I can also Bend
13:30
this just with my foot and I probably
13:33
have a better time of of keeping it in
13:35
plain here so I don't get several a
13:40
compound curve and we don't want a
13:42
compound we want a simple plane
13:47
so so again all of this work is all
13:51
lever and
13:52
Fulcrum this is the fulcrum this is the
13:55
lever I'm just inducing a little radius
13:59
into this thing that's all the
14:03
guesstimate I didn't get enough down
14:05
here I got to make sure I hold this
14:12
straight and this is the and what you
14:14
don't want to do is kink I just just
14:17
made a little bit of a kink there I was
14:19
too prominent right there so I got to
14:21
take a little bit of that out and I'll
14:24
add a little bit ad Jason to
14:26
it so let's see if that connects the
14:33
dots too strong all right so I got to
14:36
take some of the bend out uh one of the
14:39
things is it's still got a little oil on
14:41
here uh it it's really oiled up pretty
14:44
bad when you buy it so you got a Lac of
14:45
thinner and clean it up pretty nice I
14:48
should take and clean this again because
14:50
I can feel the the wheel building up on
14:52
my fingers
14:54
here so I'm just taking a little bit
14:58
out
15:06
that's a nice thing it's add subtract
15:09
you cut that piece of wood that's
15:11
subtracting it's not so easy to add when
15:14
you cut the piece of wood metal you put
15:18
too much of a bend in it you unbend it
15:22
you cut it too short you just weld it on
15:25
so we we love what you can do with metal
15:28
I still got a a little bit of a hint of
15:29
a kink here I got to take that
15:33
out
15:35
ah see I balled down the
15:38
line and see I still got a little bit of
15:41
Kink here that's where I had my
15:45
foot I was too strong on the
15:49
fulcrum all right that's looking a
15:51
little better yeah that's our first line
15:54
so what does that tell you okay we got
15:57
we got a nice little line there but if
16:00
you look at
16:02
the from here to here it's a much
16:05
stronger curve so we don't have enough
16:07
curve here so we'll have to throw a
16:11
little more curve in that front which
16:14
means we might have to lower that nose
16:16
down a little bit so we know this is our
16:18
starting point and let's take a
16:21
measurement here so it's very easy to
16:23
look at this picture see a strong curve
16:26
here and this doesn't have it so
16:29
at the between these two uprights we're
16:32
going to estimate here and we got uh a
16:35
30 and let's say 30 in in between at the
16:40
center so we're going to have to come up
16:42
strong with that we'll see if we can
16:46
maintain that
16:48
point and we'll we we'll deal with this
16:51
section first we might have to drop that
16:53
down a little
16:56
bit and if you have bad knees this is
16:58
what you need nice rolling uh seat here
17:02
we made these years
17:04
ago and we use them all the
17:14
time I might have to use the little tool
17:17
to catch that
17:27
end
17:30
that's a lot better but now we got um
17:33
this end drooping
17:35
down so we got to deal with
17:38
this going to bring this
17:41
up put say drop that down just a little
17:44
bit let me pivot it from here see okay
17:48
bring it about right two or three inches
17:51
below that line yeah go ahead just clamp
17:57
it
17:59
all right so that Line's looking a lot
18:02
better um again we might not be there
18:05
exactly we're going to disregard the
18:08
hood scoop on this that hood scoop is
18:11
going to be a add-on uh in the aluminum
18:13
after so uh we're just thinking of the a
18:17
a theoretical line that's this curve
18:20
from the windshield to here that's it
18:23
now that probably is uh pretty close now
18:27
we got to figure in
18:29
um the uh windshield line and then we'll
18:33
start putting the roof line in the back
18:35
end is very
18:37
short and that's what gives it the nice
18:39
look the big long nose and the short
18:43
back end all right so I guesstimated
18:45
this wi length here for the
18:48
windshield and I held it up here like
18:51
this this is be the top curve on the
18:53
roof and I put it up there like this and
18:58
that might be too long on the hood I
19:00
don't know so I want the freedom to move
19:03
this this way and I didn't have any
19:06
material here I could have welded it on
19:07
but it I got another Rod here and I want
19:10
the freedom to move this this way too
19:13
we'll be able to clamp it there and
19:14
clamp it there but I'm going to redo
19:16
this copy what I got here but I'm going
19:20
to leave uh another uh probably 10 in on
19:23
this end here and that will give me
19:26
enough to make all those adjustments
19:34
it just go incrementally a little bit a
19:36
little bit a little
19:37
bit and I like that curve I put in on
19:41
this one which might not be right we're
19:44
going to triple check it later but see
19:46
now I got that extra bit over there so
19:49
now I got to come around a little
19:55
more I got that pretty close now can
19:59
maybe a little stronger than what I had
20:01
before so you can bend it back on this
20:05
too bring it back a little
20:09
bit Yeah and then I want to put a little
20:12
bit of Bend that's would be the the
20:13
windshield which is generally on flat
20:15
they got a little bit of a curve to them
20:17
it's a compound curve windshield so
20:20
there I got a nice little curve to it so
20:22
now will take two more clamps and we'll
20:25
throw this in there and see what it
20:27
tells us we stand in
20:29
back and we look of course we're at an
20:32
angle here and this is a straight on 90°
20:36
profile that's a 3/4 view profile so
20:40
there's a lot of interpretation I I bent
20:44
the uh radius I think a little bit too
20:47
strong here and then it needs radius up
20:50
in here so I'm going to back off here
20:52
and I'm going to put some in here how do
20:53
I know that it's very simple I just look
20:56
at the picture and the Picture Tells Me
20:58
uh-uh you're not right so I got to make
21:01
the corrections I got infinite
21:03
correctability
21:05
here we're going to back that off a
21:07
little
21:08
bit B where I had it the first time was
21:11
right on the money and then we're going
21:13
to add a little bit in the roof line
21:16
here remember we got to try to keep this
21:18
on one
21:25
plane put is our line there I got a
21:27
little bit of a king right here I'll
21:29
take that
21:30
out and add a little more right in here
21:34
all right so that's what we got so
21:38
far uh I'm not buying it totally yet
21:41
we'll get the roof line in next we can
21:44
bend this for the roof
21:49
line put the roof right
21:52
there and then we'll come back down for
21:55
the back
21:56
body so
21:59
again we'll use the uh the foot
22:02
technique
22:10
here these are the critical
22:12
wires we got to get
22:15
these looking really good before we go
22:18
on to the next
22:21
step let's get a clamp
22:24
there let see what that looks like so
22:27
the windshield might be a little short I
22:30
think I'm going to come up with the
22:31
whole deal a little
22:33
bit going to come up with this by coming
22:36
up with that one I gave it a little more
22:38
of Illusion of drop down which is what I
22:41
want
22:43
and bring this one up a little bit more
22:45
too I got I got to put more curve in
22:48
that I
22:50
think
22:52
yeah
22:57
more
23:03
yeah that's not bad there's not enough
23:07
uh curve in the roof yet though I got to
23:09
get more curve in that
23:16
roof that's looking
23:19
better all
23:20
right and
23:22
then all right so I got the the roof
23:25
line it's getting close
23:30
and I don't have any inputs on the back
23:33
of it so now you got to do autistic
23:36
interpretation but right now I'm going
23:38
to not do that I'm going to just try to
23:41
concentrate on the front right at this
23:43
moment we don't want to make the video
23:46
too
23:47
long we made a
23:50
start I think you uh got the idea what
23:53
we're doing it might
23:56
be 20% off it might be 10% off it might
24:00
be 5% off until we get more information
24:03
in here which means the wheel wells in
24:06
that top of the fender line that's going
24:09
to give us the really good look and I
24:11
got to develop what the back is going to
24:14
look like I need to put this radius line
24:18
here and then come back with the back
24:19
window and design the whole back end I
24:22
want to keep the design harmonious with
24:24
the
24:25
front
24:27
so that's going to take some heavy
24:30
thought and we're Marx says we're
24:33
already at about an hour of uh videoing
24:36
already and uh he'll cut it down
24:38
probably 20 25% or so so I don't want to
24:42
make the videos too long uh I think
24:45
you've got uh a lot of the process what
24:48
we did today and I just want to thank
24:51
you for watching and remember to tell
24:53
your friends remember to share it and uh
24:55
check out my Facebook page if you want
24:57
to see some amazing AI design cars and
25:00
we're trying to get this AI Community uh
25:03
building and the ultimate goal is to
25:05
have all AI car show somewhere in the
25:09
country that we could control uh we'll
25:11
be the the committee that puts it all
25:14
together and stuff and it'll be a lot of
25:16
fun so raelene from Pro shaper Workshop
25:19
in Charlton thanks for watching
Autos & Vehicles