0:00
it's Ray from Pro shaper Workshop in
0:02
Charlton we're going to be building that
0:04
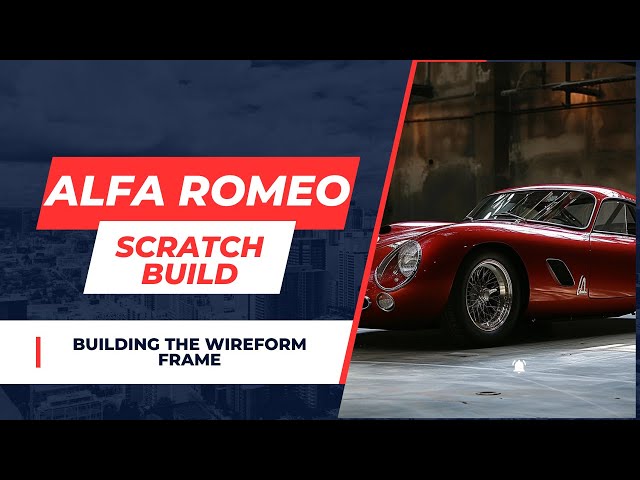
Alpha Romeo that's AI
0:07
design here it is right
0:10
here see it I see it first thing we're
0:13
going to do is we're going to do
0:15
something different this time I normally
0:17
make this elaborate build structure that
0:20
I use as a measuring tool it takes
0:23
probably uh three to five days to make
0:26
that I'm going to skip that step and I'm
0:29
going to do something different all we
0:31
had open space that's step number one
0:34
you need open space we're lucky we've
0:37
got a really level floor here not
0:40
everybody has a level floor the first
0:43
wire form I ever did was in
0:45
1993 I I designed a a hot rod and I
0:49
called it the sport Rod because I wanted
0:51
to make a hot rod that was different
0:54
than anybody else's hot rod and I I just
0:57
couldn't come up with anything unless I
0:59
added sports car ideasa so I called it a
1:01
sport Rod well we needed a center line
1:04
and uh the center line at first I was
1:07
going to make it longer than the body I
1:10
think it was 170 in the total length of
1:15
gtv6 so I'm assuming I'm going to make
1:17
this 170 in and uh I was going to make
1:21
it like a foot longer on either end but
1:22
I say oh boy that's going to be
1:23
interfering with the the the the wires
1:27
as they come around I'm going to have
1:28
this to deal with because it be over
1:31
here I says I'm going to put that
1:34
inside so I made it like 8 in shorter so
1:39
the back of the body will be around like
1:42
this and then the front of the body uh
1:44
will have like 8 in overhang on it uh
1:47
and we might make it a little longer we
1:49
can have a little overhang on the front
1:51
in the back more so than the gtv6 had I
1:54
think this has probably got more
1:55
overhang here you know why did we go to
1:58
this height I I think we went through to
2:00
60 in tall uh because it's a little bit
2:04
a couple inches taller than the GTV Hood
2:06
uh roof we're we're using this as
2:10
basically just a uh a rudimentary
2:13
starting point for the center line and
2:16
as we develop the profile then we'll
2:19
chop this off because we don't want this
2:21
on top and and we want the true Center
2:24
Line which is in the middle of this 1in
2:27
uh tube so we'll we'll make little l
2:29
standing for the the wire after we get
2:32
them bent to sat our satisfaction if
2:35
this is the the back of the car this
2:37
would be the roof here or whatever we'll
2:38
be cutting it a little lower and then
2:41
cutting this lower and lower depending
2:43
on where the wire profile goes and then
2:46
we'll add more wires we're going to be
2:48
putting uh more tubes rather putting
2:51
tubes here and we're going to measure
2:53
off of them it's all measuring off the
2:56
center line so that's the reason why why
3:00
we have that total length and then we
3:03
made it very Square we got I made a big
3:06
giant square that I used in the shop and
3:08
for general purposes and all of these
3:13
within uh 30,000 or so and it's just
3:17
migweld together it was very simple to
3:20
make give it a little 45 reinforcement
3:22
with some 3/4 uh Square here and a
3:26
little piece of 1 and 1/2 in 8 in uh leg
3:30
angle Lon down here what we have now is
3:34
we have the space but we developed a
3:37
tool this is a a tool just like if
3:40
you're doing drawings you have
3:42
construction lines if you're doing uh
3:44
old school uh mechanical drawings not
3:47
CAD drawings even CAD drawings you'll
3:49
put uh construction lines in and we have
3:52
of course we have a a a super volunteer
3:55
Frank who's no longer with us other than
3:57
the cardboard Frank but we still love
4:00
him and he's going to be in all our
4:02
videos and we know he's up there and
4:04
heav watching this and and laughing his
4:06
ass off so and this is the card that
4:09
we're going to be doing and Frank will
4:11
help out as much as he possibly can and
4:14
this is an AI Alpha Romeo design that
4:18
Mark created using midj journey.com we
4:21
have a video showing you how to create
4:24
these cars uh using the mid Journey
4:30
uh I've done I think six or seven
4:34
wireforms uh in the shop since I've been
4:37
in this shop which has been 9 years now
4:40
and the system I had before was I built
4:43
a really elaborate structure that was on
4:47
casters that you could move around and
4:49
stuff and I had to do that because uh I
4:52
needed all the space if I had 10 12
4:55
students coming in I couldn't have these
4:57
cars in the way so I had had to have
4:59
them on uh basically uh the casters and
5:03
a jig to move the things around and uh
5:07
it took a while to make that uh heavy
5:10
duty structure and maybe Mark will put a
5:12
picture up of what that looks like too
5:15
and we used those as measuring tools we
5:19
created a box structure and as you made
5:22
the wire for you could measure to that
5:26
structure well this one I wanted to
5:29
economize and I'm trying to make this as
5:31
simple as possible so that anybody in a
5:33
two-car garage can follow along and they
5:36
can do their own AI design or one one of
5:39
the AI designs we did it doesn't matter
5:42
there's literally unlimited number of AI
5:45
designs you don't have to pay somebody
5:46
$110,000 to to give you a rendering of a
5:50
hot rod or something anymore and uh
5:52
We've published probably about now 300
5:56
AI designs on uh Facebook on my Facebook
6:00
page my raline Facebook page so the
6:03
object here with this new system is to
6:07
use this as a Centerline tool and it was
6:10
pretty easy to make it took about maybe
6:13
two or three hours to to make all Mig
6:15
welded together we have a carbide blade
6:19
chopar Evolution I think it's Evolution
6:23
chopar and uh just a simple little
6:26
Lincoln MIG welder and I tacked it all
6:28
together and Mark has welded it all up
6:31
now and it's pretty sturdy and this will
6:34
be the basis of basically hanging the
6:38
wire form or supporting the wire form
6:41
I'm trying to to simplify again as much
6:44
as possible this process for inspiration
6:47
I'm going to use scaglietti who was uh
6:50
the one of the Premier Coach builders
6:52
for Ferrari it was like right across the
6:55
street from Ferrari started I think in
6:57
1951 is as is coach building firm and it
7:02
it was super convenient for Ferrari to
7:04
bring a chassis over to scaglietti shop
7:08
and they would have the chassis and what
7:10
I've read that scaglietti didn't do
7:12
drawings or anything didn't clude clay
7:14
models he just got out some wire and
7:17
started forming the wire into the shape
7:20
that they want now these are all low
7:22
production cars some of them might have
7:25
gone as many as 20 cars or 10 cars but a
7:27
lot of them were just race cars
7:29
and these are the most iconic designs
7:31
out there and the name scagliotti is
7:34
still uh the Ferrari mainstate coach
7:37
Builder now he died um I probably 10
7:41
years ago or so and uh the name lives on
7:44
under Ferrari still so we're doing a
7:48
different system we're going to work off
7:50
the center line and in this video we're
7:52
not going to bend any wires we're going
7:54
to start bending the wires in the next
7:56
video to build something like this is
7:59
the first line is the profile line right
8:02
through the center so I'm going to have
8:04
to dope out that profile line by just
8:06
looking at that picture and we'll bend
8:09
the wire and it doesn't have to be
8:11
continuous it can be in pieces and we'll
8:14
clamp it to here now the center line
8:15
these are 1 in square and the center
8:19
line is going to be a half inch off but
8:20
it's not an issue right now but we'll
8:23
we'll try to arrive at a really good
8:26
profile line and this is a little short
8:28
so the body will actually come out a
8:30
little bit more uh we're using the
8:33
overall dimensions of the GTV 6
8:36
alphao we know because theyve published
8:39
online the total length the total height
8:42
the width the uh wheel base the track of
8:46
the front the track of the wheels in the
8:48
back so all that information will be
8:51
transferred here and uh we'll probably
8:54
get some Wheels set up here and we'll do
8:56
that profile line down the center of the
8:59
the hood and the roof and the and the
9:01
windshield and the front and the back
9:03
and we have to design the back because
9:05
the back is not defined in this one
9:07
picture and that's one of the
9:09
shortcomings of uh AI design right now
9:13
is that it doesn't give you the three
9:15
views we've been able to get sometimes
9:17
uh multiple views of the cars but it's
9:20
kind of uh it doesn't happen every time
9:22
if you ask it sometimes you might get it
9:25
sometimes you might not but AI design is
9:29
is improving and is evolving so fast
9:34
it's very hard to predict how good it's
9:37
going to get and when it's going to get
9:39
that good but I believe that we're going
9:40
to see uh CAD quality drawings where
9:45
you'll have the three views or maybe
9:47
even a revolve which will allow you to
9:50
have all the information you don't have
9:52
to do this autistic interpretation but I
9:55
think the autistic interpretation is a
9:57
lot of fun because I don't have to to be
9:59
a slave to this design here I can make
10:02
it even better and the way you make it
10:04
better is you're going to put these
10:07
lines up and you stand back 20 30 feet
10:10
and you look at it and you have this
10:12
picture and you see if you've got any
10:15
errors in the in the uh execution of the
10:19
lines and and you say well geez that'd
10:21
be better if you move that a half an
10:23
inch it's always a quarter of an inch or
10:25
a half an inch or something like that it
10:27
it's almost an organic
10:29
process that has a life of its own once
10:31
you start it's a lot of fun and we'll
10:35
we'll concentrate on one side but as we
10:38
make the wires we copy the wires onto a
10:40
piece of cardboard and then we can bend
10:43
the other side wires from those lines
10:46
that we copied on the cardboard and then
10:49
we're going to measure off of here so if
10:51
we have a line in Space over here that's
10:54
coming over like this defining the body
10:56
we'll put a tube in here and and then
10:59
we'll have that in and it'll tell you
11:01
exactly where we have to attach the same
11:04
wire which is already pre-bent according
11:06
to the cardboard uh template that we
11:09
made most of the wires are going to be
11:12
wires these wheel wells openings this is
11:15
generally flat from here to here but
11:18
then it starts to roll under so you
11:21
would make that and you could make the
11:23
bend of the wire from here to here if
11:26
you try to do the whole thing it becomes
11:29
so I would bend it from here to here
11:31
weld it there and then i' have another
11:33
wire Going Under The Rocker and another
11:35
going underneath the front so you try to
11:38
simplify it as much as possible uh when
11:41
we do the headlights we'll just come
11:43
down with the aluminum skin we'll cut
11:46
later and actually this body is a very
11:49
rounded shaped body uh and it's it's it
11:53
lends itself perfectly to the English
11:56
wheel and the only real complex lexity
11:59
that I can see most of this is really
12:01
simple but it's an elegant design is
12:04
that these grills and in the center
12:07
Grill here protrude out a little bit
12:10
they're sculpted out a little bit which
12:12
gives them a nice prominence and and a
12:14
good look to them um so and then uh as
12:18
far as the trim work on it we're not
12:21
going to deal with the Chrome plat or so
12:22
we'll make all of that stuff out of
12:25
stainless um these are probably barani
12:27
wheels and these bar Wheels can with the
12:29
tires and everything can be $5,000 a
12:32
piece we're probably not going to do
12:34
that the windshield is going to be an
12:37
issue we got flat glass in the in the
12:39
Side Glass we got a uh a a back glass
12:44
there will be an issue but I'm hoping to
12:48
develop a database of all the different
12:50
companies in the world that will make
12:52
windshields so that anybody wants to
12:54
build a car be able to find the we'll
12:57
find the lowest cost one
12:59
and we'll find out the process of what
13:01
they want for making a custom one-off
13:05
windshield or a custom one-off glass
13:08
this glass is easy flat glass you can
13:10
get in just about any any City uh
13:13
they'll have the safety glass for the
13:14
windows on the side now we're going to
13:19
components it had uh torsion bar
13:22
suspension on my YouTube videos
13:24
Everybody suggested I should switch to
13:26
uh coil over Springs which I probably
13:28
will do and that gives them a lot of
13:31
nice easy adjustment for height
13:33
adjustment and we're going to use the uh
13:36
the the original uh rear end uh transa
13:40
from the GTV all that stuff has to be
13:43
rebuilt we'll clean it all up restore it
13:46
and everything you know the whole
13:48
process we're going to be videoing
13:50
everything here now this is all I'm
13:53
going to show today is just this simple
13:56
little structure and how you can start
14:00
this really complex problem for very
14:03
little money I mean I I printed this
14:06
picture out at Staples I think it was uh
14:09
38 bucks or something to print that
14:11
picture out and uh the steel content was
14:15
uh I don't think more than $100 for this
14:18
Center Line structure and then we're
14:20
going to put a bunch of Outriggers on it
14:22
that might be another 50 maybe
14:25
$75 and then the wire itself is $36 I
14:30
just bought some today for a 24t length
14:33
of course the the prices go up and down
14:34
and they're different in different parts
14:36
of the country metal prices on steel was
14:39
actually gone down I just bought a lot
14:41
of brass for an architectural job I'm
14:44
doing and the price of that went crazy
14:47
the brass went really high so uh I'm
14:50
going to try to do this so it's it's
14:53
attainable by just about anybody that
14:55
has the ambition to build their own car
14:58
and to do it in the most e economical
15:00
and simple way possible so I hope you
15:03
like the video and next time we're going
15:05
to be bending some wire I know
15:07
everybody's ansy to see that wire bent
15:09
they want to see the shape happen and
15:12
then they want to see the panels formed
15:14
and uh ideally we could have a chassis
15:17
here uh that would be just like what
15:20
skag lietti did but we we're not going
15:22
to be able to do that but we know it's a
15:24
known what we know what the the track is
15:26
going to be we know what the wheelbase
15:28
is going to be all that so we'll we'll
15:31
be good and alling fly and the potential
15:34
ointment is if I use all those gtv6
15:38
dimensions and I don't like the
15:40
Aesthetics I don't like the 20ft or 30
15:43
foot look then I'm going to have to make
15:45
some changes I maybe have to lengthen
15:47
the wheelbase I might have to widen the
15:50
track or whatever and that'll have some
15:53
ramifications but I think we might be
15:55
able to do it so I hope you enjoyed the
15:57
video it's Ray from prochet paper
15:59
Workshop in Charlton
16:01
Massachusetts I hope you okay so I hope
16:05
you enjoyed the video went with that I
16:08
hope you enjoyed the video it's Ray from
16:10
Pro shaper Workshop in Charlton
16:11
Massachusetts please subscribe tell your
16:13
friends try to share this video as much
16:15
as possible we're trying to build our
16:17
YouTube channel thank you