Up next in 10


https://www.proshaper.com
https://www.proshaper.com/metal-shaping-coachbuilding-class-options/
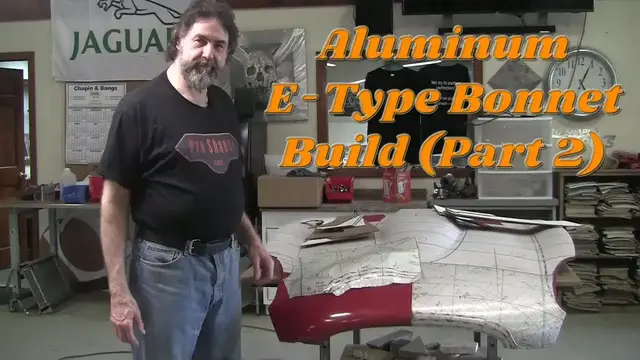
In part 2 of how to shape metal. Wray goes over how to make gauges from the E-Type Jaguar bonnet. How to transfer all of the information from the flexible shape pattern to a blank piece of sheet metal, and how 2 of his students made a form tool to make the front edge of the bonnet. All of this information is essential when trying to shape a piece of sheet metal.
Email: [email protected]
Website: https://www.proshaper.com
Facebook: https://www.facebook.com/ProShaper/
Instagram: https://www.instagram.com/proshaper/
Twitter: https://twitter.com/ProshaperM
Linkedin: https://www.linkedin.com/company/proshaper
Show More Show Less View Video Transcript
0:00
Hi, it's Ray Chaline from Pro Shaper Sheet Metal in Charlton, Massachusetts
0:14
And finally we got back to doing the E-Type Nose. Mark was on vacation. I had some issues I had to
0:21
deal with some last-minute jobs that had to be finished. And here we are we left off with a
0:27
little explanation of what the flexible shape patent is we mentioned the gauges and a lot of
0:34
people commented about how do you make a gauge so in this video instead of going right into the metal
0:39
what we're gonna do is show you how to make a gauge so we'll make a gauge offer say this one
0:47
right here this is where gauge number five will be going now we're gonna do this gauge number five
0:54
Which starts here and comes around and ends right there now what that is essentially is a
1:03
Station buck if that was a wood buck that would be a widow station would be
1:08
We arbitrarily put these in but they do have a purpose they have a certain spacing and stuff
1:13
But you know, I could be a half inch over this way or half inch over that way
1:17
It's not going to make that much of a difference So now how do I get this piece of cardboard fitting
1:24
So first thing you got to do is You've got to be able to mimic the shape to start off with so I'm gonna go like this
1:33
I'm gonna draw that just like that. So there's my idea what that shape looks like now
1:39
This is actually a pretty difficult one because you got to make this little cut out here now
1:43
You want to leave enough strength here? So this end piece has some strength you want some strength up here
1:50
So you want to make your cardboard big enough now years ago when I invented this system
1:55
I used to share five eight strips of 18 gauge or 19 gauge steel and then take a shrink a stretcher and
2:03
Bend them the hard way and it made him a really nice gauge
2:07
But it took a long time and the gauges need a lot of information on them
2:11
You need that number five you need panel number two you need a little
2:17
Storybook like here saying that it's for a type Otherwise you end up with thousands of gauges laying on benches and you have no clue what they mean that has happened
2:26
So we try to be pretty diligent in getting that information on every gauge
2:31
Not only do you put it on one side you put it on the other side too because you don't want to have to keep
2:36
Craning your neck around the thing to find out what gauge it is and where it's supposed to be
2:42
Every gauge has an index point. This one has an index point right here
2:46
So first thing I'm gonna do is I've got this approximately How I think that's supposed to go
2:54
And that gets me into the game now I'm going to cut that out with a razor
2:57
I can cut it out with a jigsaw or a bandsaw are also But just a standard razor knife should work pretty good. Alright, so here we are on a wood bench
3:07
And we're gonna cut this out with the razor knife So
3:28
So there's our starting point I guess your results might vary a little bit
3:34
I've been playing with shapes for a long time so I can estimate
3:39
Approximately where things are so I have a black pen. I got a lot of black marks on here
3:44
I don't want to use the black pen now because I want to refine this line just a little bit
3:49
Now I could actually sand this one in but I'll give it I'll try with the pen with a red pen
3:55
Let me go get a red pen. So now I have the red pen And I'm gonna take the red pen and I'm gonna lay it on here like this
4:03
And I just Rub it all the way around You See I've got a deficiency I hear the angle I came off on the wrong angle
4:17
So I'm going to recut that again now. So now we're going to cut the red line out
4:24
And a bandsaw actually works better than the razor the bandsaw is a more refined cut
4:39
I Have a band saw with a quarter inch below wide blade and cuts these very nicely
4:57
Now we're going to sand with 80 sandpaper also that gives you the fine fit
5:02
So next we'll go maybe one more cut or maybe just sand it in
5:07
So we're going to give it one more I
5:55
Will go back and try it Okay, we're fitting pretty close now
6:03
We got a little gap here if I cut this to length I
6:11
Usually like the gauges to end where they're supposed to end so this gauge is going to be ending right here
6:18
So I'm going to chop that off right there And it's supposed to be ending right there
6:24
And I'll chop that off there And then we'll see how that works
6:29
All right, so the gauge is fitting pretty decent now coming right around
6:36
You always put the gauges at 90 degrees to the surface and
6:40
It's cut off at the ends There is a little bit of gap from here from here to here
6:49
To solve that you take in Just sand where it's hitting a little bit. I I
6:55
Don't have to spend too much time fitness and we don't really need this gauges. It's just to show you the process
7:01
So you would just sand the spots where it's touching until it touches completely
7:06
Now the gauge ends here the gauge ends here. We've got plenty of material to
7:12
Write our story on What do we want to do first we want to do is make sure we have an index point
7:19
So there's our index point right there And we're going to tick that off right here at the same spot
7:27
And then we'll bring that over to the other side here so there's a
7:34
Little tick now where does that come into play that comes into play
7:39
When you roll this edge if you don't have that edge rolled properly
7:44
Then this won't line up if that edge is too far out the tick mark is going to be out
7:50
So that tells you a lot. So you have to have that index mark
7:55
now you can also use these roll zone marks as Indexes we can do that later too. We can put a an index and that'll give us an idea of how we're progressing with that role
8:08
We get to the point of arranging that role in there so
8:12
This is gauge number five So on gauges, I've developed a system. I put number five
8:21
All my gauges always have underscore under them so I can distinguish what that not means
8:26
And then I have orientation number five orients right there. Then again, I put all the same information on the other side
8:34
There now this is for panel number two Panel numbers. I always have a circle
8:43
And it's number two here because the panel number two circle number two
8:48
Then I usually have a green pen. I Don't have a green pen right with me and I'll do the little storyboard. I put a little square
8:58
1962 Jaguar II type front bonnet front section as much as you want put it on both sides
9:06
Poke a little hole in here and they can be hung. Alright, so I hope that explains how to make a gauge
9:12
These gauges will literally last forever You can hang them with the flexible shape patterns on your garage wall
9:18
And you can literally make hundreds of panels that accurate panels where this comes in really good is restoration and
9:26
You've got a rusted out panel on one side the other side is not as bad you take the information from the good side and
9:34
And you correct the bad side and then eventually fix even maybe the good side might have some problems
9:41
so this information is Like solid gold you can actually make a panel
9:48
from just the gauges without a flexible shape pattern, but What the flexible shape pattern adds to the gauges is it
9:59
Tells you exactly where it I it localizes where that gauge is supposed to be now, how does it do that
10:06
Well, when you see all these gauge lines in here, so we're making a panel and
10:11
Now how do we get these gauge lines on to the new panel
10:15
Well, that's another thing that haven't showed you yet is we're gonna punch holes along all these gauge lines
10:22
So when we make the panel we take a magic marker and these little holes that we're punching in
10:27
we're gonna go dash dash dash dash dash dash dash and Then we transfer all this information gauge number three goes right here
10:35
so that Index is in properly with gauge number three and gauge number five and so forth go
10:42
So that the way we gonna do that and I show you how that works Okay now we going to punch these holes where the gauge has got to go and
10:53
We've got a little Leather punch these this one happened to come from harbour freight as they sell them pretty cheap
11:02
Standard ball peen hammer and we're just going to try to center ourselves on the lines
11:08
That's important and then every Three-quarters of an inch or 19 millimeters. So give it take a little bit
11:17
We're just gonna punch along the line. I generally don't try to punch the intersections. It's good to keep those in intersections whole and
11:26
You know, you can get a little wider spacing a Little tighter spacing it's not gonna make much much of a difference
11:34
But what this does it gives you the ability to very accurately index
11:41
All of the gauge locations where they go. This is an external station buck essentially what we're making with the gauges
11:48
We don't need access to the internal. There's so many cars that
11:54
If you're copying the part There's all kinds of stuff in the way on the inside
12:00
Always the outside of the car is available to you so external
12:05
Station buck makes a lot of sense So all along the gauges and now the index points what I do on that
12:18
Is I'll punch a hole on either end of the little index points for where the gauges go
12:24
so This is the index Index point for gauge number 12 So I've got that mark. So now when I put that gauge on my panel
12:36
I'll take it off here and take it here and then I'll make a little line going across with a little straight edge
12:42
And I know that that's where gauge number 12 has to index and this is the weld indexing line and
12:52
That has punched holes in it also I Got that done. So there's quite a bit of punching. This is a gauge over here. This is an index point for a gauge
13:09
There's quite a bit of punching you have to do to get this all right now
13:13
A lot of people instead of using this correct tape, which I sell on my website
13:19
Which is translucent all that information is Transfer it to the other side so it allows you to flip it in this case. We're not doing the flip
13:28
We actually made a left and a right but you allows you to flip it So that you can only have to make one side of something and then flip it over
13:36
And you only have to make the gauges on one side and then flip them over and that really ensures a really good symmetry also
13:43
So a lot of people have tried using this blue tape, which is readily available
13:48
It's a low stick tape, but it's not translucent and that Translucence is very important a lot of people have tried using saran wrap
13:56
Saran wrap as the first layer of the of the flexible shape patent. I've tried it. It's not a good deal
14:03
Someone said that they used aluminum foil aluminum foil is not a good deal. It's not translucent
14:09
It doesn't really stick as well as the tape once you use one of these things
14:15
You'll be hooked on it. I had a class both the four-day
14:20
class and my three-day finishing class this past week and Two guys stayed all the way through I gave the hundred and thirty hours class special
14:33
So they stayed from the like almost two weeks here to utilize their whole 130 hours in one one go
14:40
so They were intrigued by the flexible shape patent and I showed him the flexible shape patent and they said well
14:48
Geez, we'd like to try to make that e-type nose, too. So I said great and
14:53
So I says well I really don't want you to use my my flexible shape pad because I haven't used it in a video and I didn't want
15:00
I'm beating it up because it'd be the first time that they're using it So I didn't want it to get ripped or something so they actually made another flexible shape patent off of the e-type
15:10
nose and They made the aluminum panels and and both it was
15:17
Rich and Nate and they both made one side they flipped their panel
15:22
Over and they both made one side and they got it ready to be almost be to be welded now in the process of
15:30
making their panel they came up with the problem of how to
15:36
Put this curl in well as far as the complexity of this e-type bonnet. It's this
15:43
Opening right here this grill opening with this curl which has initially a shrink and then to get it over
15:49
Center then there's an actual stretch on this edge. So this has a lot of complexity
15:55
this is a light tight little radius here and With the flexible shape pattern, they were actually able to make it pretty easily
16:02
As far as the volume of shape. It's not that big of volume
16:06
So they did some shrinking I think four or five shrinks and they popped up the shape they did some stretching and planishing And then they got ready to do the roll that setting the arrangement So
16:18
primary is always Doing the area value first. That's what the flexible shape patent tells you is the area value and the gauges give you the arrangement value
16:29
The bending of it so you have to get the area value first
16:33
so they got the area value really nice the panels were chrome plate like and
16:38
They tried to bend this is 063 3003 aluminum and they hadn't annealed it and it was pretty stiff
16:45
So they were having a little trouble getting this to roll over properly the way you roll it over is
16:51
I have these little post dollies that I put in these little post dolly haul holders
16:56
And you can slap it over with a slap it with a leather face on it
17:00
So they were doing okay, but they made a few little mistakes. So I suggest that I says well, you know
17:07
Why don't we do this you guys got some time? I'll show you how to make a nice form tool for making this front edge
17:15
So instead of using the slappers and really carefully checking with the gauges
17:20
I suggested we use this form tool. So I had to make the form tool and
17:27
That is the way most of the people that are making these e-type bonnets around the world
17:33
They are making them with a complete solid Surface form tool essentially. So it makes it a lot easier if you're doing multiples
17:44
Now they weren't in any big hurry or anything to get this thing done
17:49
So they were more than willing to make the form tools This is the form tool which was molded
17:56
This is an idea I came up with years ago, too This if you see in the pictures is all the wire form internally essentially, it's like reinforced
18:08
concrete with the steel inside it and it originally we intended it to
18:14
Put in my one-inch Post dolly sockets, but I didn't like the angle so I just made a modification. I added this piece of angle iron
18:23
And now we can put that piece of angle iron here. So I added that angle iron
18:31
And now This is a much more user friendly. I've got it up tall here. So it's right up by my eyes and I can see it
18:40
What we did find it Without a kneeling this edge. There's a little stiff getting it over
18:46
So I had rich and Nate both a kneel their front edges
18:51
At first they didn't get the annealing proper. So they didn't really get it really good and soft. So
18:56
You're going to make sure and tomorrow we'll cover the next part. We'll recover
19:02
Annealing properly when we start working the aluminum panel Which will be part 3. This is part 2 right now. So
19:11
This is now in a real user-friendly position and We put that like that right there
19:20
And And you can see we can clamp here and we can
19:28
Use a nice leather face slapper and we can set that arrangement
19:33
That's exactly what the guys that are commercially making these are doing
19:37
They're making sure that they conform to that Desired shape now. This was molded right out from the inside of that hood
19:47
Which is undamaged and and It looks like That will probably have to make one here. Also, we don't have to
19:58
But I probably will Mold one out from inside here again. It's throwing cleaning it up a bunch
20:06
throwing a Mold release which I use a heavy wax to do that and then we fit in quarter inch hot roll wires
20:16
MIG weld it all together probably put four or five wires in there and then have a couple stands and legs for it to
20:23
support itself so it makes it in a user friendly situation and
20:29
After you get all the wires done first you put a big heavy coat of of that
20:36
reinforced Bondo in there the waterproof Bondo and then you plunge the wire form into it and
20:44
Then fill in backfill all the wire form right up to this lip and you get a perfect mold
20:50
After about 10 minutes, it's all set Boop, it just pops out because the wax releases it
20:57
Usually there'll be some air pockets you might have to fix and stuff. No big deals
21:03
So we'll have both moles for both of these We'll have the flexible shape pad so we can make these if we want to in the future. Yeah, it's racial lean
21:13
Keep the comments coming and thanks for watching. Please subscribe And we'll check you back on part three. We'll really get into the metal work in part three
21:23
Thank you
#Classic Vehicles
#Automotive Industry
#Manufacturing