live_tv
Livestream Starting Soon
00
Hours
:
00
Minutes
:
00
Seconds
Up next in 10


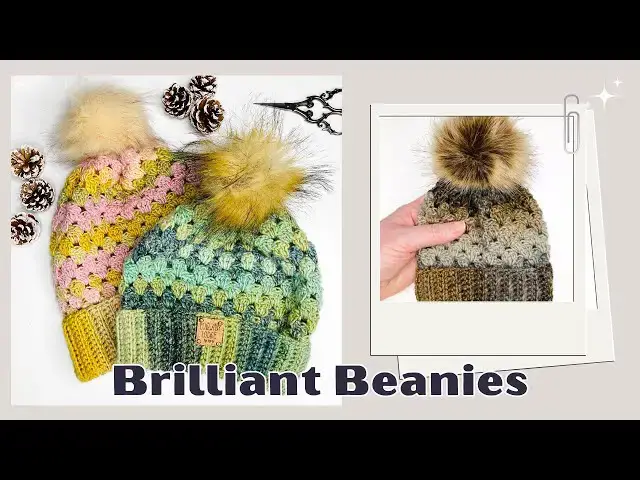
In this video you will learn how to crochet a granny stitch beanie. For pom poms and other accessories - USA https://www.amazon.com/shop/lullabylodge?ref_=cm_sw_r_cp_ud_aipsfshop_2PEYZRX5N4SBF52303ZY UK https://www.amazon.co.uk/shop/lullabylodge?ref_=cm_sw_r_cp_ud_aipsfshop_2PEYZRX5N4SBF52303ZY (affiliate links)
The beanie size chart may be found here - https://www.lullabylodge.com/2024/11/how-to-crochet-granny-stitch-beanie.html
As an Amazon affiliate I may receive commission on qualifying purchases at no extra cost to you.
Please join our Ravelry Group where you can share photos of your Lullaby Lodge makes, get pattern support from our lovely community, take part in pattern testing and crochet alongs and much much more… https://tinyurl.com/3crb9ttt
Lovecrafts a great place to buy yarn! - https://www.lovecrafts.com/?utm_medium=affiliate&a_aid=7f83a24a (affiliate link)
Grab your crochet essentials at Amazon - https://amzn.to/4h5PQtE (affiliate link)
Video recording equipment - https://amzn.to/4h4r7pu (affiliate link)
Show More Show Less View Video Transcript
0:00
transform your yarn stash into these
0:02
gorgeous granny Stitch beanies they're
0:03
so quick and easy to make even a
0:05
beginner that knows only the basics
0:07
could easily tackle this pattern so I
0:10
made my beanies in this Yan Smith Nana
0:13
Aaron you can use any Aaron or wter
0:16
weight yarn for these you're going to
0:18
need both a four and a 5 mm hook a
0:22
darling needle and some scissors I'm
0:24
going to be making the newborn size
0:26
today but you can find the other sizes
0:28
in the written pattern so check out thep
0:29
destion box for more details So this hat
0:32
is made by creating the ribbing first
0:34
and they're working from the bottom up
0:36
to finish off your beanie so for the
0:37
newborn size starting with 4 mm hook
0:41
going to put a slip
0:44
knot on your
0:49
hook and we're going to chain
0:52
15 one 2 3 4
0:58
5 6 7
1:01
8 9 10
1:04
11 12 13 14 and
1:09
15 so starting in the second chain from
1:11
the hook we're going to put a single
1:16
crochet and we're going to put a single
1:18
crochet in the next
1:21
Stitch and into every
1:25
Stitch all the way across so we're
1:27
coming up to the last couple of stitches
1:29
here
1:31
single crochet in both of
1:37
those now I'm going to show you a little
1:39
tip to get your the edges of your
1:41
ribbing really nice and neat so instead
1:44
of chaining one and
1:45
turning I am just going to turn and I'm
1:48
very very slightly going to elongate
1:52
that Stitch only just a tiny little bit
1:54
and for this first Stitch only I'm going
1:56
to single
1:57
crochet through both of these loops
2:01
for the rest of the
2:03
stitches I'm going to working through
2:05
the back Loop
2:08
only and we're going to single crochet
2:10
just through those back
2:13
Loops all the way
2:18
across so it helps if you just turn turn
2:22
your fabric over so you can see the back
2:24
Loops easier so you keep going all the
2:27
way until you get to the last last
2:34
Stitch and this last Stitch here again
2:36
I'm going to crochet through both Loops
2:38
of that
2:40
Stitch so we're not going to chain one
2:42
we're just going to turn slightly
2:45
elongate our Loop and put a single
2:48
crochet through both
2:50
loops and then again single
2:52
crochet through the back
2:55
Loops all the way across
3:00
until we get to that last Stitch and
3:01
again we're going to through work
3:02
through both of those
3:05
Loops now this is going to give you
3:07
really nice KN edges so you're going to
3:09
just repeat that last row so elongate
3:12
your Loop single crochet through both
3:15
Loops of the first Stitch single crochet
3:18
in the back Loops of all of the
3:21
remaining stitches up until that last
3:23
Stitch and then again single crochet
3:24
through both Loops you're going to
3:26
repeat this until you have a total of 45
3:31
rows so you go ahead and do that and
3:34
I'll meet you back here when you're
3:35
ready to carry on okay so I finished my
3:38
45 rows of ribbing for this size and we
3:41
simply going to fold the ribbing
3:45
over and then we're going to join these
3:47
two pieces
3:51
together so working into the back Loops
3:54
of this front side the side that your
3:57
yarn is attached to so into the back
3:59
back Loop and then into the bottom loop
4:02
from your foundation chain and then
4:05
we're just going to slip
4:08
stitch and we're going to do that into
4:11
each Stitch across so through the back
4:14
Loop find the loop from the foundation
4:18
chain and a slip
4:23
stitch so you're going to keep going
4:25
until you get all the way to the end of
4:29
your ribbing so I've worked all the way
4:31
across this is my last
4:35
Stitch and now I finish the join now
4:38
this is actually going to be the right
4:40
side even though the seam is on the
4:42
outside when you fold up your brim this
4:44
will be the right side of your beanie so
4:47
we're now going to start working around
4:49
the top top of our brim and we're going
4:52
to put a single crochet into each row so
4:55
I'm just going to chain
4:57
one and then put a single croch
5:03
cret into the
5:05
top of each
5:09
row all the way around so you should end
5:12
up with 45 single crochet around your
5:14
brim and then we're going to join with
5:16
the slip stitch to that first single
5:18
crochet we're now going to swap to 5 mm
5:22
hook and we're going to turn now for
5:25
this particular pattern I'm not going to
5:27
use the usual chain three as a St chain
5:30
I'm going to use stacked stitches here
5:32
so I am going to just put a single
5:34
crochet into that
5:37
Stitch like so and then put my hook
5:40
through that first leg of the single
5:43
crochet and make another single crochet
5:47
stitch so this will count as your first
5:49
double crochet this just looks a little
5:52
bit neater when you're working in the
5:53
round it it just looks a little bit
5:54
neater so we're going to put two more
5:57
double crochet into that same Stitch
6:01
and this makes our first granny
6:05
cluster we're then going to skip two
6:07
stitches one two and put a granny
6:09
cluster into our next
6:13
Stitch that's three double
6:16
crochet all into the same
6:20
Stitch skip two and then a granny
6:23
cluster in the next Stitch
6:36
and we're going to repeat this all the
6:39
way
6:42
around so I'm at the end of the round
6:44
and I'm just going to join with the slip
6:45
stitch to the top of that stacked single
6:47
crochets
6:49
there and then we're going to
6:52
turn and we start the next round off
6:54
with another stacked Stitch so we're
6:56
going to put a single crochet into that
7:01
space hook goes through that first leg
7:05
and we put another single crochet like
7:07
so and then two double
7:10
crochet to make our granny
7:14
cluster and from now on we're going to
7:17
be working into the spaces we made from
7:19
the previous round so we're going to put
7:21
a granny cluster into each space
7:33
now at the end of this round again we're
7:35
going to join with the slip stitch to
7:36
the top of that stack
7:39
Stitch and turn so we're just going to
7:42
repeat that last round until we have a
7:44
total of nine rounds in the granny
7:46
Stitch so I've put nine rounds in granny
7:49
Stitch and I'm going to turn and this
7:51
last round is going to be a decrease
7:53
round so we're going to start the round
7:55
off with that stacked Stitch
8:02
and then we're going to double crochet
8:04
two together over these two spaces so
8:07
yarn goes over into the space pull up a
8:09
loop yarn over and pull through two and
8:12
then we're going to do the same into the
8:13
next space so yarn over pull up a loop
8:17
yarn over and pull through two then yarn
8:20
over and pull through all of those loops
8:22
and then we'll put another double
8:23
crochet into that
8:27
space and we're going to repeat the all
8:29
the way around so I'll show you one more
8:32
time we're going to put a double crochet
8:33
into the next
8:37
space like so and then double crochet
8:40
two together over the these both both of
8:42
these spaces so yarn
8:45
over hook goes in pull up a loop yarn
8:48
over pull through two and then we'll do
8:50
the same into the next
8:55
space yarn over and pull through all of
8:57
those loops and then finish with the
8:59
another double crochet into that
9:03
space and you're just going to repeat
9:05
this all the way around decreases all
9:07
the way around and as you can see we've
9:09
got this one space left here we don't
9:12
have an extra one to work a decrease
9:13
over so I'm just going to put a granny
9:15
cluster into that last
9:24
space and then we're going to join with
9:27
a slip stitch
9:30
and fasten
9:31
off and we're going to leave a long tail
9:33
so you can cinch the top of the
9:39
hat so we're going to thread our tail
9:41
onto a dining
9:43
needle and we're going to start
9:46
weaving through the front Loops of our
9:53
stitches like
9:56
so and you're going to do this all the
9:59
way
10:01
around the top of your
10:14
beanie once you get back to the
10:16
beginning you're going to simply pull
10:18
that top
10:25
tight then we're going to go around and
10:28
go back back
10:30
through all of those stitches
10:45
again then you can take your yarn
10:47
through to the inside of the beanie
11:00
just tie a little knot with the yarn by
11:02
going through that
11:03
Loop and then hide your
11:16
end now need to weave in this last tail
11:22
here and all that's left to
11:27
do is add a cute fairy pom pom to your
11:31
beanie these fur pom poms give a really
11:34
finished touch to your beanie you can
11:35
also get the little labels if you want
11:37
to I've had these made up with um my
11:40
brand name on them you can get them with
11:43
made with love or anything you like
11:44
really I will I've added these pom poms
11:47
to my Amazon storefront I will see if I
11:49
can find some labels to add as well and
11:52
if you'd like to know exactly how to
11:54
attach your pom pom then watch this next
11:56
video
#Hobbies & Leisure
#Crafts
#Fiber & Textile Arts