live_tv
Livestream Starting Soon
00
Hours
:
00
Minutes
:
00
Seconds
Up next in 10


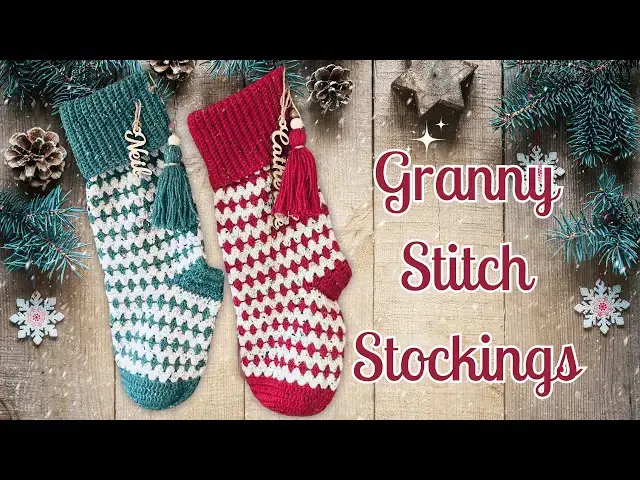
In this video, I'll show you how to crochet granny stitch Christmas stockings that will add a festive touch to your holiday décor. Get everything you need here - USA - https://www.amazon.com/shop/lullabylodge?ref_=cm_sw_r_cp_ud_aipsfshop_6NYZ15JWQW8AH4XC7WZZ
UK - https://www.amazon.co.uk/shop/lullabylodge?ref_=cm_sw_r_cp_ud_aipsfshop_6NYZ15JWQW8AH4XC7WZZ
Leather hanging straps - https://www.etsy.com/uk/listing/844511467/set-of-pre-cut-leather-blank-straps-for?ref=yr_purchases
Carved wooden names - https://www.etsy.com/uk/listing/1297923714/oak-wooden-name-and-christmas-stocking?ref=yr_purchases
This classic design is not only beautiful but also fun and easy to make. Follow along as I guide you through each step of the process using the classic granny stripe stitch. We'll start by discussing the materials you'll need and then dive into the basics of the granny stitch. You'll learn how to crochet granny stitch Christmas stockings with clear, easy-to-follow instructions, perfect for both beginners and experienced crocheters.
By the end of this tutorial, you'll know exactly how to crochet granny stitch Christmas stockings that you can customize with your favourite colours and embellishments. These stockings are perfect for hanging by the fireplace or giving as handmade gifts. Join me and get into the holiday spirit with this delightful crochet project!
Get notified of new pattern releases & exclusive deals and discounts by signing up to our mailing list - https://tinyurl.com/3cae89k8
Feel free to join our Ravelry Group where you can share photos of your Lullaby Lodge makes, get pattern support from our lovely community, take part in pattern testing and crochet alongs and much much more… https://tinyurl.com/3crb9ttt
Lovecrafts a great place to buy yarn! - https://www.lovecrafts.com/?utm_medium=affiliate&a_aid=7f83a24a (affiliate link)
You can find all your crochet essentials and video recording equipment in my Amazon Influencer Store USA - https://www.amazon.com/shop/lullabylodge?ref_=cm_sw_r_cp_ud_aipsfshop_6NYZ15JWQW8AH4XC7WZZ UK - https://www.amazon.co.uk/shop/lullabylodge?ref_=cm_sw_r_cp_ud_aipsfshop_6NYZ15JWQW8AH4XC7WZZ (affiliate link)
Show More Show Less View Video Transcript
0:00
you're looking for a festive gift for
0:01
someone or want to make stockings for
0:03
your kids my granny Stitch stocking is
0:05
so easy to make works out fast and is a
0:07
great stashbuster project use as many
0:10
colors as you like or crochet in classic
0:12
colors like mine so today I'm going to
0:14
be using stylecraft life double knit and
0:17
this particular one has these little NPS
0:20
in the yarn which gives you a kind of
0:22
Tweedy look I'll be using two different
0:24
colors for mine but you can of course
0:26
use as many colors as you like and I'll
0:28
be working with a 4mm hook today going
0:31
to start with by putting a slip knot on
0:32
my
0:35
hook and we're going to chain
0:41
four and join that first Stitch to make
0:45
a
0:48
ring then go to chain
0:51
three this counts as our first double
0:54
crochet then going to put another double
0:56
crochet into that ring
1:02
and I'm going to keep putting double
1:03
crochets into the ring until I have a
1:08
total of 15 double crochet that's
1:11
including that chain three as
1:13
well now I was working over my tail as I
1:16
went and then you can just give that a
1:18
little bit of tug and that will close up
1:20
that hole just a little bit in Center
1:22
then going to join to the top that chain
1:27
three so we're going to chain three this
1:30
counts as our first double crochet we're
1:32
going to put another double crochet into
1:34
that same
1:37
Stitch and in the next Stitch a double
1:43
crochet and then another double crochet
1:46
into that same
1:48
Stitch and we're going to repeat this
1:50
all the way
1:52
around with two double
1:56
crochets in each Stitch
2:01
we a total of 30 stitches we're going to
2:04
join to the top of this chain
2:07
three and begin round three so we'll
2:10
chain three to start this counts as our
2:13
first double crochet and we're going to
2:15
put double crochet another
2:18
one
2:21
whoops in that same
2:23
stitch in the next
2:28
Stitch double crochet
2:31
and in the following Stitch two double
2:37
crochet so we're going to repeat this
2:39
around alternating between one double
2:44
crochet and then in the next Stitch two
2:46
double
2:49
crochet in the next Stitch one double
2:53
crochet in the following
2:55
Stitch two double crochet so just keep
2:59
repeating that all the way
3:03
around we're a total of 45 stitches and
3:06
as usual we're going to join to the top
3:08
of the chain
3:09
three and for the next round chain three
3:12
to
3:13
start and put another double crochet
3:16
into that same
3:21
stitch in the next Stitch double
3:26
crochet in the following Stitch double
3:31
crochet and that's what we're going to
3:33
repeat so in the next Stitch two double
3:38
crochet
3:39
one
3:41
and
3:43
two and in the next two stitches one
3:46
double
3:51
crochet so just repeat that all the way
3:54
around a total of 60 stitches and we're
3:57
then going to join
4:00
with a slip
4:01
stitch we finished with our increases
4:03
now so from now on we're just going to
4:05
be working a double crochet into each
4:07
Stitch so chain three to
4:10
start we'll put a double crochet into
4:12
the next
4:16
Stitch and the next
4:20
Stitch and in each Stitch around just
4:23
one double
4:25
crochet in each
4:27
Stitch so I've work all the way around
4:29
put a double crochet in each Stitch and
4:31
then just joining with a slip stitch to
4:33
the top of that chain
4:35
three so you're going to repeat this
4:38
round twice
4:41
more okay so I've just finished round
4:43
seven I'm going to fasten off
4:48
now so I am done with the
4:53
green now you're going to end up with
4:55
something looks like this kind of ball
4:56
shape so what you want to do is fold
4:58
that in half
5:06
like
5:08
so and that makes the the toe part of
5:12
your stocking so I'm changing colors now
5:15
I'm going to be using this uh natural
5:19
color what it's called natural lip it's
5:23
called natural NE there we
5:25
go so I'm going to put a slip knot on my
5:28
hook with a new color
5:32
and I'm going to put a single crochet
5:34
into that Stitch where we fastened
5:38
off like
5:40
so and then I'm going to do another
5:42
stitch on top of it so it's a stacked
5:44
Stitch I'm going to put my hook through
5:47
this first
5:48
leg and work a single crochet and that's
5:52
going to count as our first double
5:53
crochet now you can do this actually
5:56
here instead of the chain three if you
5:57
want to but I like to do this when I'm
5:59
working granny Stitch because I just
6:00
think when it's in the round it looks a
6:02
bit more seamless so we're going to put
6:04
two double crochet into that same
6:09
Stitch that's one now I like to carry
6:12
this tail and work over it as as I'm
6:14
going so I'm going to pick that up while
6:16
I'm doing this second double crochet so
6:19
I'm going in with the first part of the
6:20
double crochet as a normal then I'm just
6:23
going to lay the tail over the hook
6:25
finish off that
6:27
Stitch and then take that across we're
6:29
going to skip skip the next two two
6:30
stitches one two and a double crochet
6:33
into that one so I'm going around both
6:36
of those into the Stitch pulling up a
6:39
loop finishing off that double crochet
6:43
stitch and then just gently pulling that
6:46
so it disappears and then I can do two
6:48
more double crochet into that same
6:50
Stitch and work over that
6:53
tail and again I'm going to pick it up
6:55
once more after I've done the first part
6:57
of that Stitch
7:00
pick up the tail finish off the Stitch
7:03
carry it across skip the next
7:06
two double crochet into that next
7:11
Stitch just pull that so it disappears
7:14
and then two more into that same
7:20
Stitch and I'm going to repeat this all
7:22
the way around so skip two and then a
7:25
granny cluster which is three double
7:27
crochet into the same Stitch skip two
7:29
granny cluster skip to Granny cluster
7:31
all the way
7:34
around so I worked all the way around in
7:36
granny Stitch skipping those last two
7:37
stitches and then joining to the top of
7:39
that stacked
7:43
Stitch and now we're going to
7:47
turn and we're going to start off Wi
7:49
putting a stack Stitch into this space
7:55
here like so
8:02
then two double crochet into that same
8:10
space I'm going to continue now around
8:12
and put a granny cluster into each of
8:15
the
8:18
spaces so that's three double
8:26
crochet into each space
8:33
now because I'm going to be alternating
8:35
with just two colors I want to be able
8:36
to carry the yarn inside the stocking so
8:39
I don't have to keep joining a new yarn
8:41
every time and having lots of ends to
8:42
weave in um I did find if I change color
8:46
by pulling the last part of the Stitch
8:48
with through with a new color that I was
8:50
getting little blips of color on the
8:52
right side that I could see that I
8:54
didn't like so I'm going to join with
8:56
this color then I'm going to turn
8:59
then I'm going to drop this color
9:02
down and then pick up the green again
9:05
which I completely forgot to leave it d
9:08
i shouldn't have fastened that off
9:09
earlier so if you're watching this um
9:11
back sorry for the mistake there okay so
9:14
I made a quick Russian join so I can
9:16
correctly show you how to carry this up
9:19
the back so we're going to lay down this
9:22
old color we're going to take the green
9:24
and we're going to chain one don't pull
9:27
it too tight because you are going to
9:28
have that float at the back which I
9:30
should have carried
9:33
up and caught that at the back with the
9:36
previous row which I didn't do but I
9:38
will show you how to do that so you
9:39
won't make my mistake okay so we're
9:42
going to start off with it the stack
9:44
Stitch Again by putting a single
9:46
crochet
9:48
here and then putting our hook through
9:50
that first leg making another single
9:52
crochet and then two double crochets
9:54
into that same
9:56
space it's one and two
10:01
and then we're going to carry on all all
10:03
the way around with a granny cluster in
10:05
each space So at the end of the round
10:07
I'm just going to join to the top of
10:09
that first
10:14
Stitch and
10:17
turn going to drop down the green
10:20
remember to always have your floats
10:23
going up the inside of the stocking so
10:25
just hold that green down chain one
10:30
one with a new color and then start with
10:33
your stacked
10:41
Stitch like so and we're just going to
10:43
continue with a granny cluster in each
10:47
space all the way
10:56
around now you need to work a total of
10:59
14 rounds in granny Stitch so you can
11:02
change color as often as you want I'm
11:04
doing two rows of white one row of green
11:06
and alternating that but you can as I
11:08
said change color as often as you like
11:10
if you're using more than two colors I
11:12
recommend you fasten up after each round
11:14
so you go ahead and work your 14 rounds
11:17
of Granny Stitch and I'll meet you back
11:19
here when you're ready to carry on with
11:20
the
11:21
heel once you've worked your 14 rounds
11:23
in granny Stitch you're going to fasten
11:25
off with the white
11:29
whichever color you're using at this
11:32
point now you want to orient your
11:34
stocking so that you've got the
11:37
same at the
11:39
back so from where the seam is we're
11:41
going to count four granny clusters 1 2
11:43
3 four I'm going to put my hook in the
11:45
first
11:46
Stitch that Granny cluster there and
11:50
just pull my yarn
11:55
through and chain one and I'm going to
11:57
put single crochet
12:00
in there and then I'm going to put
12:02
another single crochet on top to make a
12:04
stacked
12:06
Stitch I'm then going to go and put a
12:08
double
12:10
crochet into the
12:12
next 23 stitches so you will have
12:17
24 double crochet all
12:20
together and this is the first row of
12:22
the
12:25
heel so this is how it should look the
12:27
end of the first row got 24 double
12:31
crochet
12:32
stitches now I'm going to
12:37
turn and I'm going to do a stacked
12:39
double crochet for that first Stitch so
12:42
put single crochet in
12:46
there and stuck another one on top and
12:49
I'm going to double crochet into the
12:50
next nine
12:54
stitches a total of 10 10 double crochet
13:00
next going to double crochet two
13:02
together so if you haven't done this
13:03
before you yarn over hook goes into the
13:05
next Stitch pull up a loop yarn over
13:08
pull through two yarn over hook goes
13:10
into the next Stitch pull up a a loop
13:14
yarn over pull through two yarn over and
13:16
pull through all of those Loops so we've
13:17
worked double crochet two together and
13:19
we're going to do that again in the next
13:22
Stitch
13:29
you can then go ahead and work a double
13:31
crochet into each of the remaining 10
13:34
stitches at the end of the row I'm going
13:36
to
13:37
turn and start the row with a stacked
13:40
double
13:42
crochet so that's two single crochets
13:45
stacked
13:48
together then going to double crochet
13:50
into the next eight stitches so that's
13:53
nine stitches in total so I've got my
13:56
nine single crochet we're then going to
13:58
decrease two stitches over the next four
14:01
stitches let's double crochet two
14:03
together
14:09
twice so there's double crochet two
14:11
together and we're doing that
14:19
twice and then double crochet in the
14:22
remaining nine stitches for this next
14:25
row you're going to double crochet into
14:28
the first eight
14:30
stitches then double crochet two
14:33
together twice double crochet in the
14:35
next eight stitches for the following
14:38
row it'll be double crochet in seven
14:42
stitches double crochet two together
14:44
twice double crochet seven stitches and
14:47
for the row after that it's exactly the
14:49
same but with six stitches double
14:51
crochet six double crochet two together
14:53
twice double crochet six I will meet you
14:56
back when you've finished off the heel
14:59
once you finished your heel should look
15:00
something like this we're then going to
15:03
fold that heel in
15:06
half and then we're just going to turn
15:08
it over and we're going to slip stitch
15:11
into this
15:12
first Stitch here or the last Stitch
15:15
just to
15:17
join Okay so we've joined with the slip
15:20
stitch now going to put a single crochet
15:23
into this space that we've got from the
15:24
heel so we just put a single crochet in
15:27
there and then we're going to stack
15:28
another on top for our stacked double
15:32
crochet and then we going to put two
15:34
more double crochet into that
15:37
space
15:40
one and
15:42
two we're now going to be working along
15:45
this edge of the heel so we're going to
15:47
skip this row here and then put a granny
15:50
cluster into the next row around this
15:52
post so it's three double
15:56
crochet one
16:00
two and
16:03
three and then we're going to skip the
16:05
next one and put three double crochet
16:06
cranny cluster into that next
16:16
row we'll skip this next row and put
16:19
another granny cluster around the post
16:21
of this Stitch here
16:33
we're now going to work into this space
16:36
just here so we'll put a granny cluster
16:39
in
16:47
there and then we can see exactly where
16:50
we need to go now we're going to put a
16:51
granny cluster in each space all the way
16:54
around until we get back to the
16:56
heel so I've worked all the way around
16:58
around you can see we're back at the
17:00
heel now we've got one more space to
17:01
work into just here so I'm going to put
17:03
a granny cluster into that
17:12
space and then we're going to start
17:14
working into the
17:15
heel so we're going to work around the
17:17
post of this first Stitch with a granny
17:19
cluster
17:29
skip this next row and then granny
17:30
cluster in the next
17:39
row skip the next row and we'll put our
17:42
final granny cluster in the following
17:47
row
17:55
oops and here we are back at the start
17:57
so we're just going to join
18:01
with a slip stitch to that first Stitch
18:04
and then we will turn our work and what
18:07
you're going to do now is just repeat
18:08
exactly what you're doing at the
18:11
beginning alternating your rows and
18:13
you're going to work from the
18:16
heel it will be a total of 20 rounds in
18:21
granny Stitch so that's counting from
18:23
this row here so I'll meet you back once
18:25
you finish those 20 rounds so I've added
18:27
my 20 rounds in granny Stitch and we're
18:30
now ready to add the ribbing onto the
18:32
the top of our stocking but before we do
18:34
that we're just going to quickly whip
18:36
stitch together this little hole that
18:38
we've got in the heel here so just using
18:40
some yarn on a daring
18:44
needle just hiding that tail in
18:50
there there we go so I'm just going to
18:53
whip Stitch through
18:54
the the back loops
19:05
just working along each
19:11
Stitch to close up that
19:21
heel you can then just push your tail
19:25
through
19:29
to the
19:35
inside and then just weave that tail end
19:41
in and then you can just snip that
19:44
off so I'm using the green again for the
19:47
ribbing the same color I used for the
19:48
toe and the heel and I'm just going to
19:51
attach just at the back where that seam
19:54
was not that you can really see it
19:56
attach my yarn with a slip stitch
20:01
now we're now going to chain
20:08
41 okay so I've got my 41
20:11
chains we're now going to start the
20:13
ribbing going to skip that first Stitch
20:16
and then put a single crochet into that
20:18
second chain from the
20:21
hook and I'm going to go ahead and put a
20:23
single
20:25
crochet in each chain
20:29
all the way to the
20:32
end a total of 40 single
20:36
crochet now we're going to be attaching
20:39
our ribbon to our stocking as we go
20:42
along
20:43
so we're now going to slip stitch into
20:46
the next two
20:47
stitches so that's
20:50
one and two we're now going to turn now
20:54
usually the correct way to turn your
20:56
work is this way so that you end up with
21:00
your yarn working yarn behind you this
21:03
gives you the neatest edges but in this
21:06
instance when we're
21:07
attaching uh the ribbing to the stocking
21:09
it actually works better if you turn the
21:11
other way this this way you get a neater
21:15
Edge along the outside of your
21:17
stocking so we're going to skip those
21:20
two skip skip stitches we're going to
21:23
skip the two slip stitches so we've got
21:25
one two and then we're going to work
21:27
into the back look only with a single
21:30
crochet into that next
21:34
Stitch and this is how we're going to be
21:36
working from now on always into the back
21:41
Loops so you're going to work a back
21:43
Loop single
21:46
crochet into every Stitch all the way to
21:49
the end of your
21:51
row until you get to your last Stitch
21:54
I'm going to show you a little trick to
21:55
get those edges of your ribbing really
21:57
nice and neat and tidy so in this last
22:00
Stitch only we're going to single
22:02
crochet through both
22:06
Loops like so and then when we turn
22:10
we're not going to chain one as we would
22:12
normally we're going to turn and we're
22:14
going to very slightly elongate that
22:17
Loop and then put a single crochet in
22:20
this very first Stitch through both
22:23
loops and then in each other Stitch
22:27
we're back into working in into the back
22:28
Loops only again so a single crochet in
22:32
the back
22:34
Loop of every
22:40
Stitch so we're back at the end of
22:42
stocking here I've got another Stitch to
22:44
work into now this Stitch at the end can
22:46
sometimes be difficult to see so it
22:49
might be helpful if the first Stitch of
22:51
the next row you put a marker in there
22:53
to make sure you're not skipping that
22:54
Stitch or alternatively keep counting
22:56
your stitches so you're not using any so
22:59
again we're going to slip stitch into
23:00
the next two
23:03
one two and we're turning this way
23:07
skipping these first two stitches and
23:10
then single crochet in the back Loop of
23:12
that first single crochet
23:16
stitch so if you want to go ahead and
23:18
put a stitch marker in here just so that
23:20
you can make sure you're not losing any
23:22
stitches and then you're going to carry
23:23
on again and work a single crochet in
23:27
the back Loop of each Stitch until you
23:28
get to the end and there again it will
23:30
be a single crochet through both Loops
23:32
so you're just really repeating the last
23:34
two rows now until you've worked all the
23:37
way around your stocking so I'm almost
23:40
at my final row here and I'm just going
23:42
to slip stitch into these last
23:46
two
23:51
stitches and then turn my
23:53
work and then I'm going to
23:56
work the last row back back up and then
23:59
we will join the two sides
24:01
together so I'm now ready to join the
24:05
seam the sides of um ribbing together
24:09
we're going to do this by actually
24:10
working in the front Loops this time
24:11
we've been working in the back Loops so
24:12
far but now we're going to work into the
24:14
front Loop so I'm just picking up that
24:16
front Loop of the
24:18
Stitch and then getting the bottom loop
24:21
from the foundation Foundation chain and
24:24
making a slip
24:26
stitch so picking up front
24:29
Loop into the foundation
24:32
chain and slip
24:34
stitch and you're going to just do this
24:37
stitch for
24:39
Stitch all the way
24:41
across once you get to the end you're
24:43
just going to fasten off and weave in
24:45
that end I made some tassels to finish
24:48
off mine also got these cute little
24:51
wooden carved name tags you can attach
24:55
those as well and I've also got these
24:58
leather straps you just attach with a
25:01
rivet what you do is you just push the
25:03
rivet through to the other
25:08
side pop that on and push the back of
25:12
your rivet
25:14
on like
25:16
so I will link where I got these from so
25:20
I'm just
25:21
threading onto a yarn needle through the
25:25
side of the stocking
25:30
and then tying with a
25:34
bow like so and you can attach your
25:38
little wooden name label in exactly the
25:39
same
25:40
way if you'd like to know exactly how I
25:43
made the tassels then watch this video
25:45
next
#Hobbies & Leisure
#Crafts
#Fiber & Textile Arts
#Other