Up next in 10

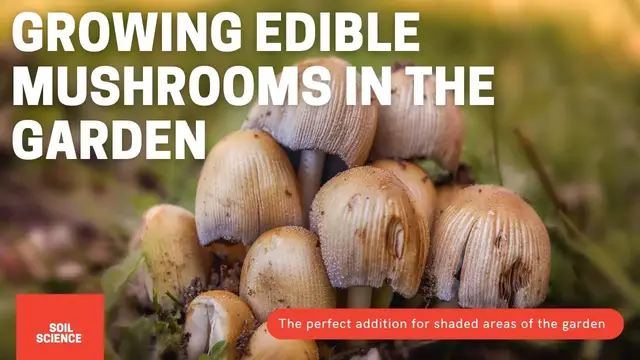
Must Have Shade Garden Addition. Growing Edible Mushroom In Your Garden // Crop Series Ep 08
Apr 28, 2022


Ever wonder how to grow edible mushrooms in the garden? Mushrooms are the perfect addition to any outdoor shady garden. Mushrooms are best grown in shady areas with high humidity. This video looks at how to grow mushrooms in your garden. This backyard mushroom kit is perfect for anyone looking to grow mushrooms in their own. Gardening in Canada dives into backyard garden mushroom growing!
Must Have Shade Garden Addition. Growing Edible Mushroom In Your Garden // Crop Series Ep 08
Grab your mushroom kit here: https://geni.us/E7tij5d
Website/Blog & FREE printables: https://gardeningincanada.net
——————
👩🔬 Grab your at home Garden Soil Testing Workbook! https://etsy.me/3dW5HLg
—————
👩🔬Patreon: https://www.patreon.com/gardeningincanada
—————
Amazon Affiliate:
pH Meter: https://geni.us/ZXQx0S
Fungus Gnat, Thrip control: https://geni.us/SBDgp
Spider Mite Control: https://geni.us/tG5FlN
Show More Show Less View Video Transcript
0:00
Hello plant people how are you guys doing today if you're new around here my name is Ashley and I'm a soil scientist on this channel
0:05
I like to take that science and apply to all things plants and in today's video
0:09
We are officially planting mushrooms. So the company that sent me this is called my fungi
0:16
And we were initially going to work together This entire summer to give you guys kind of like a whole
0:24
Series about mushrooms and mushroom growing in your yard, but it didn't work out
0:28
they didn't have enough stock levels to supply the potential demand that you
0:33
know an entire series or a group of videos would be able to give so without
0:39
with that being said I'm not getting any kickback for this however I do not mind
0:43
helping out a Canadian company especially a small family owned and operated one so be sure to check out this group on Instagram they've got
0:52
really funny memes actually I enjoy their posts their content and then they
0:57
also have the products as well so I'm going to be doing blue oysters in my
1:03
garden and I'm not gonna get into too much of the science of growing fungi the
1:08
benefits of growing mushrooms in your garden but what I will tell you is that
1:12
if you have a shade garden or if you have a full shade area in your yard
1:17
whether that be on the lawn or on bare soil and you are sick of hostas then
1:23
mushrooms is your next best choice so very unique looking little critter to be
1:30
in your garden there's huge benefits to your soil and to your surrounding plants
1:34
and just the whole microbiota of your backyard ecosystem but they're also
1:37
delicious I mean Bobby absolutely loves mushrooms I love mushrooms and there's
1:44
lots of health benefits to mushrooms as well so we are going to plant this in a
1:48
full shade area behind this big bad boy tree behind me one kit will cover ten
1:54
feet area we're gonna do less than 10 feet so I'm expecting a very high
1:59
concentration and mushrooms now with that being said it is incredibly hot
2:04
right now in Western Canada so I'm hoping this doesn't fail fungi like not
2:11
only low light high moisture but also lower temperatures they don't like
2:15
extreme temps and unfortunately 40 degrees Celsius 35 degrees Celsius is counterintuitive to growing mushrooms so we'll see what happens if it turns out
2:27
great if it doesn't this zero fault of my fungi this is the wrong time of your
2:33
to be doing this but I am just I'm so excited the other thing to mention too
2:37
is that if you left this here my theory would be if the fungi is engineered or
2:43
or made in a way to survive a Canadian winter, like the spores are
2:48
you would have this mushroom growing in your backyard year after year, so it actually acts as a perennial
2:54
So something to keep in mind when you're choosing what mushrooms you wanna grow outside in the yard
2:59
you may wanna select a variety that comes back year after year But anyways go give these guys a follow on Instagram Check out their website if you do want to grab some mushrooms they are still available but they did mention that there is limited quantities so if you get there
3:15
and they're sold out don't feel too bad about it they will have some more very
3:21
very soon but without further ado let's get this stuff blended so really fun fact
3:26
about this company is that there's zero waste we're actually using box everything came in plus all the products that came with it so the only real waste
3:34
product is the actual plastic bags it comes in but quite honestly how are you
3:38
gonna get around that I mean we're talking about live living organisms here
3:43
and we can't really just throw it in cardboard it will just soak through and make an absolute mess but so ground prep when it comes to ground prep we want to
3:52
remove any sticks, twigs, mulch, leaves, grass, mulch of any form and it has to be placed either
4:00
directly on the soil preferably or the lawn so keep that in mind. I cleared this out as much as
4:09
humanly possible and let's get started with breaking down the cardboard box and putting it
4:14
in place. I'm sure a lot of you already know the obvious when it comes to the cardboard box. The
4:20
purpose of it is to eliminate weed competition and kind of like a no-dig system. So another thing
4:28
the cardboard is going to do is it's going to be a great interface for moisture sequestration. It's
4:34
going to act kind of as a bit of a battery pack to kind of hold some of that extra moisture in
4:39
which is overall going to help with the fruiting body growth of the mushroom itself. My thongi has
4:46
a really nice system it's all nicely numbered which is pretty awesome so bags one and two are
4:54
identical product product i would i think they're probably cedar shavings maybe pine shavings um
5:01
judging from the smell anyways so one and two are the same and then four and five are also identical
5:07
so we're gonna place this down it asks for approximately two inches uh thickness now again
5:14
I'm doing much smaller surface area than 10 feet, but nonetheless, I'm going to do two inches or close to two inches over the entire space that I am doing
5:27
I know one of the questions I'm going to get right off the hop is, should you not be watering in between each layer
5:33
And while you most definitely can, I quite honestly don't think you're going to benefit hugely from layering or watering each layer
5:44
And so I'm just going to water after I put my spores down in this next step
5:49
Okay, so we are going to break this up and place half of what is called Spawn onto the initial first layer we did with Tatfranc giving a good quality control inspection
6:02
my fungi fat fronk says it good to be quite honest i was really surprised by the texture of this i did not realize that for fungal gardening or mushroom gardening that you used a seed um based method so it looks like a long grain barley or something i not
6:26
entirely sure what's in there um but it's seed and then it is encapsulated kind of in this
6:32
white coating but the most important part about this is obviously an even spread but also getting
6:39
rid of all the clumps so you can see as I'm dropping them some I am dropping some clumps
6:44
as I'm doing this but after I do go through and I do still break up all those little individual
6:50
clumps that ended up falling out of my hand note this action here this rolling hand action
6:57
that seemed to be the most effective in actually breaking up those clumps into smaller pieces
7:02
it was quick it was easy if it was on the olympic stage i mean i definitely think it'd be 10 points
7:08
out of 10 on on the scale for mushroom planting performance in my personal opinion but all joking
7:15
aside you do want to break up these clumps because otherwise you're just going to end up with a mass
7:20
of mushrooms and it's over competition and you're not going to spread out your mycelium
7:24
this is now step two i'm applying a another layer of uh that same kind of wood chippy type really
7:34
thin pine shaving something similar actually to what you would see in like a bunny rabbit cage
7:41
type thing if that makes sense so uh layer this out again they're asking for two inches
7:46
i'm doing less than you know 10 feet area so i it may be a little bit thicker than what they
7:53
advised but pretty darn close this is when we begin the official watering process so i did this
8:01
for probably 15 minutes it absolutely soaked this entire area you don't want running water so you
8:09
don't want runoff and erosion that's going to displace the pores and the spores the pores the
8:16
spores and then the actual top covering but you definitely want enough moisture that it is
8:22
wet. So now we have it completely soaked and we're going to do the second half of this
8:28
beautiful loaf looking thing and get that spread out. Also I should also note it doesn't smell
8:35
I thought it would be really stinky but it's not stinky. It just smells really fresh. So
8:40
no clumps, same idea, evenly spread throughout the entire space. Hello again. Okay so the three
8:49
was upside down but I was super positive about it I definitely owned it in that footage there so
8:56
anyways this is a different type of wood shaving but is a shaving nonetheless so it's even thinner
9:03
than the first two layers we put down and smells absolutely wonderful so now we are on step four
9:11
and five these are the identical bags similar to what steps one and two are these are obviously closer to your true wood chips very similar to what you would use for a mulch is a decorative kind of painted mulch but this is completely natural and naturally
9:28
colored so you just scatter this over again evenly as possible if you wanted to you could add a little
9:35
bit extra if you had some but quite honestly the bags were very perfect perfectly portioned for
9:41
the space and the volume of spawn that they gave you so it worked out very
9:46
wonderfully okay so I am officially completed I am just letting it soak a
9:50
little bit more with water I may even run the sprinklers here for a little bit
9:53
probably 30 to 45 minutes to water mostly my garden but also to really make
9:59
sure that this is thoroughly soaked I really need that humidity nice and high
10:03
now typically if you're doing this in the spring or the fall you wouldn't need
10:07
the humidity that high because you would just lay this lovely little cover that they send with the
10:14
package on the top of the soil. However, it is currently 40 degrees Celsius in the high midday
10:22
and in the shade even it's getting over 30. So I don't want to risk putting this on top and just
10:30
totally baking my fungal spores. Now, I know they're very tough little critters in soil microbes
10:37
those mycelium, but I don't want to risk it. So I'm going to pass on the very, very lovely
10:46
plastic that they send with you. And if it is spring, fall, for sure use this, but we are
10:51
midsummer, middle of July. It is hot, hot, hot, hot, hot out there, folks. So I want to try to
10:57
avoid it as much as possible now um if it gets cooler i will definitely put this on but i am
11:02
going to try my very very best to keep the moisture up in here completely saturated every day all day
11:09
day and night so that may involve two three times of watering i'm not sure keep in mind we aren't you
11:16
know it's not super um hot where this is because it's in full shade so i'm not too too worried
11:23
about it I may try this and put a thermometer underneath and see what the
11:27
temperature reaches but I'm not holding my breath I'm expecting a long tedious
11:32
haul mostly because this is the time of year I'm starting it but he started in spring you wouldn't have this issue I'm just not that organized so what can I
11:39
say anyways I want to thank you guys so much for watching I will be sure to post
11:43
photos videos of this either on the next plant tour or on my actual Instagram I
11:51
I will post photos for sure there or on the Facebook group. Like I said, be sure to go follow my fungi and order your kit while they last
12:00
Not supposed to last very long, not until next year. And I will talk to you guys next time
12:05
Bye.
#Hobbies & Leisure
#Other