0:00
hello and welcome to a filter grade
0:01
tutorial today we're going to learn how
0:03
to import and apply LS to your footage
0:04
in Vin resolve for those of you that
0:07
have no idea what a l is a lot is a
0:08
preset color profile that when applied
0:10
to your video footage can instantly
0:11
change the color white balance Shadows
0:13
highlights and the overall look to your
0:14
Clips it essentially does a grading for
0:16
you speeding up your workflow they're
0:18
especially helpful if you're a newe
0:19
color grading or want your footage to
0:21
have a unique look lets can also
0:22
stimulate your creativity and help you
0:24
create mood and tone while giving your
0:26
footage a look that separates you from
0:28
rest okay today we're going to be
0:30
looking at the cine plus Kino lot which
0:31
you can download right here at
0:33
filtergrade dcom this lot is great if
0:35
you looking for a cinematic look with a
0:37
lot of options for white balance and
0:39
exposure adjustments so let's get into
0:42
it so once you've downloaded your le
0:43
pack you're going to want to unzip it
0:45
and it will turn into a regular file
0:47
here you can view in the documents
0:49
there's a little write up on the Luts as
0:50
well as instructions on how to apply and
0:53
use them and here we've got our log and
0:54
R 709 folders we're going to need both
0:57
of those for when we drop them into
0:59
resolve so let's get into resolve right
1:00
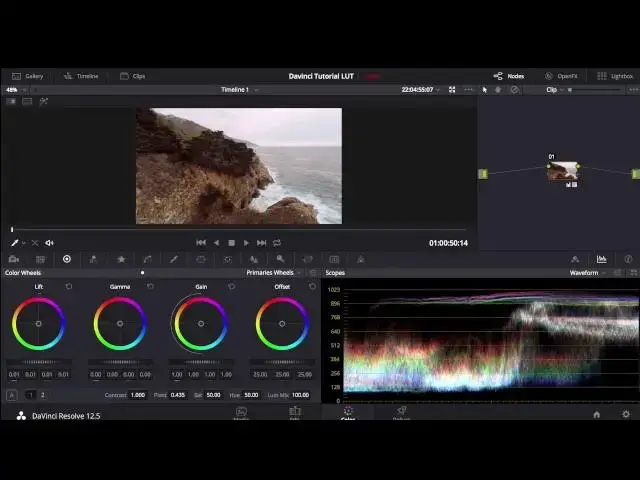
now once you've got your timeline all
1:02
set up you're going to want to go to the
1:03
color tab now that you're at the color
1:05
tab you're going to want to go down to
1:06
the bottom right hand corner to this
1:07
gear project settings open that up find
1:11
color management scroll down to look up
1:14
tables and hit open L folder this opens
1:18
up all your LS that you have resolve
1:20
already comes with preset LS that you
1:23
use so now all we have to do is go into
1:26
our cine plus Kino L pack highlight the
1:29
log and R7 109 files simply drag and
1:36
resolve just above the button you just
1:38
hit hit update lists what this does is
1:41
it checks all the ls that have been
1:43
added or taken away and it will update
1:45
your list of which ones you can use once
1:47
the save is ready to hit hit it go to
1:49
the top of the screen and click the
1:50
button that says nodes this is a node
1:52
and this is where you're going to be
1:52
applying your new lets to all you have
1:55
to do is right click go down to
1:58
3dl and as you can see our kolet have
2:00
been added so log and r79 or Rec 79 are
2:04
used for different types of footage if
2:06
you shoot your footage in a raw or flat
2:09
color profile you're going to want to
2:11
use log if you're shooting on a regular
2:13
DSLR with no specific color profile that
2:16
you haven't changed any settings you're
2:18
going to want to use the r79 or Rec 709
2:21
so this footage here is shot with the
2:22
Canon 5D MK I in a regular color profile
2:25
meaning that I'm going to use my re 709
2:30
go to exposure variations now here you
2:32
can see so many different options from
2:34
the L pack that we can choose for this
2:37
night scene I want to make it a little
2:38
darker and a little colder so all you
2:40
have to do is hit dark cool 2 and just
2:43
like that your L has been applied scroll
2:47
here as you can see the highlights are a
2:49
lot colder a little blue hue is added to
2:52
give that cinematic look all right so
2:54
let's go back to clips and we'll check
2:55
on another one so this footage here is
2:58
shot with a GoPro in a flat color
3:00
profile on a drone so in this instance
3:02
we're going to use the log but so go
3:06
down here to the log there essentially
3:08
all the same LS as the Rex 79 file just
3:12
for different types of footage so let's
3:15
brighten it up a bit make it a little
3:16
bit warmer just like that warmer profile
3:19
a little dark more contrasty cinematic
3:21
look and don't worry you can always
3:23
adjust it after you've applied your L as
3:25
well as get rid of the L completely just
3:27
by right clicking and hitting reset node
3:29
there you back to square one so let's do
3:31
one more here this footage here is shot
3:32
with a 5D Mark I but in a flat color
3:35
profile so here we're going to use a log
3:37
again go down to The Kino L let's make
3:39
it a little bit darker and we'll make it
3:42
warmer as well I recommend experimenting
3:44
with all your Luts that you get just so
3:46
you know which ones are best in which
3:48
situations and which scenarios so this
3:50
looks a lot different we got nice Blues
3:51
in the ocean here kind of a desaturated
3:54
dry look to all the grass and brush
3:56
around the area not sure how I feel
3:58
about the brightness and the overall
4:00
blue hue here so I'm going to go in I'm
4:02
going to adjust it a bit change the lift
4:05
let's just bring the whole thing down
4:07
make it a little more contrasty and
4:09
there you have it you've got a nice
4:10
dramatic scene very cinematic thanks to
4:12
using Luts I've cut down a lot of my
4:14
time and have got a specific look that I
4:16
probably wouldn't be able to get without
4:18
it and there you have it that's how you
4:19
import and apply LS and V you resolve
4:22
don't forget to check out filter
4:23
grade.com for all the best Photoshop
4:25
actions Lightroom presets and video LS