Up next in 10

Discover the essentials of web development as you embark on a journey to learn "How to Create a Search Bar in JavaScript" with this insightful tutorial. In this video, you'll be guided through the step-by-step process of building a dynamic and responsive search bar using JavaScript. From setting up the HTML structure to implementing the necessary JavaScript code, this tutorial caters to both beginners and intermediate developers. Explore the fundamentals of handling user input, filtering data, and dynamically updating the content of your web page. Whether you're looking to enhance user interaction on your website or simply keen on honing your JavaScript skills, this guide provides a clear and concise walkthrough. Elevate your web development projects by incorporating an efficient and user-friendly search bar, bringing a seamless search experience to your users. Dive into the world of interactive web design with this practical and hands-on tutorial.
Show More Show Less View Video Transcript
0:00
Every developer needs to know how to create a JavaScript search bar because they're used in every single site
0:05
And in this video I'm going to show you how to create one as well as some pitfalls you need to watch out for
0:09
Welcome back to WebDev Simplified. My name is Kyle and my job is to simplify the web for you
0:17
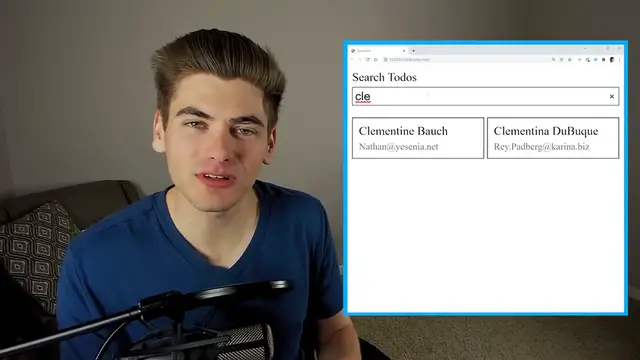
In this video I'm going to show you how to create this search bar over here that allows you to search through a list of users
0:22
This video is going to be broken down into three parts. The first is going to be the HTML, then the CSS, and then finally JavaScript for the searching
0:29
I'm going to have timestamps down below in the description so you can jump around to the exact section you care about
0:34
Now to get started with the HTML, we're just going to create a simple index HTML, get the boilerplate code inside of here
0:39
and all we really need to have is a search bar and then a section for all of our user cards at the bottom
0:44
So we're going to have a section called a search wrapper, which is going to contain our search bar
0:48
So we'll just say search wrapper like that. And inside of here we're going to have a label, which is going to be for our search element
0:55
We're going to give that a label of search. And we're just going to say search users, even though this says search to-dos over here, that was just from before
1:02
Then what we're going to do is we're going to have an input. This has a type of search because that's a specific type in HTML you can use
1:09
We'll give it an ID of search so it links up to this for attribute right here
1:13
So that's our entire search section. And if we save and open this with live server, we can actually see this on the right hand side of our screen
1:19
As you can see, we now have that search users and this text box right here
1:22
Now, the next thing that we need to do is to actually work on the section for our cards
1:26
So let me just open up what we had. We're going to create a div called user cards
1:31
And this is where all of our user cards are going to go. And inside of here is where we're going to put each individual card
1:36
So a card is just going to have a class of card. Let me just put that in there
1:39
And then inside of here we're going to have a header and we're going to have a body
1:43
So we're going to say header and body. And here we're going to have like email at gmail.com
1:49
And then for our header, we're just going to have something along the lines of my name
1:53
And now if we save and come over here, you can see we have my name and then the email. All we need to do is actually style this
1:58
So let's work on the CSS next. First, we can just link a style sheet
2:02
So we'll say link. And we want to link a style sheet. We're going to call it styles.css
2:07
And then we can create that over here. Now, if we go back over here, the very first thing that I want to work on is going to be our search wrapper
2:13
So we can just say search wrapper. And we're going to make this a display of flex
2:18
And we're also going to give it a flex direction of column. That's just going to make them stacked on top of each other
2:22
If we come over here, you can see it looks pretty much the same as it did before. But we can also add a gap of 0.25rem
2:28
And that's just going to space out our label from our actual input box
2:32
Next, we can take our input and we can increase the font size to 1rem
2:35
That way the font size in our input is the same as the rest of our page. I think that looks a lot better
2:40
And then we can work on our user cards. And for the user cards, we're going to be using CSS Grid
2:45
So if you're unfamiliar with that, I'm going to link a video in the cards and description for you to check that out
2:49
But essentially, we just set the display here to grid. And then we need to define our columns
2:53
So our columns here is going to be a repeat. And we want it to autofill. And the reason we're doing this is so that as our screen size changes
2:59
you can see the amount of cards on each column actually changes. So this autofill allows us to essentially set a minimum and a maximum size
3:06
by doing min max. So by our minimum size, we're saying 150 pixels
3:10
Each card must be 150 pixels wide. And then we're going to be 1fr as the maximum
3:15
So the minimum size is 150. And the max is just stretching to fill as much space as is available
3:20
So you can see here, we don't have enough space for two cards. So we only show one
3:24
But as we get bigger, now we have enough space to show 250 pixel cards and so on
3:28
as we get bigger and bigger screens. So that's going to be for our user cards
3:32
And in order to see that working, let's just copy this single card that we have here a couple times
3:38
And now if we come over here, you can see that our cards are showing up. And as I expand my screen, you'll see they're now side by side
3:42
And we have more and more cards next to each other. So this grid is working like we want it to
3:46
Now the next step is just to finish off our grid. We're going to add a gap between our cards of 0.25rem
3:51
And we're going to add a little bit of margin on the top of just 1rem just to space it out from that search bar
3:57
Now the next step is to style our actual cards. And these are going to be super basic styling
4:01
If you want to go into a more advanced card styling video, I'll link that in the cards and description for you
4:05
because I have a full video covering CSS cards. So we're going to do a one pixel solid black border
4:10
We're going to set a background color to white just so we can have that white background
4:14
And then we're going to put a little bit of padding of 0.5rem on all sides. There we go. Super basic card
4:20
Then next, we're just going to style out our header. So we're going to get the header inside of the card
4:24
which we're going to give a little bit of spacing on the bottom, 0.25rem
4:28
And then finally, we're going to do the body. And all I want to do in the body is just take our font size
4:33
And I want to make it a little bit smaller. We'll say 0.8rem. There we go
4:38
Also, I'm going to change the color of this to be a little bit lighter. So we'll say like 777. So it's a little bit more of a light color
4:43
And then finally, we're going to add an additional class here called hide, which we're going to set the display to none
4:49
This hide class is what we're going to use to hide things. So as we search for something, you can see as our list gets smaller
4:54
we start to hide different cards. As you can see, all those other cards are hidden. And that hide class is allowing us to do that
4:59
While when there's no searching, we have all the cards visible. Now that right there covers all of the HTML and CSS
5:04
We can actually close out of this old version because as you can see, this looks exactly the same as the actual version we want
5:09
The next step is going to be our JavaScript. So let's create a simple script.js file
5:13
And in their index.html, we're just going to make sure that we link that script.js
5:18
and we're going to make sure we defer this at the top of our page. If you're not sure what this attribute does
5:21
I have a full video on it I'll link in the cards and description for you. But one important thing that I want to do
5:26
is I want to make it so that our user cards here are pulled in via an API
5:30
So if we come over to this JSON placeholder website, which I'll link down in the description below
5:34
this is essentially a API that you can use that has fake data. And if we scroll all the way down
5:38
you can see there's this user data and we can click on this. And this is essentially just some JSON data that we can use
5:43
So what we can do is we can copy this URL. And then in our script.js, we can use this URL to make a request to this actual web page
5:50
And to do that, we're going to be using the fetch API. So we can just say fetch
5:54
We can paste in that URL that we have right here. We want to make a fetch request to this
5:58
And this fetch request is a promise. So we're going to say .then. It's going to give us a response
6:03
And we want to convert that response to JSON. And then we want to chain that as well to get our data
6:08
Now, if you're unfamiliar with how the fetch API actually works, I have a full video on it
6:12
I'll link in the cards and description for you. It's a pretty straightforward concept, but it allows us to get this data right here
6:17
inside of our JavaScript in this data variable. So now the next thing I want to do with this data
6:21
is to display it on the page. And to do that, I'm going to be using a HTML template
6:26
So if we go into our index.html, right now we have a bunch of cards in here. What I want to do is I want to take this card
6:30
and convert it into a template. So I can create a template right here and just paste my card inside of here
6:35
And I'm going to leave all this information blank because this is all going to be coming from our JavaScript
6:39
And then by default, our user card section right here is going to be empty. And our JavaScript is going to populate it for us
6:45
Now, if you're unfamiliar with templates, I have a full blog article covering them, but essentially it allows you to create HTML
6:49
that doesn't show up on the page because as you can see, there's no HTML like this on the page anywhere
6:54
but we can use it inside of our JavaScript. So what I want to do is I just want to say here
6:58
data user card, so we can select this. I'm sorry, user template
7:02
There we go. And then in our JavaScript, we can get that. So we can just say const user card template
7:08
is equal to document.querySelector. And I want to query select for that data user template
7:16
that we have. Make sure I spell that properly and make sure that const is also spelled properly
7:21
Now with this card, what we can do is we can just say, hey, we want to actually get the card inside of it
7:25
So we can say card is equal to that template. We want to get the content of the template
7:29
This is very important. We use the content property. And then we want to clone a node of that and pass in true
7:36
So what this is doing is saying get the content inside our template, which is all of this information here
7:40
And by saying clone node with true, we're saying clone this content as well as all the content inside of it
7:45
So it gets everything inside of this card. This is going to return to us something called a document fragment
7:50
I can kind of show you what I'm talking about by just saying console.log card like that
7:55
And then if we just inspect our page here and I bring this over and we open up our console
7:59
you can see we get this document fragment being returned. Now in order to actually use the content in this document fragment
8:04
we just need to get the very first child. So what we can do here is we can just say .children of 0
8:11
This is going to get us the first child, which is that card. And now when I inspect and I look at my console
8:15
you can see we get the card being returned here. And the card has all the content inside of it
8:19
So we can actually add all the information we want to this card. So we want to do this inside of a loop
8:24
So let's just say data.forEach. And this is going to be for each user
8:28
There we go. And now if I just console.log our user here instead of the card and I inspect
8:33
you can see we get a bunch of user information being printed out. You can see we have like an address, company, email, name, and so on
8:38
All we care about is this email and this name property. That's all we're going to be using in this example
8:43
So what I want to do is I want to get the header, set it to something, and I want to get the body from our card
8:49
Now the easiest way for us to do that is go back into our index.html and we're just going to add some attributes here
8:54
We're going to say data.header and we're going to say data.body. And then that way in our script, we can just say, hey, card.querySelector
9:03
And I want to get the data.header. And I want to do the exact same thing for my body like this
9:09
So now I'm getting both the body and the header section and I can add the content into those different sections
9:14
So I can say, for example, our header.textContent is going to be equal to our user.name
9:20
And I can do the exact same thing for our body, but this one is going to be the email just like that
9:26
So now I've actually populated that HTML. All I need to do is add it to this user card section
9:31
I'm just going to use a data attribute for that called user.cards.container
9:35
And then in our script.js, what I can do is just copy this. We'll say user.card.container
9:41
And this is data.user.cards.container, I believe is what I called it. Let me just make sure
9:47
Yep, user.cards.container. So now I can take that container. I can append my card inside of it just like that
9:54
So now you can see all of our children are showing up right here, which is exactly what we want
9:58
So now we have all of our cards. The next step is going to be actually dealing with our input here
10:02
When we type in something, we want to filter our list. So let's get our input real quick
10:06
We can just come up here and we can say data.search. And then in our script, we can just say search.input
10:13
is equal to data.search. And then finally, I can just come in here and I can add an event listener
10:20
So for our search input, I want to add an event listener on input. This is going to run anytime that we change anything inside of here
10:26
So adding or deleting characters. Then I just want to run a function
10:30
And this function is going to take in an e value. And that's because we want to get the value from our input
10:34
which is just e.target.value. So this is going to be whatever we type in
10:39
And we can see that by just saying console.log value here. I just inspect our page, open up the console real quick
10:46
and I start typing. You can see everything I type is being output right here. So every time we make a change, it's showing up inside our console
10:51
which means this function here is running. Now, what I want to do in this function is I want to take all of our users
10:56
And what I want to do is I want to loop through them and hide all the ones that don't match the input we typed in
11:01
So to do that, we need to easily be able to get all of our user information. And the easiest way to do that is going to be to actually have a user object
11:07
So we're going to say const actually let users equal a new array
11:12
We're just going to have an empty array to start with. And then inside of here, we're going to set our users equal
11:16
to whatever we return from our data for each. And to return something, we're going to change this to a map
11:21
Now, if you're unfamiliar with this map syntax, I have an article and a video I'm going to link for you in the cards and description
11:26
But essentially, we can come down here and we can actually return an object. And this object is going to contain data about our user
11:32
So we want to get our name, which is just our user.name, our email, which is user.email
11:37
And we also want to have the element that is associated with this user, which in our case is our card
11:42
But now, if I come up here and I console.log users, and make sure this says users right here, and I save, and I inspect our page
11:49
and I just come over to our console and I just type something in, you can see we get an array of 10 things
11:53
They have a name property, an email property here, and an element property
11:57
And this element is associated with the card for that thing. So the second one, you can see on the right-hand side, is highlighting the second card
12:02
First one is highlighting the first card, and so on. So now I have the email, I have the name of the user, and I have the card for that user
12:08
So I can check, hey, does the thing we type in match the name of the email? Otherwise, just hide this card
12:13
So let's do that right now. We can create a simple variable called isVisible
12:18
And we want to do this inside of a loop for all of our users. So user.forEachUser
12:24
What I want to do is I want to see, hey, is this user supposed to be visible? And this is just saying, hey, does my name match the input
12:32
Does it have the input inside of it? So we can say user.name includes value
12:36
Or we want to do the same thing for their email. So we can say user.email.includesValue
12:43
And what this includes function does is says, hey, does this string for this name include this single letter anywhere inside of it
12:48
If so, return true. So if the name or the email includes that, our isVisible is set to true
12:54
Then we can take our user element. We can take the class list. And we can call this nice function that is called toggle on this
13:01
And this toggle function allows us to pass a name of a class, which in our case is hide, and then a true or false variable that tells it if it's supposed to be on
13:08
or off. And we can just say isNotVisible. So this little line of code here essentially says, if this user is visible
13:14
we're going to negate that and pass in false. Which means that we do not want to hide the user, remove the hide class
13:19
Otherwise, if they're not visible, this is going to get negated to true, which means add the hide class in
13:24
So with this simple line of code, if I start typing in something, you're going to see everything disappears because nothing has SDF
13:29
If I type in just F, for example, only the users that have F in their name are
13:33
going to show up. But you'll notice something interesting. You can see here we have this Leanne right here
13:37
And if I type in L, and I type in like E-A-N, you notice Leanne does not show up
13:43
The reason for that is it's case sensitive. If I use capital L, now she shows up
13:47
Generally, you don't want to have this case sensitivity. So to get around this, what you can do is you can convert everything to lowercase
13:54
So here we're just going to say to lowercase. That's going to convert our value to a lowercase value
13:59
We're going to do the same thing with our name. We're going to do the same thing with our email
14:03
So now we're converting all the values to lowercase before we do any checks. And that way, it doesn't matter if it's got a capital letter or a lowercase
14:09
letter, it's always going to work. So if I type in L-E-A-N, it works. If I type in all upper caps, it's going to work
14:14
It doesn't matter what case you use. And this is really important and something most people forget about
14:18
And that's all it takes to create this search bar. If you want some more beginner-focused JavaScript tutorials, they're going to
14:23
be linked over here. And with that said, thank you very much for watching and have a good day
#Programming
#Web Design & Development
#Computer Education