Up next in 10

HOW TO MAKE A FULLY LINED DRAWSTRING BAG WITH BOXED BOTTOM - Easy to Follow Tutorial
Jan 10, 2025

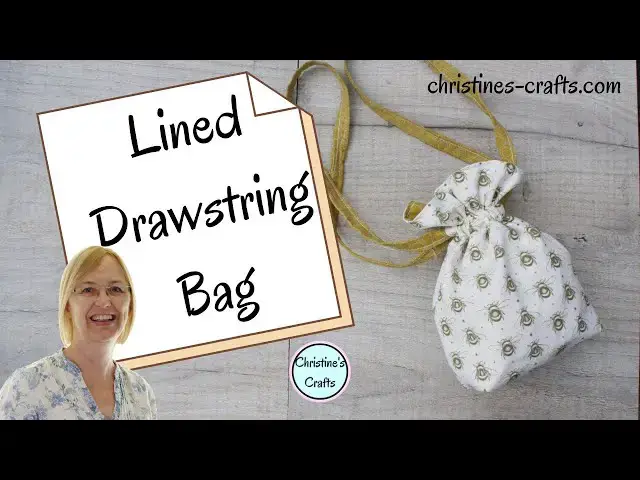
In this video you will learn how to make your own fully lined drawstring bag with or without a boxed bottom. It is a super easy to follow video that you can work along with or watch to see what to do. You have the choice of box corners or a simpler design.
Scale it up or down depending what you want it for. How about one for your dressing table for cotton wool balls, or a super stylish gift bag or for holding sports equipment or shoes? You are only limited by your own imagination.
For a small bag these are a great fat quarter project and that is what I used in this video. Craft cottons make super small drawstring bags. What you use for a drawstring is up to you but rope, ribbon and matching fabric strips all work well.
If you enjoy crafting my blog is full of great ideas and tutorials. Plus if you subscribe you gain access to my free resource library, which includes a home crafts e-book, planners and much more, and get to hear about my latest projects first. Take a look at https://christines-crafts.com/
Enjoy watching and sewing your own drawstring bags. Please leave me a 'thumbs up' if you enjoyed this video and subscribe so that you get to see all my videos as they are posted.
You can also find me across social media. To see all my information and ideas find me at https://linktr.ee/Christines_Crafts.
If you are thinking of opening an Etsy store then use this link and get off to a great start with 40 free listings https://etsy.me/32xoPdg
Show More Show Less View Video Transcript
0:00
hi in this video i'm going to show you
0:02
how to make your own drawstring bag
0:04
a fully lined one that pulls nice and
0:06
tight you can make it with long handles
0:08
to carry it around you can make a great
0:09
big one you can make a tiny one
0:11
it's entirely up to you so i'm christine
0:14
of christinescrafts.com
0:16
and this channel is dedicating to
0:18
crafting on a budget
0:20
so let's get started you're going to
0:22
need your fabric for your bag and your
0:24
fabric for your lining
0:26
and out of your main fabric you're going
0:28
to cut two pieces they're going to be
0:30
seven inches wide
0:31
by nine inches tall if you want to make
0:33
one identical to mine
0:35
obviously you can change those
0:36
measurements to whatever you like
0:38
and then you're going to cut out two
0:40
pieces of lining exactly the same size
0:43
so whatever size you go for
0:44
you want two pieces of main fabric and
0:46
two pieces of lining
0:48
you're also going to need something for
0:50
your drawstring
0:51
so you could use rope string
0:54
ribbon perhaps the fabric that you've
0:56
already got
0:57
and that's what i'm going to do i'm
0:58
going to make mine out of the lining
1:00
fabric so it all coordinates
1:03
so the first thing to do is to take your
1:05
main fabric pieces
1:07
and then you're going to place them the
1:08
same way and you're going to place them
1:11
right sides facing and you're going to
1:14
pin
1:15
or clip around three sides we're just
1:18
going to leave the top open
1:20
so you line them up and work your way
1:22
all the way around
1:24
and just leave the top open it doesn't
1:26
matter if you prefer to clip them or pin
1:28
them
1:29
and then that's ready to sew along those
1:31
three sides
1:33
then you need to take your two lining
1:35
pieces and place them one on top of the
1:38
other with their right sides facing
1:40
and we're going to do something similar
1:43
so you want to pin
1:44
or clip right down one of the long sides
1:49
and then when it comes on to the bottom
1:51
you want to make sure you're going to
1:53
leave a
1:54
large gap in the bottom because we're
1:55
going to use it later to turn our back
1:57
the right way out
1:59
oh we've been joined by the cat emily
2:02
we'll just ignore her so i'm using some
2:05
large clips
2:06
so that i can mark that hole in the
2:08
bottom to make sure that i don't
2:10
accidentally sew it
2:12
so i'm going to sew down both sides i'm
2:15
going to turn the corner and sew a
2:16
little bit of the bottom
2:18
but leave a fair sized hole to turn
2:20
everything through
2:21
later so you're going to sew
2:24
and leave that gap at the bottom
2:28
so you're going to end up with what look
2:30
like two bags
2:33
so take your main fabric over to the
2:35
machine
2:37
start at one top edge do a little bit of
2:40
reverse
2:41
and remember we need to do that on all
2:43
our seams to keep them nice so that they
2:46
don't come unraveled
2:48
work your way down one side
2:51
make sure you stay the same distance
2:53
from the edge of your fabric all the way
2:55
down
2:56
all the way around and repeat the same
2:58
distance on the
2:59
lining so that everything sits nicely
3:02
when your bag is complete
3:04
when you get to the bottom make sure
3:06
your needle is in
3:08
lift your foot and turn through 90
3:13
degrees
3:15
put the foot down and off you go and
3:17
then just work your way along to the
3:19
other corner
3:20
turn in the same way and work your way
3:22
up to the top and then just finish off
3:24
with a little bit of reverse
3:28
and that's the back piece sewn you're
3:31
then going to take
3:32
your lining pieces that you clipped or
3:34
pinned together
3:35
and this time we're going to make sure
3:37
we look where we've marked
3:39
and we start sewing there and now we're
3:42
going to sew along to the corner
3:45
and up the side again reversing at the
3:47
beginning and the end
3:50
it doesn't matter if you start at the
3:51
top and work your way down to that hole
3:53
or start at the hole and work your way
3:54
up to the top of the bag so
3:56
long as you do remember to leave that
3:58
hole
3:59
otherwise you're going to get a bit
4:01
further on and you're not going to be
4:03
able to turn your back the right way out
4:11
once you've got the lining done
4:14
you've got both pieces you're then going
4:18
to have a decision to make
4:20
if you just want to keep your bag as it
4:22
is and you're not going to make any boxy
4:24
corners at the bottom so it stands up
4:27
snip your corners and then move on to
4:29
sewing your lining to your back
4:33
if you want to make boxy corners so it
4:35
stands up like i've done
4:37
you don't need to snip these corners and
4:39
you'll see why in a moment
4:41
because what we're going to do is make
4:44
a box corner and we're going to do it on
4:46
both the lining
4:48
and the main piece
4:52
so make sure to avoid bulk that you
4:54
press your seams
4:56
open and then you're going to open the
4:58
bag at the bottom
5:00
so that you can line the seam along the
5:02
bottom
5:04
with the seam up the side and press them
5:06
together
5:07
and then you're going to pin across
5:11
and you're going to sew across there to
5:13
form the box at the bottom of your bag
5:16
so you'll sew along now you need to
5:19
repeat that for
5:20
all four bottom corners and it's
5:22
important you get them the same size
5:24
so i suggest once you've pinned one and
5:26
you think it's the sort of width you
5:28
would like
5:30
measure how far down from the corner
5:33
point
5:34
you've done your line
5:37
and then measure it for the other three
5:40
it's the only way to make sure your
5:42
lining will sit nicely inside your bag
5:46
pin it clip it and repeat for
5:50
the lining you want all four of them
5:54
done
5:54
and ready before you start sewing
6:01
take each one and turn to the machine
6:04
and again you're just going to do a
6:05
little reverse at the beginning a little
6:07
reverse at the end
6:08
and just sew along where you've pinned
6:10
it if you clipped it and marked it with
6:12
for example an
6:13
erasable pen that's fine but just go
6:15
along your line
6:18
and repeat for all four
6:26
and you'll be able to see soon why you
6:28
wouldn't bother clipping the corners
6:30
because once we've got all of these
6:32
complete
6:33
we're going to trim up the excess
6:37
you don't need to worry about cutting
6:39
off the
6:41
the corner and therefore ending up with
6:43
your threads undone
6:44
because you've just sewn over them with
6:47
the seam that you've just made
6:50
so once you've got all four done that
6:52
makes a lot of bulk in those corners
6:55
so cut it down to about the same seam
6:57
allowance as you left on your side seams
6:59
and your bottom seam
7:02
if you've pressed all your seams open it
7:04
just helps reduce the bulk in your bag
7:06
if you haven't that's
7:07
up to you you don't have to but it can
7:10
just make it sit a bit better
7:13
so now we've got a bag and we've got a
7:15
lining
7:17
we need to attach the two together you
7:19
can see one of them the bag is complete
7:21
and the lining still has a hole in the
7:24
bottom
7:25
so because of that you're going to take
7:27
the main back piece and turn it the
7:29
right way out
7:31
then you're going to place it inside the
7:34
lining
7:34
and as you turn it out you'll see how
7:36
you've got those nice boxy corners
7:39
place it inside the lining
7:43
and take a little bit of time to push it
7:44
down all the way and make sure it's
7:46
sitting how you want it to and that it
7:48
has worked how you were expecting
7:50
and then you're going to line the tops
7:52
up so make sure you line up the side
7:55
seams
7:57
and pinroll clip them in place
8:01
and then you're going to do the same all
8:03
the way around the top
8:07
i didn't find that i needed too many
8:09
clips it depends on the size of your bag
8:13
but just make sure it's lined up and
8:15
everything's sitting smoothly
8:19
because you're going to sew around the
8:20
top of this and sew your lining
8:23
into your bag we do it this way to get a
8:26
really nice finish
8:29
so once you've clipped it pinned it and
8:31
you're happy with it
8:32
you need to take it over to the machine
8:35
and sew the two together
8:38
you might find it's useful if you're
8:40
doing a small bag to take any extra bits
8:42
off your machine so that you can wrap it
8:44
round
8:46
the base of the machine which is what
8:47
i've done here
8:49
and then you just need to line up with
8:52
the edge
8:53
with your zipper foot and work your way
8:56
all the way around
8:59
keep going until you get back to where
9:00
you started
9:03
and just sew over the stitches you
9:05
started with and do a little reverse so
9:06
nothing comes undone
9:09
and now you're ready to turn it out so
9:12
through that hole you're left in the
9:13
lining you're going to pull
9:14
the whole bag and the lining
9:18
and you'll see we've now got that hole
9:19
we need to sew up
9:21
you can slip stitch it closed so it's
9:23
invisible
9:24
or you can just run a little bit of
9:26
machine stitching along it which is what
9:28
i did
9:29
and now it's time to put your lining
9:31
inside your bag so just push it down
9:33
inside the bag
9:36
make sure you're happy with it get it
9:38
all lined up
9:40
and then you need to get a nice edge on
9:42
the top of your bag
9:44
so you need to just work it with your
9:46
fingers and get it so that the seam that
9:48
you've just sewn is right
9:50
at the top there's no lining showing on
9:53
the outside and none of the
9:54
outside shown on the lining and just
9:57
keep working your way around
9:59
doing that and either pinning it or
10:01
clipping it
10:02
and then you're going to do a little row
10:04
of top stitching
10:05
all the way around the top of the bag
10:08
it's just going to hold it all nicely in
10:09
place and give you a nice finished
10:12
edge so just line it up as close as you
10:16
like i tend to do it quite close about a
10:18
quarter of an inch some people go really
10:20
close but i find that hard to be
10:21
accurate
10:23
again just work your way around and a
10:25
little bit of reverse at the end
10:27
so you've now got a bag and we're just
10:30
going to have to worry about a
10:31
drawstring
10:33
if you're using rope or something
10:34
similar that's fine
10:36
if you want to make your own drawstring
10:38
using fabric that matches
10:41
you'll see here i've got short pieces
10:43
because i used a fat quarter so i'm just
10:45
going to sew them together
10:46
you just want some nice long lengths of
10:48
fabric
10:50
and what you're going to do with each
10:51
one is fold it in half
10:54
lengthways and press it
10:58
and work your way all the way along the
11:00
length until you've got it all folded in
11:02
half
11:04
then open it back up and from one side
11:08
you're going to
11:08
fold the edge to the center that you've
11:12
clearly got marked where you pressed it
11:14
and do that all the way along that side
11:19
once you get to the end you're going to
11:22
do exactly the same thing with the other
11:25
side
11:26
you're basically splitting it into
11:28
quarters
11:30
and once you've done that you need to
11:33
fold it
11:35
in from either side and then fold it
11:37
along the middle
11:38
and either pin or clip it in place
11:43
and repeat that all the way along the
11:45
length
11:47
and once you're happy it's held and
11:48
you're going to be able to sew it
11:49
confidently you're going to run
11:51
a row of stitching all the way along
11:53
that edge that you've just pinned
11:56
if you want to you could also run
11:58
another row stitching along the other
12:00
side just to make it symmetrical
12:02
i didn't but you could and then you're
12:04
going to have a nice long drawstring
12:06
that you can use
12:08
in your bag so now you need to make a
12:11
casing for your drawstring
12:13
something for it to run through so it's
12:15
worth measuring your drawstring how
12:17
wide it is if you're using a rope just
12:20
measure it a ribbon
12:21
measure it so i've made mine it's about
12:25
a quarter of an inch
12:27
wide so i'm going to make sure my casing
12:30
is wide enough for that
12:33
and a little bit extra
12:36
so the first thing i'm going to do is
12:38
measure an inch and a half down from the
12:40
top
12:41
so that inch and a half is what's going
12:42
to stick out at the top of the bag and
12:44
make a pretty edge
12:46
you can use whatever size you like but
12:48
an inch and a half looks quite good on
12:49
this size
12:50
bag and then you need to measure down
12:52
how wide you want your casing
12:54
now make sure it's plenty wide enough
12:56
for your drawstring
12:58
so for example i'm doing mine for
13:01
quarter of an inch
13:03
i'm doing it a good well not half an
13:07
inch less than that
13:08
so yeah probably
13:11
3 8 something like that just make
13:15
sure it's going to fit nicely
13:18
and mark it all the way around if you're
13:20
not confident use an air erasable pen
13:23
and actually mark it if you feel
13:25
confident you can just mark it with pins
13:28
check that your drawstring is going to
13:29
fit and then you're ready to sew and
13:33
you're going to sew
13:35
all the way around on both of those
13:38
seams that you've marked
13:41
don't worry about the fact it's all
13:42
enclosed we'll deal with that shortly
13:46
so as before when you were top stitching
13:49
just set off and sew all the way around
13:52
and then
13:53
a little bit of reverse at the end and
13:56
do it along
13:57
both of the seams that you marked and
13:59
that's going to form your little casing
14:01
that your drawstring can go in
14:04
once you've got them both in place we
14:06
need to work out how we're going to get
14:07
the drawstrings
14:08
in there so you're going to go to your
14:12
side seams and only in between those two
14:15
rows of stitches
14:17
you're going to unpick the side seam
14:21
just between those two rows of stitches
14:24
you can just get a little seam ripper in
14:26
there
14:27
or a pin or needle or even a tiny pair
14:30
of scissors
14:32
and you're just going to undo those few
14:34
stitches and it's just going to make a
14:35
nice little hole
14:37
that we can get our drawstrings into
14:40
the ended little threads just clip them
14:42
off
14:43
so do the same at the side seam on the
14:45
other side
14:47
and now we're ready to simply put our
14:48
draw strings in
14:54
so take your first drawstring and i
14:56
recommend putting a safety pin in one
14:57
end
14:58
it's so much easier to thread it through
15:01
and then place it through one hole one
15:04
of the side seams
15:06
and work it in and you're just going to
15:09
work steadily work it
15:10
all the way around and now you're going
15:13
to realize that
15:13
if you left a nice wide casing it'll go
15:16
through very easily
15:17
if your casing is a little bit tight you
15:19
might have trouble getting it through
15:22
just keep working all the way around as
15:24
you get to the other side seam you might
15:26
have a bit of trouble getting past it
15:27
just persevere you will do
15:29
and then bring that drawstring right out
15:32
again
15:33
so you've got the two sides back out of
15:35
the same hole
15:40
okay and then what we need to do is take
15:43
our safety pin off
15:46
put it on the other drawstring and
15:48
repeat the process for the other
15:52
drawstring
15:54
once we've got them both in we'll make
15:56
our drawstrings the length we want them
15:58
and that really is a personal choice the
16:00
longest it's long enough to go all the
16:02
way through and come out when the bag's
16:03
wide open
16:05
any extra length is up to you
16:08
so take your second drawstring feed it
16:10
through the other hole
16:11
in the side seam and then all the way
16:14
around
16:14
and back out now remember you've already
16:16
got a drawstring in there so it might be
16:18
a little bit tricky
16:19
just persevere and get it back out of
16:22
the hole you went in through
16:28
and then there you go you've got all
16:30
your drawstrings through
16:32
and out so now you just need to decide
16:35
how long you want them
16:37
and make sure they're both the same
16:38
length so you want your bag down
16:40
smooth you don't want it gathered up at
16:43
all
16:43
and then you want to measure how much
16:46
you've got sticking out either side
16:48
and make sure they're the same
16:52
so i think i'm going to go for six
16:53
inches either side of mine because i
16:55
want them nice and long
16:58
as i say if you just want a short
17:00
drawstring handle
17:02
cut it quite close to the bag
17:09
i'm just adjusting it and then i'm going
17:11
to cut mine at six
17:15
and then it's up to you you can knot
17:17
your drawstrings together
17:19
to form a loop or you can sew them
17:22
i'm gonna overlap mine and
17:26
sew a little rectangle on there so that
17:28
it sews it nice and tight
17:30
and i will then feed that inside the
17:33
casing
17:34
i'll do that for them both but if you
17:36
want to you could just knot your two
17:37
ends together
17:38
and your bag is complete
17:41
so if you did sew them what i recommend
17:44
you do then
17:45
is just pull your drawstring until that
17:48
goes inside
17:50
if you have a little bit of resistance
17:51
as it goes through the hole just give it
17:53
a little wiggle and help it in
17:55
and then your handles will just look
17:57
great because they haven't got that
17:59
stitching on them
18:01
and that's it you've completed your
18:03
drawstring bag
18:04
it's fully lined and very pretty so well
18:07
done
18:08
thank you for watching and i hope you've
18:10
enjoyed this video
18:11
please leave me a thumbs up below and
18:13
any comments and letting me know how you
18:14
get on with yours and how big a
18:16
drawstring bag you make
18:17
and remember if you like all sorts of
18:19
crafts especially on a budget
18:21
please subscribe to this channel and
18:24
then you'll know when all my videos
18:25
arrive
18:26
thanks for watching good luck with your
18:28
drawstring bag
#Fashion Designers & Collections
#Crafts
#Fiber & Textile Arts
#Fiber & Textile Arts
#Clothing Accessories
#Art & Craft Supplies