Up next in 10


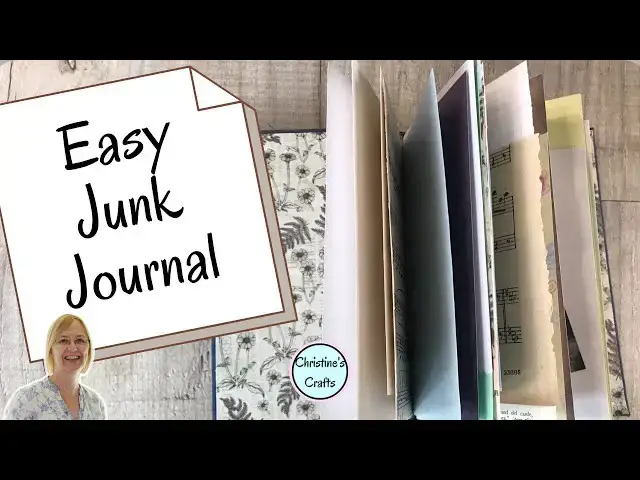
Would you like to have a go at junk journaling but are worried about binding? Well, this super easy way of making your own junk journal makes binding unbelievably easy. Just follow along and make yours today for hardly any expense.
A handmade junk journal is a special item for you or as a gift. Use it as a diary, memories book, garden record, etc. Use it however you like and explore your creativity.
Use an old hardback book from a charity shop or thrift store and any paper that you have already! Get started today and enjoy junk journaling on a budget.
If you enjoy crafting my blog is full of great ideas and tutorials. Plus if you subscribe you gain access to my free resource library, which includes a home crafts e-book, planners and much more, and get to hear about my latest projects first. Take a look at https://christines-crafts.com/
Enjoy watching and creating your first junk journal. Please leave me a 'thumbs up' if you enjoyed this video and subscribe so that you get to see all my videos as they are posted.
You can also find me across social media. To see all my information and ideas find me at https://linktr.ee/Christines_Crafts.
If you are thinking of opening an Etsy store then use this link and get off to a great start with 40 free listings https://etsy.me/32xoPdg
Show More Show Less View Video Transcript
0:00
In this video I'm going to show you how to easily make your own junk journal
0:04
If you've never done it before this is absolutely the easiest way. No complicated skills required and you can make it all out of old bits and pieces, great upcycling
0:14
I'm Christine of Christine's crafts and this channel is dedicated to crafting on a budget
0:18
So what are you going to need for your junk journal? Well the first thing you're going to need is an old book, a nice old hardback book
0:24
It doesn't matter how old it is or what size it is, the size is entirely your choice
0:28
Pick one up in a charity shop or a thrift store and you can use it for your base
0:35
You're also going to need something to use to bind your journal together
0:40
So I'm using ribbon. You could use string. You could use a large elastic or rubber band
0:46
The choice is entirely yours. It's just something to fasten it all together. You're going to want some glue and or double-sided tape so that you can stick things together
0:55
The choice is yours. you can use whatever glue you like, whatever you're comfortable with
1:01
I'd recommend a ruler. A nice thin metal one is a good idea because you can tear paper against it
1:06
I'd suggest you're also going to want some scissors or a cutting wheel. It's entirely up to you how you want your paper to appear and I'll explain that a little bit later on
1:15
But you're going to need some of these tools. I've made some covers on the computer for mine but all you really need is some paper
1:23
or whatever you want to stick to your cover and lots of different
1:27
bits of paper to go in your junk journal. Now what paper? Absolutely any paper you like
1:34
It could be old bits of paper that you've used. It could be some scrapbook paper, some old
1:39
music scores, some smaller bits of paper that were perhaps for card making. You can even use your
1:45
ordinary copy of paper, which is what this is. Perhaps in different colours, perhaps just some
1:49
white. Squared paper. It really doesn't matter whatever you want in your junk journal. And perhaps
1:56
whatever bits and pieces of paper you've got hanging about. So the first thing to do is to actually make the cover
2:03
And what you need to do carefully is remove the pages. Now the way I like to do this is to just get a knife and cut through that front page there
2:15
And then when you try and open it you'll realise if you've not gone all the way through
2:20
And you'll see that you're separating those pages but leaving the spine there all in one piece
2:25
your cover will still be a complete cover. You're literally cutting the pages out. You don't have to do it with the knife, but that's what I've found the easiest. And then you can use those pages if you want to, or you can take them off for some other craft project. Whatever you do, don't throw them away, there's always a project for them. So you're left with this cover. And that's the first thing we're going to focus on. We've got the outside of it and the inside of it. And at the moment, it doesn't look particularly
2:55
inspiring. So you see in my book I've got some nice pictures which I'm
3:01
definitely going to use in my journal. So you can start on the outside or
3:08
the inside first it's entirely up to you. I'm going to start by covering the inside
3:13
So take a ruler and measure all the way across. Flatten it down and measure
3:20
across and then measure the height of your book because you want one piece of paper to
3:25
cover all of it. Now I'm going to use this nice one with ferns on and I'm going to cut it to the size I've measured
3:33
Now that doesn mean it be exactly right but that where I going to start from and when I tried it on if I not happy with it I will cut it again So I cutting it neatly I decided I don want a torn edge I want some nice neat edges and I cutting it
3:50
down to the size to go on my hard back cover. So the next thing you want to do is just try it on there and make sure it really does
4:01
fit nicely and that when you glue it this is going to work
4:05
So one of the key things here is to press down firmly into that spine because you'll
4:09
have a little step and just make sure you're happy with it
4:15
And then it's a case of fixing it down. Now for this I do use glue and you'll see here I'm wrestling with my old pot of glue which
4:22
actually I binned after this project I was so irritated by it
4:26
But I covered the whole thing with glue because I need to get something right to the edges
4:30
Now you can achieve that with tape but I think glue holds it down nicely to the whole spine
4:36
and the whole cover so you don't have it wandering around later or little pockets popping up
4:43
So then place it on carefully and I recommend starting in the middle and just go along the top
4:49
and make sure it's lined up and then firm it down a little bit and then just check your
4:54
lined up everywhere. And really is just a case of firming it everywhere and making sure
5:00
you've got contact so that it all holds down flat. And then I suggest you put
5:06
something heavy on it while it dries because you really do want it stuck down. Once it's dry
5:14
I'd start looking on the outside of the cover. So you've got three sections to cover. Now because
5:22
I'm using a wide ribbon, I'm not going to cover the actual spine of mine, I'm just going to cover
5:27
the front and the back. So what you want to do is measure and cut your bits of paper the
5:32
right size that they fit in there but don't fit over the edge. Now because of the
5:36
My book's got this sort of panel on the front and the back, I'm just putting my card in that panel
5:43
You can of course also make a strip of card to cover your spine
5:48
Depends what you're using to bind your book. So I've chosen to use double-sided tape to hold these down
5:54
They're not going to be bending, they're not going to be trying to peel up. So I'm just putting tape all the way around the edge
6:00
But notice I've got it right on the edge so that there's no temptation to get things under the edge and
6:06
pull it up. So simply take the protective paper off all the tape and then place it down
6:14
exactly where you want it and this is the time to take a little bit of time and make
6:19
sure you've got it lined up because you're going to be looking at this for a long time hopefully or whoever you're gifting it to is going to be looking at it for a long
6:27
time. So again take off your protective paper and stick it down
6:36
And that's your cover made, apart from your binding of your pages
6:42
So if you want to embellish it and stick things on, you make this as fancy as you like
6:46
That's the beauty of junk journals. You can be incredibly creative. And you can apply anything you like to them
6:53
And there you go, a cover. All complete for me. So I need to start thinking about paper
7:02
As you can see, I'm going to cover that. That's why I'm not worried about
7:06
So what paper is going to go in there? Well, as I said, you can use any paper you like. This is your creative journey, not mine
7:15
But I'm just going to give you some hints and tips. So the first thing I'd do is decide on the largest piece of paper you're going to put in there
7:22
And an easy way of doing this is measuring across the book and then guessing how much you want to come in from it So maybe half an inch less maybe a whole inch less
7:35
But you can have a go. You can always cut a bit more off, that's my principle
7:40
So measure the height and cut it to the right height. Now it's really important to know that you don't need all your pages the same size
7:51
In a junk journal you can do what you like. and actually encourage you to have a list different size pages
7:57
It makes it more interesting. But this step on the first one, it's important to make it the biggest one you're going to use
8:04
Now you'll see when I've tried it in, it sticks out. So I'm going to cut some more off
8:10
You can have your pages sticking out of your cover, but I don't want that. I want the cover to protect my pages
8:16
So I'm cutting some more off. Don't worry about the fact this one'slins folded and refolded
8:21
It's only one page, but it's getting folded. but it's giving me my size
8:26
And then I know that every other page wants to be that size or smaller
8:32
Smaller's good, but no larger than that. So basically that's acting as your template
8:37
So then you can move on to all your different pages. So if you've got a nice piece of copy of paper, you can just cut that down
8:46
Now notice this time, I've decided I want a bit more of a traditional feel, a bit more rustic, a bit more vintage
8:52
So I'm going to rip the edges by simply placing the ruler down tight and ripping the paper
8:58
Now you could go around all four sides and make them all match. It's up to you. So that's two pages. I'm on my way
9:06
So then you'll literally carry on. Now this you'll notice is a smaller piece of paper
9:12
So because it's a little bit of a symmetrical pattern on it with the corner detail
9:16
I'm going to take the top and the bottom of it so that it fits inside the cover and then I'm simply going to fold it in half
9:28
Now this won't be as wide as the book, but that's okay. It really doesn't matter
9:34
And you'll also notice that a lot of my papers are coloured on one side and not the other
9:38
That doesn't matter. Any paper will work. So here I've got a pad of squared paper that I use as a paper
9:46
in my other job as a math teacher. Why not use some of that? That could be great for putting some
9:51
information in. Another page added. So there's not a lot of detail on that squared paper. Perhaps I should
10:05
make a little pocket. Now a great thing to do in a junk journal is make pockets. Now you can do it
10:10
just by folding the page but I'm going to make one using one of the pictures out of the original
10:15
book because I think that's a really nice link back to the book that I've used. So if you're
10:20
going to add another piece of paper to make your pocket, I recommend you using some really narrow
10:25
double-sided tape and just placing it on the three sides they're going to be making your pocket
10:33
So you just end up with one side open to slide in your bus ticket, your receipt, whatever it is
10:40
you decide you want to store in there later. That's your memory
10:45
It really doesn't matter. I mean at this moment I could say you know your junk journal can be for anything
10:51
You could store up some memories in it. You could record day to day like a diary
10:55
Perhaps you want to create one to record your garden and put little seed packets in and photos and little notes and hints and tips for next year
11:05
Really you could use it for anything. As you can see that quite a nice little pocket and it just another detail So next I going to show just another bit of paper but you see this is a great big piece of scrapbook paper
11:21
so I'm going to treat it a little bit differently. I'm going to make a page exactly as I did before, exactly the size I want
11:30
but then I'm going to use the offcut to make a smaller page because it will still be
11:38
a significant size and it's something I'm happy with. So I'll simply fold one one way and fold
11:46
the other one the other way just for a bit of variety and I've got a little bit of a
11:50
different size there as well. And another little pocket but this time at an angle
12:00
Now you'll see a lot of my pages are quite blank. I've left a lot of space for writing
12:04
for sticking things in and for even doing stammer. or whatever in the future and that's because of the way I want to use it
12:12
But you could use all coloured paper if you wanted. And all you do is keep going with all your paper until you've got enough pages for your book
12:22
Now enough pages, what do I mean by that? That is entirely up to you
12:27
So you just keep going. Then when you've got enough, it's time to bind it
12:34
Now you'll see I've got quite a few more pages added, but haven't got loads. loads. Now that's partly because I want to stick a lot of things in and partly because I know I can just open it up later and add some more if I want to
12:45
So once you're happy you've got enough and I believe when you've got them all fastened together like this, one outside the other it's called a signature
12:54
Then you're going to place them in your journal. Check it. Make sure you're happy they're not sticking out or if they are you're happy for them to stick out and then bind it
13:04
Now if you're using a rubber band, you're simply going to feed it over the sheets and the book cover and it will just sit there and hold it all in place
13:16
If you're using a ribbon or a string, you want to place it inside your journal right on the fold
13:24
So you want all your pages on the fold and the spine of the book and then turn the whole lot over and you're going to fasten it
13:33
Now I'm choosing to use a bow, but for the first part of the bow, I will do a double
13:39
As you can see, because it just holds it a little bit better while I'm netting about with the ribbon
13:45
making sure the pages are where I want them, and just getting myself happy with it
13:50
So at this point you can, if you want to, turn it back over. Check you're happy
13:55
Just make sure you're still holding it all because it won't be too secure just yet
13:59
and then pull it all tight and finish fastening it off. Now obviously you could not this if you preferred
14:07
but then it would be hard to undo later. So it depends what your aim is
14:12
whether you want it to be permanent, fix and secure. And then once you've done that
14:18
you just make sure you're happy with the pages and you've got your junk journal to start using however you like
14:24
So just some final thoughts and tips before I leave you. Just make sure you've got it nice and secure and remember that your pages are not actually stapled in or sewn in
14:34
So you do just need to be a little bit careful with your journal, but it does also mean you can take it apart and change it and add some in later
14:41
So I hope you've enjoyed this video and I recommend the one on the screen now if you're enjoying your paper crafts
14:47
And please subscribe to my channel to see all my videos in the future and give me a like if you've enjoyed it
14:53
Thank you
#Crafts
#Crafts
#Art & Craft Supplies
#Other