Up next in 10


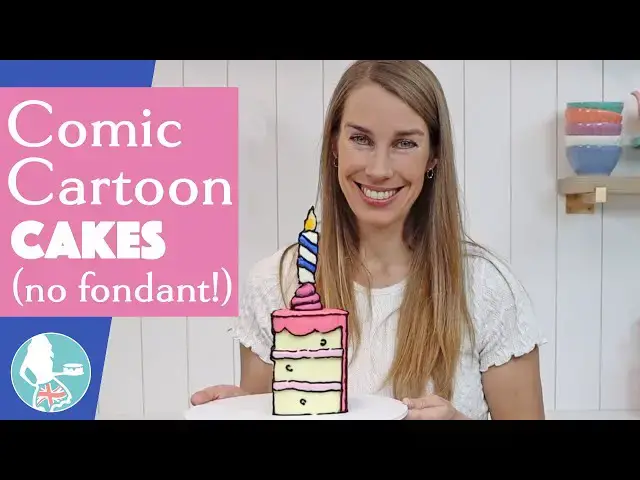
These comic style cartoon cakes are trending and if you don’t like fondant you’ll LOVE this method for making a buttercream cartoon cake with no fondant!
*Start your FREE 7 day trial on my cake school
https://britishgirlbakes.teachable.com/p/all-you-can-cake/
*LEARN The Basics of Cake and The Basics of Buttercream in my most popular online courses!
https://britishgirlbakes.teachable.com/
*My 4 Minute Buttercream recipe
https://www.britishgirlbakes.com/recipes/buttercream-frosting/
*READ a written version of this tutorial (with photos!)
https://www.britishgirlbakes.com/how-to-make-a-comic-cartoon-cake-with-buttercream/
*SUBSCRIBE to my channel for a new cake decorating tutorial every week!
*SAY HI!
Website: https://www.britishgirlbakes.com
Instagram: https://www.instagram.com/britishgirlbakes
Show More Show Less View Video Transcript
0:00
These comic style cakes are trending, but if you don't like fondant
0:03
you'll love the buttercream version of this cake design. You'll need one round cake layer of any size, cut into quarters, and buttercream frosting
0:16
This is my four-minute buttercream, and you'll see why it works so well for this design
0:21
Spread a bit of buttercream onto the middle of a cakeboard to attach your first quarter of cake
0:26
And then you can use whatever filling you like. I'm tinting this buttercream pale purple to match the filling I'm going to put on the outside of the cake so that they match
0:35
You'll see how that turns out in a few minutes too. Layer your cake, pushing each layer down to attach it to the filling
0:42
And I'm only using three layers of cake for this, but you might use all four if your cake is wider
0:47
This layer was only six inches wide, so it already looks very tall with just three layers
0:53
Your layers won't line up perfectly, so trim them with a serrated knife like a bread knife
0:57
and put the cake in the freezer for about 30 minutes, so it firms up
1:01
and that way it'll be much easier to frost. Tint some buttercream pale yellow and cover the cake with a thin layer of frosting
1:09
called a crumb coat, to trap in any crumbs. Smooth the frosting to give the cake a nice shape
1:15
but don't worry about getting it super neat, because we're going to cover this up with another layer
1:20
which will be visible, so take your time to get it nice and smooth. I think this is the trickiest part of this cake
1:26
Getting the sides smooth on a round cake is fairly simple because you just hold your cake comb still as you spin the cake
1:33
But with edges, like on this wedge-shaped cake, you have to be much more intentional
1:38
scraping from a corner to get that corner sharp, but stopping before you get to the next corner
1:43
so that you don't pull the frosting off or make the corner rounded. Once you're happy with the sides, tidy up the top edge by swiping sideways with your offset's bachelor or a cake comb
1:53
to make sharp edges from the sides onto the top of the cake. Chill the cake again for about 15 minutes to set the frosting
2:01
and then fill a piping bag with the leftover buttercream from the filling of the cake so it's the same colour
2:07
Use a medium-sized round tip, like a number 8, to pipe two lines around the cake only along the straight sides for the filling
2:15
By holding the tip quite close to the frosted cake as you pipe
2:19
the filling will be fairly flat rather than rounded, which makes it more cartoony
2:24
You can use a toothpick to flatten any bulges or tidy up any messy parts
2:29
Then use another colour for the frosting on the cake. I've added pink to the purple that I used for the filling
2:35
so that I can repurpose the leftover buttercream and I have a full tutorial on nine ways to use leftover frosting and you can watch that by clicking the link up in the top right corner of the screen I using a slightly larger rounder tip for this Pipe the frosting onto the top of the cake and then smooth it with your offset spatula
2:52
and then pipe it onto the sides in a wavy line as if the frosting is dripping down
2:57
Spread this with your offset spatula to fill in any gaps and then you can smooth it slightly
3:02
but I'll show you a much more effective way to get it really smooth next
3:06
Tidy up the top edge, wiping your offset spatula on a towel or paper
3:10
towel after each swipe so that it's clean when you use it again and that will give you the sharpest
3:15
neatest edges remember the back of the cake too scrape from one side towards you almost to the edge but
3:23
stop just before and then scrape back in the opposite direction and that will give you the smoothest frosting
3:28
don't worry about the edges where this frosting ends where it meets the yellow cake i'll show you a quick way
3:34
to tidy that up next put the cake back into the freezer for 15 minutes to chill the frosting and
3:40
and then use a sharp knife to trim off the edges of the frosting to make a straight line down the cake
3:46
It's much easier to do this now, once the frosting has set, because it won't smudge or stain
3:52
To get the frosting super smooth, run a metal cake comb under hot water and dry it off
3:57
and then scrape gently over the frosting and you'll see the texture disappear, leaving a smooth surface instead
4:03
You can do this along the filling, too, to make it a bit flatter for this comic-style design
4:08
Again, toothpicks are a great way to fix any imperfections. Now for the signature part of this design, the black lines
4:16
I have a tutorial on how to make black butter cream and other tricky colours, and the link for that is in the top of the screen and in the video description
4:24
Use a piping bag with a small round tip like a number three, and practice a few times on a towel or plate to get used to the consistency of the butter cream
4:32
That way you'll know how hard you need to squeeze and how fast you need to move the bag as you pipe
4:38
The bottom of the cake is the easiest because you can rest the tip on the cakeboard to hold it steady
4:43
so that's a good place to start to get comfortable with piping these black lines before you move up to the trickier parts
4:50
If the buttercream breaks as you're piping, that's perfect. Broken lines are part of this comic style, which is very convenient for cake decorators because it makes this style very forgiving
5:01
I recommend choosing a number three tip because if you go smaller like a number two
5:05
the lines will be very fine, which means you really can't. can't shake at all without it being very noticeable. If you choose a bigger tip like a number four
5:13
your lines are going to be very thick, which is a bit exaggerated for smaller cakes like this one
5:18
You're going to outline every section of this cake, which means piping up the side of the
5:23
cake where it meets the coloured frosting and also piping along the top and bottom of the filling Piping along the top is the easiest because you can see what you doing And what really helps here is chilling the cake before you do this because the frosting has set
5:37
so it's firm, which means you can rest the piping tip on it as you pipe
5:41
And that will help hold your hands steady so your lines are less wobbly. But also, it will help keep the lines flat against the cake
5:49
My hands are super shaky, probably because of the ridiculous amount of coffee I drink to keep myself awake to decorate at night
5:56
after my three little ones have gone to sleep. So, if I can pipe these lines, you definitely can
6:02
Toothpicks will be your best friend, since they're so useful to tidy up the lines
6:07
and you can use the edge of an offset spatchelor too, to nudge a line upwards or downwards
6:12
Piping underneath the filling is easier if you raise the cake up, so you can see what you're doing underneath the filling
6:18
But if the line breaks, or if you have to pause and then start again and there's a gap between the lines
6:24
remember that that's perfect for this design. You'll also need to outline the front edge of the cake
6:30
the pointed part of the slice, going over the filling to highlight that it's bulging out of the cake, cartoon style
6:36
and also the edges of each side of the cake. And to make this easier, you can use a cake comb to score a line as a guide
6:43
or even hold the cake comb there to pipe along to help get your line straight
6:48
Toothpakes really are the MVP's of this design. pipe a few circles that don't quite join up
6:55
I suppose to show that the cake is airy or light instead of dense. To add some detail to the top of the cake, pipe a swirl
7:02
and it's easiest to use a round tip rather than a star tip, and you'll see why when I outline this
7:08
Put the cake back in the freezer to set the swirl on top, and meanwhile, make a candle with chocolate
7:14
I'm using white chocolate chips, nothing fancy, and here are my secrets to working with chocolate successfully
7:20
First, use a microwave-safe bowl so it doesn't overheat and burn the chocolate
7:25
Then use 70% power and 30-second intervals in the microwave to melt the chocolates slowly
7:31
so it doesn't seize and become grainy. Stir it until it's smooth and spoon it into a sandwich bag
7:37
Push it down to a corner and cut a tiny piece off that corner. Tape a toothpick on department paper to hold it still and pipe a rectangle over it to make a candle
7:48
and the toothpick will let you poke it into the cake so it stands upright
7:53
It's easiest to do this on a cutting board or a tray, so you can pick it up and put it in the freezer to set quickly
7:59
It'll take less than five minutes. Meanwhile, melt some more chocolate chips and tint the chocolate using oil-based colors
8:06
which won't make the chocolate seize. Spoon this coloured chocolate into another sandwich bag and cut the end off just a tiny piece so you can pipe with precision When the candle has set pipe diagonal lines along it and of course this is out of focus but I show you again on the other side
8:22
Flip the candle over and pipe the same diagonals on the other side, and the side of the candle lying face down on the parchment
8:29
will set flat, because it's pressed against the parchment, as long as you don't try to move it before it sets
8:36
If you like, you can put the first sandwich bag back in the microwave for 10 seconds to remelt it
8:41
and then pipe over the white chocolate on this side of the candle to cover up the toothpick that's
8:46
showing and tidy it up with, you guessed it, another toothpick. You'll need a tiny bit of chocolate for the flame on the candle, so I just used the leftover white
8:57
chocolate in the sandwich bag and squeezed it into a bowl and then spoon it onto the top of the candle
9:02
and shape it into a flame using a toothpick. While the candle sets, which takes about 10 minutes
9:08
at room temperature or five in the freezer, outline the swirl on top of the cake
9:13
which will have chilled and set by now. You can see that it's much easier to outline this
9:18
than it would be to outline a swirl piped with a star-shaped tip, which has lots of texture and lines
9:24
Choose which will be the front of your cake, and then draw lines along the left and right sides of the swell
9:30
from the point of view of someone looking at the cake from the front. You can put your candle anywhere on the cake
9:36
I'm putting mine on top of the swirl. It's easiest to poke another toothpick into the cake first, to forge a pathway
9:44
and then, once the candle has set, push it into that pathway
9:48
so that you're not putting any pressure on the candle, which might snap it. Use your black buttercream to outline the candle
9:54
and I considered using black chocolate, because I thought it might be neater
9:58
but this way, the black lines on the whole cake are consistent. I outlined the back of the candle too
10:04
and this is probably obvious, but I'll say it just in case, When you're putting the candle into the cake, choose the neatest side to face whichever side you've decided will be the front
10:14
Tadda, a comic-style cake slice made out of buttercream with no fondant
10:19
When you take photos of your comic-style cake, make sure you position it so that the outlines on the sides are at the right angle
10:26
I love how this cake looks superimposed in a photo, because with the outlines, it really does look flat, or 2D
10:33
If you like the way I've broken down every step in this cake design, you'll love my mini-eons
10:37
courses and master courses on my cake school. You can visit by going to british girlbakes.com
10:41
or click the link up in the top of the screen or in the video description. You can take individual
10:46
courses or you can sign up for my club plus membership which gives you access to every
10:50
mini course, master course, live workshop and five minute Fridays. I'll see you there
#Food & Drink
#Cooking & Recipes
#Desserts