Up next in 10


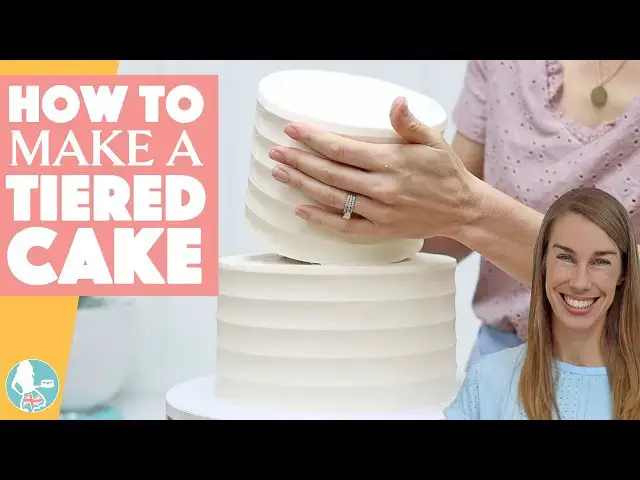
Learn how to make a tiered cake from start to finish in this step-by-step cake decorating tutorial. I'll show you how to assemble cake layers, frost each tier, add supports, stack cakes safely, create sharp buttercream edges, hide joins between tiers, and transport a tiered cake without it leaning or sinking.
These beginner-friendly techniques will help you create a straight, stable, professional-looking tiered cake with confidence for a wedding cake, birthday cake, or celebration cake!
In this tutorial:
00:00 How to Make a Tiered Cake
00:10 Choose Cake Sizes and Boards
01:02 Assemble the Cake Layers
02:10 Chill Cakes Before Frosting
02:28 How to Frost a Tiered Cake
04:49 How to Get Smooth Buttercream
05:55 How to Get Sharp Cake Edges
06:42 How to Add Supports to a Tiered Cake
07:52 How to Stack a Tiered Cake
09:12 Fix Frosting Seams and Imperfections
09:51 How to Hide the Join Between Cake Tiers
11:32 How to Transport a Tiered Cake
12:08 DIY Cake Box Hack
12:26 Tiered Cakes, my channel, my cake school
⭐Join this channel for members-only perks!
https://www.youtube.com/channel/UC1k3PDqnjUG8wMH1vY3yojA/join
🥣My Recommended Cake Decorating Tools: https://www.britishgirlbakes.com/my-recommended-tools-for-cake-decorating
💫Start your FREE 7 day trial on my cake school: https://britishgirlbakes.teachable.com/p/all-you-can-cake
🎂Take my FREE course on 10 Frosting Techniques: http://britishgirlbakes.com/free-course
👩🏼🍳My 4 Minute Buttercream recipe
https://www.britishgirlbakes.com/recipes/buttercream-frosting/
📄READ a written version of this tutorial (with photos!)
https://www.britishgirlbakes.com/how-to-make-a-tiered-cake/
👍Please LIKE and SUBSCRIBE to my channel for a new cake decorating tutorial every week!
💬 SAY HI!
Website: https://www.britishgirlbakes.com
Instagram: https://www.instagram.com/britishgirlbakes
Show More Show Less View Video Transcript
0:00
If tiered cakes terrify you, this tutorial will change that. I'll show you exactly how to stack
0:05
and decorate a tiered cake so it stays straight, stable, and stress-free to transport. First,
0:10
choose the size of your cake. Make sure each cake is at least 2 inches smaller than the tier
0:14
underneath so that you can clearly see each layer once they're stacked. I'm using 8 inch,
0:19
6 inch, and 4 inch cakes. For your base, use a thick, sturdy cake board, ideally a cake drum.
0:25
It should be about 4 inches wider than your bottom tier, which gives you space for decorations around
0:30
the cake and also somewhere to hold on when you lift or move it. You'll also need cake boards
0:35
for the upper tiers, and these should be exactly the same size as the cakes they'll support. I'll
0:39
call these "invisible cake boards" because they'll be completely hidden underneath the cakes later.
0:44
Cardboard cake boards are strong enough to support the weight of cakes, but they're also easy to cut
0:49
down to size if you need to trim them. They should have a greaseroof lining so they don't
0:53
absorb moisture from the cake. For this tiny 4 inch cake, I don't have a matching board, so I'm
0:58
making one by tracing around the pan onto a larger cake board and cutting it out. For each cake,
1:03
spread a bit of buttercream onto the cakeboard and press your first cake layer onto it to attach
1:07
it securely. For the bottom tier, assemble the cake directly on your cake drum. Spread on your
1:11
filling - I'm using buttercream - and continue layering your cake. As you stack each layer, make
1:16
sure it's directly on top of the layer underneath so that the cake stays straight instead of leaning
1:21
to one side. For the upper tiers, assemble those on the invisible cake boards that are exactly
1:26
the same size as each cake. Attach the first cake layer with a bit of buttercream to act like glue,
1:31
holding it in place while you build the cake. These invisible cakeboards are really important
1:36
because they'll support the weight of each cake, once you've created your supports. Without these
1:40
boards, the top tiers would sink down into the bottom cake. Continue layering your cakes and
1:46
fillings and if any filling bulges out around the sides, flatten it with your offset spatula
1:51
or angled palette knife. That will make frosting the cakes much easier later. If your cake layers
1:56
have domed tops, trim those off first so that every cake layer is level. Flat layers make a
2:01
much sturdier tier cake. At the end of this step, you should have your bottom tier assembled on the
2:06
cake drum and each upper tier assembled on its own invisible cake board. Now, chill all of the cakes
2:11
in the fridge or freezer for 15 to 30 minutes. Eventually, instead of three separate cakes,
2:16
you'll stack these to go from this... to this. But there are a few steps first so that the upper
2:21
tiers don't sink down into the tiers underneath. If you skip these next steps and just stack your
2:26
cakes as they are, this is what can happen. Once the cakes are chilled, it's time to frost them,
2:30
starting with a crumb coat. This is a very thin layer of buttercream that traps any crumbs coming
2:36
off the cake, so they don't end up mixed into your final coat of frosting. It's much easier
2:40
to frost cakes when they're cold because they're less crumbly and less wobbly, so they won't slide
2:45
around or start to lean as you spread and smooth the frosting. Here's a quick peek at what happens
2:50
when you don't chill a cake before frosting: millions of crumbs come off, the cake won't stay
2:54
still, and the cake layers shift, so the cake starts to lean. Nightmare! For the upper tiers
3:00
on their invisible cake boards, place each cake onto a larger cake board underneath. That larger
3:04
cake board gives your cake scraper somewhere to rest when you smooth the frosting. To stop
3:09
the cake sliding around, use tape or a non-slip mat like this drawer liner between the boards.
3:15
Smaller cakes are especially lightweight, so they tend to move around more while you frost them. So,
3:20
while you're spreading the buttercream, you might need to gently hold the cake in place. But once
3:24
you move on to smoothing with a cake scraper, there's much less pressure against the cake, so
3:28
it's more likely to stay still. Larger cakes, like this tall 6-in tier, are heavier, so, combined
3:34
with the non-slip mat or the tape underneath the cake board, their weight helps keep them stable
3:39
while you spread and scrape the frosting. This crumb coat doesn't need to look neat or smooth. It
3:45
just needs to completely cover the cake so that no cake is exposed. What you do want to pay attention
3:50
to is any buttercream sticking up above the top edge of the cake or bulging out around the sides.
3:55
Those bumps will show through your final coat of frosting later, so smooth those down now. The
4:00
crumb coat always looks slightly alarming before the final coat goes on but don't worry because
4:04
this is all going to be covered up soon. Once all of the cakes are crumb coated, chill them again
4:09
in the fridge or freezer for 15 to 30 minutes to set the frosting before adding your final coat.
4:15
When this crumb coat is cold and firm, that's also the best time to trim any invisible cake boards
4:20
if needed, because you won't damage the frosting if you do it now. Next, cover each cake with a
4:25
final coat of frosting. For this cake, I'm adding texture using a textured cake comb.
4:30
The easiest way to level the top edge of a cake is to use your offset spatula or straight-edged
4:35
cake comb to swipe sideways across the top edge, which is what I'm doing here. But for tier cakes,
4:40
I actually prefer another method that creates really sharp top edges, which instantly make
4:45
the cake look much more professional. I'll show you that technique in a second. For now,
4:49
pop the cakes back into the fridge, and let me show you three tricks for really smooth frosting.
4:53
The first trick is to perfect the consistency of your buttercream. When you stir it, if you see
4:58
lots of holes or air bubbles like this, and if it feels stiff and difficult to stir, it's too
5:03
thick. Stiff buttercream is much harder to spread smoothly onto a cake. To fix it, scoop out about
5:09
a third of the buttercream and microwave it for 10 seconds. Then pour it back into the main bowl and
5:14
stir everything together. That melts out the air bubbles and the transformation is really dramatic.
5:19
Now the texture is smooth and creamy buttercream that's much easier to stir and to use for frosting
5:24
a cake. Look at the difference between this cake - I've used the microwave hack for this buttercream
5:29
so it's silky smooth - and this cake, which I frosted before using the microwave hack. Look at
5:34
all those little air pockets in the frosting. The next trick is for fixing tiny shallow
5:39
imperfections and air bubbles after frosting the cake. Warm up your cake comb using a hair dryer,
5:44
a blowtorch or hot water. You want the comb to be warm, not hot. Now, scrape around the cake and the
5:50
warmth will smooth out those little imperfections, leaving really smooth frosting behind. This next
5:55
trick is for getting extra sharp top edges. Put the cake into the fridge for 30 minutes or the
6:00
freezer for 15 minutes. To check if your cake is ready, gently poke the top edge. If it holds its
6:06
shape, the frosting is firm enough for the next step. If you can feel the buttercream give way
6:10
underneath your finger, and if sticky buttercream comes off on your finger, the cake needs more
6:15
chilling time. Once the frosting is firm, dip a knife into warm water and dry the knife off
6:20
before slicing around the top edge of the cake. Cut away all of the buttercream sticking up above
6:25
the top edge, dipping the knife back into the warm water between cuts to keep it warm and
6:29
clean. This creates really sharp top edges that make tiered cakes look so professional. Look at
6:34
the difference between this cake where I used my offset spatula to swipe the top edge to level it
6:40
and this cake where I used the knife method. Okay, now for the fun part, or what most people think is
6:45
the most intimidating part. It's time to stack the cake. I'm using boba straws, or wooden or
6:50
plastic dowels work, but they're trickier to cut to size. These act as support pillars inside the
6:56
bottom cakes. You don't need any in your top tier. Use four supports within each lower tier.
7:02
This hidden support structure is what turns separate cakes into one stable tier cake. All of
7:07
your cakes should be cold for this step, so chill them in the fridge for about an hour beforehand.
7:12
Start with your bottom tier on its cake drum. Take the cake pan for the next tier up and lightly
7:17
score around it onto the frosting so that you mark where the next cake is going to sit. Now push
7:22
a boba straw or dowel about an inch inside that scored ring, pushing it all the way down until you
7:28
feel it hit the cake board underneath the cake. Pinch the straw right where it sticks up above
7:32
the frosting. Pull it back out and cut where you pinched it. That gives you the exact height you
7:37
need so the support will sit perfectly level with the cake. Use that first straw as a guide to cut
7:43
three more straws or dowels to exactly the same height. Now push all four supports into the cake,
7:49
pushing them about an inch inside the scored ring. Spread a little buttercream over the tops of the
7:54
straws. That acts like glue and helps secure the next tier. Now take your next cake out of
7:59
the fridge. Slide your offset spatula underneath the cake between the invisible cake board and the
8:04
larger cake board underneath it and peel away the non-slip mat or tape. Carefully lower the
8:09
cake down onto the bottom tier, centering it within the ring you marked earlier. Everyone
8:13
holds their breath for this part until you've done it a few times and realize that cold cakes
8:17
are not as fragile as you fear they are, so you really can handle them like this. Repeat the same
8:22
process for the next tier: use the cake pan that you baked the top tier in to score around the cake
8:28
so you know exactly where the next tier will sit. Push a straw or dowel into the cake about an inch
8:33
inside that line all the way down to the cakeboard underneath. Pinch it where it sticks up above the
8:38
frosting and cut it to that exact height. As long as all of the straws are exactly the same height,
8:43
the next cake will sit level on top of them. So, use your first support as your guide to
8:48
cut three more supports the same height and then push all four into the cake in a square formation
8:54
about an inch inside the line you scored. Spread a little buttercream over the supports and then
8:58
take your top tier out of the fridge. Separate it from the larger cake board and then lift
9:02
it up and carefully lower it down onto the tier below, keeping it centered. The top tier will be
9:07
sitting on its invisible cake board, which is now completely hidden inside the stacked cake. Now,
9:13
two tips to make your tiered cake look even more professional. The first is to get rid of
9:17
these seams left behind where you swiped your cake scraper or textured cake comb away from the cake.
9:22
You could position these so that they're all at the back of the cake. Or to smooth them out, place
9:27
a piece of parchment paper or wax paper over the seam and gently press through the paper with your
9:31
finger. That blends the texture together without damaging the frosting so the seam goes from this
9:37
to this. These tiny finishing details are what make cakes look perfect. Before adding any final
9:42
details or decorations, it's best to chill the cake so that the frosting becomes really firm.
9:47
You might need to take a shelf or two from your fridge to make space for the height of the cake.
9:51
and then chill it for about 30 minutes. To cover the joins between the tiers, I like to pipe a
9:56
little border around each one. For this cake, I'm using a medium-sized round piping tip, a Wilton
10:01
number eight. Fill your piping bag about 2/3 full with buttercream so it's comfortable to hold and
10:06
easier to control while piping. You can also use this buttercream to fix any little imperfections
10:11
in the frosting. I accidentally poked my finger into the cake over here so I'm piping a bit of
10:16
buttercream over the mark and then gently scraping over it with my textured cake comb to blend it in
10:20
and make it disappear. The frosting on the cake being chilled makes it much more forgiving for
10:25
touch-ups like this. This is a beaded border, and here are my tricks for making it neat. Rest the
10:31
piping tip down on the cake board as you pipe the border. That helps steady the piping bag and also
10:36
make sure the border goes all the way down to the bottom of the cake without leaving a gap. Piping
10:41
becomes much easier once you stop trying to hold the bag floating suspended steadily in midair.
10:46
Instead of piping each bead with the piping tip facing the cake and then pulling away, which
10:51
leaves a peak on each bead, pipe sideways instead. Squeeze the piping bag to let the buttercream
10:57
bulge out into a ball shape. Then release your pressure as you swipe the bag away sideways,
11:01
leaving a little tail on each bead. The next bead overlaps that tail. For the upper tiers, you can
11:07
also rest the piping tip down on the cake below while you pipe. That steadies the piping bag. And
11:12
because the cake has been chilled, the frosting is firm enough that resting the piping tip against it
11:16
won't damage the frosting. This is such a quick but pretty border for any cake but I especially
11:21
love it for elegant tiered cakes because it adds detail without distracting from the rest of the
11:26
design. But for more whimsical cakes, colourful, textured, and more elaborate piping can look
11:31
fantastic. It's safest to transport tier cakes while they're cold because the cake and frosting
11:36
are firm and much more stable. A tier cake shouldn't just look stable, it should actually
11:41
survive the car ride, too. Being cold helps the cake resist vibrations while you drive, as well as
11:46
any sudden breaking or sharp turns. This is a cake I drove 4 hours on very bumpy roads to Yosemite,
11:52
and with its internal support structure and being chilled before driving, it arrived perfectly.
11:58
But if you leave a cake uncovered in the fridge overnight, it can absorb flavours from the fridge
12:02
and the moisture inside the fridge can also cause condensation on the frosting. So to protect the
12:07
cake, box it up. Now, here's a quick hack if your cake box isn't tall enough for your cake. For
12:12
the lid, use a second box flipped upside down and cut two diagonal slits into one side. Then repeat
12:19
on the opposite side. Now push the middle flap inside the box while leaving the outer flaps on
12:24
the outside. That raises the height. Tier cakes can look incredibly complicated, but once you
12:29
understand the structure behind them, they become so much more manageable. Tell me in the comments
12:34
if you're going to use these tips and tricks. Join my channel for exclusive videos, my Perfectly
12:38
Smooth Frosting course, and lots more perks. And visit my cake school on www.britishgirlbakes.com
12:43
to learn hundreds more cake decorating designs and techniques. See you there!
Hobbies & Leisure