Up next in 10

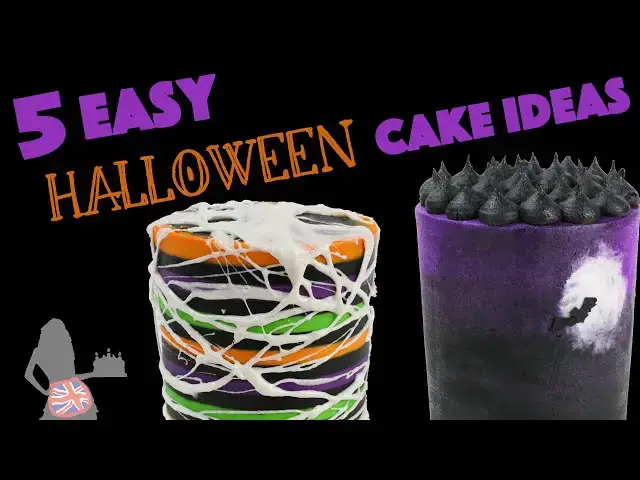
5 EASY Halloween Cake Decorating Ideas
Sep 6, 2024


In this cake decorating tutorial I share 5 easy Halloween cake decorating ideas including marshmallow spiderwebs, homemade stencils and lollipops, gold buttercream pumpkins, and cake interiors decorated with sprinkles and Halloween candy cookie dough!
For the recipe for me Black Buttercream That Won't Stain Your Teeth click here: https://www.britishgirlbakes.com/recipes/black-buttercream-recipe/
For the recipe and tutorial for homemade sugar lollipops click here: https://www.britishgirlbakes.com/recipes/sugar-lollipops/
For the full tutorial on the Striped Halloween Cake with Gold Buttercream Pumpkins click here: https://www.britishgirlbakes.com/striped-halloween-cake-with-gold-buttercream-pumpkins/
For the recipe and tutorial for Edible Cookie Dough click here: https://www.britishgirlbakes.com/recipes/edible-cookie-dough/
For my online cake decorating school click here: https://britishgirlbakes.teachable.com/courses
To read a transcribed version of this tutorial (with photos!) click here: http://www.britishgirlbakes.com/5-easy-halloween-cake-decorating-ideas
SUBSCRIBE to my channel for new cake decorating tutorials every week!
Show More Show Less View Video Transcript
0:00
Hi! In this tutorial I'm going to show you five very easy ideas to decorate Halloween cakes
0:08
This first technique is messy but fun! Melt marshmallows for 30 seconds in the microwave
0:13
and then pinch the warm, gloopy marshmallows and stretch them to make thin strands
0:18
which you can then wrap around your cake. Your cake needs to be cold for this so that the strands
0:23
of marshmallow don't cut into the frosting. If you dip your fingers in water first the marshmallows
0:29
won't stick to your hands as much but it's quite fun to get messy for this! Wrap the marshmallows
0:35
randomly around the cake, playing around with the height of each hand to change the angle that
0:39
the marshmallows go onto your cake so they all overlap and tangle up like a spider web
0:45
You can go over the top of the cake the same way, stretching the marshmallows to make strings
0:50
or push all of your fingers together and then slowly spread them out to stretch the marshmallow
0:56
out and then drape that over the top of the cake. This covers more of the cake so it's quicker
1:02
and by doing it this way, with the marshmallows spread out into more of a sheet instead of
1:07
strings, the marshmallows won't cut into the frosting on the top edge of your cake. You can't
1:12
go wrong with this cake design because you're aiming for a mess so you can have a lot of fun
1:15
in the process! Now we'll take a very unfestive cake and make it Halloween-y with two different
1:21
techniques. The first uses a homemade stencil and a pre-made stencil. To make a creepy full moon
1:27
stencil, cut two circles out of parchment paper, one circle slightly bigger than the other. The
1:33
bigger circle will be the glowing ring around the moon. Press the bigger circle against the cake and
1:39
spread white buttercream over it, carefully spreading from the outside of the circle towards
1:44
the middle so you don't wrinkle the stencil or push buttercream underneath the outer edge of the
1:49
circle. The frosting on your cake needs to have set for this so this cake has been in the fridge
1:54
for a few hours for the frosting to firm up. Smooth the white buttercream with your offset spatula or
2:00
a frosting smoother and don't worry if it's so thin that you can see through it because the purpose
2:05
of this circle is just to create the light that shines out around the moon. We're going to make a
2:10
bolder moon in the middle. Use an offset spatula or a paintbrush to smudge the outside of the circle
2:16
so that it blends gradually into the rest of the frosting on the cake
2:20
and next we need to create a bright moon within this glow. You can chill the cake again to set
2:25
this white buttercream or go straight on to the next stencil, pressing it against the cake and
2:31
spreading over the circle with white buttercream to create the moon. You'll probably smudge some
2:36
of the previous white circle with your stencil but that's fine because we're going for a glowing
2:41
blurry effect anyway. Smooth the buttercream, peel your stencil off and there's the moon
2:48
Now I'm going to use a bat stencil and you can use the whole stencil or block off parts of the
2:52
stencil using parchment paper so that only a smaller section transfers onto the cake like this
2:58
or I'm about to use a different technique. I want just one bat and instead of risking smudging my
3:04
moon or messing up the stencil and staining my white moon with black frosting, I'm taping some
3:08
parchment paper onto a cutting board and then stenciling onto the parchment paper, doing three
3:13
bats so that I have extras if my first one doesn't work. I have a tutorial on 16 ways to use stencils
3:19
on cakes and if you're interested in that the link is in the video description. Peel the stencil off
3:25
put the paper on the board in the freezer for 15 minutes and while that's chilling, if the frosting
3:30
on the cake has set you can spread a tiny bit of buttercream onto the moon to make it sticky
3:34
Then take your parchment out of the freezer and use a sharp knife to lift the buttercream
3:38
off the parchment and press the bat onto the cake wherever you want it to go
3:44
A simpler way to make this a Halloween cake is to add some candy. I'm matching the colour scheme
3:49
with these purple and black sprinkles which I'm going to turn into lollipops to add to the top
3:53
of the cake. I'm using a mould but you can pour this sugar mixture straight onto parchment paper
3:58
for round but not perfectly circular pops and I have a full tutorial on sugar lollipops on
4:04
britishgirlbakes.com with the recipe and the link is in the video description. You could use Halloween
4:09
candy within the lollipops instead of sprinkles like orange and black M&Ms or candy corn
4:15
When the lollipops are cool, after about 30 minutes, lift them up and push them into your cake
4:20
To make these elegant gold pumpkins, pipe buttercream with a small star tip like a number
4:26
199 to make a stem. Use a 1M star tip to pipe the pumpkin, piping four curved lines. This is
4:33
parchment paper or you can use wax paper and the reason for piping onto this instead of straight
4:37
onto the cake is so that you can paint the pumpkins gold. Put the pumpkins on the paper
4:42
into the freezer for at least an hour to set and meanwhile, make some lollipops
4:50
I'm using some gold paint using gold luster dust and a few drops of clear alcohol like vodka or you can use
4:55
almond extract or any other clear coloured alcohol-based flavour extract will work
5:00
Take your pumpkins out of the freezer and brush them with the gold paint, getting into all of the cracks and crevices with your paintbrush
5:09
Now pipe or spread a bit of buttercream onto the frosting on your cake to act as glue
5:13
Lift a pumpkin up with an offset spatula and press it into the buttercream. If you're enjoying this tutorial please click the thumbs up button and subscribe to my channel for a
5:22
new cake decorating tutorial every week! If you wipe off any gold paint as you push the pumpkins
5:28
against the cake, you can touch them up by painting on a bit more gold paint and you can
5:32
also use your paintbrush to push the pumpkins around gently to wrap them more closely around
5:36
the sides of the cake. I have a tutorial on how to decorate this cake from start to finish
5:41
with the buttercream stripes and more details on the gold pumpkins and the link is in the
5:45
video description. Finally, decorate the inside of your cake! Pour halloween coloured sprinkles
5:51
into your cake batter before you bake it and the sprinkles will melt and dissolve, leaving splotches
5:56
of colour in the cake. You can do this for cakes and cupcakes and add cookie dough filling made
6:01
with halloween candy for an even more festive touch. For cupcakes, cut a hole out in the middle
6:06
with a sharp knife and then roll a spoonful of cookie dough into a ball. The recipe is on
6:11
britishgirlbakes.com and I have a full tutorial on how to make it and use it as a filling and
6:15
frosting and the links are in the video description. Push the cookie dough ball into the hole and pipe
6:21
frosting over the top for a delicious surprise when you bite into the cupcake. You can stack this cookie dough between layers of cake too, using a bit of buttercream above
6:31
and below the cookie dough to make it stick to the cake. The layers of cake and cookie dough filling
6:36
look irresistible and this cake flavour is definitely the most popular I've made for people
6:41
Everyone loves cookie dough! I hope I've given you some ideas for decorating your Halloween cakes
6:45
and I'd love to see what you make! Please tag British Girl Bakes in your photos on Instagram
6:50
so I can see your creations! Thanks for watching and Happy Halloween! Remember to subscribe to
6:55
my channel for a new cake decorating tutorial every week
Food & Drink
Cooking & Recipes
Desserts
Food
Candy & Sweets
Hobbies & Leisure
Holidays & Seasonal Events
Party & Holiday Supplies