Up next in 10


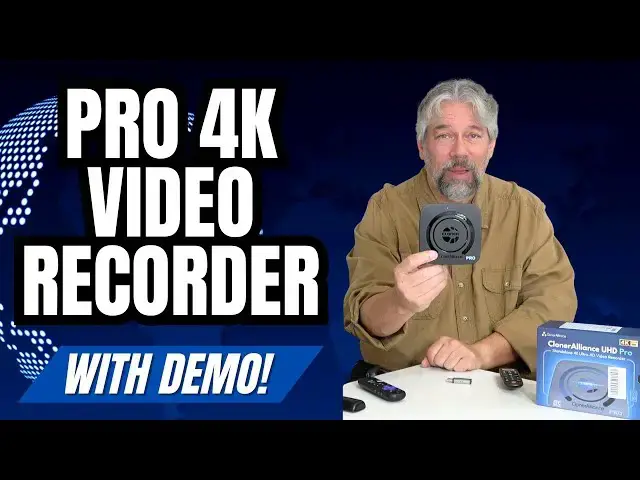
Imagine a device you could place onto the HDMI cable going into your fancy 4K TV that would let you easily record anything you saw on screen. That's the purpose of the ClonerAlliance UHD Pro 4K Video Recorder box, and it not only produces great results, but it's super easy to use too! Tech expert Dave Taylor walks you through all the key features of this terrific device, including an extensive demo where he captures the Roku experience and a streaming movie, then shows the resultant file on his Mac system. It's perfect for video games, streamers, even people who want to add their commentary to contemporary news and other events.
Check it out at: https://amzn.to/3Evp9Qo
or directly at the vendor site: https://www.cloner-alliance.com/askdavetaylor
if you do go to Cloner-Alliance, use coupon code "DAVETAYLOR" to save some $$
Visit Dave's Q&A Web site at: https://www.AskDaveTaylor.com/
0:00 Introduction
1:00 Close-Ups of the Ports
2:22 The Remote Control
4:07 H.264 versus H.265
5:50 The SanDisk 256GB Flash Drive
7:17 Roku DVR Demo
8:30 Recording a Movie off the Roku
10:12 UHD Pro Recording Viewed on Mac
12:26 Practical Uses for the UHD Pro
13:54 Scheduled Recordings
15:10 ClonerAlliance Helper PC App
16:43 Flash Drive Storage Capacity
Show More Show Less View Video Transcript
0:00
this little box lets you record any
0:02
video stream with excellent clarity
0:04
Let's check it
0:11
[Music]
0:12
out Dave Taylor here and I'll tell you I
0:15
plug a lot of different devices into a
0:18
lot of different televisions including
0:19
this tiny little VO and it works great
0:23
when I just want a screen that's super
0:26
portable and easy to work with But the
0:28
problem is with video games with
0:31
streaming devices it's hard to record In
0:34
fact I will say it's essentially
0:36
impossible to record a lot of video
0:38
content Enter this This is the Cloner
0:43
Alliance UHD Pro 4K video recorder box
0:48
And you can see on the back here that I
0:51
have HDMI in which happens to be my 4K
0:56
Roku stick HDMI out which is going into
0:59
the television That's not what we're
1:01
seeing We'll get to that in a moment And
1:03
power Now the box as you can see in
1:06
these close-ups gives you a lot more
1:08
options On the left side there is a
1:11
micro USB you can connect directly to
1:14
your PC if you want to do some live
1:16
streaming There's also much more
1:19
importantly in my opinion is a USBA plug
1:22
where you can plug in an external
1:24
storage device and use this as a DVR for
1:28
anything that's going to be on your TV
1:31
screen It is extraordinarily flexible On
1:34
the back there is a power button which
1:36
is pretty darn important And that power
1:39
HDMI in HDMI out and that's 4K HDMI On
1:44
the right nothing really And then on the
1:47
front is really interesting because
1:49
there's line in line out and
1:52
microphone Why would you want those well
1:55
you can plug your microphone into this
1:57
and now you can talk over what you're
2:00
seeing and what you're capturing on
2:02
video So if it's a video game you could
2:05
actually capture your own narration or
2:07
commentary or snarky comments about your
2:09
opponents depending on how you play And
2:12
then on the right hand side there are
2:14
three buttons that are duplicated by the
2:17
excellent remote included with the
2:19
Cloner Reliance device The buttons are
2:21
switching between H264 and
2:24
H.265 the ability to take a snapshot and
2:28
stop and record button So you generally
2:32
aren't going to be using those buttons
2:33
because the included remote control as
2:36
you can see here has all of that
2:38
functionality and more making it super
2:41
easy to work with But if you lose the
2:44
remote or you forget to get batteries
2:46
and you do need to supply your own AAA's
2:49
then you can at least get basic
2:51
functionality with the functions and
2:53
buttons on the box itself So I really
2:56
like it Now let me tell you some specs
2:58
and then we're going to jump right into
3:00
some really interesting demos that I
3:02
think you're going to really appreciate
3:03
So it is an HDMI capture DVR or digital
3:07
video recorder It works with everything
3:10
unless you give it an HDCP stream which
3:14
is a encrypted content protected stream
3:18
Generally that's not going to be what
3:20
you have But if you give it that it
3:22
can't unrypt or decrypt or um unencode
3:25
it So you're going to be stuck Other
3:28
than that I will tell you for video
3:31
games for Blu-ray players
3:33
DVRs for cable boxes for streaming
3:37
devices it can record anything Now if
3:41
you use the built-in smart TV system on
3:45
your smart TV it can't record that
3:47
because that's not looping out and
3:50
coming back in But if instead of this I
3:53
switch to using the Roku then we find
3:56
that I'm in good shape Now let's see It
3:59
is flashing blue and green which means
4:02
that it's not happy about the input So
4:04
let's just reboot it And that's easy
4:06
enough So H.264 and H.265 are two common
4:12
video encoding systems And the
4:15
difference is that
4:17
H.264 is much more common So it's
4:20
probably what all of your computers and
4:22
phones and all of your tablets will use
4:25
but it tends to make larger data files
4:28
H.265 is a little more modern It makes
4:32
smaller files by honestly about 40%
4:35
because it has a better compression
4:37
algorithm but it is very new So a lot of
4:41
devices can handle
4:43
H.265 You will have to choose between
4:46
those to figure out which one you want I
4:48
think the issue is that the Roku is not
4:51
turned on Anyway we'll figure that out
4:53
in a second So it records in optimally
4:57
4K at 24 frames per second And you're
5:00
thinking 24 frames a second that's
5:02
exactly what movie theaters use So they
5:04
call this that cinematic sort of
5:07
experience And 24 frames a second is
5:09
enough to fool your eye with motion You
5:12
can record at higher frame rates It is a
5:15
lot more data and it is a lot more to be
5:18
writing out to an external device and in
5:21
fact I think it's flashing because I
5:23
don't have my storage device in but you
5:25
can record if you really want the
5:27
maximum frame rate then they recommend
5:30
1080p at 60 frames per second So you're
5:34
not getting 4K but honestly you're
5:36
getting an enormous amount of data So if
5:38
you want to actually go and manipulate
5:40
it or edit it you have a lot of
5:42
information to work with Probably 4K at
5:46
24 or 30 frames a second will be more
5:49
than sufficient for you But I'm going to
5:51
go ahead and put this flash drive in And
5:54
let me tell you this is a SanDisk
5:57
256 gabyte storage device right it
6:01
doesn't look like much but what I love
6:03
about it is it has USBA And then you
6:05
slide this and USBC So my computer uses
6:11
USBC This device wants USBA So that's
6:14
what we'll use And I will plug it into
6:17
the side Make sure it's plugged in
6:19
properly And that device you want it to
6:23
be as fast as possible So don't use some
6:26
clunker old USB flash drive or external
6:30
hard drive cuz if it's too slow this is
6:33
going to have a lot of problems working
6:35
with it That will not be bueno But you
6:39
can have this formatted in EXF fat NTFS
6:44
FAT32 or FAT32 as we call it MDR It
6:48
works with a lot of formats And what I
6:50
really recommend is XFAT or EXF fat
6:54
which is file allocation table but it is
6:57
really the best because it's fully
6:59
compatible with Mac and Linux and
7:02
Windows And so for the demo what we're
7:05
going to do is we're going to record a
7:07
little bit and then I'm going to take
7:08
this and plug this into my Mac and show
7:11
you the recording that we just made
7:13
Pretty cool right in fact let's just
7:15
jump straight to that demo For this
7:17
demonstration I have the Cloner Reliance
7:20
UHD Pro in line between my Roku 4K
7:25
streaming stick and my little VO
7:27
television So when it's on right now I
7:31
can just use the Roku as if it was just
7:35
a regular TV with a Roku plugged in So
7:37
super easy to work with And I can also
7:41
by pushing buttons on the UHD Pro remote
7:46
I can get that menu to come up So I can
7:49
go into record settings and I can choose
7:53
between
7:54
H.264 and
7:56
H.265 And you'll recall that
8:00
H.264 gives you bigger files but it's
8:03
more compatible We can change the bit
8:06
rate So we can go to high And I like
8:11
when it shows me that it's recording So
8:13
I'll do that And file size gives you
8:17
maximums You can adjust You can add a
8:19
watermark You can loop the recording
8:22
That all looks good I'm going to press
8:24
back And then we're going to go back
8:26
again So now I'm back to having it be
8:29
invisible I'm going to however go back
8:32
to home on the Roku And then I'm going
8:36
to push record on the UHD Pro And notice
8:40
on the left it's giving me all of these
8:42
stats and it's telling me that it's
8:44
recording So now as I'm going through
8:48
the Roku I can actually record
8:51
everything that's happening So all of
8:54
this is being recorded which is pretty
8:56
slick So let's go ahead and pick a show
8:59
I have to find something that I'm
9:00
willing to watch or willing to share
9:03
with you And when I share it I'll only
9:05
be able to share a moment or two but
9:07
let's go to Transformers Age of
9:09
Extinction That wasn't
9:12
horrible And so all of this is being
9:16
recorded right now And that information
9:18
on the bottom will go away momentarily
9:21
Then we can get rid of that And so
9:23
here's the recording I'm talking over
9:26
the audio because I don't have the
9:28
rights to rebroadcast this In fact let's
9:32
Oh I can't pause live TV So let's go
9:34
back Um I really don't have the rights
9:37
to that but we now have this recording
9:40
And notice on the top left it's still
9:42
recording So I'm going to push the
9:44
record stop button on the remote one
9:47
more
9:48
time And now it's saved So I'll go back
9:52
to home on the Roku because why not but
9:55
now on the device on my little external
9:59
SanDisk USB I have an MP4 file that is
10:04
the entire capture I just did To show
10:08
you what I mean let's now switch to my
10:11
Mac Ordinarily I'd just do a screen
10:14
capture but that's done with the
10:15
QuickTime program which I'm going to
10:17
actually demonstrate with our footage So
10:20
I'm going to open this up And you can
10:22
see here are three recordings And the
10:25
first two were before I figured out how
10:26
to change the date which is why they
10:28
look old But let's just go ahead and
10:30
open this one with
10:33
QuickTime
10:35
And it is
10:37
playing It's not yet but it will be And
10:40
let me go ahead and turn the sound
10:43
up and watch As you can see it's a
10:47
really clean recording Of course it
10:49
didn't record my microphone because it's
10:52
recording the audio from the TV or video
10:56
source If you listen there's the
11:00
clicks So we're hearing the clicks from
11:03
the Roku as sent to the TV audio system
11:07
And this is everything we just did And
11:09
then I said well let's watch
11:10
Transformers So we went to live
11:14
TV And so now you can hear that it has
11:19
the audio from Transformers and of
11:22
course it has extremely clean video and
11:25
I can pause this at any moment So
11:28
there's a lot I can do with this footage
11:31
I can also not just bring it into a
11:34
video editor but QuickTime on a Mac
11:37
actually has the ability for you to trim
11:39
things So I might say let's go and get
11:42
rid of everything up to where it
11:44
actually started the footage of the
11:47
show So that's about
11:50
here So I can do that and then I can
11:53
trim And now I have footage So look here
11:56
Starting at zero I start right there And
12:00
I no longer have all of that Roku
12:02
interface but all of it's been recorded
12:05
It's all really clean It all looks very
12:08
good I can shrink it down I can save it
12:12
as a different file name if I want here
12:15
And this is 62 megabytes so it's not
12:19
particularly large Though of course I
12:21
only have about 20 seconds of capture
12:24
Now let me jump back on camera It's a
12:26
pretty compelling demo I have to say I
12:29
found this device really easy to work
12:31
with Just remember it has to be in line
12:34
on the HDMI signal that's coming into
12:38
your television So I have the Roku
12:41
instead of plugged into the TV I have it
12:43
plugged into this and then the cable
12:46
running to the television So I can watch
12:48
the Roku just like this and I can do
12:51
everything I want to do and it works
12:53
perfectly well And I can just ignore
12:56
that this is here And then when I need
12:58
to record or want to record I can use
13:01
the remote or I can use that record
13:05
button on the front and I can record
13:07
really as much as I want If there's a
13:09
movie that's just about to start even
13:11
one with ads I could easily record the
13:14
whole thing and then go onto my PC or my
13:18
Mac or my Linux machine bring up any of
13:21
a number of different video editors cut
13:24
out all the ads save it and then maybe
13:27
even copy that onto my tablet and I am
13:29
ready to go next time I'm on an airplane
13:32
with relatively little work If I want to
13:34
be even simpler I can find a source that
13:37
doesn't have ads For example a paid
13:40
streaming service which you can use here
13:42
cuz I can use the Roku to sign into
13:45
Disney or HBO Max or whatever And then I
13:48
can use this to record that content too
13:51
Super easy It's really really easy to
13:54
work with Now one of the other features
13:56
that you can use this for is you can
13:59
schedule recordings So if I have this
14:02
with a sports program and I know at 2:00
14:04
in the morning South African rugby is
14:07
going to come on and I really want to
14:09
watch it but I really don't want to have
14:10
to stay up So I make sure everything's
14:13
set up properly I make sure this is in
14:15
the right time and date And then I can
14:18
go into the remote and I can actually go
14:21
and set up a schedule And that's as easy
14:24
as pushing
14:26
menu and then let's see So schedule
14:30
settings So now I can schedule a
14:33
recording if I want And that you got to
14:35
say is pretty darn easy There's also a
14:38
snapshot button which is kind of fun too
14:40
Let's back away from that menu There we
14:43
go So the snapshot is
14:47
the camera button on the remote or it's
14:50
on the front and you can just take a
14:52
screen capture basically of your TV
14:56
That is pretty cool especially if you
14:58
have a program where you can use say the
15:00
Roku remote to pause the perfect frame
15:04
and then use this to be able to get that
15:07
screenshot Very cool So on the PC if
15:11
you're running Windows you can also get
15:13
something they call the Cloner Alliance
15:15
helper and that has some video editing
15:18
capabilities But honestly I find that
15:20
you don't need it cuz it's generating
15:22
MP4s and MP4s are pretty universal with
15:25
video editors You can also use OBS
15:28
Studio if you want to live stream and
15:31
you want to maybe have it cut between
15:33
this stream of what's on the TV and you
15:36
on camera So like a lot of video gamers
15:39
do that kind of thing This is compatible
15:42
with OBS Studio So let me unplug things
15:45
just this is going to cause that to get
15:48
confused but I'm just going to go ahead
15:49
and let's say turn it off Probably a
15:52
good first step And then here's my Roku
15:56
4K stick So it's super easy to work with
15:59
And then this is the HDMI out that's
16:03
feeding my television which obviously it
16:05
is no longer doing That's power This is
16:09
my USB drive And this is the unit It's
16:12
this small It is 4.6x
16:16
4.6x 1.1 in And it's about a pound and a
16:20
half A little bit lighter than that But
16:22
it is I can't emphasize this enough
16:25
Really really easy to work with And
16:27
because it uses external storage I don't
16:30
have to hook it up to anything I plug in
16:33
my external storage record whatever the
16:35
heck I want And generally I will
16:37
encourage you to record a few minutes
16:39
before and after your program just so
16:41
you have a little extra footage to work
16:43
with and then just plug this into
16:45
another device to watch things I mean
16:48
how much could I put on this if I had 50
16:50
movies there'd still be space I can take
16:53
this and plug this into the back of a
16:54
hotel TV and most of them have USB and
16:58
support for external MP4 video files
17:02
Crazy easy I can just record my favorite
17:05
shows and then they're on here and I can
17:09
do this all without any DVR subscription
17:12
without having to worry about if that
17:14
service is compatible with my recorder
17:17
This does everything other than HTCP as
17:20
I said earlier So I am a big fan This is
17:24
definitely one to check out if you want
17:25
to record anything whether it's sports
17:28
whether it's streaming from your kids
17:31
phone onto the TV that you want to
17:34
actually use So you would stream onto
17:36
the Roku device and then go through here
17:39
and then you could record it I mean
17:41
there's so many ways you can do this and
17:43
obviously things like Max or Showtime or
17:48
gosh all the there's hundreds of
17:49
streaming services Amazon Prime Video
17:52
and the Smithsonian channel and Netflix
17:55
All of that you can record with this
17:58
device while you're watching the program
18:01
or even while you're watching you know
18:03
something else through the smart TV
18:05
interface As long as what's being fed
18:08
into this device is what you want to
18:10
record you can record with it One
18:13
definitely worth checking out I am going
18:15
to ask you to subscribe to my channel
18:18
Click or tap on that subscribe button
18:20
Hit that bell icon for notifications
18:22
Give me a thumbs up if you found this of
18:24
value And I certainly hope that you did
18:26
Great This is the Cloner Reliance UHD
18:30
Pro 4K video recorder and it is
18:36
$287.50 at amazon.com That's a little
18:39
spendy but how much would you pay to you
18:42
know buy and download individual movies
18:45
versus having a device that will let you
18:47
record anything as much as you want as
18:50
many times as you want forever So do the
18:54
math I think you'll find this is a
18:56
pretty sweet deal and it's a great thing
18:58
to add to your whole AV setup because it
19:02
just sits there and it gives you
19:04
essentially zero additional latency and
19:06
just lets you whenever you want push the
19:09
record button and just capture what's
19:10
going on So cool Really one to check out
19:15
That's all I got I think I might go back
19:17
to that movie So I'll have to catch you
19:20
in my next video
19:24
[Music]
19:33
Heat Heat
#Online Video
#Consumer Electronics
#TV & Video Equipment
#Media Streaming Devices
#Virtual Reality Devices