live_tv
Livestream Starting Soon
00
Hours
:
00
Minutes
:
00
Seconds
Up next in 10

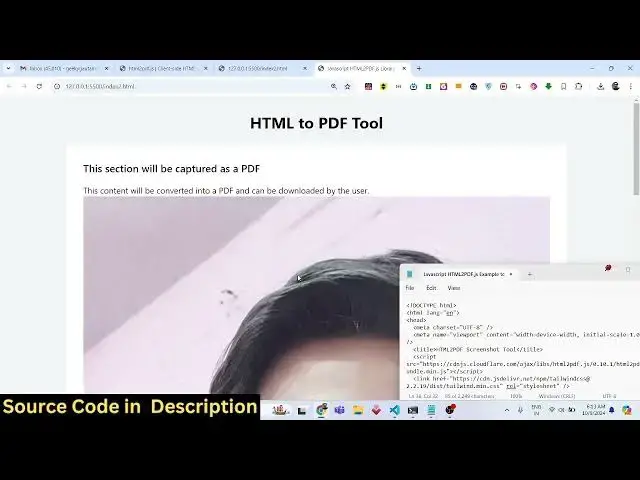
Javascript HTML2PDF.js Example to Export HTML to PDF Document Web App in Browser
Jan 9, 2025
Get the full source code of application here:
https://gist.github.com/gauti123456/0544bd291ef28242898a3321fd905350
Show More Show Less View Video Transcript
0:00
uh Hello friends welcome to this video
0:02
so in this video we will talk about
0:04
html2 PDF JS library and I will actually
0:08
show you a demo right here the web
0:11
application that we will be building in
0:12
this tutorial so this actually takes the
0:16
screenshot of your HTML and convert that
0:18
into PDF so I have made this application
0:22
using Tailwind CSS and if you can see on
0:24
your screen we have this div
0:27
section and we will try to actually
0:30
export this HTML to PDF using this HTML
0:34
to PDF JS Library it's a simple example
0:37
in the browser which is running vanilla
0:39
JavaScript we have a button out there if
0:42
I click this button it will all this
0:45
HTML which is there in this plus the
0:47
image the text everything will be
0:49
converted to PDF if I click the button
0:51
you will actually see it will take the
0:54
screenshot and now if I show you all the
0:57
content has been converted to PDF
0:59
document
1:01
plus the image as well you will see that
1:02
so we are actually having a local image
1:04
which is present in this we are loading
1:06
this image inside our
1:10
HTML so we are actually using HTML to
1:13
PDF library for this example this is
1:16
actually a open-source JavaScript uh
1:19
Library which actually allows you to
1:21
convert client side HTML to PDF it
1:25
renders using pure JavaScript and we
1:28
will be using the CDN for this to
1:30
actually load this Library so that we
1:32
can use it in the browser so let's start
1:34
building this application so just make
1:37
first of all a simple index. HTML file
1:40
and here simply be saying
1:42
JavaScript HTML to PDF GS
1:46
Library
1:49
example and then we just need to
1:51
actually include the CDN for this so
1:55
that we can use this Library so this is
1:58
actually the CDN link for the script tag
2:01
so you can just go to their official
2:03
documentation and just copy the script
2:05
tag and paste it after the title so
2:08
after you do this we also need Tailwind
2:10
CSS because we are using Tailwind CSS
2:12
for making the UI of the application it
2:15
is not necessary for this tutorial but
2:17
we are just using Tailwind CSS to just
2:21
make the application look good so here
2:23
we'll be using some Tailwind classes to
2:25
actually change the background color BG
2:27
gray 100 so this is actually Tailwind
2:29
class
2:30
and then we'll be using the container
2:32
class MX Auto to actually make it in the
2:35
center position padding will
2:38
be8 and here you'll be giving a H1 tag
2:41
right here so you'll be having the text
2:45
3 XEL so it will be larger the font will
2:48
be bold so these are all Tailwind CSS
2:51
classes so text will be appearing in the
2:53
center positions text Center margin
2:56
bottom six you will have a simple
2:59
heading here which which will be htm2
3:01
PDF tool so if I just show
3:05
you this application in the browser it
3:08
looks something like this we have a
3:10
simple heading in the center position so
3:13
after this heading we will have a
3:16
section we will be having a you can give
3:20
an ID to it of capture section so we
3:25
have a simple div tag we have given an
3:26
ID to it of Capt capture section
3:30
so we'll be giving some class as well
3:33
background will be
3:34
white padding will be eight it will be
3:38
rounded on large devices LG and it also
3:42
will be having
3:45
Shadow so here inside this we will have
3:48
h2
3:50
tag so we will have some basic text
3:55
which needs to be converted to PDF
3:57
document so
4:01
this section will be captured as a PDF
4:03
so you will actually see this is
4:05
actually the section right
4:10
here so we will basically be
4:15
assigning the classes here text SL font
4:18
semi Bol
4:22
mb4 so you can have a paragraph as well
4:26
after this heading you can have as many
4:29
HTML elements you can have a anchor
4:31
element as
4:32
well so all this HTML will be converted
4:35
to
4:40
PDF and after this we will also
4:45
be having a image so right here we can
4:49
even load a image
4:51
tag so image is present in the same
4:53
directory image
4:57
jpg so you can see we have we can load
5:00
this
5:02
image and then we can have a simple
5:09
button so right here this div is ending
5:12
right here so after this we can actually
5:15
have
5:18
a button which will trigger the process
5:22
so you be having this button inside this
5:24
div element which will have a class of
5:33
so inside this we'll have a button here
5:35
which will simply say generate
5:39
PDF we'll be giving an ID to it of
5:43
uh generate PDF
5:47
button we'll be giving a classes to it
5:50
BG blue it will have a background color
5:52
of blue text color will be white text
5:56
White
6:00
padding X4 padding
6:04
Y2 and it will be rounded
6:07
so if you see now we will have a
6:10
generate PDF button so as I click this
6:13
button we need to call the HTML to PDF
6:16
Library so you'll be first of all
6:19
targeting this button we have given this
6:20
ID to this button of generate PDF BTN
6:24
you will find a onclick listener to this
6:26
button so when we click this button this
6:29
call backun function will
6:30
execute and inside this function we will
6:33
basically select whichever section that
6:36
we want to convert to PDF so we have
6:39
given that section and ID so capture
6:42
section you'll be making a variable
6:44
right here and here will be using
6:46
document. get element by ID and we have
6:48
given that section that ID if you see we
6:54
have given this ID capture section so we
6:56
are targeting it right here
6:59
so after we get that element we can
7:02
simply use our HTML to
7:06
PDF this is actually the library we are
7:09
calling this Library this is actually a
7:12
function and it actually takes the from
7:14
function and here you need to pass the
7:17
section that we want to take the
7:18
screenshot so capture section and then
7:22
it uses the set function and here it
7:25
actually passes some object so this
7:28
object will contain contain three
7:30
properties first is the margin of the
7:32
PDF document let me set it to one and
7:34
then the file name you can set this file
7:37
name to anything let me set it to
7:38
result. PDF and then it contains the
7:42
third property which is HTML to Canvas
7:45
and this needs to be set a scale
7:49
property scale basically means that you
7:51
are taking a screenshot if you want to
7:53
scale it all the elements you will
7:56
provide this property the fourth one
7:58
will be Js PDF and this property will
8:01
take a object and it will contain
8:04
additional information about the PDF
8:06
document such as the units which will be
8:10
in inches the format of the PDF document
8:13
which will be a letter
8:15
size orientation either it can be
8:18
portrait or landscape these two values
8:20
are
8:23
there so we will be providing the
8:26
portrait orientation
8:33
so these three options is contains
8:35
inside jspdf and lastly we'll be
8:38
invoking the save method which will
8:40
actually take the screenshot and save it
8:42
as a PDF document this is actually the
8:46
library it basically uh receives this
8:49
section that needs to capture and then
8:51
it converts it into PDF document so if I
8:54
just refresh and click on this button
8:56
you will actually see it will take the
8:58
snapshot
9:06
uh I think let me
9:12
see let me remove first of all this
9:15
image I think it is we need to resize
9:17
this image so let me only have the text
9:20
right
9:23
here so we only have the text for now if
9:26
I click generate PDF you will see all
9:29
this HTML the paragraph The Heading has
9:33
been converted so you can have as many
9:35
paragraph as many headings as you want
9:37
let me just copy paste it several times
9:41
just to illustrate this
9:48
process so now you can see we have lot
9:50
of HTML there so if I click this now you
9:55
will actually see everything will be
9:57
captured
10:00
so now if you want to load the image as
10:06
well you can just give it
10:09
a source here which is image jpg we can
10:13
give it a fixed width of 200 and a
10:15
height of 200
10:29
so if you see now if I refresh it you'll
10:33
see this image if I generate PDF you
10:35
will actually see the image will also
10:37
get converted alongside with the text so
10:40
you can actually take the screenshot of
10:43
the HTML which may contain images text
10:46
everything it will be converted to PDF
10:48
document using this open source library
10:51
of HTML 2 pdf.js Library it's a open
10:54
source client side HTML to PDF rendering
10:57
Library so I just showing you a simple
10:59
example in this video so if you need the
11:02
full source code the link is given in
11:04
the
11:05
description you can go and uh get the
11:08
source code and if you like this video
11:10
please hit that like button subscribe
11:12
the channel as well and I will be seeing
11:14
you in the next video
#Programming
#Web Design & Development
#Open Source