Up next in 10

Build a React.js Image & Webp Converter in Browser Using Canvas API & react-dropzone in Javascript
Jan 9, 2025
Get the full source code of application here:
https://gist.github.com/gauti123456/9b1b9d803f617393091b2e3c7d2c04f9
Show More Show Less View Video Transcript
0:00
uh Hello friends welcome to this video
0:02
so in this video we will look at how to
0:04
build out a simple image converter
0:08
inside react CH so this is the actual
0:11
demo of the application we will be
0:13
building in this video so you can see
0:15
the live demo we have a drag and drw
0:18
interface here you can drag and drop
0:20
your image files or you can simply click
0:23
it and then select any extension files
0:25
jpg PNG
0:28
webp let me select this file and you
0:30
will see the live preview of the image
0:32
file that you have selected and then you
0:34
have these choices you can convert this
0:36
jpg image to
0:38
webp and jpg PNG so if I want to convert
0:42
this into webp the file will be
0:45
converted and we will see this download
0:47
button and you will be able to actually
0:50
download this image so if you try to
0:53
open this it actually opens in the
0:55
browser this is a webp image so if you
0:59
try to open this image let's suppose in
1:02
the browser it will simply open with so
1:05
it's converted to webp image in the
1:08
similar way you can convert this to PNG
1:10
as well simply click PNG click on
1:12
convert and then click on download and
1:15
it has converted this to a PNG image so
1:18
in this way now if you upload this
1:23
uh uh
1:25
this
1:27
PN you can upload any file here this is
1:30
actually this is webp if you want to
1:33
convert this into webp or PNG click on
1:37
convert or
1:39
webp so this is actually the application
1:42
guys we will try to make in this video
1:45
so if you watching it for the very first
1:47
time then please hit that like button
1:48
subscribe the channel as well so let's
1:50
start the video and for building this we
1:52
will be using the canvas API you have
1:55
known canvas API it's actually built in
1:58
inside browser we will draw the image on
2:01
the canvas to actually convert from one
2:03
format to another using the base 64 code
2:07
so using canvas API so we will not be
2:10
using any third party Library we will
2:12
just be using the drag and drop
2:13
interface react drop pH for integrating
2:16
the drag and drop functionality for
2:19
selecting files and also be using some
2:21
bootstrap for building the user
2:23
interface using react bootstrap so we
2:26
need these two packages so simply go to
2:29
your command line just initiate a new
2:32
react sh project and install these two
2:34
packages react drop zone and react
2:38
bootstrap and also the base bootstrap
2:41
package as well so these three
2:43
packages react drops so react bootstrap
2:47
and bootstrap with these three packages
2:48
you need to install by In invoking This
2:51
command I've already installed these
2:53
packages so now I will start my
2:55
development server so the very first
2:57
thing we will do we will start it from
2:59
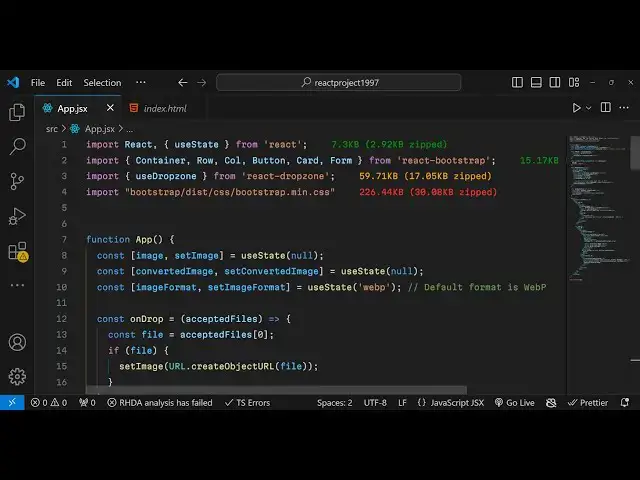
scrap B so just create a app.jsx file
3:04
and I will create a functional
3:09
component so it will auto reload if you
3:12
go to Local Host 5173 so now you can see
3:16
it is showing app so now what we need to
3:19
do guys we need to create first of all
3:21
our state variables which will be
3:23
required for this application so the
3:25
very first state variable which is
3:27
required is the actual reference to the
3:29
image so you will keep track of this
3:31
using the UST State Hook by default the
3:34
value will be null and the second
3:37
variable which will be required is to
3:40
keep track of which extension the user
3:43
select for conversion so converted image
3:46
set converted image this will be the
3:48
output image once the user click the
3:50
download button once again we'll be
3:52
storing the use State hook default value
3:54
will be
3:55
null these are the state variables guys
3:58
which are required for this application
4:00
for building this and then we have the
4:04
format so here the user will select the
4:06
choices given to them from the dropdown
4:10
so you'll be having image format set
4:12
image format and the initial value will
4:14
set it to
4:17
webp and that's all so these three state
4:20
variables we have declared the actual
4:22
input image this is output image and
4:24
this is the actual formats choices which
4:27
will be given to the users these three
4:29
state variable tables are there now guys
4:31
we need to start building the user
4:33
interface in the jsx so as I already
4:36
told you we need to actually use the
4:38
bootstrap so we'll be
4:41
invoking getting our container class
4:44
which will be react bootstrap and then
4:45
also we need to import the base
4:47
bootstrap class which is the CDN
4:50
bootstrap
4:52
slis CSS bootstrap main. CSS we just
4:57
invoking the main CSS
5:00
file right here base bootstrap file and
5:04
on top of that we need to also give it
5:07
some bootstrap classes by using the
5:09
class name directive Mt 5 margin to five
5:14
and we will have the
5:16
row inside this you will have the column
5:20
and it will basically give the medium
5:24
here which will be
5:28
six and B basically you'll be having
5:31
here the card
5:32
structure which will be the part of the
5:35
react bootstrap and here you will be
5:37
having the body of the
5:42
card we having a H1 tag here which will
5:45
simply say that upload the image so here
5:49
we'll have the drag and drop
5:51
interface for in integrating the drag
5:54
and drop interface we first of all need
5:57
to initialize the functionality here at
6:00
the very top which will be drag and
6:05
drop so for doing this there is two
6:08
methods that we need to import which is
6:10
first of all is get root props and get
6:14
input props both these things will be
6:17
coming from this uh hook which is
6:20
provided used Drop Zone which will be
6:23
imported from react Drop Zone The Base
6:26
Library used drop zone so there is a
6:28
hook right here and here we need to
6:30
initialize it passing the properties on
6:33
drop and the second one is we will only
6:35
be accepting the image files right here
6:38
so image/ star so now we need to pass
6:41
these two properties which we are
6:43
importing right in the jsx so we will
6:46
basically simply
6:49
say inside our div tag we need to pass
6:53
this uh inside C bracket get root props
7:01
and here we need to give the class name
7:02
here which will
7:07
be drop
7:10
zone and inside this we will actually be
7:13
having input
7:18
field and basically ins side C bracket
7:21
we will simply say get input
7:28
props and and inside the paragraph you
7:30
will simply say drag and
7:36
drop and image here or click to
7:43
select so what will happen now if you
7:46
refresh your
7:49
application so it is saying that on drop
7:52
is not defined so just make sure that uh
7:56
on
7:57
drop have you selected
8:00
on
8:07
drop uh oh sorry we do need to
8:10
initialize on drop it's basically it's a
8:16
function which will be responsible for
8:18
when you draw files what should happen
8:21
so basically it will take the actual
8:24
file which is dropped here and this
8:26
function will invoke and here you simply
8:29
say accepted
8:30
files we'll get access to the file and
8:33
then we will compare it if the file is
8:35
there then we need to set the image
8:38
using this hook function and URL do
8:41
create object URL and file that's all
8:44
essentially we are reading the file
8:46
which is drag and drop you and this
8:48
function will be called and here we are
8:50
reading this file and setting this
8:52
calling this hook function and setting
8:54
this image input image so if you just
8:57
now refresh the application you will see
8:59
this drag and drop functionality and if
9:01
I try to
9:03
click either we can select the image or
9:05
we can drag and drop so once you do this
9:09
now we need to actually in the jsx we do
9:11
need to actually tell to show the
9:14
uploaded image so for doing this uh
9:17
right here if you
9:21
see we need to initialize uh we need to
9:24
show the image as well so just after
9:27
this after this div
9:30
inside curly bracket if the image is
9:33
dropped then in that case this code will
9:35
be executed and here in this div we need
9:38
to show the actual image live preview of
9:41
the image so inside the H5 tag we will
9:43
show a short little preview of the image
9:47
inside the image tag and you will simply
9:49
say image source and the actual image
9:53
and you'll give it a style attribute
9:56
which will be Max width
10:00
which will be equal to
10:06
100% that's all so here we are simply
10:09
showing the live preview of the image
10:11
and if you see if I select the image you
10:14
will see the light preview of the image
10:16
which is showing right here so after
10:18
that guys we now need to show the
10:20
choices as well once we select the image
10:22
we need to show the choices to the user
10:24
so that they can
10:27
simply convert the image from one format
10:30
to another so you'll simply have the
10:32
call here again you will be having the
10:34
medium devices to be
10:40
six and here it will be Simply Be
10:42
comparing that if the image is there in
10:46
that case we need to execute this code
10:50
and we will have the card structure and
10:52
inside the card structure we will have
10:55
card body
10:59
and basically we will have give heading
11:01
which will be convert image so this this
11:04
screen will be responsible for
11:06
converting the image and we will have
11:08
some choices inside this
11:12
form form
11:17
group and here we'll be giving a control
11:23
ID which will be form group
11:29
sorry this will be form
11:32
format and here uh basically what we
11:34
need to do we need to give a form
11:39
label we simply say that select the
11:45
format and then you'll be having the
11:49
form
11:52
control and we need to give some
11:54
attributes to this this will be a select
11:57
field and this will be a as a select
12:03
field and the value will be equal to the
12:05
actual image format we have this state
12:09
variable and when we change this value
12:11
so we'll be giving an onchange event
12:13
handler so this inline function will
12:15
execute and
12:17
whatever is the selected value be
12:20
setting this using the state function e.
12:23
Target do
12:26
value so if you just refresh now you
12:29
will if you select the
12:33
image uh let me see what is the problem
12:36
I think we haven't defined that form is
12:39
not defined so do need to import the
12:41
form here from react bootstrap just
12:45
import
12:46
this and uh I think that's all uh if
12:55
I you will now see uh the screen is
12:59
showing on the right hand side but we
13:01
are not seeing the choices we need to
13:03
declare the choices in this uh in the
13:06
form control if you
13:10
see so inside the form control we need
13:13
to have the
13:15
choices First Option will be for
13:18
webp uh this value will be selected by
13:22
default when you load the page and apart
13:25
from that we will have uh two more
13:27
choices which will will be for jpg and
13:30
PNG you can have more choices as
13:33
well but I'm just showing you for
13:36
example uh this will be
13:42
PNG so after you have these choices and
13:45
we after that we also will be having a
13:49
button bootstrap button and inside this
13:53
we
13:55
will put the variant primary variant and
13:58
uh we give it a onclick when we click
14:01
this button this function will execute
14:04
which is handle
14:06
convert and the label of the button will
14:08
be simply
14:10
convert and now we need to Define this
14:13
function which will be handle convert if
14:16
you see you need to Define this function
14:18
handle
14:22
convert so if you refresh now select
14:26
your image you will see this button and
14:28
the choices as well so now we need to
14:32
basically write this function when we
14:34
hit the button what should happen so
14:38
inside handle convert we will initialize
14:40
the canvas API we will draw the image on
14:42
the canvas for doing this we will
14:44
instantiate a new image Constructor and
14:47
then image. source is equal to image you
14:50
will draw this image and
14:54
onload when the image is drawn on the
14:57
canvas we will basic basically create a
14:59
new element of canvas to draw the to
15:02
draw the image on the
15:04
canvas we will use the 2D context so
15:08
canvas has this method get context and
15:10
we get the 2D context here and we will
15:13
initialize the canvas width to the
15:16
actual image
15:18
width and uh same goes for the height as
15:22
well image.
15:25
height and then we'll draw the actual
15:28
image using the draw image function of
15:30
the context and we drawing this image on
15:33
x coordinate 0 y coordinate
15:35
0 very simple method and after this we
15:39
will convert this image
15:41
to the actual format so we will use this
15:46
function which is widely used canvas to
15:49
data URL so this will return the base 64
15:51
code of the image when we draw the image
15:53
on the canvas and right here after this
15:56
we can using the template string we can
16:00
depending upon which format that you
16:02
need to convert to you will put the MIM
16:04
type here so image/ webp for webp PNG
16:09
for PNG jpg for jpg so we're dynamically
16:13
setting this and after that lastly we
16:15
set the output image using the UST State
16:19
function which is
16:21
converted that's all so we are passing
16:24
this output image and setting this right
16:26
here
16:29
so this is actually this function guys
16:32
which will be responsible for converting
16:34
your output image now we need to show
16:36
the output image on the
16:38
browser now we need to actually write
16:41
here at the bottom side after your
16:44
button after this form is ending right
16:47
here we need to have a condition that if
16:50
the converted image is there in that
16:54
case we need to show the
16:56
image in the H5 tag which is converted
17:02
image preview we show the preview of the
17:06
output image in the image
17:09
tag this will be converted
17:12
image and we'll giving a style which
17:15
will be Max
17:18
width which will be
17:24
100% so after showing this output image
17:27
we also need a download button but just
17:29
out uh below this image so we'll have a
17:33
button here I will put the variant as
17:36
success which is a green button we say
17:39
that uh
17:42
download converted
17:46
image so we'll basically bind a on click
17:49
event here when we click this download
17:51
button we need to execute this custom
17:53
function which will be defining handle
17:55
download now we need to Define this
17:57
function
17:59
handle
18:02
download so inside this if you just
18:04
refresh now let me show
18:07
you uh once you select
18:11
PNG the choices is changed but if you
18:15
see there is some kind of problem
18:17
whenever I change the choice right here
18:19
the preview is
18:27
gone uh
18:30
set image
18:41
format so I think what is a problem
18:45
right here uh I think I made some kind
18:47
of typo mistake right
18:50
here
18:56
uh set converted
18:59
image set image format let me see what
19:02
is the problem set
19:20
image uh Let me refresh here uh you
19:25
basically select the image and then
19:28
click on convert you will see the image
19:30
is converted successfully and we see
19:33
this green button which is saying
19:35
download converted image but if I click
19:37
this button nothing is happening we need
19:39
to write the actual function responsible
19:41
for this
19:44
so handle download if you see inside
19:48
this we actually create a anchor element
19:51
dynamically and click it so this is a
19:54
various we give the file name like this
19:59
this is a code and if you now
20:04
refresh select your image so webp choice
20:08
is selected click on convert so now the
20:11
image is successfully converted to webp
20:14
image and click on the download button
20:16
if you see your image will get down
20:19
converted from jpg to webp so now this
20:23
image opens in the browser because webp
20:26
images are opening in the browser you
20:28
can see that
20:30
in this easy way guys you can create a
20:32
simple image converter inside react
20:35
Che uh all the source code will be given
20:37
in the description of this video if you
20:39
need the full source code uh please hit
20:43
that like button subscribe the channel
20:45
as well if you are watching it for the
20:48
very first
20:49
time so also check out my website as
20:52
well guys which is uh free mediat
20:55
tools.com which contains thousands of
20:58
free tools regarding audio video and
20:59
image and uh I will be seeing you guys
21:02
in the next video
#Arts & Entertainment
#Computers & Electronics