Up next in 10

Build a React Dropbox File Chooser API to Upload Download & Display Files in Browser Using JS
Jan 9, 2025
Get the full source code of application here:
https://gist.github.com/gauti123456/8876a168b5f4e81e96fd461ff15d6e01
Show More Show Less View Video Transcript
0:00
uh Hello friends welcome to this video
0:02
so in this video we will look at how to
0:04
integrate the Dropbox file Chooser how
0:07
to upload download files from Dropbox
0:10
Dropbox as you all know it's a good
0:12
alternative to Google Drive it's a file
0:14
sharing platform where the user can
0:16
select files and upload them so we have
0:19
the right react CHS application and we
0:22
have this Dropbox file sharer so we will
0:24
authenticate first of all with Dropbox
0:26
and we will able to upload download
0:28
files so we have this interface out
0:30
there we have a button out where we
0:32
click the button and the Dropbox Chooser
0:35
will open so I've already logged in and
0:38
now you will see these are all the files
0:39
that I uploaded it is actually showing
0:42
so what you can see you can select some
0:44
files that you want to show in the you
0:46
can select all these files so there is
0:48
the choose button if I click the button
0:51
the files will be shown in the T table
0:53
structure you will now see with live
0:55
preview this is the image URL we have
0:58
the size of the image that is shown here
1:01
168 we have a download
1:03
button for each image this is the actual
1:06
PDF file so you can upload any sort of
1:09
file it can be video PDF as well and if
1:12
I click the download button I will be
1:14
redirected to the Dropbox actual URL of
1:17
that file and here I can actually
1:20
download or whatever I want to
1:23
do so basically we can
1:27
here we have this so we can actually
1:31
download delete you can see we can save
1:33
this or you can download this image by
1:36
clicking the download button so in this
1:39
way you can do this very
1:43
easily
1:45
so we can even upload files so if you
1:48
see in the Dropbox file Chooser we have
1:51
this upload button so we have the upload
1:53
option as well you upload the images
1:55
that you want to upload so as you upload
1:59
the images
2:00
uploading is going on if you see so all
2:04
the three files that I selected will be
2:07
uploaded one by one and now you can see
2:09
the upload is complete so all the three
2:12
files have been uploaded to the Dropbox
2:15
so in this way you can perform all these
2:18
operations if you want to show the
2:20
uploaded files you can click click the
2:23
choose button and then it will actually
2:25
show the
2:26
files in the Tableau structure you will
2:28
see that so now I will show you how to
2:31
integrate this inside react CH all the
2:35
source code will be given in the
2:37
description so we have a specific
2:39
library for this which is react Dropbox
2:43
Chooser this is actually a
2:46
package specifically for react Chas
2:48
applications it communicates with the
2:50
Dropbox API it is having
2:53
3,630 weekly downloads so we just need
2:56
to install this module which is npm
2:58
install react Dropbox Chooser so just
3:02
copy this command and just go to your
3:04
command line and initiate a very simple
3:06
react CH project and we need to also
3:09
install
3:10
bootstrap and react bootstrap so we are
3:13
using bootstrap for building the user
3:14
interface of this application so we
3:17
require these three packages bootstrap
3:20
react bootstrap and react Dropbox
3:22
Chooser so install all three packages I
3:24
have already done that so what I will do
3:27
I will start the development server and
3:30
start from scratch so the very first
3:32
thing we need to
3:34
do so we will initialize the functional
3:39
component so you will see it will hot
3:42
Auto hot Auto reload so if I make this
3:46
change you will see it will
3:48
automatically restart the application so
3:50
the very first thing we need to do right
3:52
here we need to import all the modules
3:55
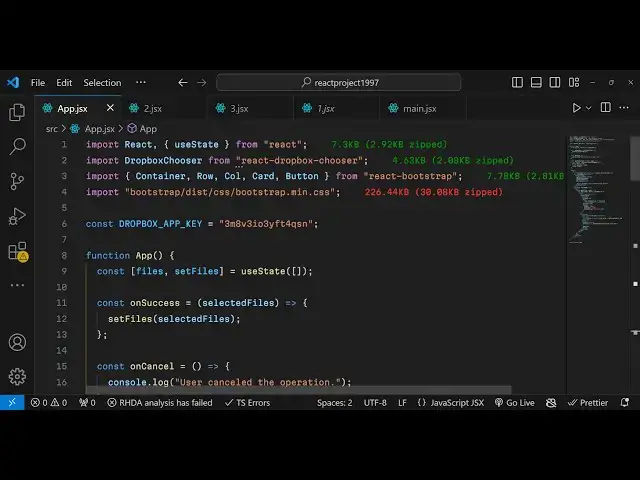
so first of all we'll be importing that
3:57
Dropbox
4:04
uh Chooser and this will be coming from
4:06
the library that we installed which is
4:08
react Dropbox Chooser and then we need
4:11
to also import the
4:14
bootstrap so bootstrap is not necessary
4:16
for this tutorial we are just using it
4:18
for a styling purposes so from react
4:21
bootstrap we are requiring these
4:22
components container row call card
4:25
button and the base bootstrap CSS file
4:28
so once you imported is now we need to
4:31
actually create a variable which will be
4:33
the Dropbox API key so this Dropbox app
4:37
underscore key you will get from this
4:39
Dropbox Cloud console so you need to go
4:44
to Dropbox and create account here
4:46
simply type Dropbox developer you need
4:50
to create a developer account I've
4:52
already done that so then this is their
4:55
website and here you can create apps and
4:58
uh
5:01
so you need to select the API that
5:03
you're using so we are using this API so
5:05
you will select that and which app we
5:08
want the full access so we'll provide
5:10
full Dropbox access we will name our app
5:13
let me call this as sample
5:15
app you can give any name of your
5:18
choice after giving the name click on
5:21
create app so it will actually create
5:23
this app here and here you need to set
5:26
some options so the first option you set
5:28
need to be o o so the redirect URI so
5:33
this will be the U URL that you want to
5:36
set so my application is running on this
5:40
URL if you see Local Host
5:43
5173 so this is my homepage so whatever
5:47
is your url you need to copy this URL
5:50
and simply paste it right
5:56
here so simply just p
6:00
paste and I will be using SL o after for
6:04
authentications so in the URL structure
6:08
I will be using SL o at the very end
6:11
that's why we are providing it and then
6:13
in the authorized domain section right
6:16
in this section whatever domain that you
6:18
want to add in my case I'm developing in
6:22
the Local Host in the development we
6:24
will provide Local Host here so we just
6:27
need to add Local Host
6:30
so just click the add option so Local
6:32
Host will get
6:38
added sorry let
6:42
me local
6:46
host so now you can see the Local Host
6:49
has been successfully added and then you
6:51
can get your app ID you will see this is
6:54
actually your app key so you need to
6:57
copy this this will be different for you
6:59
so don't copy my information and just
7:02
paste it here so just configure that and
7:06
after configuring it now you can use
7:09
this module so now to use this module
7:11
we'll be declaring a variable files set
7:14
files just to keep track of which file
7:17
is selected by the user so we using the
7:19
UST State hook and this will be an empty
7:22
array so here if you we declaring this
7:26
because to show file selected by the
7:28
user or or whatever files they will use
7:31
to upload so this variable will be used
7:34
for keeping track of that now in coming
7:37
back to the jsx so right here we'll be
7:40
using the components that we imported of
7:43
bootstrap this will be the container
7:48
one but before that we do need to create
7:52
a simple button so the first heading
7:55
will be an H1 heading simple which will
7:57
say
7:59
Dropbox file choose selector so we just
8:03
need to wrap everything in the
8:10
div so after this we will have basically
8:15
a div
8:16
section another div which will have the
8:20
class text Center and here we'll be
8:22
embeding this component which is Dropbox
8:25
Chooser so this component guys if you
8:28
don't pass any option
8:30
you
8:32
will you will see this button appearing
8:34
which is open Dropbox Chooser but if you
8:37
click this button nothing happens
8:39
because we need to provide some options
8:41
to this component so the very first
8:43
option it takes is the app key parameter
8:47
so app key we need to provide here so we
8:49
have set this using Dropbox app key and
8:53
then you need to provide the success and
8:56
the error call back so once you provide
8:58
this we need to configure these
9:00
functions on success and when the user
9:03
cancels the operation this on cancel
9:06
will be executed so we need to write
9:08
both these functions on success and on
9:14
cancel and the fourth parameter it takes
9:17
is multi select this means that we will
9:20
able to select multiple files to upload
9:23
and download or show to
9:25
the so you just need to Define both
9:28
these functions at the very top this one
9:31
for on
9:36
success so this call back function
9:39
automatically get access to the files in
9:42
the argument so right in the argument we
9:45
will create an variable this will be
9:48
automatically be passed so whatever
9:50
files the user will select it will get
9:52
automatically passed right here and
9:55
similarly we have the on cancel function
9:58
so this will simply be called and we
10:00
show a message to the user cancel the
10:02
operation so if you just see now click
10:07
this so now you will see automatically
10:09
you will be logged in and whatever you
10:12
will
10:12
see uh you will see the list of files in
10:16
your Dropbox so we are logged in
10:18
successfully and we are actually seeing
10:20
the list of files that we have in our
10:22
current Dropbox account
10:27
so so if I click the cancel button so
10:31
you will see the message printed out
10:33
that is user cancel the operation
10:37
so now we need to allow user to upload
10:41
files
10:43
so for uploading purpose they can
10:46
directly upload this using this
10:47
component we have this function
10:50
available which is in this you can
10:52
directly choose the files that you want
10:54
to upload and just say so now you will
10:57
see uploading process has been started
10:59
so so this uploading part is built in we
11:02
don't need to build it from scratch so
11:04
this is actually the full component
11:06
upload is completed so all the files
11:08
selected has been uploaded now what we
11:10
need to do if I click the choose
11:12
button all the files that are selected I
11:16
need to display that files so for
11:18
displaying those files what we need to
11:21
do if I just
11:23
uh console log
11:26
this so whatever you see whatever files
11:29
that we
11:32
select you can select multiple files and
11:35
click on choose so as I click the choose
11:38
button you will see this uh object will
11:40
be returned and each file will be
11:43
returned to us with having some
11:44
properties such as ID what is the icon
11:48
all that stuff link name of the file
11:50
thumbnail so using this object we can
11:52
now show the files using jsx so what we
11:56
need to do WR in this function we need
11:59
to first of all set the files using the
12:01
hook function that we have which is set
12:03
files and to the this is actually an
12:06
array so we need to set this you can see
12:09
that now in the jsx after this
12:12
form we can
12:17
actually display the files and wrap this
12:22
inside the
12:26
container I give it a class name like
12:29
like
12:32
this we will have the row
12:36
tag and then we have the jsx so if files
12:41
are there
12:42
we mapping through each file and for
12:45
each file we have variables file and
12:47
index so we will wrap this inside
12:51
column and we will actually give it a
12:53
key parameter and we will simply say
12:55
index
13:00
giving a class name of
13:06
uh so after this we need to have a card
13:11
structure we will be displaying the
13:14
images in card like structure so right
13:16
in this we will have if the file exist
13:20
so this is actually the file
13:23
variable if the file link exist in that
13:26
case we need to show the thumbnail of
13:29
the image in this card like structure
13:31
card
13:35
image so all the source code will be
13:37
given in the
13:40
description so what I will do I will
13:43
simply paste it this is little bit
13:45
complicated but uh using we are simply
13:49
using this in a this Loop right here
13:51
that you
13:53
see so if you see we are using this
13:57
simply in a card component we are
14:00
pasting this link file. thumbnail and
14:03
file. Link so you're using this object
14:05
and each file having these properties
14:07
which is thumbnail link we're displaying
14:09
it and we just styling it giving it a
14:12
height of 200 pixel we giving a border
14:15
from outside and we then we displaying
14:18
the title of the image which is file.
14:20
name title of the file and then the size
14:23
we file. bytes we're dividing it by one
14:26
two one24 to get the size in kilobytes
14:30
just it is not necessary we are just
14:33
formatting it properly and
14:35
then the next thing we are actually
14:39
using this function to download the file
14:42
so we have a download button and when we
14:44
click this button we are executing this
14:46
function handle down handle download we
14:49
are passing two things to this function
14:51
the link of the file and the name of the
14:52
file so I think we do need to Define
14:55
this function for downloading purpose so
14:58
right here you can download you can
15:01
Define this function which is handle
15:02
download it will accept two things the
15:05
link of the actual link and the name of
15:07
the
15:10
file so now to download this we can
15:15
easily do this by creating an anchor
15:18
element by using document. Create
15:26
element after that we can set the
15:29
attribute to be
15:31
link and set the download parameter to
15:34
be name actual name and then we can
15:36
click
15:38
this so that's all that we need to do
15:41
right here and if you just refresh your
15:47
application so click it and if you now
15:51
select the files multiple files you can
15:54
select click on the choose button so as
15:56
you click the choose button you will
15:58
actually see the files will
16:00
get displayed I
16:11
think uh let me see let me paste
16:14
everything right I think some error has
16:17
taken
16:24
place P I think some type of mistake is
16:26
there so all the source Cod will be
16:29
given in the description so you can
16:31
actually choose the
16:39
files so you can see that then you can
16:42
click the download button it you will be
16:45
redirected to the actual link of the
16:46
file where it has been uploaded and from
16:49
here you can download you can edit the
16:51
files everything you can do so in this
16:54
way guys thank you very much for
16:56
watching this video please hit that like
16:58
button sub subscribe the channel and do
17:00
check out my website as well free mediat
17:02
tools.com which contain thousands of
17:04
free tools regarding audio video and
17:06
image and I will be seeing you in the
17:08
next video
#Business & Productivity Software
#Cloud Storage
#Other