live_tv
Livestream Starting Soon
00
Hours
:
00
Minutes
:
00
Seconds
Up next in 10

Build a Node.js Express Project to Export SVG to PNG Image & PDF Using Inkscape Library in Browser
Jan 9, 2025
Buy the full source code of application here:
https://procodestore.com/index.php/product/build-a-node-js-express-project-to-export-svg-to-png-image-pdf-using-inkscape-library-in-browser/
Show More Show Less View Video Transcript
0:00
uh Hello friends welcome to this video
0:02
so in this video we'll be looking at how
0:05
to actually make a web application
0:07
inside nodejs Express which allows you
0:10
to convert your scalable vector graphics
0:13
SVG files to PNG image or PDF files so
0:17
it's a converter kind of application
0:20
which allows you to actually convert
0:22
your SVG files to PDF or PNG image files
0:26
so this is actually the interface that I
0:28
developed using Tailwind CSS this uh
0:31
framework and you have this choose file
0:33
button here you'll simply click and you
0:37
will select your SVG file let me take a
0:40
very simple example if
0:42
I select this uh SVG file which is
0:47
actually a image of a car if I open this
0:51
and show to you how it looks like it
0:55
looks something like this you can see
0:57
it's a transparent car image so if I
1:00
select this SVG file and if I try to
1:03
convert this into PDF so we have this
1:04
radio button we can either select P PDF
1:07
or PNG if I select PDF so first of all
1:11
the file will get uploaded and it will
1:13
get processed inside nodejs Express and
1:16
your PDF file will get downloaded you
1:18
will see as an attachment if I open this
1:21
now you will see this PDF file will get
1:23
created and it will only create one page
1:25
and it will hold the image SVG image it
1:28
is you can see the quality of the image
1:30
it is looking good and it has been
1:33
converted to a PDF document same goes
1:36
with the PNG as well if you select this
1:38
time the PNG radio button now your SVG
1:42
file will get converted to a PNG image
1:45
file if I open this now image file you
1:47
will
1:48
see the SVG has been converted to a PNG
1:52
file so this is a online converter
1:54
website that we'll be developing in this
1:57
tutorial step by step code I will write
1:59
a next explain to you all the source
2:01
code is given in the description of this
2:03
video so you can go to the description
2:05
and if you want the source code you can
2:07
go to the description so now to get
2:09
started we first of all need to tell you
2:12
which modules that we are using for this
2:14
application so first of all for the web
2:17
server we are using Express which is
2:19
actually a number one web server
2:21
framework in nodejs almost 26 million
2:25
downloads are there then we are using
2:28
malter Library which is a file upload
2:31
library in nodejs which allows you to
2:33
upload files inside your
2:36
server then we are actually using an
2:39
open-source library for converting SVG
2:41
to PDF or PNG inkspace inkspace you can
2:46
just see it's a utility kind of a
2:48
software free open source vector
2:50
graphics editor SVG editor so which has
2:53
its various users you can convert your
2:55
SVG to PDF image files so first of all
2:58
you need to have this software installed
3:00
on your machine so I already downloaded
3:03
this so go to their official website
3:06
inkspace dorg and there's a download
3:09
option right here and depending upon
3:11
your operating system either it can be
3:13
Linux Mac windows so it is a
3:16
crossplatform software you need to
3:18
select your operating system and
3:19
depending upon that you can install this
3:21
exe file so once you install it let me
3:24
show you my location so I installed it
3:26
in the D drive and I created this folder
3:30
space so you need to first of all just
3:33
add this inside your environment
3:35
variable so just open this environment
3:38
variable go to path and just add this
3:41
path I have already added this you can
3:44
just see this
3:46
path just add this path in the
3:48
environment variables so once it is
3:50
installed you can cross check by going
3:52
to command line and just typ in inkspace
3:55
so if the command is successful and you
3:57
have already installed it inkspace
3:59
success sucessfully so
4:01
now after it has been installed now we
4:04
can start building this application so
4:08
this is actual directory structure of
4:10
this application it will look something
4:13
like
4:16
this so we will have this public folder
4:19
where we have the uploads directory
4:22
where will be storing all the input
4:24
files which the user will upload to the
4:26
server you can just see this is a PDF
4:28
file or SVG file that they will upload
4:32
we need to create this directory
4:34
structure before you create this
4:35
application so just create a public
4:37
folder inside that create uploads
4:39
directory where all your input files
4:41
will get downloaded sorry
4:44
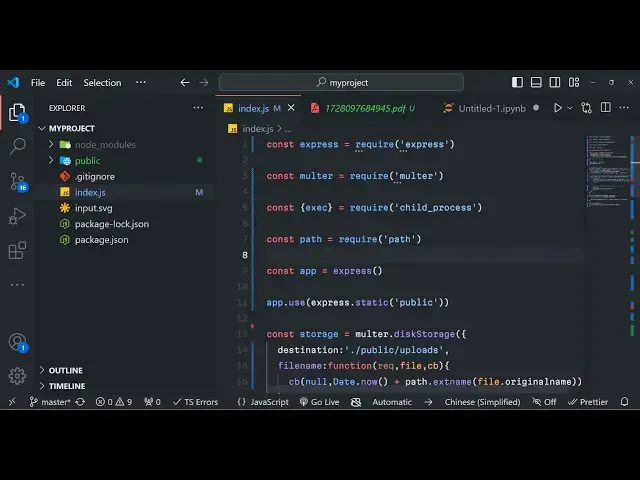
uploaded uh this is index.js the
4:46
starting point of the
4:49
application if you want to create this
4:51
from scratch you can just invoke this
4:52
npm in a-y command this will create a
4:56
package.json file with default options
5:00
so then we need to install these two
5:02
modules Express and malter express for
5:05
the web server and malter for the file
5:07
upload install these two modules and
5:11
after they just create index or JS
5:16
file and here we can actually start a
5:19
very basic Express server which is
5:22
listening on Port 3,000 so we can simply
5:24
require the Express
5:27
package requiring Express
5:30
I need to start a new Express
5:33
app very basic app app. Listen you'll be
5:37
listening on Port
5:39
5,000 in the call back function we can
5:41
simply say that app is listening on
5:45
Port 5,000 and here we can uh make this
5:50
public directory as static you have
5:53
created this public directory Now to
5:55
create this as static we'll use a
5:57
middleware which is app.
6:01
use inside this we'll pass express.
6:05
static and we will make this directory
6:08
this public directory is static because
6:10
we'll be storing all your static assets
6:12
such as index HTML files image files all
6:15
these files so that's why we make this
6:17
as a static directory this is a very
6:19
important line if you don't write this
6:22
your application will not
6:24
work so after you set this directory of
6:27
static we need need to
6:32
also import the molter package for
6:35
uploading the files first of all we just
6:37
need to require it require
6:40
molter and then we need to create this
6:43
inside public directory our index. HTML
6:47
file which will be the interface that
6:49
the user will see index. HTML so here
6:52
we'll be using
6:54
some get GitHub co-pilot which actually
6:57
makes the process far more easier so
7:00
what I will do is that I will simply
7:02
make a simple prompt to the GitHub
7:03
co-pilot that make a simple HTML file
7:07
having
7:09
Tailwind CSS
7:15
CDN so what it will do it will actually
7:17
create this HTML file automatically for
7:20
me include the Tailwind CSS
7:27
CD so this uh
7:30
GitHub copilot uh makes it really easy
7:33
to actually construct write code
7:37
automatically you can just see it has
7:39
created automatically included the
7:41
CDN of Tailwind CSS and we can change
7:45
the
7:47
title SVG to PDF and PNG
7:52
converter so in this way you can use
7:54
GitHub co-pilot inside your projects to
7:57
actually reduce the typing and here we
7:59
can again write a simple prompt that to
8:02
make a simple UI
8:05
interface to
8:08
select to allow the
8:11
user to select image
8:14
file sorry
8:17
SVG and then have a radio
8:22
button having output
8:26
format for PDF and
8:30
PNG and a button and use Tailwind
8:34
classes you just need to give these
8:36
prompts so that the AI will write your
8:40
the code automatically so once you do
8:43
this it will actually you can see it
8:46
will generate this code for you
8:47
depending upon the prompt that is
8:50
there either you can accept or
8:53
discard so in this way if I open this
8:56
this application in the browser in uh
8:59
will look something like
9:05
this so you can see uh the Tailwind CSS
9:15
CDL I think the Tailwind CSS CDN is
9:18
incorrect so we can directly go to the
9:21
official website and include the CDM
9:33
so you can just see the interface is
9:35
quite ready this is a heading this is a
9:37
input file where the user can select
9:40
then we have the radio button either
9:42
they can select PDF or BNG then we have
9:45
the button so in this way you can
9:48
actually generate some static code using
9:51
this AI get copilot and then here you'll
9:55
be writing the basic JavaScript so it
9:58
will be simple be
10:01
including creating a new file client.js
10:04
in the RO same
10:10
directory this will be the client
10:12
JavaScript
10:16
code so now to submit the form what we
10:20
will do inside
10:21
this we will get reference to the form
10:24
element you'll simply say document. get
10:26
element by ID you'll be selecting the
10:29
the form element then we'll be attaching
10:32
a event handler to this form so when the
10:34
form submits we need to Simply select
10:38
whichever file the user has selected we
10:40
can attach this event handler by using
10:42
this method add event listener and uh we
10:46
have the submit event handler so when
10:47
the form submits this call back function
10:50
will execute and we'll be simply be
10:52
saying e. prevent default which will
10:55
prevent the auto submission of the form
10:57
now we need to get access to the file
10:59
that the user has selected so for that
11:01
we'll be using the form data
11:04
Constructor which is a very basic method
11:06
in JavaScript to actually get the things
11:09
that user selects so after constructing
11:13
a new instance of it now we need to
11:15
Simply select the
11:19
file for that we'll be using again
11:21
document. getet element by ID so we have
11:24
given this ID to this uh element if you
11:27
closely look in the HTML SG file let me
11:31
show
11:32
you in the index. HTML file make sure
11:36
that you give this
11:39
ID you can just see we have given this
11:44
ID SVG
11:46
file so we have given this ID to it and
11:50
directly we are targeting it in the
11:52
JavaScript so after you do this we also
11:56
need to do the same thing for the format
11:58
as well so what whatever format the user
12:00
has selected this time we'll be can use
12:02
Query selector as
12:04
well and here we need to provide a
12:07
selector for getting that output value
12:11
so this is actually the selector here
12:14
you'll be giving the name parameter that
12:16
we have given in double codes which is
12:21
format and whatever is the radio button
12:24
value checked do
12:26
value here we are targeting the name
12:29
value here we targeted the ID value so
12:32
if you closely look in the index. HTML
12:34
we have given this uh name parameter to
12:37
Output format to both the radio buttons
12:41
output format so we are just targeting
12:44
this just replace output format
12:50
here so we are using this name parameter
12:53
to get the actual value so after we get
12:56
both these values we can append this in
12:59
the form data object form data append
13:02
first of all the SVG
13:05
file which is uh file field do files
13:10
zero then
13:12
the output format either it can be PDF
13:17
or PNG this is stored in this variable
13:20
which is
13:21
format so we are actually transferring
13:23
both this two information first is the
13:25
actual file and the second is the actual
13:27
format
13:29
in this form data now we need to
13:32
actually make a simple post
13:36
request to the server from the client
13:39
for using this we using the buil-in
13:41
fetch API in for every browser so fetch
13:44
API here we need to first of all it
13:46
takes is the address to which you need
13:49
to make it we need to basically first of
13:52
all upload the file so we'll making a
13:54
post request to/ upload and then the
13:57
second parameter is will be an object
13:59
checked here the method will be
14:02
post and here we providing the body here
14:05
which is the form data
14:08
object this fetch request will return a
14:11
promise we can handle this using the uh
14:14
Den keyword first of all we need to
14:18
convert this into Json again it will
14:20
return a promise uh here will be having
14:24
the file name after uploading it you can
14:28
just console log it in the browser so
14:32
here we are simply making a post request
14:34
from the client to the server now we
14:36
need to make this request in the server
14:38
site code in the index.js
14:41
file we need to first of all upload this
14:44
input file which is coming from the
14:46
client for doing this as I already told
14:49
you we are using malter Library we need
14:52
to first of all make the storage object
14:55
right here we're using the deck storage
14:57
method we need to actually store the
15:00
file in the physical storage so it'll be
15:03
providing this
15:04
destination it will be stored inside uh
15:09
public directory SL uploads that we
15:14
created put a comma and the file name
15:16
what file name that you want to give to
15:19
request file call
15:21
back so here we'll be providing a unique
15:24
file name by using date.
15:27
now and and for this we also need the
15:30
path module as well which is a built-in
15:33
module and using this we can get the
15:36
extension path. extension
15:42
name whatever is the original name of
15:44
the file so file. original
15:47
name so we have constructed the storage
15:50
object now we can simply use
15:52
it inside molter and uh whatever is the
15:56
storage we are passing it like
16:01
this now we need to actually make that
16:04
post request app. poost SL upload to
16:07
actually upload the file and then we'll
16:09
be using this middleware upload. single
16:13
we are uploading only a single file and
16:16
whatever is the name parameter that you
16:17
have given right here if you see in the
16:20
form data you have given this SVG file
16:23
so whatever it is we need to replace it
16:26
here SVG file
16:30
and then request
16:33
response so after uploading it
16:43
uh we can actually send
16:46
uh this uh path here request. file.
16:51
paath as a Json response so what you
16:54
will see uh if I
16:56
now select this SVG file
16:59
click on convert so what you will see
17:04
uh in the uploads directory nothing has
17:06
been uploaded uh let me see if any error
17:10
has taken
17:11
place uh it is saying that cannot read
17:14
properties of
17:15
null at line
17:18
number okay I I see the error because we
17:22
haven't given the ID to the form element
17:25
just give it an ID to the form because
17:28
we are Target getting this
17:30
ID like this so just give it that ID to
17:35
the form and again resubmit
17:39
the form here select your SVG file click
17:43
on convert uh you can just see nothing
17:46
happens here but if you see in the we
17:49
actually getting this path here public
17:51
SL upload SL the file name so the file
17:54
has been uploaded and if I check in the
17:56
uploads directory this is your SVG file
17:58
which has been uploaded in the public /
18:00
uploads directory now we just need to
18:03
process this file and convert this into
18:06
either P PDF or PNG depending upon the
18:09
choice so right here uh instead of
18:13
passing the input file path we need to
18:15
first of all format whatever the format
18:18
the user has selected request. body.
18:21
format and the SVG path path.
18:25
resolve request. file. paath
18:30
and here you'll be after getting both
18:32
these parameters we'll be declaring
18:35
output
18:36
path so SVG path.
18:40
replace so the output file name will be
18:43
the same file name of the input file L
18:47
just the extension will change so
18:48
instead of SVG it can be either PDF
18:52
or PNG so for that we'll be dynamically
18:56
be placing this so dot
18:59
whatever is the format it can be either
19:02
PDF or
19:04
PNG the file name will be the same so if
19:07
the input file is named as file. SVG so
19:11
the output file will be file. PDF or
19:15
file.png and now we'll be using the
19:18
child process
19:19
module execute
19:23
because in nodejs if you want to execute
19:26
any command programmatically we'll use
19:28
this child process module which is a
19:30
built-in module inside that module we
19:33
have this method of
19:34
execute so here we will be
19:41
executing the inks
19:44
space
19:46
command by using the execute method we
19:49
say
19:50
inkspace whatever is the file input file
19:54
which is located in the SVG
19:56
path and then we provide this parameter
19:59
export D- export and then the actual
20:03
file name is uh located in this
20:10
uh output
20:14
path this needs to be dash dash file
20:18
name just make it correction and then it
20:22
has
20:23
a call back function which will have
20:26
three variables
20:34
this error if any sort of error take
20:39
place if no error take place in that
20:42
case
20:44
uh you can
20:47
simply if any sort of error take place
20:49
we can console log
20:53
error and then just
20:56
return and we can even can send a simple
21:00
response to the uh client that uh
21:05
error converting
21:08
svg2 like
21:17
this if no error take place then we will
21:20
simply send the path of the output file
21:24
to the
21:26
client so we can simply say response.
21:30
send path. base name output
21:35
path that's all so if I
21:39
uh just select the spvg file click on
21:43
PDF convert so you will see unterminated
21:48
fractional
21:51
number if you see uh the PDF file has
21:54
got created you will see the SPG file
21:57
has got converted to PDF
21:59
but here
22:05
uh I think some error has taken place
22:10
uh some type of mistake so what I will
22:13
do
22:16
uh I will copy this once
22:26
again just make this
22:30
at the very
22:38
top let me execute this once again uh
22:42
you will actually
22:56
see so if you see here we we are sending
22:59
this
23:01
response you can even send it as a Json
23:04
response as well
23:15
uh instead of sending it as a plain
23:18
response we are sending it as a Json
23:20
response
23:30
so if you now see we have got the
23:32
successfully the path of the output file
23:35
in this case the PDF file the SVG has
23:38
been converted to PDF we are getting
23:40
this Json now we need to Simply download
23:44
that file automatically in the browser
23:47
as soon as the user click the convert
23:49
button so now to do that we just need to
23:53
create a simple get request in the
23:56
server site code
24:02
app.get this will be a dynamic request
24:06
after slash download we have this cury
24:09
parameter
24:10
underscore file Name colon file name
24:14
this means that it's a dynamic parameter
24:17
every time it will be different so here
24:20
in this call back
24:24
function we need to write these two
24:26
lines of code for first of all fetching
24:29
the file
24:30
name by using request. params file name
24:35
and then we use the response. download
24:37
function of Express to actually download
24:40
the file as an
24:42
attachment so it is present in the /u/
24:46
uploads file
24:49
there so this is the get
24:53
request so now in the index Ro HTML uh
24:57
here we have are in the client JS file
25:00
if you
25:01
see we are console logging it we don't
25:04
need to console log instead we just need
25:16
to redirect the user to window.location
25:23
href slash download slash whatever is
25:27
the file name
25:32
file name. paath there is a Path
25:35
property
25:39
so like
25:43
this so if you refresh now hopefully if
25:47
you now select your SVG file select your
25:51
PDF click on convert so it will take
25:53
some time and you will now see the PDF
25:56
file has been download as an attachment
25:59
if you open this you'll see SVG file has
26:02
been successfully
26:04
converted if I select PNG
26:07
now again the same process will happen
26:10
this time the SVG will convert to
26:14
PNG image file so in this way you can
26:18
actually convert your SVG files to PDF
26:21
or PNG it's a really simple converter
26:24
website that we built in this tutorial
26:26
from scratch in node Json Express
26:28
and for this purpose we have used the
26:30
open source library of
26:33
inkspace I showed you step by step how
26:35
to install this how to use this inside a
26:38
real life project so if you need the
26:40
full source code of this uh video the
26:43
link is given in the
26:45
description and uh thank you very much
26:48
for watching this video and you do check
26:50
out my website free media
26:52
tools tool website where I actually
26:55
deploy tools
26:58
on a daily basis so do check this
27:01
website
27:02
out and please hit that like button
27:05
subscribe the channel as well and I will
27:07
be seeing you in the next video
#Design
#Programming