Up next in 10

Build a Next.js Google Drive Clone in Browser Using NextAuth.js & Firebase Storage & Auth Full App
Mar 5, 2026
Buy the full source code of application here:
https://procodestore.com/index.php/product/build-a-next-js-google-drive-clone-in-browser-using-nextauth-js-firebase-storage-auth-full-app/
Show More Show Less View Video Transcript
0:00
Uh hello guys in this video I'll show
0:02
you I built out a NexJS Google Drive
0:04
clone. So in this video I will show you
0:07
the overall directory structure of the
0:09
project. So coming back to the project
0:11
this is actually the full directory
0:12
structure of the project. It's a
0:14
complete NexJS project. The link is
0:17
given. You can directly purchase the
0:18
full source code. So I will break you
0:21
down and running this project from
0:23
scratch. It has authentication as well.
0:26
So you'll see all the files are coded
0:28
inside TypeScript. So everything is
0:29
customizable. You can easily customize
0:31
this and add additional features. So
0:34
once you purchase it automatically all
0:36
the source code will be downloaded from
0:37
Google drive. So we are running this
0:40
application as you see npm run locally
0:42
this. So first of all let me use a brand
0:46
new account
0:49
and open the homepage.
0:52
So the application first of all opens.
0:55
It has the same interface of Google
0:57
drive. So first of all, it offers you to
1:00
authenticate. So we actually
1:02
authenticated using Firebase. So we have
1:04
used the Firebase authentication and
1:07
Firebase storage for storing your files.
1:10
Once you click the authentication
1:12
button, it will allow you to
1:14
authenticate. First of all, you just
1:15
need to grant the permission and after
1:18
that uh the interface will show right
1:20
here.
1:22
So the same interface of Google Drive.
1:24
Here you will see we have this option of
1:28
Clicking new here. And you can be able
1:32
to upload files here.
1:35
And once you click the new button here,
1:37
you will be able to select whichever
1:40
files you need to upload.
1:43
And here you can actually select
1:46
you can select a folder, you can select
1:49
a image, it can be a video as well.
1:52
[clears throat] So as soon as you select
1:54
the video, you will see the video is
1:56
successfully uploaded. You will get this
1:58
notification similar to Google Drive.
2:00
And after that
2:05
it will show right here inside the
2:07
dashboard area. You will see that video
2:09
is successfully uploaded.
2:13
Uh you will see that and similarly you
2:17
can upload a image as well. So you can
2:20
add multiple images.
2:24
So we are actually using Firebase
2:26
storage in the back end here for
2:27
actually storing all these media files
2:30
all these files which are automatically
2:32
uploaded. So you will see that the files
2:35
are successfully uploaded and uh now we
2:38
have all the options here. We can simply
2:41
click this and you can open the file
2:44
here. You will see we using Firebase
2:46
storage right here and inside the code
2:49
you once you purchase it it's very very
2:52
easy for you to deploy this or configure
2:54
it. Simply open uh this file here which
2:57
is
2:59
inside the source folder you will find
3:01
this file firebaseconfig.typescript
3:04
file. So inside this file you just need
3:06
to replace the entries right here.
3:07
Simply paste your own Firebase
3:10
configuration object
3:14
and uh also in ENV file you need to
3:17
paste the Google client ID and client
3:19
secret because we are using the Google
3:22
authentication for this. So you need to
3:24
go to Google cloud console. Simply
3:26
create a credential co client ID. I've
3:30
already created this. So I pasted this
3:32
uh client secret and client ID. So you
3:35
paste need to authorize JavaScript
3:38
origin authorize redirect URL.
3:42
So you just need to create this env file
3:45
which is really easy to do. And after
3:48
that for this authentication we using
3:50
this framework which is next o inside
3:53
next.js. As you can see we using the
3:56
latest version of next firebase next o
3:59
which is a library for authentication in
4:02
nextjs applications.
4:06
So you have all the options here. You
4:08
can download, rename,
4:10
you can add to this. So this section you
4:14
will see that you can even also can
4:17
create a new folder as well. So click
4:20
new folder and here you can
4:24
also can create a folder similarly to
4:27
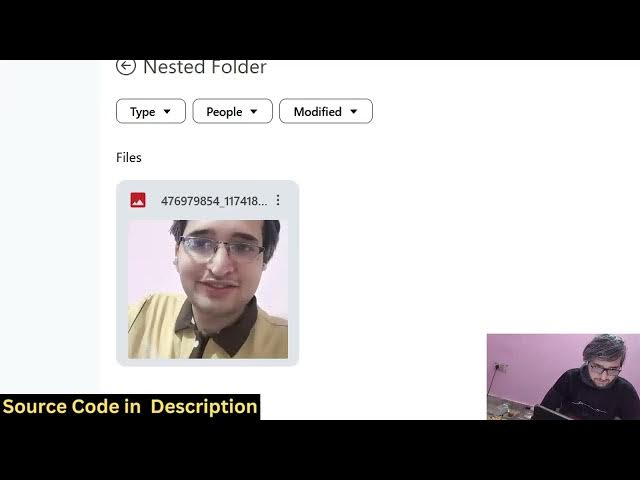
Google Drive. So you can enter into this
4:29
folder. So this is a nested folder. And
4:32
now here you can upload your files.
4:36
So it's really simple and the link is
4:39
given guys. You can directly purchase
4:41
the source code. So it's very easy for
4:43
you to customize this and it will save
4:45
you a lot of time because I coded this
4:48
directly inside NexJS.
4:51
So now if you want to delete a folder
4:54
you can click move to bin. So it will go
4:56
to the trash section and right here you
4:59
can now click delete forever and it will
5:02
be deleted from the Firebase storage
5:07
and we are using this console
5:09
firebase.google.com. We just need to
5:11
create account here and simply paste
5:13
that object that I showed you. It's
5:15
really simple and it's using this next o
5:21
library. If you don't know this next
5:28
is actually a authentication library
5:31
specifically for nextjs application. So
5:33
we are using this library inside our
5:36
project.
5:37
So you can just refresh it. Close the
5:40
tab.
5:42
So it's completely authenticated and we
5:45
are storing these files inside the
5:48
database. So if you close the tab again,
5:50
open, reopen this, your files will be
5:52
retained here. You will see that you can
5:55
try this with a different account here.
5:58
So it will now if I try this with a
6:01
different account, you will see that
6:02
again it will ask me to login
6:06
again sign in with Google. So it's a
6:08
complete full stack nextjs Google drive
6:10
UI clone. It has all the features. So
6:12
once you authenticate, it will create a
6:14
brand new account here. Again, you
6:16
repeat the process. you actually select
6:19
the images. So this is a different
6:21
account here. You will see that
6:24
again you select.
6:41
So you can see that these are two
6:44
different accounts here. So that's why
6:46
it's completely authenticated and uh you
6:49
can
6:51
let's suppose you want to delete this
6:53
you can click move to bin you can rename
6:56
the file as well change the name
6:59
it has all the features here of Google
7:01
tries if you're interested in this
7:02
project the link is given in the
7:04
description if you still face any issues
7:06
you can email me after the payment I
7:08
will definitely help you and
7:12
so the link is given in the descript
7:14
description you can see all the features
7:17
are there and uh it's fully customizable
7:20
it's using the latest version of next
7:22
next o
7:25
firebase as well Prisma for creating
7:28
that database
7:32
so each and every component is divided
7:34
into its appropriate TypeScript file so
7:37
each and everything is customizable so
7:39
it's easy for you to after you purchase
7:41
it it's really easy for you to deploy
7:44
this application as well and also add
7:46
additional features. You will see that
7:49
each and every component is
7:50
customizable.
7:53
So the link is given guys in the
7:55
description. You can definitely purchase
7:57
the source code.