live_tv
Livestream Starting Soon
00
Hours
:
00
Minutes
:
00
Seconds
Up next in 10

Build a Next.js 14 Full Stack User CRUD With Routing & Server JSON API Using MongoDB in Javascript
Jan 9, 2025
Buy the full source code of application here:
https://procodestore.com/index.php/product/build-a-next-js-14-full-stack-user-crud-with-routing-server-api-using-mongodb-in-javascript/
Show More Show Less View Video Transcript
0:00
uh hello guys welcome to this video so in this video we will be looking at how to build out a full stack NEX
0:07
js14 user cred application in the browser using JavaScript and Tailwind
0:14
CSS and you can actually see the live demo on the screen guys we are actually
0:19
running this application on Local Host 3000 and currently we have one user out
0:25
there which we are displaying it from mongod DB database we have the functionality for creating user
0:31
displaying users or updating the information or deleting them so we have the username email address and now if I
0:39
want to create a new username if I show you the database right here this is my database next cred project we have a
0:45
table of collection of user and we have this one record which is available which is ID is the primary key name email
0:54
address and password so we are actually can create a new user and if I click the
1:01
button create user here I can provide the name and then the email address and
1:07
here we can provide the password as well click on Create and now your second
1:13
record will be created and instantly without uh any delay you will see the
1:18
result as well so if I just refresh my database and show to
1:23
you just refresh you'll see the second record is added in the mongodb database
1:30
and we are simply showing that right in the front end as well so we I will be
1:37
showing you in this tutorial guys uh the data fetching how we do in next year's 14 the API routes all this will be
1:44
coming in this video we can even edit this information if I click the edit button you will able to edit a
1:51
particular user and this is actually the API route Local Host 3000 edit followed
1:57
by the primary key which is the ID this is dynamic routes in nextg and here you
2:02
can change the username click on update and now you can see your username is
2:09
simply updated and if I show you the database as well if I just refresh my username is
2:16
also updated as well we can even click the delete button right here if you want to delete a certain entry you will see
2:24
are you sure you want to delete Sanjay I will say simply delete and it will make
2:29
that delete request and instantly that will be removed and if I show you refresh it that entry is removed right
2:36
here there is a single record available we can create delete update and we can show users so in this
2:43
way in next js4 we are using Tailwind CSS for the UI that you are seeing right
2:49
here user interface so if you are interested in watching this video please hit that like button subscribe the
2:56
channel and if you're interested in purchasing the full source code with with directory structure and full
3:01
documentation and support from me the link is given you can go to my website pro.com the link is given in the
3:08
description of the video after you purchase it you will be redirected to Google Drive where you will be having
3:14
this uh ZIP file which will contain all this directory structure with the full documentation on
3:21
support I will provide you if you face any problem so the source code is given in the description so now let's get
3:28
started guys by building this application so we are using next chair I
3:35
already told you guys at the recording of this video at the time of recording this video the latest version is 14
3:42
version and we are using this we are actually using mongodb and for interacting with mongodb
3:49
we will be using Mongo's package which allows you to actually interact with
3:55
mongod DB database create collections insert data delete data update data so 2
4:01
million weekly downloads and we are using Tailwind CSS which is a user
4:07
interface for building user interfaces a setad of predefined CSS classes it has
4:14
and then we are also using S SWR which is a data fetching library for react
4:19
cheers so it's a react hook library for remote data fetching so we also will using this
4:27
package as well so let's start building this guys so the very first thing I will
4:32
do I will simply go into my projects directory and uh I will simply make a
4:39
new project now to make that project the command is npx create next app at theate
4:48
latest so we are installing the latest version so next JS user crud
4:56
project this is actually the name of the project that I'm giving right here this is npx create next app at theate latest
5:04
so just enter it it will ask you some questions that you want to answer it while setting the next js14 application
5:11
so it will actually ask you whether you want to set up the source directory you
5:17
want to use typescript or not so I will say no I will stick to the default option I want to use JavaScript es lint
5:24
I don't want to use it so no Tailwind CSS I will say yes I want to use Tailwind CSS so simply press yes it will
5:32
set up automatically for you would you like to use the source directory I will say yes because I do need to use the
5:39
source directory an app router by default yes
5:44
recommended so would you like to customize the default import allies I will say no stick to the default options
5:51
so don't change any option so now it will install all the packages which are
5:56
required for this so this will hardly Take 5 to 10 seconds depending upon your internet connection so once it is in set
6:03
up we can open this project inside vs code so just wait for the command to
6:18
finish so it is also installing those Dev dependencies if you see this is
6:24
Tailwind CSS this is post CSS so it is automatically setting setting up the
6:29
tment CSS for you so you don't need to manually do it so that's the advantage
6:35
of using these questions so depending upon your preference you can use any UI
6:42
framework
6:49
so so once it is installed we will open the project in
6:55
the VSS code so now it is created that next project I will CD
7:01
into nextjs user crud and open it inside my VSS
7:09
code this is actually the basic structure of a next 14 project guys we
7:15
have the app router folder in the source directory we do have the app folder right here if you see in the source
7:21
directory we do have the app folder inside the app folder we have the layout
7:26
file we have the index page.js by default every route that you create
7:33
index every client route that you create you must name your file as
7:38
page.js right here so if I just start my nextjs application by running npm runev
7:46
this will start the development server on Local Host 3000
7:51
so this is my layout file where you can actually provide your title and description and your head tag this is
7:59
Global for your application this is the app route here
8:05
you can write our API routes or client routes as you know and nextjs is a full
8:11
stack application you can write client side code and as well as server site code you don't need any nodejs or
8:17
Express so if I just navigate to Local Host 3000 it will just compile your
8:24
application and it will take some time whether you're running it for the very first
8:30
time after it it will refresh it you will see this is the next CH basic app
8:35
and now we can edit this file right here we can remove everything from
8:42
here we don't need this so we can remove this and just have a Hello World
8:53
message so just refresh now there will be this hello world message all the styling will be be removed you will see
9:00
that so in this way now to set up your Tailwind CSS guys you do need to
9:06
actually you have see basically it created this Tailwind config.js file in
9:12
the root directory and inside this it automatically done this so now inside
9:18
your Global CSS file I think this file is not present you do need to create
9:24
this file okay I think you do need to create
9:30
this file if you see in the package.json file we have these packages installed
9:37
which is post CSS and Tailwind
9:42
CSS and we also need to install this package as well in order to set up Tailwind
9:49
CSS so just execute this command which is npm install D for a Dev
9:55
dependency we need to install this Auto prefixer package so we already have
10:01
installed this tailwind and post cxs so just need to install
10:08
this that's all and just here inside your root directory in the source
10:16
directory you do need to create a file called AS Global global.
10:23
CSS it is saying that it already exist oh sorry it already exists so you will
10:28
see it has has already Tailwind it has already included that so so you don't need to set up
10:35
anything so it already automatically did that for you whenever you answered that question so now in the layout. JS file
10:42
you can see at the very top we are including This Global CSS right here globally inside of our application so
10:49
that's why it is included now we can actually give any Tailwind class right here to this element
10:57
so so there is actually a class in Tailwind which you can give which is
11:05
uh BG red
11:12
500 so you need to restart your server npm run def so you can give any tailin
11:18
class now to your
11:25
GSX so you'll see the background color will change to red so we will look at later on the CSS part for the time being
11:33
we just need to set up the mongodb database so we are using this special software mongodb Compass which allows
11:39
you to actually create your collections and tables mongodb Compass just search on Google and install this software it's
11:46
a GUI based software for mongodb completely free so once you install this
11:51
uh you just need to it will look something like this so basic uh this is a connection string
11:58
DB Local Host 27017 this is a connection string by
12:03
default it runs on this port number and right here inside your nextjs
12:09
application you just need to create a EnV file and right here just write this connection string so just say mongodb
12:18
URI and just write this connection string mongodb colon sl/ localhost
12:25
27017 followed by your database name so I will create this database next
12:32
crud or I can say coding s sorry free media tools this is the name of
12:41
the my channel right here so I will create this database free media tools
12:47
so first of all connect it and now simply create this database free media
12:53
tools
13:02
I think you don't need to create the database manually this next CH will automatically create it so you just need
13:08
to provide the UR this full URL alongside with your database name you don't need to manually create the
13:15
database it will automatically get created so NV file is created now right
13:20
in the source folder you need to create a lib folder where we will be creating this
13:27
mongodb dogs file so here we'll be writing our we'll be
13:33
importing the Mongoose library from the Mongoose
13:39
package and I think we haven't installed the Mongoose package if you see okay we
13:46
haven't installed it we do need to install it npmi and S SWR for data fetching these
13:54
two modules are necessary simply install this npm and S SWR simply install the them and
14:03
this will be our dependency so it will get added right here in this
14:12
section you can see that we are using the latest version of everything react 18 next 14 so it is these two packages
14:20
are added and S SWR so right here uh we need
14:26
to import the mongoose package from the package and right here we need to
14:34
specify the connection string
14:40
so mongodb URI and this will be coming from the environment variable process.
14:46
EnV and mongodb urri and here we'll simply compare that if mongodb URI is
14:53
not set then in that case we'll be throwing a new error to the user that uh
14:59
please define the mongod DB URI EnV
15:08
variable inside EnV file like this so that's
15:17
all after this if the variable is defined in that case we will say global.
15:25
mongus and then if this is not
15:30
find then we will say cast is equal to Global is equal to
15:38
connection null and promise
15:45
null so what what we are doing right here basically Global do is
15:50
actually a connection variable we are storing it inside the scatch variable so we are simply checking in the safe
15:56
condition if this scatch variable doesn't have a value in that case we are defining it to global. mongus and here
16:02
we are defining the connection to be null and the promise to be null and then we have we will Define a function which
16:08
will actually connect the DB database connection method so this will be a
16:14
simple async function and here we will again say if cat do connection so this
16:20
see this means that if the connection already exist in the cat then return that connection cat.
16:27
connection if if the connection is not available in that case we do need
16:34
to connect it so if catched do
16:42
promise then we need to define the options right
16:49
here buffer commands to fall this is slightly complicated guys you just need to copy paste whatever whatever I'm
16:55
doing right here this is just to actually connect the
17:03
database so this is not equal to the just colon right here after we Define
17:09
the options we just need to say catch. promise and then this have the
17:16
connect method to actually connect to that database mongodb URI and pass the
17:21
options as well so this will actually return a promise
17:30
we'll return this uh Mongo's uh variable you can see that so we have the connect
17:37
method inside to actually connect to that database then it will return a promise which will have this connection
17:44
variable so we are simply returning it so after we do this we basically will store this variable cash.
17:53
connection dash. promise and then we will return this
17:59
cash. connection and then you just simply export this file so that we can use it
18:05
in different files export default DB connect so we are only exporting this
18:12
function right here that we defined DB connect so we are exporting it so that we can use it in different files so
18:19
similarly we need to create a new folder right here which is models so here
18:25
models represent the data which we want to store it inside the table so just create a user.js
18:32
and we now here in this file we will Define the schema or data what we will be storing it again you'll using the
18:39
package and right here we will Define the user
18:44
schema so new
18:53
schema so don't need this
18:59
so in the schema we have three variables name will be of type
19:04
uh string and it will be required so required to be
19:10
true Boolean parameter so name is required then email again type will be
19:18
of string and it will be required to be true and one other property we are
19:25
adding is is unique so the email should be unique it can't
19:31
be the same two emails can't be the same it should be unique and then the
19:36
password so in this easy way you can Define your schema whatever data that you want to store it in which structure
19:44
required to be true so we can have more restrictions such as that let's suppose
19:50
if you want to have a password of certain limit minimum length maximum length you can read the Mongo's
19:56
documentation it has a very filters available so after you do this we can
20:03
actually export this export default
20:09
do models. user and it will actually create this uh
20:17
model based upon the schema we will name this model as user user
20:25
schema like this so this this simply means that using the schema that we defined just
20:31
create a table or mod um just collection inside the database so once you run your
20:38
application it will actually let me run npm run Dev it will actually create your
20:45
collection now we need to guys in the next step we need to create
20:52
our a in we need to just edit this page. jsx to actually retrieve everything
20:58
anything which is present in the database and show some routes so we will do be doing it in the next
21:04
section uh now guys we will be first of all be looking at the API routes in next year 14 how to actually create a backend
21:11
API route in next year 14 so we will be retrieving the data right here which is
21:17
present right here in this table we have the database we have the table already created user and already two records are
21:24
present so I will be showing you how to actually create a backend API route to next year 14 this is really easy we have
21:31
the source folder and we have the app folder right here this is the app router so inside this app folder you need to
21:38
create a special folder which is API which is specifically assigned for creating API route so just create right
21:45
here the API folder and right inside this API folder that you see the API folder is created
21:53
we will be creating whichever uh API structure you want so I will be creating user I want
22:00
to I am working with user so that's why I will call this as a/ API SL users I
22:07
will create a brand new folder right here users so right here now every route that
22:14
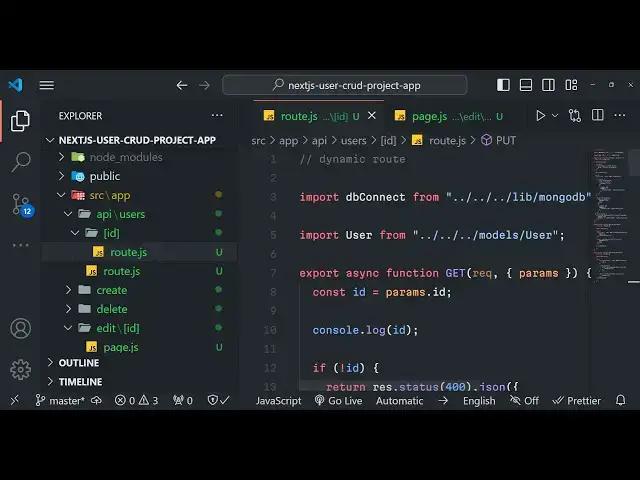
you every API route that you create in next js14 needs to be as route. JS so
22:21
this is mandatory every client out route must be named as page. jsx and every
22:28
client every serers side route must be named as route. JS the structure will
22:34
look something like this Local Host 3,000 API users and then here in this we
22:40
will be creating route. JS so you will see we have created the
22:46
API folder inside that we have created user folder and then here we have our
22:51
route file this is the actual structure so right here we have our we'll make
22:58
this export asyn function and this will be a get request simply so we have this
23:03
uh basic get function available to us which have request and response this is provided by
23:11
nextjs inside your route. JS file for every method we have a special method so
23:17
for the Post method we will look something like this we will write here post like this so for every method we
23:24
have a function so for get method here we can return anything to the user let's
23:29
suppose you want to return the response you can simply return return new response json. stringify and then here
23:37
we can say message to be hello world so this is
23:43
our API route so if I navigate to so our Local Host
23:49
3,000 so this is the client side side here if you open Local Host
23:56
3,000 so this is actually opening right here this is a client site if I want to
24:03
go to the server site I will say/ API slash users
24:11
so/ API SL
24:17
user so it is saying some error is there which is
24:22
uh reporting Observer is not defined
24:29
uh let me check guys what is error uh guys you can see I have made a very silly mistake right here instead of
24:35
writing uh response we return reporting Observer that's why it was creating
24:41
problem and you were seeing this MCH message that reporting Observer is not defined here we need to write the
24:47
response right here just return we need to return the response and here we returning a Json property message hello
24:53
world if I navigate to Local Host 3000 this is our client side if I
24:59
you will see that it is our client site if I want to go to the API route SL API
25:05
SL user so you will basically see this is our API route that we created a very
25:12
simple route which contains a message hello world this is a property so in
25:17
this way you can create both client and server site in next CH now what we need
25:22
to do we need to actually uh make a route where we can
25:27
actually get all the users which are present in the database first of all we need to DB connect we need to
25:38
Simply take this from this uh Li folder
25:43
which is located in the mongod DB and then we need to import the user
25:49
as well from models and slash user so we do need
25:57
the D connection and the user model as well just make your EnV file uh the
26:04
database right here which we are working right here which already contains some data next crud project just change this
26:10
and I will change this this to next
26:16
C project this is my database
26:23
so so already there is a user table which is available so right here what I
26:28
will do I will simply make a function export Asing function get and
26:34
right here first of all we will make the connection to the database we will say await DB connect we
26:43
will call this function and then in the TR catch block we will basically fetch all the users
26:50
from the database so right here we will say let
26:57
users uh are await user and it contains this function find it will actually find
27:03
out all the users just pass an empty object right here and then here we need
27:08
to return a API response json.
27:16
stringify with success you will put a success property and also data property
27:23
which will be the number of users which are present right here
27:29
if you just refresh right here just refresh your
27:40
database it is saying to that catch is not
27:48
defined so basically guys the link is given to the full source code I have given so you can go to the description
27:57
and I think I made some kind of mistake right here so what I will do I will simply go to the Leb folder and go to
28:05
mongodb and paste it the correct code so now if I refresh now there will be no
28:11
error it is you can see it is compiled if I you will see that two users are
28:18
there Local Host 3000 API users So currently if you see in the database we
28:24
have two users so we are actually returning those two users from this API route we have the ID primary key name
28:31
email password this is also so now this AP route is ready guys
28:40
now we can consume this AP route inside our front end so in this way you can easily create
28:48
your API routes inside next chairs and
28:54
uh now in the next section we will be consuming this route and displaying these entries in the front end using
29:01
Tailwind CSS so now guys in this section we will be retrieving all the details from this
29:08
API route that we created in the last section in the homepage of the application so just you need to navigate
29:15
to The Source folder and you need to go to the page.js file right here and here
29:21
we need to edit this file so if I just check now it is actually showing uh if I
29:28
go to it it is it is showing this hello world message instead of this we need to edit
29:34
this and remove everything from here and just first of all make sure
29:40
that we explicitly said that this is a client side component in next js14 you
29:46
need to set this using this use client directive at the very top so this signifies that this is actual client
29:53
side component and uh we do need to make sure sure that it's mandatory after we do
30:01
this we do need to create uh a just change this to user this is a
30:09
user component here we showing the list of users so just change it so after this
30:16
guys what we will say we will Define some state so we will be defining the data
30:22
which will be coming and the error if any sort of error take place for this we will be using this hook
30:28
which is used s SWR it will be imported from this s SWR so it is
30:35
static validate library in react hook Library which makes it very much easy to
30:40
actually retrieve data from the API route so we will say the location / API
30:46
SL users and then we will assign this function which is
30:52
fetcher so we need to Define this function right here
30:58
it will actually take the URL and now you'll use the fetch API which is built
31:04
in you need not have to install any package here we'll be simply going to this
31:09
URL and this will actually return a promise to us dot then and here we need
31:15
to Simply return the response. Json property that's
31:24
all sorry you can directly do this response. Json
31:32
or what we can do we can say return response. Json that's
31:39
all so we defined a function we basically using use as WRR where we
31:44
provide the URL to fetch so we will be fetching from this
31:49
uh URL and uh this will be coming it will
31:55
automatically set the state in this data variable or if any sort of error take place then it will show you this
32:01
error so right here after this we will simply say that if any sort of error take place in that case we need to say a
32:10
diff fail to load and if any sort of data is not
32:18
present in that case also you will say loading this is very much necessary if
32:24
you have a lot of data coming then you can show a loading bar as well so it is a very good package it allows
32:30
you to set this automatically so we we need not have to use use state or use effect so it
32:38
basically reduces the boiler plate code and it's a very good dependency aswr and after that you do this we need
32:46
to assign these Tailwind classes right here
32:55
Flex right in the jsx class name Flex justify Center just make it in the
33:03
center and uh then we have another
33:11
diff Max W3 XEL these are all tailin classes E4 for padding BG white stands
33:20
for background white then we can even provide a shadow as well Shadow on
33:26
medium devices MD and round it on large
33:32
devices and then we will have a H1 tag which will actually show to the user that create
33:41
user so if you just refresh now let me just show you if it is working as not it is saying object is not
33:53
iterable uh use S SWR importing we are importing this what is
34:01
this error use
34:08
WRR SL API SL
34:14
users let me just restart it and just check
34:45
uh again it is saying object is not a trable cannot read property let me see guys what is error uh now guys I just
34:52
need to figure out the two issues which are happening so basically what we are using
34:59
this used s WRR I just wanted to show you you can you may also encounter the
35:04
same issue this will actually return a object right here not array just make
35:10
this curly bracket not square bracket it will actually contains these two properties the data or error the second
35:17
mistake that we did is actually we don't need to return this Json from here we
35:22
need to return this full function this return full function
35:28
so how we can do that we can either write like
35:37
this like this we can write this I think it should work compiled we will now see
35:44
it is now perfectly working so it it simply means the same thing we are
35:49
returning this full function fetch function to this hook or we can write it in a cleaner way just writing on a
35:56
single line so this also means the same thing we
36:02
don't need to explicitly write the return
36:10
statement so this will also means the same thing we are returning this whole function to this hook it would contain
36:18
these two properties in the object data or error so now this will be working now to
36:25
show this uh this data and first of all if you see this uh gray
36:32
color that is happening the these are the default styles of next CH just go to your global. CSS apart from this delete
36:40
everything we don't need the default styling so I will simply delete everything and now if you refresh you
36:46
will not see any default styling so this is the thing just make these slight modifications and now you can actually
36:55
get your data so now inside the H1 we need to give some classes to
37:04
it font we need to bold it margin bottom for text Center so if you do this it
37:11
will give just add this in the center of the screen so this is actual heading and
37:16
now we also need to have the link tag which will be imported from the next package and it contains the link and
37:24
this is a link tag guys here we can actually create a anchor
37:29
tag so you can say create user and I think
37:38
this was user not create user
37:44
sorry and now we can actually provide a href property so whenever you click this it will navigate you to the slash create
37:51
route which we haven't created and right here we need to give some classes to it
37:56
of BG blue these are all tailent classes right here BG blue 500 and when we hover onto this
38:03
BG blue 700 and the color of the hyperlink will
38:08
be in white color and uh font will be bold so if you just make these changes
38:13
and just see the Local Host Street hous you will actually see this will
38:18
look something like
38:25
this and also you need to make it in the centers of the screen so padding we also need to give py2 PX4
38:35
from the X Direction and it will be rounded block margin bottom for text
38:44
Center so you will see the button will be created in background color will be blue and everything is styled so if you
38:52
just click this button this will show you this 404 error because the the page
38:57
is not found we haven't created this route in the next section I will show you how to create these client side
39:03
routes in next year 40 so now we just need to after this we need to show this
39:08
information from the database so after this uh link we will have a unordered
39:14
list tag and inside this we will use the map operator data
39:22
dot so if you see the structure of the API route if you see we are returning
39:28
the data property from here we can even directly return it the
39:34
users so if you directly return if I show you Local Host API / users we will
39:41
have directly our users property which will be a simple array so we can simply Loop through this
39:47
array so we can simply write here data. user do map
39:57
so inside this we will have our key parameter which we need to set which
40:04
will be user uncore ID which is a primary key of the table and then here we can actually show
40:12
the name of the user the email address so inside double curly curly
40:19
bracket user. name user. email
40:29
so if you go to Local Host 3,000 so we will see two records are
40:36
there we are simply printing these out so we can now style this we can give
40:41
some classes to it PG gray 100
40:52
rounded and these paragraphs will also have classes phone Bol
41:06
so it will look something like this you will see this is a first record second record and then we have two buttons for
41:15
actually uh updating the user or deleting them so we will have a div tag
41:21
right here we have again we'll be using the link tag this label of this will be
41:27
edit so if you just go to this edit HF property will
41:34
be we'll not be having this HF now I will show you a dynamic routes later on
41:40
whenever we do it so for the time being we'll just add these classes margin top to
41:47
justify
41:52
Center and similarly we will have the delete button as well
42:06
so you just need to give these classes to it text blue
42:22
500 and for the delete button we will have the red button text red five
42:37
100 so this will be there in the same diff tag so we don't need the separate diff tag so just after this you can
42:44
paste it hrf expects a string or object
43:03
for the time being we can just say
43:14
sledit we will now see so the UI is uh almost ready guys this is actually the
43:20
UI which would look something like this if you click edit it will go to this route we will have Dynamic routes for
43:26
these function functionality but later on we will do it so the UI is completely ready now in the next section I will
43:32
show you how to create these routes for creating user updating or deleting user so our we are successfully showing the
43:40
users from the database whenever you go to the homepage so we'll be showing you in the next section how to create a
43:45
brand new user uh for the time being guys I can just say right here uh this for the edit
43:53
and the delete button we can directly do right here because we have the user ID
43:58
so that Dynamic routes is very simple in next CHS we write qu bracket and then we
44:05
can write this Dynamic route SL edit and Then followed by the user ID so we'll
44:11
say user uncore ID like this and similarly for the delete
44:17
operation as well we will be using that ID parameter in K bracket SL delete
44:25
SL user do underscore ID so this is dynamic routes because we are passing
44:31
the ID of the user in both these routes if you refresh now click on the edit button it will actually take the user ID
44:39
you'll see the ID of the user in this route similarly in the delete request as
44:45
well you'll see/ delete so now in the next section we will look at how to
44:50
create a brand new user so now in this section guys we will be looking at how to create a simple
44:57
form by which we allow the user to create a new user right here in the source directory just make a new folder
45:06
for create so this is a client side route so SLC create it will do and then we need
45:13
to make this page.js file this is mandatory that you name your file as page.js so it's a client side route that
45:20
we are creating client side page just need to mention explicitly use client at
45:25
the very top and then here we need to it will be a simple functional
45:31
component and uh you can simply make this
45:36
as create
45:46
user so right here uh we need to set some state for this component so we need
45:53
to say the name for setting the name so we'll use here UST state
45:59
it will be imported directly so current value will be nothing and similarly for the email as well email set email use
46:06
State nothing and for the password as well so these three things you will be setting or creating
46:14
it like this and we do need the router as well for actually redirecting the
46:21
user when they are actually created your record so now to redirect them to A
46:27
Different Page we will actually use the use router hook use router hook which is
46:32
available which will be coming from next / router this is a
46:38
hook and uh now we will route write our
46:44
jsx so we will have this classes Tailwind
46:52
classes P4 space y4 this is
47:04
padding after this we need to have a
47:09
heading text to excel phone board and here we'll say create
47:19
user so if you just navigate to slash create it is saying to us that use
47:27
router next router was not mounted uh let me see where is the
47:33
problem right here okay you just need to make sure uh it is coming from next SL
47:41
navigation just make this change not next router next SL navigation you will now see it will go
47:48
to Local Host 3000 SLC create this is a create user which is coming so after you do this uh
47:57
2 XEL sorry
48:03
so here we will actually have a simple form and we will be giving a class to it
48:11
of space y4 and we will have this uh input
48:20
field input element we'll be giving a
48:27
class name to it so width I will make it full padding
48:36
PX in the X Direction 3 py2 in the y direction it will have some border as
48:42
well it will be rounded and
48:50
focus when we focus this we will remove the outline outline to none when we focus it
48:58
we will add a border to it of blue color 500 so these are the classes that we are
49:04
attaching so then what we need to do we also need to attach uh the type
49:09
parameter so we'll be storing type will be
49:14
text so the value of this will be name on
49:21
change so we'll be attaching a event handler to it so whenever the value is changed we'll call calling the hook
49:27
function set name e. target. value very simple stuff if you studied react you
49:32
will know everything what I doing right here and placeholder we can attach a simple placeholder we can say enter
49:41
name so one field is added if you see here you can enter your
49:48
name so what I can do I can simply copy this repeat it two more times just to
49:54
save some time and here we can replace set
50:00
email will be it will be email type will be
50:05
email enter email this will be
50:12
password password this will be set
50:19
password you will say this is a placeholder and you will
50:26
now see this is actual form here you can write your email and then the password lastly guys we do need
50:33
a button for this to actually submit so we'll say create
50:43
user and then we will have the classes which needs to be attached to
50:49
the button these will be BG background will
50:56
be blue 500 when we hover onto the button BG blue will be 600 text will be
51:05
white padding X4 py2 and it will be
51:14
rounded so we need to attach a onclick listener to this button or we can simply
51:20
say type is equal to submit that's all we don't need to attach on click here we need to attach a onsubmit to the form
51:28
element right here so when we submit the form this onsubmit will actually execute
51:34
a function which I will call it handle submit so we need to now Define this
51:39
function handle submit this will have this uh e
51:45
parameter pass to it so we need to first of all prevent the auto submission of the
51:50
form like this just make this function as asyn as
51:57
well asynchronously we running this and then we need to Simply make a fetch
52:02
request await fetch and/ API SL users and right here
52:10
we will actually be calling a simple post request here you'll Define a simple
52:17
method to be post and here you'll passing the headers so here we need to Define this
52:24
header which is content type
52:29
application SL Json and uh then we need to define the body as well so this will be json.
52:36
stringy and here we defining two properties name email and password we are passing these three properties in
52:43
the body of the request while we are making it so then it will actually turn
52:49
you a promise guys after it is done
52:58
it will actually return a
53:05
promise body is done right here it will return you a promise so if response.
53:11
okay if this is a case then we need to redirect the user to the
53:18
homepage you can say router do push push to the homepage start Sol so this is all
53:25
that we need to have now we need to make this post request in this API routes folder SL API SL user go
53:33
to the route do JS file and right here in this file we do need to make a post
53:40
request similarly that we did for the get request so I will show you step by step
53:46
it's very simple so let me now show you so just go
53:52
to your API folder route. JS file write inside here we will make a post
53:59
request to add a new user for adding the new user we will simply say export async
54:08
function post request
54:14
response first of all we'll connect to the database so we will say DB
54:19
connect you will say the try catch blog once again
54:27
so here we will simply say we need to actually create the user we will
54:36
say user. create function is available in and right here we will say
54:44
await request. Json so in this way you can actually get the data which you are
54:50
passing right here in the content type application Json in the body json. stringify we can get this user request
54:57
or Json so after we get this we can actually return a new
55:05
response json. stringify success to be true and data
55:12
will be user and one other property we will be
55:19
returning right here you can even return uh
55:27
the headers as well if you want to this is not mandatory but it's a good practice you can just add a status code
55:34
2011 and the header as well this is not mandatory but it's a
55:41
good Pro programming practice to actually return the status code and the content type as well in the header so if
55:49
any any error is there then also we can return a full response to the user just
55:54
to tell them that 400 error is there like this success false status 400
56:00
headers content type application Json so this is all uh if you now check if you
56:07
navigate to your application click on create user enter the information let's suppose I enter John John gmail.com and
56:17
password click on create user so I think it is saying to us
56:29
if you check your database this entry hasn't been
56:36
added I think some error has taken place export
56:42
Asing function post let me see
56:49
uh I don't need this so user create
57:04
in the try catch error right
57:12
here uh let me see just troubleshoot is creating a user let me see if this error
57:18
if if uh we are getting this uh request or
57:24
Json and in the create file right here let me see if we are getting this
57:32
uh name email and
57:38
password and just don't uh do this don't redirect the user to the homepage just
57:44
stay in this page so this is the practice that we use to troubleshoot whenever and any error take place so
57:52
John
58:11
uh handle submit we are having this on
58:19
submit let me see what is the problem which is there uh this is the create
58:25
file and just wait guys let me see what is
58:33
there uh guys I figured out the error I just made a very silly mistake and if you see in the E do prevent default this
58:40
D needs to be Capital so just make this SL adjustment D needs to be capital and
58:46
one more issue in the route. JS file we essentially write in written this console log statement by accident this
58:53
is actually a asynchronous call right here request. Json it needs to be having await keyword so simply remove this and
59:01
rerun your application and if I go to Local Host 3000 and go to create
59:09
user and let's suppose uh I create a user
59:20
John so now it should create a user so let nothing happens but if you
59:27
see we have made a request this data is coming you will see
59:32
it is console logging it and if you check in the
59:39
database if I refresh now you will now see there will be three records this
59:44
John entry is also been inserted so what you can now
59:49
refresh go to this and right here we can redirect the user
59:56
you can say router. push to the homepage so whenever the request is successful we will
1:00:04
redirect the user back to the homepage so if you see now there will be three entries out there now again if I create
1:00:11
a new one let's suppose Smith Smith
1:00:18
gmail.com click on create user so now there will be four entries Smith entry
1:00:24
is also being added so in this way you can uh do it let me
1:00:32
delete this alert statement we don't need it so in this way you can create as many users click on this enter the name
1:00:39
enter the email address click on create you will see it
1:00:45
will create the user and also inside the database as well so you will see now the
1:00:50
rest two operations are remaining the delete and the added operation so we'll be looking these operations in the next
1:00:56
video uh now guys in this section we will be looking about how to delete a specific user so if you just go to Local
1:01:04
Host 3000 we are in the last section we saw how to create a brand new user so if I
1:01:11
click the delete button it will redirect me to this page 404 not found and if you
1:01:17
see the route Here Local Host 3,000 SL delete followed by this is dynamic so
1:01:22
this will be every time different depending upon which user that you select this is called as Dynamic API
1:01:28
routes Now to create these Dynamic routes go to your API folder and right
1:01:34
here in the users folder we do need to create after this a dynamic parameter
1:01:41
which is square brackets so in this case we will be passing the ID parameter you can give
1:01:49
anything right here you can give any name but for this purpose I will be giving ID so inside this we need to
1:01:56
create our file route. JS this is actually called as
1:02:05
Dynamic route so here we need to actually get the
1:02:13
information about the specific user which is passed right here so first of all we do need to actually require the
1:02:21
DB connect and this will be coming again from this uh
1:02:29
lip folder and it is mongod DB and similarly we need to
1:02:35
also get the user model
1:02:42
from the models folder and inside this we have the file present which is user
1:02:47
so after you do this we now need to actually write a method simple method
1:02:53
which will actually return the details about a spe specific user using their ID so how we actually get this ID variable
1:03:01
we have this object pass here which is called as params you can call it
1:03:09
anything this is actually a function right here export async function get and
1:03:16
this is actually the param params which will be passed right here so in this case we are passing the ID here so now
1:03:23
to get the ID we'll simply say params do id parameters.
1:03:29
id so we can console log the ID so if you now hit this route if you just go to
1:03:36
this route and
1:03:47
check so this is actually a server route that's why we do need to actually create
1:03:52
a client side route where we actually call this just just create a new folder
1:03:57
delete now and right here just make a file
1:04:03
page.js and it will be a client side component for deleting
1:04:08
the certain user and here once again we will be using a functional
1:04:19
component you can call this as delete user
1:04:26
so we need to also write here include the
1:04:33
router use router so it will be coming from next
1:04:39
navigation package and right here we need to Simply
1:04:48
extract the ID so we do this using use params use
1:04:56
params is actually a hook which is available inside next navigation so this is we are doing it in
1:05:03
the client side component this is actually a server side component to now to get the server side component we use
1:05:09
params do ID in the client side we use use PS which is a react
1:05:15
hook and again we will be using the same concept which is uh use the same hook
1:05:21
use S SWR and write here it actually Returns
1:05:26
the object which contains two properties data and error once again we will call
1:05:32
the fetch function and here we'll be providing the ID if the ID is defined in
1:05:37
that case we will be making this request to/ API SL users and we will pass this
1:05:42
ID if the ID is not defined then in that case we will be passing null and then we
1:05:48
will be calling this function feter we do need to Define this function
1:05:53
at the top so
1:05:58
URL we will say fetch it returns a
1:06:08
promise so you can see that it's very simple we are using use S S SWR we are
1:06:15
passing the ID right here so now we need to actually make
1:06:22
this request / API SL users and this one so it will call this route here which is
1:06:28
get function and if you check now if you refresh your application click on the
1:06:35
delete
1:06:47
button and just make sure inside your uh page.js file right
1:06:56
right here so here we are simply going to this route slash
1:07:03
delete and here we are providing user ID you will see that
1:07:10
so we are going to this/ delete we have this page.js
1:07:18
file and right here uh we do need to actually show the
1:07:26
user a message are you sure you want to delete
1:07:32
this user or not so if you just go to this it is compiling it so just
1:07:45
wait so again it will be saying uh 404 not
1:07:50
found we do need to write the complete file right here so inside your
1:08:04
delete uh I think let me paste this file right
1:08:10
here oh sorry the error is coming because guys this is a dynamic route as I already told you this is you can see
1:08:17
we are passing this dynamically this ID parameter so in the client side also we
1:08:23
do need to follow the same practice so right here let me copy this
1:08:31
and so in the delete folder that you created you need to create the same
1:08:36
fashion you need to create the square brackets ID so this is the dynamic route
1:08:45
and right here we need to create
1:08:52
page.js so now if you hit this route you will see this delete
1:08:59
user and in the command
1:09:05
line you will see the ID printed out so this is a server side route which we are
1:09:10
getting this ID passed to it so we are getting the same ID in the command
1:09:16
line inside our route. GS so after we
1:09:21
get this what we need to do uh we need to simply delete this first
1:09:27
of all we need to get the information about this user so we will say if the ID is
1:09:33
not defined then we need to
1:09:43
actually response. status 400
1:09:55
missing ID parameter so if the ID is not defined
1:10:01
then we will return this error message so if the ID is defined then we will basically connect to the database and
1:10:08
then in the TR cat block we will get information about this
1:10:24
user so await user it contains a function in find by ID we pass the
1:10:30
ID and then it will return the information so so if the information is
1:10:37
not found in that case you can return error message like
1:10:45
this json. stringify success to false
1:10:57
status 400
1:11:08
headers so if the user is defined in that
1:11:21
case if the user is defined in that case we can simply return the response back
1:11:26
to the user json. stringify success to true and the data
1:11:34
will be the actual user you can directly pass the user not
1:11:40
in the data property just directly pass the user and the status property will be 200
1:11:48
and
1:12:00
so if any sort of error take place then we can even return
1:12:06
this 400 error so this is actually the full function in the server side route
1:12:12
we Define this get request now in the client side component in the delete page.js
1:12:20
file so you'll be getting either the data or the error
1:12:27
now after this we can actually have if condition
1:12:33
right here if the error happens in that case we can say fail to
1:12:43
load if the data is not return the
1:12:48
case loading so right inside the jsx we can
1:12:55
actually
1:13:01
write the Tailwind classes right here which is padding for
1:13:20
space text to Xcel phone bold and and
1:13:26
uh we will say delete user and
1:13:36
uh it will basically sh say to the user are you show are
1:13:42
you sure you want to delete and here we can dynamically put
1:13:50
the username so can say data do name
1:14:00
so if you just refresh
1:14:07
here if you now click the delete
1:14:17
button you will see this data property right here so inside data property we
1:14:22
have
1:14:33
so inside route. JS you will see that inside
1:14:38
of this property that you see right here we are returning the user information
1:14:44
inside this user property directly so what we can do we
1:14:49
can directly
1:15:00
think we can directly print
1:15:07
out so now you can see that we can access the name property of the user by
1:15:12
like this inside curly bracket data. user.name if you now refresh you will see this
1:15:19
heading if you are you sure you want to delete this username
1:15:25
if I see the if I show you the servers side route
1:15:31
here/ API SL users followed by the ID so here this is
1:15:37
the actual ID which uniquely identifies a user simply copy this and paste it so
1:15:45
this is actually the route that we return if someone goes to this server side route it actually Returns the
1:15:50
information inside this Json response and we get user information such as the ID name email
1:15:57
password about a specific user so we are simply displaying this right here are you sure you want to
1:16:03
delete and after this we will have a simple
1:16:10
button so delete button which will be
1:16:18
there so we can actually attach all these tail bin classes
1:16:25
so the background of the Buttle will be
1:16:30
red text will be white padding for
1:16:38
py the button will be rounded so if you refresh there will be a button added
1:16:46
delete button so if you just go to your
1:16:52
homepage of the application click on delete now this view will be showing
1:16:58
right here you can try out for any user you can see that this ID parameter
1:17:05
will change because this is a dynamic route depending upon which user you select it will change so now the task is
1:17:12
very simple when we click this delete button we need to delete this user
1:17:18
so apart from that we will also have a cancel button if you want don't want to
1:17:24
delete the
1:17:30
user so we have the cancel button if you click it you will be redirected back to the
1:17:38
homepage so use router function so click you will
1:17:46
be redirected back to the homepage so now if I click the delete button I need to delete this
1:17:53
so we need to bind on click listener to this
1:18:02
button you can call this function as handle delete now we need to Define this
1:18:08
function at the very
1:18:13
top so this will be a async function just label it async and then here we
1:18:21
need to make a simple fetch call to the backend server / API SL users and here
1:18:28
we'll be passing the ID of the user in the URL and the method here will
1:18:36
be delete and we also need to pass the headers right here which is
1:18:43
uh content type application SL Json
1:18:49
and so if everything goes okay then in that case this will be true and and we
1:18:55
will be redirecting the user back to the homepage router. push this is complete
1:19:02
and now we need to go to route. JS and now we need to define a method right
1:19:08
here to actually delete the user so this will be very simple right
1:19:15
at the bottom you can Define this export asyn function
1:19:20
delete request and the params will be passed right here here first of all we
1:19:26
need to get the ID which is passed params ID similarly then we need to make
1:19:31
the connection to the database DB connect we will call it and then in this
1:19:36
TR catch block we need to Simply make this request delete that specific
1:19:43
user we can do this using await user dot it has it this method delete one and
1:19:51
here we need to pass the ID of the user and _
1:19:57
ID so we'll pass the ID right
1:20:02
here so after doing this uh we can simply check in this if condition that
1:20:08
if the user is deleted successfully or not if the user is does not get deleted
1:20:17
then in that case we can simply return return error message
1:20:26
success to false the user get deleted successfully in that case we can
1:20:33
return a simple
1:20:39
response success property to True like
1:20:44
that so that's all this completes the delete operation and if you now refresh your application and go to a certain
1:20:51
user click on let's suppose I want to delete this John user click on delete
1:20:56
click on now you will see this user is completely gone from the UI and if I
1:21:02
show you the database as well if I refresh it only four entries are remaining let's suppose if I also want
1:21:09
to delete this also so instantly it deletes it doesn't take any
1:21:15
time you will now see now only one user is remaining and if I show you the
1:21:21
database as well the table only contains one entry like
1:21:26
this so in this way you can delete user create user and also show the list of
1:21:32
users which are currently there in the table now the only operation which is remaining is the update operation if I
1:21:40
click the edit button similarly the path will be very
1:21:45
similar so we will be covering this section in covering this edit feature in the next
1:21:51
section uh now guys we'll be looking at how to tackle the edit operation uh in
1:21:56
the last section we look at the delete operation if I click edit again it will be a dynamic route ID will be passed in
1:22:04
the URL so once again we need to create uh the server or sorry client side
1:22:12
component for this we need to create a brand new folder inside the source directory this one for the
1:22:18
edit and then create another this will be a dynamic route so square brackets ID
1:22:24
which should be passed so inside this once again we'll create page
1:22:31
tjs so the file name must be page.js every
1:22:37
time and now this will be a client side component so that's why use
1:22:42
client and uh you can rename this to edit
1:22:48
user and the process will typically Remains the Same Again we need the router package so it will be coming from
1:22:55
use router next sln
1:23:04
navigation and we again need to extract the ID we'll be using the use
1:23:10
params again it will be coming from next
1:23:16
navigation and again we will be using the use S SWR to actually data fetching
1:23:22
from the server route to actually get the information about the user which we
1:23:30
need to update so again we'll make first of all a request to the server route /
1:23:36
API SL users first of all we need to pass the ID we need to check whether ID exist so
1:23:44
question mark if the ID exist and we will make this request we will pass the
1:23:50
ID if the ID doesn't exist we will pass null and we will use this this function fetcher you need to get the information
1:23:57
about the user first of all so
1:24:02
fetcher pass the URL fetch URL it will actually return a
1:24:21
promise so that's all and now it will return on either data or error depending
1:24:26
upon whether
1:24:34
so so right here we do need to create some State
1:24:39
variables because we are updating the name email or password
1:24:44
so we'll use the UST State hook for
1:24:50
maintaining initial value will be empty email set
1:25:13
email so we have declared all these variables State variables name email password so right here we will be using
1:25:21
use effect hook as well this hook that that you all know it will only run right
1:25:27
here we need to specify the condition it will run if you write here square brackets it will run every time but here
1:25:35
we need to specify condition that if the data is returned to us then only execute this right here so if
1:25:42
the if the data of the user returns then
1:25:48
only execute it so right here if the data executes if the data fetching is
1:25:54
done we will be setting the updated name like this dynamically data
1:26:01
dot user.name similarly set email to be data do user.
1:26:09
email and password to be so this is done because we need to
1:26:15
pre-fill the entries of the inside the input field so let's
1:26:20
suppose the user hit the edit button that pre fill entries need to be
1:26:26
pre-filled that's why we are doing this and after we do this now we can simply
1:26:31
write the jsx and also write these if conditions
1:26:36
right here if the data is not defined will show a loading
1:26:42
bar so this is typically the same uh we return this all this jsx when we created
1:26:48
the user so all these classes will be the same so I will not waste time in writing
1:26:56
once again this this time this will be for edit
1:27:02
user rest of the things remain the same on change placeholder everything Remains the Same The Heading will change from
1:27:08
create user to edit user and uh the form Remains the create button will change to
1:27:15
update everything will remain the same so if you now
1:27:21
click your edit button you will see that uh it
1:27:27
is saying handle submit is not defined so just make that
1:27:38
function prevent Auto submission of the
1:27:46
form so you will see automatically the data will be pre-filled the old values
1:27:52
will be pre-filled in the input field now you just need to update them and click the update button so you can do it
1:27:58
for anyone you can see that so this is the update operation so now we need to
1:28:03
write this uh handle submit function so this is very easy inside handle submit
1:28:10
will make a simple fetch call to the backend route await
1:28:15
fetch / API slash users and again we will pass
1:28:22
the ID in the URL this time the method here will be put
1:28:28
because we are updating the information modifying the information and also we need to pass the
1:28:34
headers which
1:28:42
is and here the body will be again you will be wrapping this with Json
1:28:48
stringify we passing the name email password
1:28:55
and uh if all things are okay then this will be true response okay and
1:29:02
then we'll be redirecting the user to the homepage now this is this file is done
1:29:09
so just make this function as async so now you need to go to again
1:29:15
your API folder this uh route. GS file and right we Define the get method we
1:29:22
Define the delete method in the previous now here we need to Define uh the put
1:29:29
method request so right here we need to first
1:29:35
of all fetch the ID from params do ID after we get the ID this becomes very
1:29:40
much easy to actually update the user using their ID so will be actually
1:29:47
be connecting to the database and then this inside try catch
1:30:02
we have the function uh which is user dot find by ID and update this is a
1:30:09
function provided by mongus provide the ID and then provide the data updated
1:30:18
data and then there is an object you need to pass here
1:30:24
which is new property you need to set it to true and run validators to be also
1:30:35
true so new means that we are updating the data that's why you need to pass this and right
1:30:44
here if all goes well and we will simply return the
1:30:50
response this is not necessary but just for the clarish we will do it success
1:30:57
property to true that's all this completes the this
1:31:06
things this thing is not necessary because we are not returning we are not getting some but I'm just writing it for
1:31:14
Success message this really is finding my ID and updating it so just wait refresh
1:31:22
your let's suppose if you want to change the name of this click on edit and let me change it to my name
1:31:30
click on update you will see the name is updated and it is reflecting back here
1:31:36
if you also check the database refresh the name will be
1:31:42
changed in this way you can create a brand new
1:31:50
user you can see you can delete it are you sure you delete it you can edit
1:31:57
change the information so you can see that so this is a actual crud application guys we
1:32:04
developed in next js14 with routing and navigation so if you like this video
1:32:10
please hit that like button subscribe the channel the full source code of this application with directory structure
1:32:15
documentation and support is given in the description you can directly purchase it from my website proc Cod
1:32:21
store.com so thank you very much for watching this video video please hit that like button subscribe the channel
1:32:26
and I will be seeing you in the next video
#Programming