Up next in 10

Build a React.js Passport.js Google OAuth2 Login in Express.js With Sessions & MongoDB in Browser
Jan 9, 2025
Buy the full source code of application here:
https://procodestore.com/index.php/product/build-a-react-js-passport-js-google-oauth2-login-in-express-js-with-sessions-mongodb-in-browser/
Show More Show Less View Video Transcript
0:00
uh hello guys welcome to this video so in this video we will actually build out a
0:06
reactjs nodejs Express password JS Google login system
0:12
so Google o or2 login system and uh we will be actually be storing the users
0:18
details in mongodb database So currently you will see this is actually the database right here and we actually have
0:25
a user table which is currently empty nothing is present right here and we
0:31
also got a sessions table as well which is actually storing the sessions details about the user we will be storing users
0:38
in the sessions and let me show you the demo of the application it will be running on Local Host 3000 this is the
0:45
react CHS front end and it is will be calling the back end of Express which
0:50
will be actually be interacting with the back end so this is actually the back end stuff which is present in nodejs and
0:57
express and this is actually the front end of the appli which I coded inside react CHS so if I
1:03
just show you there is a login with Google button right here we have used tail CSS for the UI of the application
1:11
if I click this button I will be logged in successfully with showing the profile
1:16
picture display name email address and the logout button if I just refresh now there will be one entry added in the
1:23
users table you will see that this entry is successfully added with the Google ID
1:28
display name email Emil address profile photograph this is actually the full link of the profile photograph this is
1:35
email this is display name this is Google ID and primary key is automatically been
1:44
inserted so you will see that so also if you close this browser here if you close
1:51
the tab and reopen it once again it will automatically detect you are already logged in so it will redirect you to the
1:58
profile page you will see that if you also close the browser again open it if
2:03
I again open it it will again so if you close the
2:11
browser then you just need to click login with Google so if you just close the tab right here again reopen it then
2:17
it will actually detect that you're logged in so you can do it for any account if you're doing it for the very
2:24
first time
2:31
so if you're doing it for the very first time it will show you this consent screen where you need to select your
2:36
Google account you need to allow the permission simply click continue and now a second entry will be added so if I
2:43
check the database in the users table there will be two entries out there if you see so there is a second entry which
2:50
is added automatically so if you see the sessions table
2:55
uh there will be two indexes which should be there
3:02
so this is actually the thing we also have a log out button if you click log out you will be redirected back to the
3:08
homepage if you now close this it will detect that you are logged out so it will show you the login page so you can
3:16
now log in log out so this is a simple application we will be showing
3:23
you it's a full stack application we will be showing the how to code the
3:28
front end in react Chase and the back end in nodejs and express and on top of that we are actually using passportjs
3:35
which is actually a open source library for authentication for various providers
3:41
it provides you specifically we will talk about Google right here it has various strategies available about
3:48
500 plus authentication strategies it's open-source Library so we will be using
3:55
this password Google oo package for implementing the Google o strategy for
4:02
passport JS so we will be using this and uh so all the source code is given guys
4:09
in the description you can directly purchase the full source code uh with full directory structure and documentation so the link is given you
4:16
can go to procore.com after you purchase it you will be redirected to Google Drive where you can actually download
4:22
the zip file so the link is given in the description you can directly purchase a full source code so now let's get
4:28
started guys by building the this application so I will be seeing you in the next section so now to get started
4:34
guys uh we will start building this project so I'm there inside my working directory so I will simply open command
4:40
line Here and Now to create react Chas project we will actually be using this V
4:47
development environment which is actually a very good Next Generation front end tooling system and it is
4:53
better than create next app it takes less time in creating next Chase or
4:58
sorry react Chase project and installing module so I will use this so there is a simple command out there in order
5:06
to instantiate a new react Chase project so just npm
5:12
create vit V at theate latest so you'll use the latest version of v and then you
5:19
need to give the project name so let me give here react o to login this is the
5:26
project name and then you need to also so specify the template so we will be
5:32
creating a react Chase project so specify the template D- template react
5:37
this is a command mpm create V at theate latest followed by the project name--
5:43
template react so if you just enter it it will actually create it will say to
5:49
you that install this create with package so simply press Y and now it
5:56
will ask you which project you want to create so I will simply select with the
6:01
drop down react project so it has created scaffold the project I just need
6:07
to CD into the project directory and then run the command npmi
6:15
so this will install all the packages of react so this is really fast as compared
6:21
to the official react create create next create react
6:27
app so I found this to be very you can see it is completed so we can now open this directory in the this is
6:35
actually a basic react Chase project and uh you can basically run this by using
6:42
npm run def so this will start the development server which is hosted on
6:47
Local Host 5173 you can just go to this and it will show you this homepage of
6:56
vat so you will see this is actually the demo app that they provide you so now we
7:01
can uh edit this uh but first of all we need to install some modules right for
7:07
the react CH front end we need xio module to actually call the backend API
7:13
to make API request and then we also need the react router Dom so our
7:19
application will contain some routes so that's why react router Dom we need to install and X xio Library as well so
7:27
simply install these two packages and that's all that we need to do for the
7:32
front end now we will create a new folder inside this I will simply say
7:38
this a backend so a backend folder will be created so I will just instantiate a new
7:46
package.json file by invoking the command mpm in it- y so this will create
7:52
the package.json file so now we need to install the modules for the backend API
7:59
so this will be first of all we need to install uh connect
8:05
so this is responsible this package is responsible for connecting
8:10
your application to mongod Deb database this is actually a driver and then we
8:15
have course module which is responsible for accessing for enabling the API to be
8:22
used by different front end so cross origion resource sharing so then we are
8:27
have our Express backend server and then we also need to use express
8:33
session so these are the two express is the backend Server Express session is
8:38
will be storing the information inside Express session and then will be
8:43
the actual orm we will be using to actually interact with the mongodb database to
8:50
actually save the data or get the data from the database so this is the library
8:55
and then we use the passport library passport
9:01
and passport Google or
9:08
or20 so passport is the base library and this is the actual strategy for
9:14
implementing the Google o20 authentication so this is actually the strategy so simply enter it so this
9:22
will install all these packages in the package.json file so it will hardly Take
9:27
5 to 10 seconds and it will install the these packages so now it is installed if you just check right here in the
9:33
package.json file in the backend folder if you see all these packages are installed with the latest version and
9:39
now we can actually create our index.js file the starting point of the application so in the next section guys
9:47
we'll start coding the application so now guys first of all we will actually be building the backend server in nodejs
9:54
Express and then we will later on build the front end so right here in the index.js file first of all we just need
10:02
to import all the packages that we installed right here first is the actual Express package the back end server we
10:09
imported now we just need to make a simple Express app like this and we'll
10:14
start this app on 5,000 port number so we can simply say a message that app is
10:22
listing on Port 5,000 so also we need to import all
10:27
these other packages as well right right at the
10:33
top so the package which will be responsible for communicating with the
10:38
mongodb database the passport package as
10:43
well and then we will be also be including this Google
10:50
strategy which will be coming from the passport package so passport Google o z
10:58
and it basically contains this dot strategy and from this we will be
11:03
instantiating this Google strategy and also we will need to include the session as well which is actually a middleware
11:11
of Express session we included installed and
11:17
also we also included connect this is actually a
11:24
store and then we lastly we allow the other front cont to actually use this
11:30
API so that's why we'll use this course module cross original resource sharing so first of all we need to implement
11:36
this course origin course configuration so we need to allow the
11:43
other front end let's suppose we are accessing this API from react CHS front end or any other front end so we just
11:50
need to allow this API to be accessed without this course you will get a cross
11:56
origin error in the browser console so you need to enable the course right here
12:01
so you can simply do this using this middleware app.use and then we will pass
12:06
this middleware like this an option origion option so you will only be accepting request coming from this
12:14
request which is HTTP Local Host 5173 and this is a react app URL and
12:21
credentials you need to set it to true so this simply means that only
12:26
accept request coming from this U URL and credentials is true so we will
12:33
only be accepting these URLs coming from this front end only so this makes your API more secure no third party website
12:41
can use your API so this is actually meant by course cross region resource sharing this is really important and
12:48
then we need to configure the mongod DB connection as well so I'm using the mongodb at last you can see that mongod
12:56
DB Compass this is actually a good software which available for Windows for free so I'm there inside my machine so
13:05
here you just need to create a database right here so I will create a new database let's suppose uh react
13:14
O2 login and I will just you need to just create a basic collection name so
13:20
just to create the database so now the database is created which is react
13:27
oo to login so I just need to provide this database name while we are connecting so we'll say
13:35
do connect so we have this URL which is mongodb
13:42
Local Host the port number which is 2717 this is a default port number for
13:48
mongodb database and react go to login this is our database
13:55
name you can just cross check react o or2 login so this is our database name and
14:02
here we need to pass some options right here first option is use new URL parer
14:08
to be true and use unified
14:15
topology to be true so after we do
14:25
this if you run your application just try nodeb
14:31
index.js so the application will run on port number 5,000 it will give you a
14:40
message so it is saying that option UniFi topology is not supported so you
14:45
can eliminate this option remove this option with I think with the latest version of
14:51
Express so you can see that now the app is listening on Port 5,000 and the database is also being connected so now
14:59
we just need to specify the schema what sort of information we will be storing in the table so specify the
15:07
schema so right here we will say user schema so just make U Capital user
15:15
schema and new and in this
15:20
module we have the function schema and right here we need to provide an object
15:27
here so what sort of information we be storing so we will be storing Google ID which will be of typ stream and we will
15:33
also be storing the display name which will be the usern name of the user logged in user which will also be of typ
15:40
string email address which will also be of typ string and the profile
15:45
picture profile photo which will also be of typ string
15:51
this is a schema and now we just need to create a table using the schema so create a collection
15:59
using the above schema so now we do this we will simply say const
16:05
user mongus it contains a method called as model and here we will specify the
16:12
schema sorry collection which is a table which will get created using the schema which is user schema that's all so now a
16:20
table will be created using four columns Google ID display name email and profile
16:26
photo and after you do this we now need to configure the
16:33
passport for the Google login so here we need to include the middleware passport
16:39
use and we will be using a strategy that we imported new Google strategy and here
16:45
we need to provide the client ID and similarly we need to provide the client secret as well client ID and
16:53
client secret and the third one is call back ql
16:59
so this will be slops SLG gooogle callback this is constant for uh
17:04
passportjs so you should re just use this callback
17:10
URL only so this is constant SL all/ go/ callback and the these two information
17:16
client ID and client secret you will get from Google Cloud console so just go to Google Cloud console and create an
17:24
account right here so I already have a account here
17:29
so I will simply go to the console and just go to API Services go to
17:35
credentials and just click on this button o client ID
17:41
and select your application type to be web application and here you need to provide
17:48
authorized JavaScript Origins to the homepage of the URL which is Local Host
17:55
5173 this is the homepage so here you are
18:02
expecting uh sorry we our backend server is
18:08
listening on uh Local Host it is starting on Local Host 5,000 so you will
18:15
basically give the address of your backend server not the front end so Local Host
18:21
5,000 this will be the homepage URL and then the authorized redirect URI you
18:27
will simply pay the address which is o/g gooogle
18:34
callback sl/ go/ callback this is the same thing that we just written right
18:40
here if you see sl/ gooogle callback so after you do this you can simply click
18:45
on create it will give you your client ID and client secret so this will be different for you so don't copy my
18:52
client ID and client secret so I will simply paste it
19:05
so after we do this it's very easy now so just here put a comma
19:12
and Asing function will be there and we will actually after we do this we will get our access token refresh
19:21
token and the profile of the user and a done
19:27
variable so this is is a call back function right here after you provide this information in this middleware in
19:33
this Google strategy it returns you access token refresh token profile and
19:39
done just format this so right here in this function we
19:45
will in the TR catch
19:54
block we will basically get the user a wait so
20:00
user and it contains all these methods you can find by ID find by all this you
20:06
will find the user by its Google ID so Google ID is equal to profile.
20:16
ID so here we will simply compare that if the user is found out then we just need to return that user null user if
20:24
the user is not there in that case we will say user is equal to new user and
20:30
we will be just having these details which is the Google
20:37
ID is equal to profile.
20:42
ID and then we have the display name property which will be profile. display
20:52
name then we have the email address which will be profile emails it's a
20:58
array so so we will get the first value first email address and the profile
21:03
photo profile again it's AR so photos zero and we'll get the first
21:10
photograph of the user so in this code guys it is very simple we are simply checking if the if
21:17
the user is already present then we are simply returning it if the user is new if the user is authenticated for the
21:23
very first time then we are inserting it to the database we are instantiating
21:28
using this user model class you can see this is a class here we are creating a new object of this class and
21:36
basically just inserting the Google ID display name email and profile photo and
21:41
now to save this information to the database we will use the await the save
21:48
method of so this will actually save this information and then we will
21:53
return the user null user that's all so that's all that we
21:59
need to do and if any sort of error take place we can return that
22:09
error so that's all that we need to do guys for the passport configuration and one more thing we also need to assign
22:16
these lines password serialize user user done these functions are necessary you
22:23
need to write them these functions in conjunction with the previous code user
22:29
ID and also password. deserialized user
22:35
async ID done so just copy paste this code
22:43
whatever code I'm writing right here you will also get the code if you want to purchase
22:48
it await you will find the user by the
22:54
ID and then done null user so this code is constant guys uh you just need to
23:02
write this exact V exact code that I'm writing right here this is just a setup for passport
23:11
so you can see that and after we do this now we can
23:17
actually configure the express session so we'll be basically be applying this
23:26
middleware so this session that we imported early on if you see at the top
23:31
we are importing this session from the express session middleware so now we just need to assign
23:38
this middleware so this is important because we need to just store the user inside
23:46
the Google in the browser of the user so once you are logged in the application will remember you
23:53
whether you are logged in or not so that's why this session is important
23:59
if you if you don't write this code then every time if you log in again if you
24:04
close the window again you need to log in once again so that's why session is important secret key you can assign any
24:11
secret key resave value will be false and
24:16
uh save uninitialized to be false these are all constants values store we need
24:23
to store the session value in store create and it will have actually create
24:29
a URL where it will actually store all the session information mongodb Local Host
24:36
270 and here you need to provide your database name so whatever you give react
24:42
o to login so just cross check this you have
24:47
given the same database name right here also so I will just copy this value and
24:54
paste it so this is you it will also create a sessions table and it will
25:00
store the session information in that session table and then lastly we just need to apply these passport we need to
25:08
initialize this call this function and also passport session as
25:14
well these two functions first of all we are initializing the base passport library and then the session method as
25:21
well so that's all that we need to do guys and in the back end and and one more
25:29
thing we also need to configure all the routes for the Google
25:36
login so the very first route is when someone goes
25:41
to// Google so we will be authenticating password.
25:48
authenticate Google and here we need to provide what
25:53
Scopes that we will be referring to so we we will be providing the profile scope and the email
26:02
scope like this and then we will also be handling the call back URL
26:09
/ so whenever user Grant the permission so this will hit the URL and we will be
26:17
authenticating it passport. authenticate Google and also there is a second
26:23
argument for the failure if the authentication is failed so what
26:30
URL the user will go to so this is actually the URL let me explain to you
26:35
what is happening in this so it is hitting this call back URL so whenever
26:41
you grant access to your Google account so Google will try to redirect you to the react CH homepage this is HTTP Local
26:49
Host 3,000 not 5173 sorry so here our reacts app will be resding so when
26:56
whenever you are successfully authenticated you will be redirected to the homepage if it's failure then we
27:03
will redirect to like this you can even have a 404 page as well if you are uh
27:10
failed in authenticating as well so we will be using the passport. authenticate method and providing here this is Google
27:16
provider like this so one more method for the log out functionality if you
27:21
want to log out we will write this method hot/ logout
27:30
so request. logout so it's a log out method available in passport if you want
27:36
to log out if any sort of error take place we can
27:45
simply so like this and then lastly we'll redirect the user back to the
27:52
homepage 5173 so this is actually the backend functionality guys it is complete right
27:59
here now in the next section we will be writing the front end functionality in react CH so I will see you in the next
28:05
section so now guys you will be writing the front end of the application which
28:11
is react so in the last in the last section we return the back end of the app so just make a slight modification
28:18
right here you can see you will get this error which is route. get requires a call back function so in this line we
28:25
just made a mistake right here SL out /g Google so here you just need to remove
28:31
this parenthesis
28:38
and so this is it will be closed right here cly
28:48
bracket I think the correct version
28:56
is let me paste the current code so just make this slide
29:03
modification so now you will see no error is there so your app backend server is listening on Port 5,000
29:12
so so after we do this we just need to go to the front end so this is
29:19
our app do TSX so this is in typescript if you see you can even rename this to
29:26
JavaScript as well app do JS so I will simply remove everything
29:32
from here and uh start from scratch so RFC so it's a functional
29:42
component so you will be declaring a state
29:47
variable here so this will be for just keeping track of the user the initial
29:54
value will be used State we'll use this hook initial value will be
30:01
null so here we'll be using the use effect hook which comes in
30:07
react so in use effect it basically runs every time your component
30:14
mounts so it will only run for the very first time we have providing this empty par empty brackets right here this
30:22
simply means that this only runs for the very first time
30:28
so here we just need to get the user and here we'll be using
30:33
the AIO Library so it will be imported from mxus that we installed early on it
30:39
contains a get method and here you will be just HTTP Local Host 5,000 this is
30:47
our backend API address SL API SL user so this request we haven't written in
30:53
the backend API so this simply Returns the user so here we need to provide with
30:58
credentials to be true so it will actually return a
31:04
promise and it will actually have the response here and we can set the user
31:09
based upon the authentication status whether the user is logged in or not response. data so
31:15
here we just need to make this request which is uh / API SL user this will
31:23
simply return the status of the user whether the user is logged in or whether
31:28
the user is logged out so this is very simple
31:35
request it will actually return in the form of Json if you just go to index.js
31:42
and right here at the bottom side I can just explain you step by step this
31:47
request so just make this request app. get/ API
31:56
sluser so here we will simply say if request do is authenticated is comes out
32:03
to be true in that case the user is logged in so we will return the user as a
32:08
Json request. user in the else block the user is not
32:14
authenticated so response. status 401 Json and we can basically pass a
32:20
error message unauthorized
32:28
so this is a simple request we are checking request is authenticated if it turns out to be true then we are
32:34
returning the user or if it is false then we are returning 401 error
32:39
unauthorized so right here uh you will get a response if you try to open this
32:44
application in the browser so just also open a new command
32:51
line window and start your react CH application
33:01
so now it is running on Local Host
33:19
5173 so you can see that guys it actually tells us that the user is
33:25
unauthorized because no user is present right here no user is logged in so that's why it comes out to be 401
33:33
unauthorized so the application is
33:39
working so it is doing its job and now what we need to
33:45
do based upon this we just need to create some
33:53
components so right here just create in the source directory create a fold called as components and create three
34:01
components first is the login button the second one is the log out
34:09
button and the third one is the profile these are jsx components right
34:16
here if you see and uh we will just like this RFC
34:29
so all these components have been initialized and right
34:35
here go to the public folder uh we need to include uh Tailwind CSS for
34:49
this so by default I think tail is included
35:01
so right in the index HTML you can include the CDM right here just after the title paste the CDN for Tailwind so
35:08
just Tailwind
35:23
CSS so this is the CDN for Tailwind simply copy the script tag after the title
35:30
paste it now you can use tailent so right here we will be using Tailwind
35:38
class container MX Auto
35:45
mt8 so here we will simply say if the user is logged in and in that case we
35:52
just need to show the profile
36:02
so we have defined this profile component right here export default
36:11
profile we need to show the profile component so what I will do I will
36:16
import this component right here
36:42
so what I will do just rename this to TSX I think just
37:06
so you can see that so import login button and uh
37:14
import log out button so we have imported this and now we can simply use
37:19
these components right here profile if the user is already logged in
37:27
you use this and pass this as a prop this user to this
37:36
component and then we need to put a colon and right here we want to show the
37:42
login button if the user is not logged in so here we need to pass this prop as a prop now we just need to receive this
37:49
prop in this component so if you just
37:55
see you can receive this as as an argument
38:09
user so it is saying user is declared but its value is never used so that's all the error will go away you will see
38:17
that so now it's very easy guys we just need to Define our components so first I
38:24
will go to the login button component so here what we will
38:32
do if you just go to the application right now just open
38:37
Local Host 5173 so it will actually show you this 5173
38:46
soor it will show you the login button because the user is not logged in and uh
38:53
right here we will be having a login button in the center of the screen justify
38:59
Center item Center at screen so we will have a button right
39:06
here which will say login with
39:12
Google BG blue 500 these are all Tailwind
39:22
classes py2 PX4 around it
39:32
so just make we need to make this in the center screen uh I think plus justify
39:37
Center item
39:50
Center and also we need to attach a on click to it on click
39:58
so when we click this we just need to call this function which is handle login now we just need to Define this
40:06
function right
40:20
here right here we can Define this function
40:28
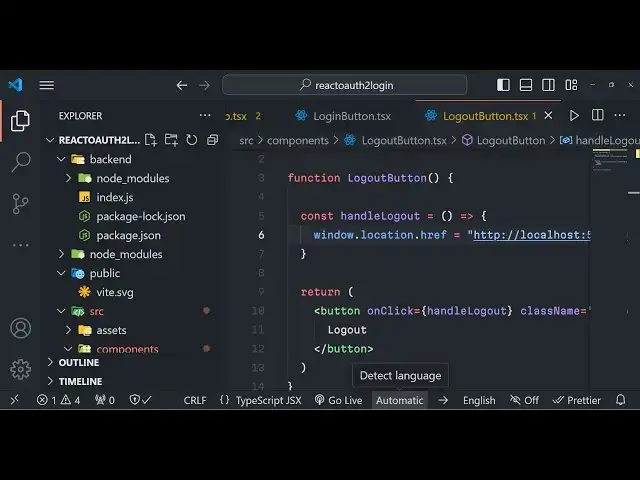
so when you click this button you will be redirected to window location.
40:33
hrf HTTP Local Host 5,000 sl/ gooogle
40:40
that's
40:48
all so if you just refresh now click on this button so you will be redirected to
40:55
your account selected screen and
41:00
uh if you select your click on continue allow the permission you will see you
41:07
will be redirected to the homepage and here you will see profile so we can actually display the details of the user
41:15
by editing our profile. TSX file so right here we can actually
41:22
show the profile of the user
41:29
so again we will use the classes of
41:39
Tailwind just to make it in the center
41:57
so these are all tailin classes that you
42:03
see so inside this we will have the image
42:13
tag so this will be user. profile photo
42:31
MX Auto
42:37
mt4 you will see it is
42:49
there so then we will actually be having
43:03
to show the display name and email address so
43:09
right in this we can display user. display
43:25
name user
43:41
so that's all and uh we will also be importing the log
43:48
out button component so here we just need
43:54
to go to log out button and just make the log out button as well which is a
44:00
very simple button which allows you to log out
44:32
so you can see that this is the log out button whenever we click it we should call this function which is
44:40
handle log out
45:00
so we'll basically be log out to http Local Host 5,000
45:09
sl/ logout so if you want to log out you can
45:16
simply go to the homepage and now you can see the profile details are there
45:21
and if I show you the database currently it is empty if I
45:33
so you will see two tables have been created the session table and the users table in the session you will see the
45:39
session information is stored about the cookie whatever and the user So
45:44
currently there is a single user in the table in the mongodb database table so
45:50
if I log in with a different user let's suppose if I go to Local Host 5173
45:57
you need to log in first of all if you're doing it for the very first time you need to Grant permission you'll see
46:03
all these information profile picture display name email address log out button if I refresh the table you will
46:10
see two entries will be added so two sessions will be created so
46:17
this is a system guys in passport reactjs nodejs and express the full stack application thank you very much
46:23
for watching this video all the source code is given in the descript description you can directly purchase it for full documentation and support and I
46:33
will be seeing you guys in the next video
#Computers & Electronics
#Internet & Telecom