Up next in 10

Build a React.js Google OAuth2 User Login & Logout System in Browser Using Javascript
Jan 9, 2025
Buy the full source code of application here:
https://procodestore.com/index.php/product/build-a-react-js-google-oauth2-user-login-logout-system-in-browser-using-javascript/
Show More Show Less View Video Transcript
0:00
uh hello guys welcome to this video so in this video we will be looking at how to integrate the Google login
0:06
functionality inside uh react CHS application so this is actually the demo
0:11
right here that you can see on your screen we are running this application on Local Host 3000 we have a login with
0:18
Google button so as I click this button I will be redirected to the consent screen where you can actually select
0:24
your Google account just grant the permission to this project and then it will show the all the details such as
0:32
the profile details user user ID user display name email
0:39
address and the profile picture these three details it will show like this so
0:45
I'll be showing you how to implement this you can do this for
0:51
any account so this is really important if you want to register
0:58
user show login with Google button and after when they do it we will not be
1:04
using any third party package we will I will show you from scratch how I did
1:09
this by going to Google API then I get the access token programmatically and
1:15
get all this information so you will be getting to understand how this authorization flow works so this is
1:22
everything coded right here if you need the source code the link is given with
1:27
full documentation and support so if you are interested the link is given you can directly purchase it from proot
1:33
store.com after you purchase it you will be redirected to Google Drive where you will actually get the zip file
1:40
automatically downloaded from Google Drive so the link is given so let's
1:45
start the tutorial step by step and uh what I will do I will simply navigate
1:53
to the projects directory and right here I will simply make a new project which
1:59
is npx create VAB and then you will say the name of
2:06
the project which is uh react login
2:12
project and then we need to specify the template here which is react so here we
2:18
are using v as a development environment npx create V app followed by the project
2:24
name and then the template is react simply enter it and now it will scaffold
2:30
a simple react CH project inside this directory react login project or or
2:39
to so now you can CD into this project react doin
2:51
project so open it inside vs code so this would be the directory structure we
2:57
have a v config file as well which is a available this is the index. HTML this
3:04
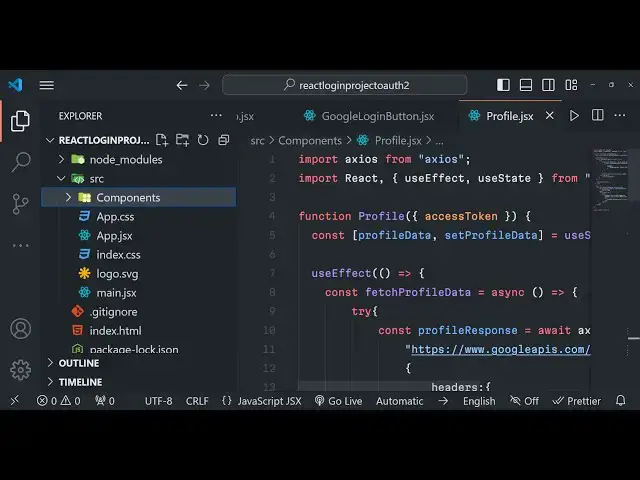
is a source directory we have a jsx file right here if I just stop this previous
3:12
project and start this project npm brand Dev this is the command right
3:22
here so sorry we need to install all the modules simply mpmi so this will install
3:29
all the packages is right here so we forgot to do that so it will install all
3:34
these packages and create a node modules folder inside the root
3:54
directory so just wait for in the installation to finish it's really quick
3:59
as compared to the create react app that's why I use the
4:05
vat development engine so it makes the process way more
4:21
easier so just wait it is installing you will see it has created the node modules
4:27
folder so now it's finished so now we can run the project npm runev it will
4:32
start the development server Local Host
4:41
3000 so now it it is listening on Local Host
4:48
3000 you will see that this is actually the basic react project in v and uh we
4:53
can edit this page uh remove everything from here then
4:59
just single hello Vol
5:05
message so right here guys first of all we need
5:10
to write inside here we need to declare some State variables first one we will
5:17
be declaring for Access token we need to get the access token so access token set
5:22
access token we'll be using the UST State hook the initial value will be
5:28
null and then we'll using the use effect hook so this use effect hook will
5:33
automatically execute whenever your component is loading for the very
5:38
first time and here you need to pass a dependency which is empty array so this
5:44
will only execute this means that it will only execute only once so right here we need to make a
5:53
function and call this handle redirect so right here we just need to
5:58
make this function
6:08
so this will be a Asing
6:16
function so right
6:22
here we will be first of all be so here inside this function guys
6:29
first of all we will be exchanging
6:34
the authorization code that we will get with access token this function is
6:41
solely responsible for that but before that we just need to get this authorization code so how we can do that
6:47
it's very easy so we will simply have a condition
6:53
right in the jsx uh but before that we just need to
6:59
include the CDN for Tailwind
7:09
CSS so we have this CDN right here so just include this full
7:17
CDM go to the index.html and just after the title paste the
7:24
CDM so after you do this we can use these Tailwind classes container MX Auto
7:43
e-4 so right here you'll have a condition that if the access token is not present in that case we need to show
7:50
the login button to the user so we'll say Google o
8:08
text 3
8:14
Xcel so if you just refresh now there you will actually see this heading right
8:19
here because this condition evaluates to true the access token is not present it comes out to be false so that's why it
8:25
is executing it and now after this we will be
8:30
actually be showing the Google login button so for this we just need to create a simple
8:36
components
8:42
folder right inside this we will Define Google login button
8:47
jsx and also the profile component as
8:54
well it's a simple functional component
9:01
now we can simply include this Google login button so you can see it has vs code is
9:08
automatically imported it for me so you will see Google login button
9:15
is showing right here
9:21
so so now in the next section guys we will be actually be writing the Google login button component and then we will
9:27
proceed from here so now in this guys we will be writing this Google login button component that we defined so inside this
9:34
component we just need to declare some things first is the client
9:40
ID and also the redirect URI so redirect URI will be the same
9:48
homepage urri Local Host 3000 after you grant access it will be redirected to this homepage and here as
9:57
I already told you you need to go to Google Cloud
10:02
console we need to get this information from just have o or client
10:13
ID in order to get or client ID you just need to select we
10:18
application and in both these fields you just need to paste the homepage which is
10:24
Local Host 3,000
10:35
click on Create and it will actually give you both the client ID and the client secret so don't copy this my
10:41
information so it will be different for you paste it this is actually the client
10:49
ID and uh in the jsx we will simply have a
10:56
button we will give it a class to it BG blue
11:21
500 py2 PX4 rounded
11:30
and here we will be also be attaching a on click listener to it so when we click
11:36
it this uh login with
11:42
the we will be executing this function which is handle login so the label will be
11:50
simply saying login with Google just Define this function right
11:57
here
12:05
so if you just refresh you will have a simple login with Google button so right when we click this
12:12
button what should happen you will actually be constructing this authorization URL it will actually go to
12:18
this URL https //g google.com/ o/
12:26
O2 slash version 2
12:32
SL this is all constant version 2/ or and then we
12:39
need to here provide the client ID just make sure you write backtick
12:46
symbol right here so that we can directly embed variables so client ID is equal to and
12:53
here we embed the variables client ID and redirect
13:03
URI is equal
13:09
to and here we just need to say the Response Code response
13:15
type is equal to code you need to get the authorization code first of all so that's why response type is
13:22
code and the scope the scope here will be multiple scope so e email and then we
13:30
will simply say percentage sign 20 for the
13:36
spacing profile again percentage
13:43
20 sorry email profile and the last value will be prompt is equal to consent
13:50
so it will be a consent screen shown to the user so you can see it's a very long
13:56
URL where we provide the client ID redirect
14:02
URI then we have the response type which is authorization code we need and then
14:08
the scope information email percentage 20 which is for space
14:13
encoding and prompt variable is consent and here we just need to
14:20
redirect the user to this URL so we can directly do this by window.location do
14:26
HF is equal to Au URL so if you just see click this
14:36
button it is saying to us that the URL is not found let me
14:48
check let me copy
14:54
this okay that needs to be o not P sorry I made a mistake M this needs to be
15:01
o so just change it so you it is saying that missing
15:07
required parameter which is redirect
15:13
urri just check guys if you I made a mistake
15:18
here so this needs to be redirect underscore URI redirect underscore URI
15:41
so it is saying missing parameter client ID sorry this needs to be centore
15:53
ID so in coding guys sometimes you can make mistakes so just refresh again
15:58
again so you will see it will now show you this consent screen you need to select
16:05
your account Grant the permission and then it will navigate to this call back
16:10
URL and it will you'll see in the URL we get this authorization code this value
16:16
so that's exactly what we want this authorization code now do we can use
16:22
this for exess token you will Ex exchange this authorization code for Access
16:27
token now after getting this we can this function will get executed
16:35
automatically so how to exchange this with access token it's very
16:44
easy so right here in this function we will get this access sorry
16:52
authorization code from the params URL search params and window.location do
17:00
search and then we will search for this param pam.get code we will actually get this
17:07
authorization code and now the if the authorization code is available and then in that
17:17
case we say a client ID we need we need the client secret as well in this case
17:22
to get access token and then the redirect URI as
17:30
well which is simply HTTP Local Host
17:38
3000 and then inside this try catch
17:51
block so right here we will basically make a simple XO score it's a wait XO
17:58
store post so xos is available directly in the browser so don't need to install
18:06
it Google aps.com toen we'll make a simple post
18:12
request I think yeah you do need to include xos you need to import this from
18:18
xos and we haven't installed it so npmi XO so install this package
18:29
so it's a client HTTP client for making request inside your react Chas application just install this and start
18:36
your development server so you'll make this post request after
18:43
we here we need to provide the second argument as the information which is the client
18:50
ID is equal to the client ID client _ secret is equal to client
18:57
Secret code here we need to pass the code which will get authorization code and here the
19:04
grantor type here will be authorization
19:15
code and then here we need to lastly provide the redirect
19:20
urri to redirect UR
19:31
now we will actually get the access
19:37
token inside your our response do data field we'll basically
19:45
set the access token by using the hook function response. data dot this will be
19:52
a property contained access token so if you just refresh now what
19:58
you it will
20:05
happen if you check the
20:17
console it is saying to us that uh HTTP over to Google aps token was
20:25
from origin was blocked by course policy
20:31
okay sorry this needs to be https sorry this needs to be https I made a
20:39
mistake
21:08
Local Host
21:22
3,000 I think I made a typo mistake somewhere because this URL must exist
21:34
o or2 xos
21:43
dopost okay sorry we haven't replaced our client ID client secret that was of issue guys which was there we do need to
21:51
include the client ID and the client secret as well so that was the issue
21:57
simply copy you can't directly call it you need to
22:04
pass your information as well so client ID and the client secret this will be different for you so don't copy this
22:10
information
22:32
so again if I try to you will see the code will be there
22:38
right here and if you check in the console access token will be there in
22:44
the response so this is actually the information access token it expires in
22:51
3600 seconds which is essentially a 1 hour this is ID token this is the scoping information all that stuff beer
22:58
token this is this is now we are getting this access token and uh after you get
23:03
access token you can call any Google API with it so now after this we can
23:10
actually also make sure we redirect the user back to the homepage so window
23:16
history replace date right inside
23:22
this document. title and uh window.location
23:37
this will essentially redirect user back to the homepage so you will not see this authorization code in the
23:52
URL so if you do this uh you will be redirected back to the homepage if you see
23:59
so you will not see that authorization code still in the URL so this is really
24:05
useful this code so after you do this guys now we can
24:11
directly write the profile page as well so we can have a condition right here
24:18
like this if the access token is present in that case we just need to show
24:24
the profile page we will basically pass the access token
24:30
as an prop to this component so right in the profile
24:37
component we will be getting this access token
24:43
passed we will see that so now to show this profile information guys it's very
24:49
simple using this access token now we can get this profile information about
24:54
the user
25:00
so first of all we will be having a state
25:05
variable profile data set profile
25:12
data use State null so by default it will be null you'll be using the use
25:17
effect which will essentially run when this components
25:26
loads again we will be wrri writing a function which will actually fetch the
25:31
profile of the users so fetch profile
25:45
data so it will be asyn
25:52
function so just format the document right here so right this have a try catch
26:07
block so here we'll again be making uh a
26:12
simple xos call and this will be a get call and it will be making to this route
26:21
www. googleapis.com
26:27
O2 SL version 2/ uh user info and right here we now need
26:35
to provide our access token as a header so now in the second
26:41
argument in the header section we now need to provide our
26:47
authorization which will be a simple beer followed by your access
26:53
token which is passed to this component
26:59
as a prop you can see we have received this prop as an access token after you
27:04
do this we can set the profile info set
27:09
profile data to be the profile response coming do
27:15
data that's all so now we can display this profile information in the
27:26
jsx so right here we can have
27:46
uh profile
27:51
page and then here you'll be comparing if profile data exist in that case we
27:56
just need to show this information
28:03
first is the
28:23
name so inside Co brackets profile data do
28:37
name this is the email address if you just refresh now
28:42
uh if you now Grant permission and
28:55
uh so it is saying the profile is not defined so just make sure that you include this component right
29:02
here profile so now it is included
29:14
automatically you will see that the display name is showing email address is showing and uh in the similar way you
29:20
can also show your profile picture as well so
29:48
you can see that the profile picture is now also showing so in the next step guys you can even extend this
29:54
application to save this information in such a in some form of a session so that whenever you L lose information you can
30:01
don't need to again and again Grant access to this you can store this information in a database mongod DB
30:07
MySQL or you can store it in a session as well so that so in this basic way
30:13
guys you can interact with Google o and integrate this login so we haven't used any third party package we just do it
30:22
from scratch everything I showed you in this video If you still have doubt you want to want to purchase it the link is given
30:29
you can directly purchase it the full source code from my website thank you very much for watching this video and I
30:35
will be seeing you in the next one
#Programming
#Computer Education