Up next in 10

Build a Next.js FFMPEG WASM Screen & Video Recorder Web App in Browser Using TypeScript
Mar 5, 2026
Buy the full source code of application here:
https://procodestore.com/index.php/product/build-a-next-js-ffmpeg-wasm-screen-video-recorder-web-app-in-browser-using-typescript/
Show More Show Less View Video Transcript
0:00
Uh hello guys uh welcome to this uh
0:02
NexJS project. I built out a screen and
0:06
video recorder project in Nex.js which
0:08
is a very popular framework. We are
0:10
running this project on localhost 3000
0:13
and this is the actual full directory
0:15
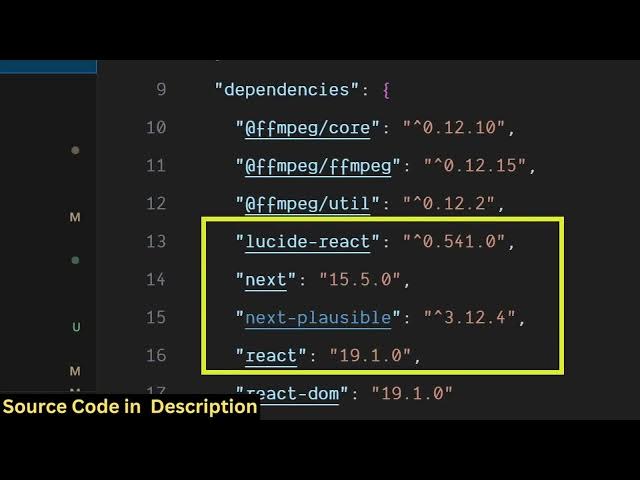
structure. We are actually using ffmpg
0:17
web assembly library for doing the
0:19
actual processing. Whenever we screen
0:21
record we are using the latest version
0:24
as you can see next and react. And this
0:27
is actually the full directory
0:28
structure. Each component is
0:30
customizable. It's coded inside
0:32
Typescript. So if you need the source
0:34
code, you can directly purchase it. The
0:36
link is given in the description. After
0:37
you purchase it, all the source code
0:39
will be downloaded from Google Drive.
0:42
And let me show you the demo first of
0:43
all. So once you launch this, you have
0:46
this option
0:48
button and you can adjust the settings
0:51
of the recording. High quality,
0:52
balanced, compressed. And here you can
0:55
adjust the permissions. So you simply
0:57
say microphone. So here you can select
0:59
which microphone you want to use and
1:02
select your microphone and inside click
1:06
on this button start recording. So now
1:08
you will be having the option to select
1:10
which screen you want to do or you can
1:13
even select
1:15
entire screen. So now the recording will
1:17
start. You will get this countdown clock
1:20
which will be running and at any point
1:23
of time if you want to stop it you will
1:25
click this button stop and save. So
1:27
recording is happening directly in the
1:29
browser. So as you simply click stop.
1:32
Now the processing will start using
1:33
FFMPG web assembly library. So it's all
1:36
processing it directly in the browser.
1:39
So there is no backend server there. So
1:42
everything is processing directly in the
1:44
browser. It's a client side application.
1:48
So once it completes reaches the 100%
1:53
your output video will be there. So you
1:56
can download that.
2:01
So now you will see the output video is
2:03
successfully created. You can play this
2:11
and as you click the download button the
2:15
recording will be downloaded as an
2:16
attachment. So this is a really good
2:18
project guys. It will save you a lot of
2:20
time if you want to actually build a
2:22
full nextjs screen recorder and video
2:25
recorder. So this project will be really
2:28
beneficial. Uh the link is given in the
2:32
description. So we have used this side
2:34
react
2:36
for the user interface that you see. So
2:39
again you can do this.
2:43
So interface is quite simple. It's fully
2:45
responsive as well. So it will look
2:48
something like this on tablet mobile
2:50
devices as well. So it's completely
2:53
responsive.
2:56
Can adjust the quality here. Can select
2:59
180, 720, 480p. So
3:12
again you can select which
3:15
screen here. So now the recording will
3:18
happen and uh
3:25
and if you don't know about ffmppg web
3:27
assembly uh this is actually a
3:29
open-source package which allows you to
3:32
use the ffmpg library directly in the
3:35
browser. So essentially ffmppg is a
3:38
command line library but this package
3:41
allows you to use directly in the
3:42
browser. So we are using this inside our
3:44
nextJS project.
3:47
So if you're interested guys in this
3:48
project, you can definitely purchase it.
3:51
It's easy for you to deploy the project
3:53
as well. And if you face any sort of
3:56
problem, I will definitely help you if
3:58
you can't run the project. But it's
4:00
really simple. You open the command
4:02
line, simply run the command npm rundev.
4:05
This will start the local development
4:07
server. And we also have the command to
4:10
actually deploy the project as well. So,
4:12
npm run build. So, this will compile all
4:15
the assets of the project into a single
4:18
uh folder where you can easily deploy
4:21
the project as well. So, this is the
4:24
next JS project and you will see that
4:31
so once it completes your recording will
4:33
show you can re-record, delete
4:36
everything you can do.
4:42
And for this we are using NexJS which is
4:45
a really popular framework.
4:49
We are also using FMPG web assembly
4:51
library. So,
4:57
so it's a full stack full stack project
5:00
of next year's