Up next in 10

Build a CodeIgniter 4 Google OAuth2 Login and Logout System With Sessions and MySQL in Browser
Jan 9, 2025
Buy the full source code of application here:
https://procodestore.com/index.php/product/build-a-codeigniter-4-google-oauth2-login-and-logout-system-with-sessions-and-mysql-in-browser/
Show More Show Less View Video Transcript
0:00
uh hello guys welcome to this video so in this video we will actually talk about how to actually integrate the
0:06
Google login inside Cod nigher for application C nighter is actually a PHP
0:11
framework if you don't know just write Cod nighter and this is the official
0:16
documentation website it's a PHP framework it's a small framework but
0:21
with powerful features it's a MVC W framework model view controller and let
0:27
me just show you the demo so if I just open host 8080 this is actually the you
0:34
will see the profile information about the user which is a display name profile picture and the email address so we also
0:40
have the log out button as well if you click log out you will you are successfully log out and we will also be
0:46
storing information inside this table if you see my SQL table so we will actually have these fields here which is ID this
0:54
is the Google ID name email profile pick so let me just uh zoom in
1:01
just wait so you will basically see guys this
1:07
is actually our table which is storing ID is the primary key Google uncore ID name display name email address and
1:15
profile picture so all these details will be storing it inside the table in COD nighter so this is the actual
1:20
directory structure of the project if you see that we are actually running this project on our port number you can
1:26
have this command PHP spark serve this is actually the spark CLI which is
1:32
provided by Cod nighter PHP spark Ser so this will actually start our development
1:38
server which will simply run on Local Host 8080 so if I open this application
1:43
the very first link which comes right here so we are not logged in we need to log in so simply we need to click this
1:49
uh login with Google button so as you click it you will be redirected to the consent screen where you need to select
1:54
your Google account on which you need to log in I will simply select my Google account right here you need to Grant
2:00
permission right here simply click on continue to actually Grant the permission to this project so once you
2:06
click continue it will actually fetch the user information and it will display the profile picture this is a display
2:13
name this is actually the email address and we also have the log out button and if I refresh the table right here you
2:19
will see that one entry has been successfully added so you will see the ID is automatically inserted primary key
2:26
this is the Google uncore ID this is a display name this is the email address and this is actually the full profile
2:32
picture link right here that we are displaying here so in the browser so if I close the window right here again open
2:39
it reopen it you will see it will automatically detect that I'm already logged in so it will actually redirect
2:45
me to the profile page you will see that so now we are actually showing the user profile information so if I close my
2:50
browser as well again reopen the browser and again go to that same URL
2:57
then also it will work because it is storing this information in the session so again it will redirect me to the
3:03
profile page so once we are logged in so we also have the option to actually click log out so now we will be
3:10
redirected back to the login page so once again if I open the browser now it will re redirect me to the login page
3:16
because we are log out so very simple login system guys we will not try to
3:22
develop this Google authentication system so now you will see this login with Google button so once you click
3:28
this button you will be redirected to the profile page so we are actually using Cod nighter 4 the latest version
3:34
of the this framework we will be storing information inside the session table in
3:39
the users table in the MySQL table right here you can try out with any account
3:45
here Google account if you have a different account you can try out with that also again it will cons uh just
3:52
show the consent screen you need to allow the permissions so once you do this you will see your profile
3:58
information in a nicely like structure we are using Tailwind CSS for the user interface this is a complete project
4:05
guys and if you are interested in purchasing the full source code of this project with full directory structure
4:10
and documentation the link is given in the description you can directly go to the my website proot store.com where
4:16
I've given the full source code with full directory structure and documentation the link is given in the
4:23
description of the video after you purchase it you will actually get a zip file of this which will actually contain
4:28
all these directories structure so once you make the payment you will be redirected to Google Drive where you will actually get this ZIP file which
4:36
will actually contain all these project files so if you are interested the link is given in the description of the video
4:43
so now let's get started by building this uh application so I will be seeing you in the next section so now guys in
4:50
this section we will start building this Cod nighter 4 project before you do this you must have exam control panel
4:56
installed on your machine so this we will be requiring for for running PHP because citer is actually a PHP
5:03
framework so you should have exam control panel installed so we are actually starting our Apache server
5:09
which will run on port number 80 and the MySQL uh database which will actually
5:15
run on Port 3306 so this comes with this uh MySQL
5:21
comes with this Apache while control panel exam control panel you can simply
5:26
write here exam control panel download the very first link which comes this is their official documentation you can
5:34
download for Windows Linux and Mac depending upon your operating system simply install this and start this
5:40
Apache server and my SQL Server so now to actually install Cod nighter and make a
5:48
new project I will simply go into the C directory and go to examp so just go to the exam directory
5:55
where the exam is installed and then go to STD docs folder and write right here we'll make a new citer project so for
6:03
making this citer project we have a command line tool that we can use which is composer which is a dependency
6:09
manager for PHP application so we'll simply write this command composer
6:14
create project citer so just write the same spelling
6:20
right here that I'm writing citer 4 SL app starter and Then followed by your
6:27
project name so let me just give Google O2 login project so this is actually the
6:33
command guys let me zoom in composer create project code nighter 4/a starter
6:40
and Then followed by your project name so I will simply enter it and now it
6:45
will actually create the composer file and it will actually install all the modules which is a cord nighter modules
6:53
so you just need to wait for some time to actually install in this and just finish so once it's installed it will
7:01
actually give you notification that everything is okay so now you can see that now we can navigate to our project
7:11
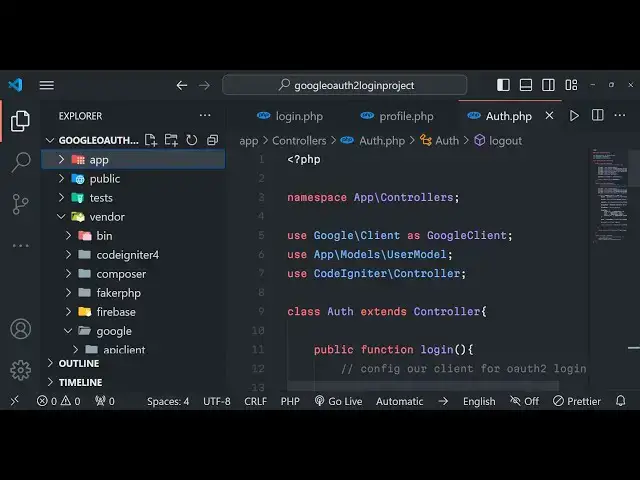
directory and open it inside vs code so it will look something like this the
7:16
basic citer project we have the app folder we have the public folder so this
7:22
is actually the basic citer project so now the very first thing we need to do we also need to install this module
7:29
which is the Google API client which is a dependency required for implementing
7:35
Google authentication composer require Google SL API client so this is
7:42
actually the composer require Google SL API client this is actually which is
7:48
required for this application simply enter it and uh now this will actually
7:54
install this Library as well it is used to actually interact
8:00
with the Google apis different apis so this is actually the client library for
8:05
PHP applications so it will hardly Take 5 to 10 seconds and it will install this
8:11
module as well after that we will actually create our table and migrations
8:17
in code nighter so there is a actual command which is there which allows you to make
8:24
those migrations so once it is finished we will try making the tables as well so
8:30
just wait for this to
8:39
finish so you can see it is just extracting the archieves here it is gone to this Google SL API Client Services if
8:46
you see the version number it is the latest version that we are installing
8:54
it so once it it is installed guys I will be back so now wise it is
9:00
successfully installed uh the library that we are installing so if you see inside your
9:06
vendor folder all the dependencies will be installed so this is actually the vendor folder and this is actually the
9:13
module that we installed it is stored inside Google this is API client folder it contains all the modules that we will
9:20
be using in this tutorial API client services so all the services that Google
9:25
offers apis we have installed it so after installing it we will now need to
9:31
create our database and table so for that we need to go to the app folder go to the config folder right here and just
9:39
there is a file called as database.php you need to edit this file and here you
9:45
need to tell citer which is your database name and the username and
9:50
password so this is actually Local Host host name will be correct Local Host username you need to replace here for
9:57
examp it is root password is nothing so by default password is nothing and here
10:03
you need to replace your database so you do need to create just go to your PHP my admin simply click it you will be just
10:11
create a new database I will call this database as uh o
10:17
or2 login click on create so now now you
10:23
will see that this database has been created
10:30
this is O2 login database currently it doesn't have any table so what I will do
10:36
I will replace this name in the database entry or or to login that's all and DB
10:42
driver is my SQL I that's all this will remain the same you just need to replace the username as root and the database
10:49
name so whatever database that you will create replace the name right here simply close this file now come to the
10:55
command line and simply you need to execute this Command right here here which is
11:01
composer uh PHP spark and make migration make colon
11:08
migration and then you need to name your migration so I will simply say create users table this is actually the command
11:16
simply pause the video and write it PHP spark make colon migration and create
11:22
users table so it will actually create the users table and you will see the file is created in the database m mtion
11:29
folder so if you just see there is a database folder right here in the
11:34
migrations we have actually created this file this file is automatically created
11:40
when we executed that command so right inside this file we just need to write here just write some code for this this
11:50
Forge and here we need to add field so we need to add field for our ID
12:02
so this ID will be actually will be the primary key so this will something like
12:09
this so what I will do I will simply copy paste it don't waste your time and then explain to you what is happening so
12:15
this is actually the fold uh I just uh just
12:28
fit let me copy this and explain to you what is happening right here in
12:33
this this is actually uh the fields right here guys we have added for add field we ID is actually the primary key
12:41
Auto increment to Google uncore ID name display name email address and profile
12:46
picture so this will be typ varar again constraint is 100 so we have just
12:52
put right here after that uh we just say here this Forge
12:59
and here we need to Simply add the primary key so we'll simply see add key
13:06
ID to be true so this basically tells the Cod nigher to make this as a primary
13:12
key and lastly we just need to create the table so there is a method out there
13:17
which is in code nighter which is create table and we will name this table as users so this table will get created
13:25
user table so there is a function create table so after this for the for this
13:31
migration to happen if you want to delete this table we have this uh drop
13:37
method as well there is a drop table method as
13:42
available as well if anytime if you want to delete this table you
13:48
can uh undo this migration so this function will call this drop table to actually delete that so both the
13:55
functions we have written so now what what we need to do we just need to run
14:01
this migration to actually create the table if you just look at in the database
14:06
nothing is present because the table is not created Now to create that table using these constraints that we have
14:12
written we just need to execute the command which is PHP spark migrate so
14:17
what it will do it will run this migration and now you can see that the
14:23
table will be created if you refresh two tables are created this is actually your migration
14:30
table it will actually hold all the migrations that you have done so we have created one migration create users table
14:37
and the second table is actually the users table if you see the structure of the table ID primary key Google ID name
14:44
email profile pick these are five columns out there so the table is
14:50
successfully created just close this file right here and now after this we now need to create model so in just go
14:58
to the models folder and just create a file right here user model.
15:05
PHP so right inside this file guys we need to models typically refers to the
15:11
data whatever data that we need to store so right here we will be
15:18
using PHP tag right here Nam space app
15:26
models we will be using the code lighter uh SL model
15:33
class and this will be the class here of user
15:38
model it will be extending the the model
15:44
class model based class so right here we will have some
15:51
variables protected first of all the table that we have created uh table is equal to the table name which is users
16:00
then we have uh the primary key which is
16:08
ID and then we have allowed
16:15
Fields so what fields are allowed so we are allowed in Google uncore ID display
16:22
name email address and the profile pck so these are the four columns
16:29
we will be storing information Google ID name email profile pick after this we
16:35
will actually Define a function in our model to actually find or
16:46
create we will actually pass the data to it and here you'll be actually inside
16:51
this model we will be getting this information by using
16:58
this where Clause so where Google ID is equal
17:05
to Google uncore ID so this is actually the method
17:14
first so this will actually get uh the username we here we are actually
17:20
providing the Google ID so this Google ID will be coming before if you make authentication successful this all this
17:28
information will be coming from Google so here we are actually getting the user by providing Google ID so after we get
17:34
this user we can just have if the user is not found in that case you can simply
17:40
say insert this user to the database so if this user is not found in the table
17:46
if this is a new user then in that case we will be inserting this user by using
17:51
the insert method in the table and then we will simply say user
17:58
us this. where goore
18:06
ID data Google uncore
18:18
ID first that's also after this we just
18:25
need to return the user
18:34
so here if you see guys basically in this function we are getting the user
18:39
and we are checking it if the user is already present so the user is already present
18:48
we are returning it simply we are returning
18:56
it so if this is a new user then we are inserting it to table
19:04
by using the insert method like this this is actually the model class so
19:10
that's all that we need to do inside the model CL class guys user model simply close this file now we will navigate to
19:18
uh again uh app folder and this config folder and here you will actually found
19:24
a file which is called as route routes.php this file is responsible for writing all
19:31
your routes inside your application so there is only a single route available to you so if you just run your
19:37
application if I run this application PHP spark serve this will start your
19:43
development server HTTP Local Host 8080 so if you run it for the very first time
19:49
this application this will actually load the homepage you will see welcome to Cod nighter
19:54
4.5.3 so which file is this doing it is going to the home page if you see in the routing file it is loading this
20:01
component home controller and then home controller is calling this file which is index so now we need to go to the home
20:08
controller if you see it's a MBC framework so model view controller so we
20:14
have a controller folder if you see we have having this home controller and
20:19
inside this home controller if you see we have the index function and it is loading this view which is this welcome
20:26
message so we have defined this file if you see go just go to the Views folder
20:31
we have this file called as welcom message. PHP so we are actually loading this file if you see if I make any sort
20:38
of changes right here to this file WR say hello Vol so if I makes changes refresh you
20:46
will see it will change so you just need to understand the inner inner workings
20:51
of citer before you make uh integrate Google login so it's MVC framework
20:57
before first of all the application goes to routes.php it basically goes to the
21:03
homepage then it loads the home controller and that home controller is located in this folder home.php then it
21:10
is loading this index calling this index method then it is loading the this view
21:15
this is welcome uncore message which is located in the views folder so now what
21:21
we need to do we need to add some more routes to it so just go to routes.php
21:26
so right here we need to add some more routes routes for getting the login page
21:34
so slash sorry Au login so for the login page we just need
21:42
to create a new controller for this which is the Au controller and here we'll need to create
21:47
a method which is login so for doing this just go to your
21:53
controllers folder and we need to create a new controller which is au. PHP just
22:01
create this folder just create this file. PHP and uh
22:06
we will simply have appcore just write some PHP tag first of
22:15
all app controllers it's a controller file that's why this name space is necessary and then you use uh
22:23
Google SL client as
22:29
Google client and then use app
22:35
models SL user we are integrating the user
22:40
model file that we defined early on and then we are using the use code
22:46
ner SL controller the base controller class for defining every controller so
22:52
you'll basically Define this controller class o extends uh controller
23:01
so inside this controller guys we will actually have this method which is uh public function
23:08
login so this function will be responsible for actually defining
23:14
our configuring our client or for O2
23:22
login there will be another function which will be responsible for call back URL
23:29
so this will be responsible for call back
23:35
URL once you actually Grant permissions so which which URL you want to load and
23:42
then the third function here will be for the log out functionality so here we will be writing
23:47
code for logging out the
23:55
user that's all so so right here guys first of all we need to write our login
24:02
functionality this is really easy we will be configuring our client which
24:08
will be new Google client so we have imported this dependency
24:15
so and here we will have this function which is available to us which is set
24:20
client ID so here we need to set our client ID and similarly we have a function for setting the client secret
24:28
as well so we need to get both this information from Google Cloud console I
24:34
will show you later on how to do this and in the meantime we also have this function as well which is set redirect
24:41
URI and here you need to set your redirect urri the base URL followed by
24:48
SL sorry au/ callback so this will look something like this uh if you want to
24:55
see HTTP Local Host 8080
25:00
SL au/ callback so this actually is the redirect URI that you need to copy
25:06
pasted inside Google Cloud console to actually get the client ready and the client secret so after this we also need to add
25:15
the scope what scoping information we need to say add scope we need the email
25:21
scope we need the email of the user and also we need the profile as
25:26
well so we need the profile as well like this so after this guys we
25:34
will actually be creating the Au URL so this will be client there is a function
25:40
here create all URL and then after that we will be
25:45
returning this we will be redirecting user to this URL which is
25:50
two and then or URL that's all that's all is there in this function
25:57
guys so once once the user goes to the login page once it clicks it it this
26:02
function will trigger and here we need to actually Define this client ID and client secret so for doing this you need
26:10
to have a Google Cloud console account for this I've already have one so if you
26:15
just go to apis and services you need to go to credentials and uh if you go to it then
26:23
click on create credentials o o client ID and select app application type to be
26:29
web application and here you need to paste your homepage URL so this will be I'm
26:37
running it on Local Host 8080 this is my homepage in the authorized JavaScript Origins and then
26:44
the authorized redirect URI so the same redirect URI that you have mentioned
26:50
right here if you see I will copy
26:56
this so This depends upon on how you are configuring your application for me it is look something like
27:14
this just see this is the HTTP local 8080 Then followed by sl/ callback
27:21
that's all so just follow me and then you will get no error so after that it
27:27
will give me my client ID client secret so don't copy this information this will be different for you so just simply
27:34
paste the client ID and also paste the client
27:44
secret so after you do this it's very now easy now
27:51
uh now what we need to do we need to go to the if you see we are actually having
27:58
this Au controller if you see Au login so here what we need to do we need
28:06
to go to the home controller so just go to the controllers folder just go to this file which is home.php and right
28:12
here if you see if you are going to the homepage we are simply loading this view but we don't want to load this view
28:18
instead we want to check if the user is in session so
28:23
session we will basically have this method get if the user is in session in
28:29
that case the user is already logged in then in that
28:38
case just remove this I think why it is
28:44
coming if the user is already logged in then we will simply redirect him to the
28:49
profile page but we will just do it later on but if the user is not logged
28:54
in in that case we will return the view as au/
29:03
login put a semicolon so here we need to
29:08
define the login page login view which is uh which will
29:17
be present in the views folder so we just need to go to the Views folder
29:23
right here and just Define a directory called as
29:29
directory o a and inside this directory you just
29:34
need to make a file login.php
29:43
so this will be the login
29:50
page so we also need to include Tailwind CSS because we are using it for styling
29:56
the UI so just after the title paste the CDN for CSS after this guys we will be
30:02
having a body class BG gray 100 inside this we will have these much
30:10
of classes this is just a basic HTML so I
30:18
will not waste time in writing this all the source code is given you
30:23
can purchase it so this will be the index uh login HTML we have a simple button
30:31
login with Google and it will simply go to this base URL which is / login so
30:37
this routing we have defined it inside routes.php so here we are actually if
30:42
you go to all/ login we will be loading this function in the controller that we
30:48
have defined if you see or. PHP we have defined this function which is login we is simply calling this function login
30:55
function if you see in the controller file so in the we are simply going to it so
31:02
now what we need to do we also need to create one other file in this views folder which is profile.php just create
31:10
this not in the O folder not in the O folder just outside this profile.php so
31:16
here we will be showing the profile of the user so we will say this is the
31:21
profile page simply here in uh our
31:29
controller file if you see uh not in controller file it is in
31:35
the uh I think there is this file home.php so just go to the home.php
31:44
and here we will simply if the user is already logged in then we will redirect the
31:50
user to the profile page so two base URL
32:02
profile so here we are simply checking if the user is already in session if the user is already logged in then we are
32:07
redirecting it to the profile page if they are not then we are showing the login page login
32:12
view so if you just refresh now you will see the login with Google
32:18
button right here so it has already detected this condition evaluates to
32:23
false because the user is not in the session so now it is running this view
32:28
which is located in the O folder in the views directory if you see o folder and
32:34
it is loading this view login. PHP so once we click this button right here
32:39
login with Google it is saying whoops we seem to have hit his snack so whenever
32:45
this happens guys if you want to debug your code nighter application there is a folder available to you if you go to
32:52
this uh writeable folder and go to logs and there is a logging file right right
32:58
here so you can check errors what error has happened so it is saying to us that
33:03
class Google client not found if you see this error is taking
33:10
place Google client not found so we need to actually uh go to
33:16
that and actually import this class because it is
33:23
saying to us that this class doesn't was found so I think I made some kind of
33:28
error in
33:36
this Google
33:43
client Google / client as Google client
34:01
let me see guys what is the error so now guys it is perfectly okay the application is now working so it was
34:07
just my backend issue so now you can see that if I click this button of login
34:12
with Google it will redirect me to the account selecting screen consent screen
34:17
so here I can select my Google account and uh let me select this account and
34:24
here need to Grant permission so simply click continue so what it will do it will exactly show you 404 page because
34:31
you can see the URL structure Local Host 8080 sl/ callback this is actually the
34:38
call back URL that we have configured and this is actually it is giving you the authorization code this is exactly
34:45
what we want this authorization code value we want this code to actually
34:50
exchange it for Access token so access token is access we need the access token
34:56
to actually use the Google API to actually show the user profile information so now to exchange this
35:03
authorization code for Access token if you see you need to go to your uh route
35:09
file go to config folder and just open this uh routes.php so we need
35:16
to write this route for the call back URL so when this URL occurs we need to
35:23
add a routing for this routes. getet
35:28
and then we will simply say /all back and whenever this occurs we need to
35:35
call the Au controller and inside this we need to call the call back function put a semicolon so here we are simply
35:42
telling Cod ner whenever this URL structure comes we just need to call the O controller in that Au controller we
35:49
have defined a method called as callback if you open the O controller if you see we have the login method we have the
35:56
call back method and we have the log out method so now we will concentrate on the call back method to actually
36:06
exchange the authorization code that we get with access
36:13
token so now inside this again we need to configure the
36:20
client new Google client we need to set
36:28
the client ID once again here also and also the client secret as
36:40
well and also we need to set the redirect URL this is same that we have done early
36:48
on as well base
36:54
URL / callback
37:04
so put a semicolon right here so here you need to replace your simply copy
37:10
this and replace it here
37:19
also and just replace your secret key as well right here
37:28
so after that we will actually have a if condition right here and here we will simply check that
37:36
if request get variable code so this
37:41
simply means that if this in this URL structure if this uh code variable
37:46
exists so we just need this value this is authorization code so we are checking in this if condition that if this code
37:53
variable exist then we need to exchange it for Access tokens so we will simply have a method right here inside this
38:00
client library of PHP which is fetch access token with
38:07
authorization code or you can even Fetch with uh refresh token as well but we
38:13
using this fetch access token with authorization code this is a method and here we need to replace
38:20
our get Val
38:29
we will just say We'll provide the authorization code like
38:36
this so after you so this will be in this request method
38:47
request it contains this method get like
38:55
this so now we actually get this access
39:02
token so if you want to print out this access token just to see what it looks
39:08
like you can just Echo out a simple statement right here
39:14
token so it will just show you on the screen if I refresh
39:21
here just go again I think
39:32
okay so this token if you want to just see the error you can again go to that I
39:38
tell you that writeable folder and this log statement and you will see this
39:45
lock if you just delete everything from here again refresh you will see arror to string
39:52
conversion this is actually the method error is coming because this token is in the form of array we can't display it
40:00
directly that's why this error is coming so we can delete this line from here instead what we can
40:06
do uh uh what we can do right here we can
40:15
set the access token the client set access token you
40:20
can pass this token as it is
40:25
token access token this is actually array so that's
40:32
why it was having this error so if you want to display this this is actually a array so in this we have this property
40:39
called as access token so now if you want to display it
40:44
if I refresh
40:51
now you will see that so this is actually the access token that we got from this authorization code if you see
40:57
so we exchanges this authorization for for this access token so we are actually
41:03
getting it and we are setting it so it is good practice to actually debug your code as well just to see if it you if
41:09
you are on the right track so after you do this we just need to declare a new variable new
41:17
Google service and uh this service will be for
41:23
the o 2 login system so passing this client as an
41:29
argument so here we need we will be getting a Google user from this so O2 this actually
41:38
contains a function which is user info and it contains a get
41:47
method so now we will be getting the user model we will be instantiating a
41:53
new instance of it we have declared this class early on which contains five properties Google ID
42:00
name email and profile ID so what we will do so you'll put the user data array
42:09
variable you will simply say Google
42:16
user ID then we comes the
42:22
name Google user name and then comes the email
42:33
address email then comes the profile
42:44
pick picture I think that's all so these are
42:50
the four columns that we had and just put a semicolon right here and then we
42:55
need to Simply insert this into the database as well so we'll say user
43:02
model find or create this is a
43:07
function we'll pass the user data so actually it is calling this class which is user model class we Define this
43:14
function early on find or create if you check in the models
43:19
folder uh if I show you user model class we have defined this function find or
43:25
create so we are actually checking if the user is already available then we are simply returning the user or if this
43:31
is a new user then we are inserting this user in the table like this so This is
43:37
actually calling that model function so this is internally related guys say MVC framework model view controller that's
43:43
why after this we need to store this VAR uh user in the session so you'll say
43:49
session set it's very simple in C nigher you look like this user pass the user
43:56
like this this will set the user in the session and then we will simply return and redirect the user to the profile
44:04
page two and here we will
44:09
simply go shift the user to the profile
44:16
page that's all
44:21
simply and here if you see if this uh request code doesn't generate
44:27
in in that case we will be redirecting the user back to the login page so
44:33
redirect to to the login page so / login if there
44:41
is some kind of error then we are simply redirecting user to the login page that's all so if you just refresh now
44:49
what will happen it will actually if you just go to Local Host
44:54
8080 click this button and uh sorry cannot seem to find the
45:01
page you're looking for can again go to the log
45:06
here again delete everything from here again
45:13
refresh so you will see it will redirect you to the profile page whenever I want to go to the homepage it is redirecting
45:19
me to the/ profile page if you see so here it is saying to me that 404 not
45:25
found so this is not error but we are on a uh right track if you open this uh
45:32
routes.php we are haven't defined this route for uh the profile route so we do need
45:41
to Define this to actually counter this error so we just need to
45:48
define the profile route just right here we will say routes doget
45:58
profile and whenever someone goes to the profile page we need to Simply call the Home controller and then def call the
46:05
profile function so here we need to go to the home controller and right here we will
46:12
be calling
46:19
our home controller and this home controller actually contains the code
46:25
for so here we will Define a function profile so we are calling that
46:32
function so here we will simply say the user will come from the session so
46:38
session get you getting the user right here you will see from the session so
46:43
after we get the user we can simply compare right here if the user exist if the user doesn't exist here we will
46:49
simply redirect the user back to the login page very simple very simple logic
46:59
base URL that's
47:05
Sol so it needs to have dollar sign so if the user doesn't exist we are
47:12
basically going to the homepage and if the user exist in that case we will showing the profile page
47:19
profile and here we will be in sending
47:24
this user as an argument user is equal
47:30
to
47:45
user that's all so if you just refresh now they will actually see this this is
47:51
the profile page if I go to the Local Host 80 it will redirect me to the
47:56
profile page we are currently logged in now we just need to go to the profile page that we have in defined
48:04
here in the views folder profile.php and here we just need to edit this file just to show the
48:11
information that we need which is the profile picture display name and the email address so just after the title
48:17
paste the CDN of Tailwind CSS and this is profile page of
48:24
user so all the source code of this project guys you can purchase it with full documentation the link is given in
48:29
the description I will support you once you purchase it and after this right here we
48:35
will be giving a class BG gray
48:41
100 so we will be having class here M at screen Flex items
48:59
we will show the image to the user like
49:16
this so we are showing the profile pick like
49:21
this so if you just refresh you'll see profile picture is showing
49:27
we will basically give it some Tailwind classes to it so just give it a
49:33
class rounded full MX Auto
49:38
mb4 so it will basically turn
49:45
around so then we actually have to have a H1 tag
50:08
so let me just write this guys a slightly complicated code so I don't enjoy writing it so I will explain you
50:15
once I write
50:21
it so just format so you will see this is act
50:27
profile pick this is a user display name this is email address and this is actually the log out button it will
50:32
actually go to the au/ logout route if you just refresh now you will see that
50:39
so I think there is some slight mistake that I done let me copy this whole
50:47
file I hate writing HTML guys that's why it creates some problem now it is there
50:52
in the same screen so all the source code is given guys you can directly purchase it from my website Pro Cod
50:58
store with full documentation and directory structure and after you basically you need to Define this route
51:04
au/ logout so just go to your routes.php file and whenever you click this uh log
51:11
out button we will actually be having this
51:18
route so in this route guys what we need to
51:24
do we just need to paste this so it will actually call the log out function in the Au controller just make open Au
51:32
controller and here we need to uh Define the log out function which is pretty much very easy we need to destroy the
51:39
session so this session it contains a method to destroy the
51:44
session after destroying the session we will redirect user back to the
51:52
homepage like this that's all two lines of code for logging out so click on log out it will react back
52:00
to the homepage again if you click login with Google you will see that so now if
52:05
you close the browser once again open it it will automatically detect that you are already logged in Local Host
52:11
8080 you will see that so if you see the this information is already been
52:17
inserted in the database as well if you check O2 database we have created O2
52:23
login database so in the users table we have
52:28
currently one user logged in so if you try to log in a different user Local Host
52:36
8080 click on if you're doing it for the very first time then you need to select the account here you need to just do it
52:42
for the very first time and then a new account is inserted so this information is inserted
52:48
automatically this is a project guys fully flesh project in citer 4 and if you are interested please hit that like
52:54
button subscribe the channel as well and you can find out the full source code purchase it the link is given in
53:00
the description you will get this full directory structure with full documentation and support from me once you purchase it from my website proot
53:06
store.com you will get a zip file after you purchase it from Google Drive so thank you very much guys for watching
53:12
this video and I will be seeing you in the next video
#Business & Productivity Software
#Computer Education