Up next in 10


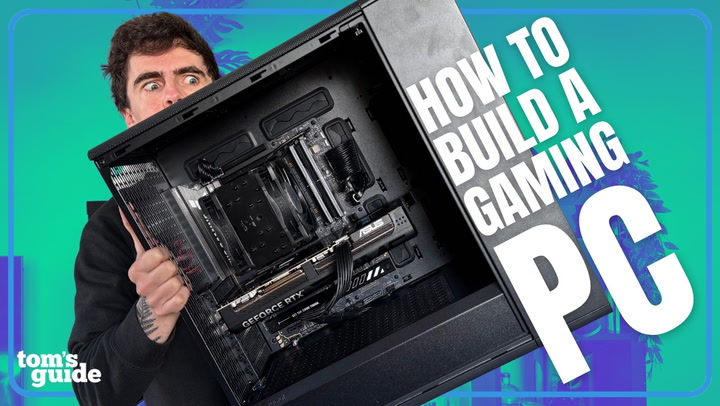
In this video, Jason walks you through how to build gaming PC for beginners breaking down the entire process step by step. He covers all the essential PC components, including the motherboard, CPU, RAM, power supply, storage, and case, with a special focus on how to install a graphics card for maximum gaming performance and how to install a processor with liquid cooling for optimal thermals and reliability.
Along the way, Jason shares practical tips for proper PC cable management, airflow optimization, and avoiding common PC-building mistakes, so your setup looks as good as it performs. Whether you’re following along with your first-ever gaming PC build, upgrading an existing rig, or just need a refresher before swapping in new parts, this guide is designed to help you build a high-performance gaming PC with confidence. Perfect for beginners, enthusiasts, and anyone looking to level up their custom PC build.
Show More Show Less View Video Transcript
0:00
So how do you build a PC? I guess we're going to find that out together, aren't we
0:05
I'm here at Scan in Bolton. For those watching in the US, think about this place slightly
0:09
equivalent to like a Micro Center, an NZXT, the kind of store that does a whole lot of things in
0:16
the world of computing, but their bread and butter is gaming PCs. And you can get these in several
0:21
different flavors. You can either buy the pre-built straight out, you can even pay to watch them build
0:27
it on the live stream or like I'm about to do you can just come down and build it yourself
0:34
Now I've got to be transparent about something here. I've never actually built a PC from scratch
0:40
but I do have my own personal scam bodyguard who's currently behind the scenes who will either nod
0:47
his head or shake his head if I'm doing something horrendously wrong which I believe I won't. If my
0:55
primary school friend who no word of a lie I saw him eat so much glue when we were in class
1:01
can build a PC then I can too surely. So what I'm looking at right here is all the pieces that you
1:11
will need to build a PC on a pretty sweet little turntable. Now to sum it all up basically you're
1:18
going to need a CPU for all of the computer processing stuff, you're going to need a GPU
1:24
for all the gaming, RAM to help with the multitasking, the SSD to like store all the
1:29
games and files that you've got but essentially what you would do is you take these two screws
1:33
off, you would take the peel off of this heatsink, pop it in, make sure you've got the riser on it
1:38
as well because you don't want the SSD to bend back, pull it all in, screw it all in, job's good
1:43
And then of course you're going to need the whole motherboard to put everything onto
1:47
thermal paste to put on the CPU to then place the cooler and its fans, then a power supply to
1:53
well power at all you can see that scan has already done me quite the favor and of course
1:59
as you see a case to put everything into and probably the most essential bit is the screwdriver
2:07
now just to let you know what i'm using here this is an atx case probably going to be the easiest to
2:13
build into the best to kind of like expand upon as well modularity to it as well oh wait it's me
2:18
back in my room again and I just wanted to give you some tips on how to pick the right components
2:24
for what you want to do. I want you to think about the components that you choose kind of like a full
2:28
host pipe system because you need to make sure you get the right balance of things going through
2:33
so that you're making the most of everything that you've got. The nozzle for the host pipe is your
2:39
GPU. Obviously don't spray water through your graphics card. The bit in the middle, the host
2:44
pipe that is going to be your cpu if you've got a big nozzle on the end like a 5090 or something
2:52
like that you're going to need a good industrial strength hose pipe in the middle to be able to
2:57
support all the water to go through to that nozzle and use it to its fullest extent but if you have
3:02
something more baseline to mid-range then you're not going to need that industrial strength pipe
3:07
kind of a waste of money so you could go something lower than that and then the power supply is the
3:13
tap and if you don't have enough power coming from that power supply to go through all of the other
3:17
components you're going to run into some problems and like I said it's about finding a good balance
3:23
between all of these things to make sure you get the most bang for your buck and then in terms of
3:29
calculating the balance between the CPU and the GPU what you could do is google search
3:35
ball net calculator there's hundreds of them and they are kept well up to date with the GPU's
3:42
demands and the CPU's demands so you can see whether you're going to get just the right
3:47
Zen light balance between the components. Anyway back to me building the PC. It's best to build on
3:53
the motherboard outside of the case. Obviously each motherboard's going to be a bit different
3:58
so for example on this one I've got the ASUS TUF Gaming B50e plus wi-fi. Can't forget that bit
4:06
And in terms of some of the way that these connectors down at the bottom are going to be labeled on some of these motherboards that will differ by brand. Make sure that you're checking
4:13
the supplier manual to kind of see how things are differently labeled on each motherboard
4:18
It's time for probably the most delicate bit which is installing the CPU. Now the CPU is going to be
4:27
smack bang in the middle here but there is a shield on this. Do not touch it and do not lose it
4:33
If you need to ever sort of like return it under warranty or anything like that if you don have this they will not take it This is protecting the pins underneath and they incredibly sensitive so do not touch them And just gently lift that up to reveal the pins Like I said no touchy You will see a gold triangle to kind of
4:57
tell yourself which way this CPU is going to go. And you're going to correspond that with the
5:03
triangle on the actual CPU area. Once you've got those matched up, what you will then do
5:10
is just very carefully line it up and it should sit completely flush. You can then close the lid
5:20
and then put the CPU brace arm back down and then that will come off. Next up it's time for the ram
5:31
sticks but the most common mistake is that the ram sticks are kind of put closer to the cpu as if
5:36
people are thinking that's going to be kind of like the same as that when you put the gpu closest
5:41
to the pc the assumption is if i put them in here it's closest to the cpu so i get the most speeds
5:48
whereas actually that's not the case what you could actually do is essentially half the speed
5:53
of your ram you're not getting those high transfer speeds so the common rule of thumb with installing
5:59
ram is that you put it in slots two and four if you have two sticks. So what you're going to do on
6:05
slots two and four is just open up the clips and then you're going to take a look for the little
6:11
slits and you're going to line it up with the line that goes on here. Give it a bit of a push down
6:18
and you'll hear a pretty satisfying click. And then once again with the second stick, this is
6:24
is all very therapeutic isn't it? So we need to keep it cool and you've got two options. A and
6:31
probably the most cost effective and easiest one to install is a fan cooler. B is an all-in-one
6:37
liquid cooler. Now for an AIO cooler you're going to want to install that after you've put the
6:43
motherboard in so that you can like measure it all out properly and make sure that it's all in there
6:47
but with a fan cooler given it's much smaller dimensions in this way you're going to want to
6:52
put it on now. That way it saves you a lot of hassle of just having to kind of like try and
6:57
eye it up when you've got it in the case. You're going to start with what's called the risers
7:01
This essentially suspends the CPU cooler over the top so that the contact point will just be the bit
7:07
that's supposed to cool it. Luckily for this one there is instruction manuals and stuff like that
7:11
that you can follow but then also on the back of it they've been very kind as to put specific
7:17
labels on it so you know where it's supposed to be pointing to. And for those who are curious this
7:22
is a Noctua CPU fan cooler. So what you'll do here is you'll start to put on the stand offs just to
7:30
raise the cooler here and then same again on this side and this motherboard the zero millimeter hole
7:39
and then when you've got the bracket on it's time to figure out how the cooler is going to make
7:44
contact with the CPU because if you have two pieces of metal touching without any sort of way
7:49
of transferring thermal energy from the CPU to the cooler you're going to have a very bad time and
7:55
chances are your house may smell like burnt metal for a little bit and that is where thermal paste
8:03
comes in but the general advice that I have always followed is just to apply a pea-sized amount
8:11
right in the middle. I know that we've put this straight in the middle but the contact between this
8:17
and the CPU will spread it out anyway. Yep and once you divide it screw it in
8:25
It's good practice to kind of alternate between sides as you screw it in as to not bend one side
8:34
more than the other. Not necessarily the worst thing in the world if you do but also you're
8:40
spending a lot of money on this stuff so obviously it pays to be careful and then once you've screwed
8:45
it in as tight as you possibly can it's time to put these two fans on here to ensure that there
8:50
is an airflow that's going through this radiator in order to keep the cpu cool also good general
8:56
practice with fans usually it is the logo side of the fan that the air comes out of so if i'm to do
9:03
this you'll notice that the air kind of comes in one side and out the other also good to know for
9:08
like case bands and stuff like that. And with this clipping mechanism
9:12
you're gonna wanna make sure that this bigger bit goes over this ridge in the cooler
9:18
And that is exactly what we going to do We sit it nice and flush And now you have a motherboard bit that is starting to look a bit more like a PC
9:31
Nice. And now before we do anything else, we want to make sure that this is plugged
9:35
into the motherboard so that the fans go whirr when I turn the computer on
9:40
So we've got a splitter. We'll go ahead and connect this all together
9:45
Give them a bit of a wiggle, give them a bit of a push to make sure that they're in. And then you're going to want to go for the CPU fan header
9:52
which as you can see, labeled on this motherboard, is that bottom one. Click it in, sorted
9:59
So now that we've got this bit sorted, the best way to do this going forward, given the heft of the graphics card
10:07
is to put this in the case first, as to ensure that you can have this laying flat
10:12
and you can make sure you've got a proper connection with this, while also sorting out your cable management around the back
10:18
99% of the time, your case is going to come with fans
10:22
But in the situation where they don't, you're going to need to get some additional fans
10:27
And you've got to think about that airflow. Remember what we talked about with the CPU cooler
10:31
Whichever way the logo is facing, the air is going to come that way. So in this computer, you're going to get the full airflow
10:38
kind of coming through and out the back. So long as you're thinking about this stuff
10:42
and keeping it thermally efficient in that way, you're going to be just fine
10:46
because the last thing you want to do is cook your computer while trying to play Cyberpunk
10:52
Gently lay it down on its side. And one of the differences you're going to notice
10:56
in some of these cases is exactly where you're going to screw in the motherboard
11:01
So you'll notice all the screw holes that you've got here to place it into. Well, you want to make sure that you've got the risers
11:08
in the case to put the motherboard onto because the last thing you want to do
11:11
is have all of this work on the back. Make contact with any of the metal off the back of the PC
11:18
Otherwise, that could cause some problems. And you're going to start to screw it in
11:28
For something like this, it definitely helps to have like a long head screwdriver to actually reach in
11:34
And then once you have all the screws in, it's probably pretty good practice now
11:38
to actually think about getting the cables through from the case into the motherboard itself. You've got certain slots for certain things so you will
11:47
have a motherboard plug that has two cables that goes in and it goes up to usually this long ass
11:55
one here but it's that will go through and power the motherboard itself. Then you have the CPU and
12:00
PCIe plugs. When you go to something like this beast over here then you'll find a direct 16-pin
12:07
connector right here on this PSU which goes around to this one which is all the power that you will
12:17
need. So we'll take the CPU plugs and as is conveniently being organized for us here we'll
12:23
feed them through this top bit. Make sure that you're lining up the actual shape of the connectors
12:30
with what's going on in there and then you'll take the 24 pin connector of the motherboard
12:34
feed that through the channel where it's going to be closest to that as well
12:38
just to keep the cables nice and tidy. Once again, wait for that click, from solve
12:44
And then it's time for the USB-A and USB-C connections onto the motherboard
12:49
so that you can get the USB ports on top working just fine for you
12:53
You'll just have to line up the groove on it with the groove in the socket
13:00
And then with this one, it's kind of hard to see, but like there's a slightly bigger corner edge of it and if you match that to like the bottom of the
13:10
port then you'll be able to line it up. If you're not feeling it go in try not to wrestle it in
13:22
you don't want to break your motherboard. And now that we have a CPU, sticks of RAM, cooler
13:28
SSD. Everything is plugged in. The power supply has all the cables going through
13:34
connected to the motherboard. The USB on the front panel is connected as well
13:38
including the power switch. Otherwise, we're not going to be able to turn this bloody thing on
13:42
It's time for the main event. So first of all, let's see what we're dealing with here
13:46
We've got an RTX 5080, the ASUS Prime, with 16GB of GDDR7 video memory
13:54
this is without a better way of saying it a bit of a 4k gaming beast so inside you get the pretty package and I assume this is something along the lines of thank you for buying And then you get everything given an anti bag which interesting tidbit
14:16
for you here. In terms of if you were ever to like upgrade a GPU or upgrade a motherboard if
14:24
you get like an anti-static bag with it my recommendation would be to keep it and keep the
14:29
box because you never know if you need to go back to that thing but it's also good for preservation
14:33
you don't want to get too much like static electricity running through the components that you buy
14:50
so now that we've got the card unwrapped i mean look at that detail it's going to go in the top
14:56
PCIe slot I know there's other ones but top one closest to the CPU closer to the RAM more PCIe
15:03
lanes going to the thing I'm gonna take out these two slots so that the entire GPU back
15:11
is accessible via an HDMI or the DisplayPort cable which will be screws
15:19
two and three so these people are telling me I sound like I know what I'm doing let me know if
15:24
you agree in the comments. So these braces come out and now we go back to the RTX 5080
15:34
and now we're gonna line it up with a satisfying click the GPU goes in. Now normally in these
15:43
situations if you need to get it out quick there is a quick release switch back here. That's also
15:47
a good indicator like when that clicks you know you're in place but also give it a little wobble
15:52
as well just in case and now those same screws that you took out to get rid of these back plates
15:59
you're gonna put those in to secure the whole thing down and while you're here before you
16:04
forget you might as well take that gpu cable and plug it straight in ladies and gentlemen
16:14
that is a gaming pc oh wow let's go You didn't see me laughing about this off camera, but they got me a branded one
16:29
Put the glass straight on. And then with the mother of all satisfying peels, the Tom's Guide test bench is now complete
16:39
And as you can see, ladies and gentlemen and MBs, I did not screw up my first PC build
16:45
It passed all of Scann's tests. And I would like to introduce you to the Tom's Guide test bench
16:51
I think I cooked here. So as you can see, got the custom glass side with the Tom's Guide branding
16:56
Also put my name on there just in case anyone else on the Tom's Guide team tries to take it
17:00
You can take it from my cold dead hands. But as well, we take the side off and I can show you what we're dealing with here
17:06
So as you can see, it's not super RGB laden and that is kind of by choice
17:11
I've never been a fan of like the overflash it in your face kind of stuff. But on the B650E motherboard, you've got yourself a Noctua fan cooler
17:19
You've got the AMD Ryzen 7 9800X3D just underneath there. Two sticks, 32 gigs of DDR5 RAM
17:27
You've got the RTX 5080 right here. The SSD is just hiding underneath this heatsink going on down here
17:33
Powering it up, you've got the Corsair RM850E PSU. And this is all housed within the gorgeously refined Fractal case
17:42
that comes with triple fans on the front as well. Now, obviously, in the guide that I did with you
17:46
I showed you all the steps except for three, which are kind of critical to the build
17:52
Number one is installing the power supply. Number two is plugging in the fans of the case
17:56
And number three is all the cable management you do around the back
18:00
And that was because Scan had already had all of that pre-prepared. Shout out to Klaus for helping me with that
18:05
But of course, I'm keen to provide those additional steps. If you need them, do go ahead and let me know in the comments
18:11
and I can build something else completely from scratch. I've been Jason England
18:15
and subscribe to Tom's Guide for more. And I'll see you in the next one
18:21
Take care. The general advice that I have always followed whenever I've been switching CPUs
18:28
is to take the cap off. Sorry, mate. I've been Jason England
18:37
Subscribe, sub, sub, how do I even say it wrong? Editor, make sure you're cutting around me
18:43
making all these mistakes
#Computers & Electronics
#Computer Components