Up next in 10


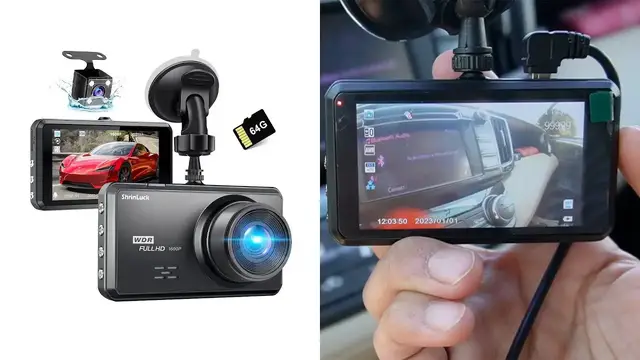
In this video, I review the ShrinLuck 2.5K Dash Cam .
Check it out here: https://amzn.to/3ZQjoDa
DISCLAIMER: This video and description contains affiliate links, which means that if you click on one of the product links, I’ll receive a small commission. This helps support the channel and allows us to continue to make videos like this. Thank you for the support!
Show More Show Less View Video Transcript
0:00
Hey, Chris here, and today I'm taking a look at this high-speed dash cam, and I was sent this for the purpose of this review, but I'll go ahead and give my honest first impressions and opinion of this
0:08
So, my idea for this was to give this to my little brother. It's this car, actually, this Honda Element
0:14
He doesn't have any cameras in here whatsoever, so I figured this could be a good safety precaution, too
0:21
So, first thing I see is going to be the dash cam itself. It does have a good weight to it
0:27
Just to give you an idea of how kind of small this is, this is my iPhone 12 Pro Max and then this is what the screen looks like
0:36
And then right up top over here we see a few cables, so this would be for the HDMI and then here for the USB, so to go ahead and actually give it power
0:45
On the side we have several buttons over here, so OKM, a lock and a power button
0:53
and then on the other side we have three buttons followed by a micro SD card
1:01
it's a oh that's nice comes with a 64 gigabyte up on top we just have the
1:06
microphone and then just a little hole for the reset button I'll put that to
1:10
the side next things here are gonna be a lot of cables a little tool to go ahead and lift up this adapter for the micro SD card to USB and finally the manual so I took everything out of the plastic and this is what we get we gonna
1:27
have the charging cable the mounting bracket cable with a camera or sensor and finally the
1:32
actual power cable which goes to the cigarette lighter so I'm inside my RAV4 instead just because
1:37
the outlet for the cigarette lighter in my brother's car wasn't working so I couldn't be
1:42
able to actually use this. All right, I can put this right over here, just like that. And now I
1:49
can stick the dash cam up on my windshield. So right there is good. So just push it into place
1:55
and then push this little piece upwards and it'll get stuck right in there. On here, I can orient it
2:01
like just like that nicely and there. And now to actually go ahead and work this, I can just turn
2:06
my car on and now i got the welcome and here it is oh yeah so immediately in the upper right corner
2:21
i see that uh it's recording and i see how many seconds have gone by so far i see the little red
2:27
dot over here blinking on and off which means it recording and then at the bottom here i could see the date which is incorrect So I can fix that Alright there I went ahead and just tightened this into place so now it won come loose and there Now there also are additional
2:41
buttons on the side over here. All right so I took this off and I got a chance to mess with
2:46
these buttons a little bit more so right on the side over here there's going to be these four
2:51
buttons and if I press the M button which would be the second button from the top it'll go ahead
2:59
switch the modes so right now this is going to be the camera mode and the reason I know it is
3:03
because well on the upper right corner here I could see a little bit little camera icon and
3:08
then all the way to the right I could see nine nine nine nine nine which is how many photos I
3:12
can take there so I can cycle through this again press the end button one more time now it'll take
3:17
me to the videos that I just took and I press it one more time and it'll take me to the actual
3:22
camera to record so if I want to go ahead and start recording immediately I can just press the
3:28
upper button right over here press ok and it immediately starts recording and then you could
3:33
see on the top right corner over here that's going to be red and then on the left side you can see
3:39
that button blinking and if I want to go ahead and stop I can press the same button ok and it'll stop
3:44
and again I can go press the M button there this is going to be the video that I just took and though I actually played I can press ok and it immediately starts recording and then you could see on the top right corner over here that going to be red and then on the left on the left side you can see that button blinking
4:02
and if I want to go ahead and stop I can press the same now if I want to go ahead and cycle
4:06
through all these different videos or images on the left side over here I'm going to have these
4:10
buttons so I can press the bottom one to cycle so this is the previous one I took and the previous
4:15
video and the previous videos and I'll go back all the way to the most recent and then in the
4:21
in the middle over here this is going to be like a menu button so I'll get to go ahead
4:27
uncycle more through everything else it has so right here delete protection slideshow and if I
4:34
press that same button again it'll take me to the different menu which gives me a lot more options
4:40
so to get out of the menu again I just have to press it a third time so one two and then three
4:44
gets out but yeah this is what the dash cam end up looking like i think it's a real a nice one it's
4:49
a good form factor oh yeah i forgot i still do have that little uh sticker over here so i'm not
4:54
sure how the quality is going to be with that and then i also have the plastic on top over here just
4:58
because i'll keep it on it it'll be kind of like a screen protector and then i kind of put this back
5:03
up over here and then just tighten this right over here and then there but yeah that's a quick
5:11
overview of the dash cam
#Autos & Vehicles
#Computers & Electronics
#Car Electronics
#Vehicle Modification & Tuning