Up next in 10


In this video, I set up and give my first impression of the Patiomage Ergonomic Office Chair.
Check it out here:
USA: https://amzn.to/3LLzdot
DISCLAIMER: This video and description contains affiliate links, which means that if you click on one of the product links, I’ll receive a small commission. This helps support the channel and allows us to continue to make videos like this. Thank you for the support!
Show More Show Less View Video Transcript
0:00
Patio Mage sent me their ergonomic office chair. So in this video, I want to do a quick unboxing and test this out to see how well it works
0:05
And here's everything that comes in the box. So the first thing I'll do is to attach the base to the legs
0:10
And if your piece looks like this, make sure to take this cover off first
0:14
And we're gonna flip this upside down revealing the screw holes upwards
0:18
And then I have this piece of cardboard on top just to prevent it from scratching the desk
0:22
And now the legs go just like this. Make sure to align it with the hole
0:30
Just like that and now we can screw everything in and we're gonna be using these screws
0:35
These are gonna be the M6 16 and they're gonna be right over here in the package
0:42
Now it's time to attach the wheels and I'm gonna go on the floor for this one
0:46
So if you're having trouble pushing the wheels down grab it kind of like this and just push it down like this
0:53
And it should go in place and place the dust cover right on top as
0:57
as well as the gas lift. So now it's time to attach the armrest to the seat. So right on the
1:04
sides here, it's going to let us know which side is which. So here you could see the R and that's
1:09
going to be right side. And then here you could see L and that's going to be left side. So I'm
1:13
screwing this one in to the right side over here. And then we're going to be using the M630 screws
1:18
that are located right over here. And before screwing it in, you can also adjust where you
1:22
want this to be. So you can have it all the way out, all the way in, or somewhere in the middle
1:26
And in this case, I'll just put it all the way inside And then same thing for the left side So now it time to attach the mechanism right over here and first things first just pull this outwards and then align this with the arrow just like this and we going to be
1:44
screwing it in with the M616 screws located right over here. Now we can move this out of the way
1:51
and it's time to grab the backrest and we're going to attach this piece right over here and we're
1:56
going to be using the rest of the M630 screws. Now the cover can be placed right here. Now this
2:04
can be screwed into the seat right over here. So this just goes just like this and this can slide
2:10
right in. And we're going to be using the M820 screws and make sure there's a washer in here
2:16
And now we can attach the seat to the gas lift. And now we're almost done so the last thing to do
2:22
is to put the headrest on top. And this is going to be the easiest part. Just slide it right in
2:28
And it fits right inside. And then you can just push it into place wherever you want it
2:35
Or put it back up. And this is pretty tough and secure
2:40
And you do have to put a good amount of force to actually push this down and push it up
2:46
Oh, yeah, that's hard. And just like that, the ergonomic chair is ready to use
2:50
And so I got a chance to mess around with it. throughout the day and this thing is pretty cool and I also want to compare it to my other ergonomic chair
2:57
because at first I thought they were gonna be very similar but there's a lot more things you can do on this one
3:01
compared to the other one over there. So let's start with the basics. For starters down over here there's gonna be
3:06
two handles The first one is gonna be for the lift so when I just lift this up I go all the way down and the second one is gonna be pretty cool I show you that later now for the armrest themselves we can move this forward or back and this has back as it goes and this can also
3:24
twist inwards and outwards and we can also adjust the height of this by
3:29
holding the button going up or going down besides the armrest we can also
3:33
adjust the headrest by shifting this up or down and just like before we can also fully extend this
3:40
upwards or down and this does require a good amount of force to push down or to pull up. Now
3:47
all those things I told you about the patio mage is going to be the same thing for this one although
3:51
this one does have an extra thing for the headrest and it's going to be to maneuver it a little bit
3:56
more so you can actually go all the way back and adjust it kind of further but besides this one
4:02
The extra stuff that this has is going to be the footrest. So at the bottom here, we can just pull this out and push this up
4:10
And just like that, there's going to be a footrest that you can relax nice and comfortably
4:15
And on top of that, this also does recline. So that second lever over here, I can pull it upwards a little bit
4:21
And I can adjust to where I want and let go and it locks into place. Or if I want to recline all the way back, a good tip is just to pull this all the way up
4:30
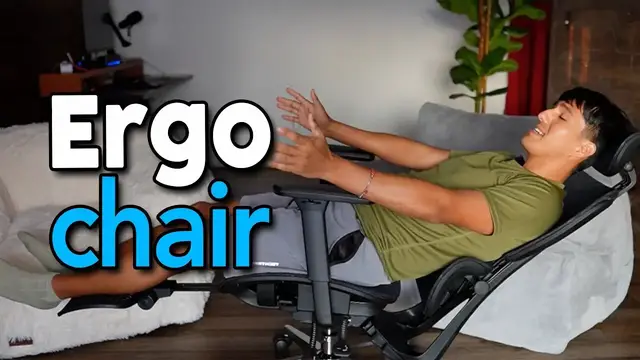
There. and now I can just move freely and I can even go all the way back and this is as far back as I can
4:36
go and this is basically just laying down now the only extra thing I would do to add some comfort
4:40
would be to add a pillow at the bottom for some extra lumbar support but when I sitting upwards there gonna be plenty support over here but if it still not supported enough for you the cool thing is you also can adjust the lumbar support and the seat itself And on the
4:56
backside, we have two knobs that's going to help with adjusting the lumbar support. So if I unlock
5:01
this, I can move this up or down just like that. And I can lock it back in place and turning this
5:09
knob will loosen this so this can go back. So as of now, if I push it back, you can see it has some
5:14
give but this doesn't go all the way and then when I unlock it it has a lot more give and this touches
5:20
the bottom so it's a lot more flexible but for my case I'm actually going to lock this in place
5:25
and I'll keep it just like that. So on the right side of the seat we're going to have this over
5:30
here and then we have this and we can move the seat more forward and the best way to actually
5:34
move it is with your feet hold on to the legs and then just pull it forward because if you let go
5:40
It's just gonna slide automatically back. So find the placement you want I'll go all the way front let go and there it locks in the place or I can go somewhere in the middle
5:49
There like that and then lock or all the way back So that's pretty cool
5:54
If you have much longer legs and you want like more support you can put it all the way like that
5:58
But in my case, this is gonna be a little bit too long Yeah, it feels like it's a little bit too much. It's kind of digging into my calves
6:07
So I want more back so I can just hold on to it and there
6:13
So overall, I'm pretty happy with this Patio Mage ergonomic office chair. It's comfortable
6:17
It has a lot of different adjustments, a lot more than my other one. And so I'm pretty excited to start using this
6:21
So if you're looking for an ergonomic office chair for your setup, definitely check this one out by Patio Mage
#Computers & Electronics
#Home Furnishings
#Home Improvement
#Yoga & Pilates