Up next in 10


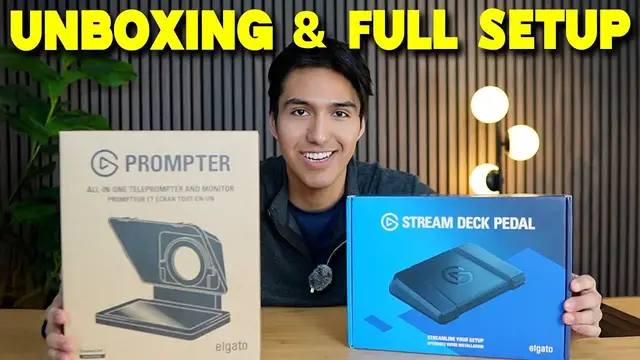
In this unbox and setup the Elgato Prompter and Stream Deck Pedal.
Check it out here
Prompter: https://geni.us/6K2fmOs
Stream Deck Petal: https://geni.us/6yQ1VP
DISCLAIMER: This video and description contains affiliate links, which means that if you click on one of the product links, I’ll receive a small commission. This helps support the channel and allows us to continue to make videos like this. Thank you for the support!
Show More Show Less View Video Transcript
0:00
So I recently started using this online teleprompter and although it works pretty well
0:04
I have trouble looking at the teleprompter and at the camera at the same time, which is why I got some upgrades. I end up getting this teleprompter by Elgato
0:13
which is simply known as Prompter. And I also got the Stream Deck pedal just to control this
0:19
prompter with my foot. So in this video, I want to do a quick unboxing and setup and give my first
0:23
impression of these. All right, so first up is going to be the prompter itself
0:27
and up top there's going to be this little box the prompter and then what looks to be a base
0:35
and yeah that's everything in the box all right so first up this little box let's see what's in it
0:39
we have some instruction guides so a quick user manual and then three little boxes inside this other box and one of them is going to have the usb cable
0:50
and here's what it looks like so it's going to be usb a to usb c and this thing is going to be
0:55
pretty long. It's also going to be braided, which is nice. And I do like the fact that the USB-C
1:00
is going to be angled. On top of that, we also do have like this little booklet inside that same
1:05
box too. And this other box, we're going to have some backplates. And one of these backplates is
1:10
going to be for a DSLR and mirrorless camera. And this other one is just going to be a universal
1:15
shroud backplate. On top of that, there also is going to be this microfiber cleaning cloth
1:20
with the logo El Gato. And this last box is going to have step-up rings
1:25
So there's going to be a bunch of these, nine total with one hidden in the back
1:29
All right, now for the prompter itself. So there it is. And this thing's actually lighter than I thought
1:34
We got the nine inch display at the bottom here and right here where we're going to see the words
1:39
and on the backside, that's where the camera goes through. And yeah, you can see
1:44
yeah, you can literally see the reflection through here. So you could see my camera right in the front
1:48
and on the back side there's going to be these two screws and of course at the bottom we are
1:55
going to have some mounting screws this is going to be for a tripod so we can put it either in here
2:01
in the center or more towards the back and finally there's going to be this other bracket which I have
2:05
to figure out how to use. All right now it's time to set up the prompter itself and I'm going to
2:10
start by screwing this onto a tripod. So there's going to be two mounting holes one up front and
2:15
one in the back and the back feels like it's gonna distribute the weight a little bit better
2:19
So I'm gonna attach it to this one instead. Just like that. And now it's time to work on the backside
2:24
So it does come with these two screws It already comes with this plate attached and this is gonna be for the Facecam Pro I don have a Facecam Pro I gonna be using my camera so I can remove this back plate
2:35
and then replace it with another one. So because I'm using this type of camera, I can't use the back plate for the DSLR mirrorless camera
2:41
it comes with, so I'm gonna be using the other one, which is gonna be the universal shroud plate
2:48
And this, this can go right inside like this. and now it's time for the L brackets so first off I just want to attach this to the back here
3:03
and then remove this sticker that says mount camera here and I'll just thread in my camera
3:10
from the bottom and of course make sure everything is tight and then bring it as close as possible
3:14
without hitting the mirror and because this camera does zoom in I got to make sure to not go
3:20
all the way in although I think that's fine yeah even if I go all the way in it's not going to zoom
3:24
in too much that it's going to interrupt the glass but once the right angle is set
3:29
this can be tightened even more. We've got to remove the lens cover
3:33
and there so now this is what I see nice and clear and there that's the first part setup
3:46
now let me get this hooked up onto the computer. All right so now it's time to download the actual
3:51
software for the prompter so just checking in over here it told me to go to elgato.com slash
3:56
downloads and then scrolling down here we want to download this camera hub which i just did and
4:01
then i could launch this continue continue agree install and just give it a few minutes all right
4:10
so there it is so here's what the hub looks like all right so i brought up the prompter so you can
4:13
see what's going on with it so when i mess with the settings there you can see size increases size
4:18
decreases. I can mess with the margins, the vertical margins. Let's see the line spacing
4:26
opacity, text color. Oh yeah, no, I think white, definitely easier to see
4:38
And then background color too. Oh wow, yeah, that's very bright. Let me go back to black
4:46
So we can also mess with the scrolling. So right here I'm seeing constant voice sync
4:51
Yeah, so this takes me to another page on how to actually use this, but let me go back to here
4:54
I go to constant the scrolling speed on a loop reading position I could change where it starts if I want it all the way on top somewhere in the middle at the bottom overlays so let see
5:10
I can add a cross, a snap, square, then change the color of that too
5:20
opacity, position, and a cool thing too I'm seeing now is that I can actually separate the script
5:24
into these different sections to these different chapters. And then when you see it on the prompter
5:30
itself, you can see how it's more organized, a little bit more detailed, versus just a bunch
5:36
of clumped up words together. And then right now I'm just pressing it. So it just goes
5:41
to these different chapters, these different sections. And the cool thing about this prompter
5:46
is the fact that you can use it just as a second screen. So right over here for content, we can put
5:51
it for chat so if you're connected to twitch and you want to see your live chat it'll go ahead and
5:56
display here now i don't use twitch i don't stream so this isn't really useful to me but what will
6:00
be useful to me is going to be this second display yeah i see my mouse right over here so i can open
6:06
up something else such as this image of a cat so this is pretty cool and all but what i'm really
6:13
excited about is using the stream deck with the prompter all right so now time for the stream deck
6:18
pedal. Yeah, this thing has some pretty good weight to it. And there it is. So it's going to be metal
6:29
on the back. It's got these, I think they're rubber. They may be rubber feet. Yeah. And then the buttons
6:35
So there's three different buttons and this one's going to be the biggest in the middle. We got the
6:39
logo there. And then there's also some other stuff that comes in here. It's going to be the user manual
6:44
and a power cable and this is going to be USB-A to USB-C and it looks like I can actually take
6:53
this off. Oh actually no, it kind of looks like it because there's this little divot in there
6:58
but you actually can take it off and this is going to be a nice braided cable. We also have
7:03
a smaller manual and there's also going to be a bunch of these little baggies which is going to
7:07
be some spring sets so I guess this is for the tension and also the middle pedal stopper. All
7:12
So now it's time to install the software for the stream deck. So we're going to be using the same website as before, elgato.com slash downloads
7:19
Head over down and then download the stream deck, which I already did
7:25
And then let me just install this
7:36
Alright so there it is so now this can be connected on the backside and then make sure
7:40
it's connected to the computer. And then you can see it's blue so it's turning on
7:45
Alright so I was watching a quick video of what to do next from here just because I wasn't
7:49
seeing options for the camera. So what we got to do is click on this button here
7:55
And then it'll take me to this page and here I can write camera hub
8:00
And then just get this. Because I got to create an account
8:06
Alright, so everything's downloaded. Now I have all these different options for camera hub
8:10
And one of the main one was set to go was prompter control
8:15
And then this can be for the scroll. So that'll scroll down and then this one I can have it to scroll upwards
8:23
Now I want to keep the speeds consistent. So I'll do it kind of like five here. And this one I'll do negative five
8:32
And the middle one, I guess I can put prompt or control again
8:36
And then this can be like a play pause one. And it immediately starts working
8:41
So if I press the right side, oops, starts going down, scrolling down, let go
8:47
and now it's scrolling down to whatever speed it was currently set at yeah scroll speed 44
8:53
so let me just change it to nothing so when it's nothing that means i would be the only one
9:00
responsible for scrolling down let go or scroll back up and let go and i guess the play pause
9:08
let's see if it actually does something no i wouldn't do anything let's see if i have a 100
9:14
percent playback speed. Let me press it again. There. Now it plays and then it pauses and then
9:21
I can just mainly control and I let go. Yeah the controls still work well. And one more thing too
9:28
about this is that the tension can be adjusted simply by removing these screws and then changing
9:33
out the springs. But in my case this feels pretty solid. Feels fine. It is kind of hard to do but
9:41
because it's going to be with my foot. It'll be fairly easy to press down. So overall, I'm pretty
9:45
happy with the combo. I'm glad I got this type of teleprompter with this pedal. It's going to make
9:49
reading scripts a lot easier, and now I can control the speed. I can flow much better without having
9:54
as many mess-ups. But yeah, that's a quick unboxing and setup of the prompter and the stream deck
#Online Media
#Computers & Electronics
#Camera & Photo Equipment
#Teleconferencing