Up next in 10


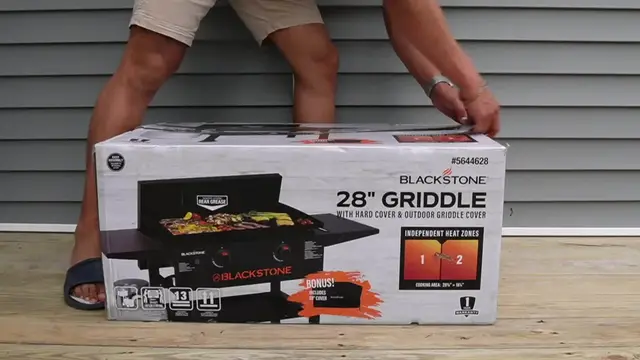
In this video, I assemble and test out the Blackstone 28 inch Griddle .
Check it out here:
USA: https://amzn.to/4bzPDv4
CA: https://amzn.to/3WLNeZU
DISCLAIMER: This video and description contains affiliate links, which means that if you click on one of the product links, I’ll receive a small commission. This helps support the channel and allows us to continue to make videos like this. Thank you for the support!
Show More Show Less View Video Transcript
0:00
So today I'm taking a look at this 28 inch griddle by Blackstone
0:03
So I just want to do a quick unboxing and assembly and give my first impressions of this. So inside the box we're going to have a bunch of stuff including the body
0:09
griddle top, hardcover, bottom shelf, side shelves, fabric cover, hardcover handles, wheels, LPG hook, LPG support, grease can, hardware, and the baggie of instructions
0:20
warranty card, and a cool sticker. So the first thing I do is to grab the body and then flip it upside down
0:30
And now the legs can be lifted up, but there is going to be a latch on the other side here
0:34
So we do have to take this out and there now it's loose. So now it can be lifted up nice and easy
0:40
And then same thing for these over here. So now it's time to attach the wheels and be careful of these legs because if you accidentally move a little bit, they will go ahead and fall down
0:50
So I'm actually going to push this one down just so it doesn't accidentally fall hard
0:54
And this wheel goes right here. And we're going to use the small thumb screws to go ahead and screw it in place
1:01
All right, now it's time to attach the bottom shelf. And so we can lift the other legs up
1:06
And this fits right over here. And now on the side without the wheels, we're going to use the large thumb screw to screw it in right here
1:18
And now on the other side with the wheels, we're going to be using the medium thumb screw
1:22
and we're also going to be screwing in the LPG support making sure that this little hook is
1:26
facing downwards just like so. Now it's time to flip this right side up and make sure to use two
1:34
people so it's a little bit easier. All right so now it's time to attach the LPG hook right over
1:43
here and we're going to be using a shear pin and the cotter pin at the other end
1:56
There. And now the control knobs can be pushed right in place. Now it's time to add the side shelves and I'm starting on the left side over here
2:07
So the first thing to do is to loosen these two screws over here So this one already came loose So all I have to do is loosen this one on the left side And now we can grab the shelf and hook it on to right over here so this one already came loose so all I have to do is loosen this one on the left side and now we can grab the shelf and hook it on to right over here and then tighten everything up and then do the same thing for the right side
2:27
and now we can hang the grease cup right over here on the back side
2:35
followed by the griddle top and make sure to align the front pins all the way in the front
2:40
first and then push it backwards so it locks in place and this might be easier
2:51
if somebody else helps out too. Now it's time to attach the handles to the top cover so they already come with a screw here so you just got to take it off so
2:59
here's both parts we're gonna have the handle and the hook and make sure this
3:02
hook is attached the right way on the backside with the hook being aligned with
3:06
with the Blackstone logo. There, now this cover can go right on top
3:16
And when not in use, you can just slide down and these will go ahead and hook onto place
3:27
All right, so now it's time to attach a propane tank and right here I have it
3:30
so this will go ahead and screw into here. and there now it's nice and secure and i'm making sure both knobs are turned off we can
3:39
go ahead and add a battery to the igniter button so this can unscrew
3:42
and here i have a double a battery and there all right so now it's time to turn the valve and then right over here
3:57
you can turn the knob so pushing it in and then go to high and then just press and hold the
4:06
ignition button until it lights up and it's lit up i can let go and then here i can go ahead and
4:11
just adjust the temperature i can do the same thing on the other side press and the other side
4:18
is lit up as well too and here you can see these are both controlled independently now it's on low
4:26
and now I go ahead and just turn everything off And of course close up the tank All right so now it time to season the Blackstone griddle
4:38
but before putting any sort of oil in here, I gotta go ahead and turn it on
4:42
So let me just put it on to high heat and then hold the igniter
4:48
And I'm gonna leave it on here for about 15 minutes or so until the griddle starts changing color
4:53
and then I'll start putting the oil in here. So here's a time lapse of what it goes ahead and looks like. So here's what the griddle looks like after 15 minutes
5:00
It's going to be really blackened everywhere and now it's time to season it so you can use the official blackstone seasoning
5:05
You could use olive oil, but in this case, I'm gonna use some canola oil
5:09
So this just has to be spread all over over
5:22
And then I'll use a paper towel just to go ahead and spread it out all around
5:26
And this isn't just going to be on the griddle itself but also on the sides too
5:31
And I think it probably was a good idea to remove the cap but I forgot to remove it so now I can't because it's really hot
5:37
And I'm also going to do it on the outside over here. And there, that's the first layer done so I'm going to wait another 15 minutes and then
5:44
do this again. Alright so now it's time for the second layer and I'll do the same thing again
6:06
and let me do this one more time and it'll be ready for use
6:15
so here's how the griddle looks like it's nice and seasoned everywhere and now it's finally time
6:34
to start using it. So here I have a plate, here I have some seasoned chicken
6:38
So let's just go ahead and put it on the grill. Actually beforehand, let me lower the temperature
6:41
cause this is gonna be way too high And actually I not gonna use both sides So let me turn off we turn off this side and I leave the left side on and I put it kind of a medium temperature in here you
6:54
can see the flame still going on. Alright, so here's our plate of chicken
7:23
And before I get to eat this, I do want to clean the griddle off. And while it's still hot, it's the perfect time to go ahead and scrape it
7:30
So I don't have that flat scraper, so I'm just going to be using this just to get all
7:35
the bits off as much as possible. And then try to clean the rest off with this paper towel
7:48
And a little bit of water
8:10
So overall I'm pretty impressed with this black stone griddle. Setup was pretty easy. It wasn't too hard to season
8:15
The only thing missing, of course, is going to be having the appropriate tools. I don't have a scraper
8:19
I don't have like an appropriate cleaning kit. So, of course, I wasn't able to clean it that well
8:25
But overall, cooking time was real quick. This, it got really hot
8:29
And so far, you know, I'm pretty happy with this. I know it's going to be a lot better to just cook things in general instead of having to
8:35
cook them indoors. Now that it's springtime, now that it's summertime, we can go ahead and use this outside and not
8:40
make such a mess indoors. So it's not as hot indoors anymore
8:44
And yeah, chicken's pretty good. All I need is some rice and some water and I'm good to go
8:48
But yeah, that's a quick look at the Blackstone 28 inch griddle
8:52
So one more thing when it's time to cover this up the lid can easily be placed on top
8:57
And there so now you can protect the griddle from bugs from leaves and you don't have to worry about it getting dirty inside
#Computers & Electronics
#Food & Drink
#Hobbies & Leisure
#Shopping