Up next in 10



English Wheel Plans:
https://www.proshaper.com/tool-designs/
Our Amazon Storefront:
https://www.amazon.com/shop/proshaper
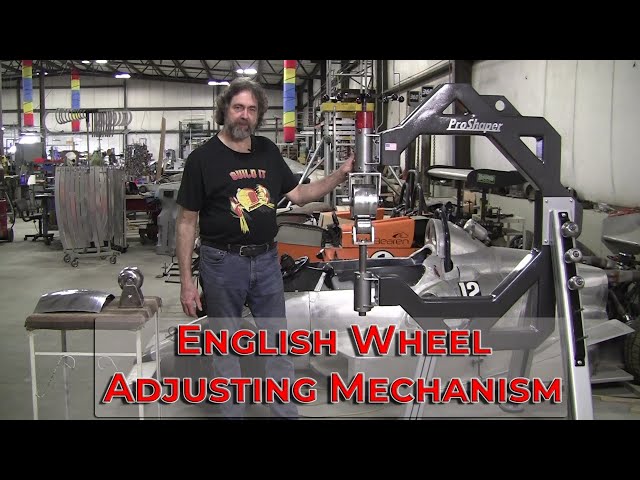
We are in production mode with our English Wheel adjusters. Wray shows the progress of our production and hopefully soon will have prices available on our website.
Email: [email protected]
Website: https://www.proshaper.com
Facebook: https://www.facebook.com/ProShaper/
Instagram: https://www.instagram.com/proshaper/
Twitter: https://twitter.com/ProshaperM
Linkedin: https://www.linkedin.com/company/proshaper/
Show More Show Less View Video Transcript
0:10
hi it's ray from pro shaper in child
0:12
massachusetts
0:13
i've been getting a lot of emails and
0:15
texts and
0:16
messages on facebook and every other
0:20
way of communicating saying hey ray
0:23
when's when's the wheels and the
0:24
mechanisms going well we've been really
0:26
busy we're dealing with the covid thing
0:28
we've had some classes
0:30
but maybe now the classes might slow
0:32
down because
0:33
supposedly the resurgence or whatever so
0:37
we've got this is the initial wheel that
0:39
we made frank made it i painted it
0:42
and we've got the mechanism all designed
0:45
and built on this
0:46
and mark painted it up and it works
0:49
really really good i worked on this
0:53
panel just a little a little bit earlier
0:55
and just a few minutes i got that nice
0:58
crown in there
0:59
and i just wanted you to see the
1:02
smoothness of this
1:04
wheel now some people might say oh you
1:07
don't have a quick release on it i don't
1:09
have quick releases on any of my wheels
1:11
years ago i found them that they're
1:13
really not necessary
1:15
if you've got a little uh relief on your
1:18
edge of your wheel
1:19
you go in at a 45 degree angle and let
1:22
you right in it's not a problem
1:24
so and this is so easy this uh adjuster
1:28
is probably one of the best ones i've
1:29
ever made
1:31
and it's just really nice and smooth the
1:34
action on it
1:35
so if you mark and come over maybe roll
1:39
over a little closer
1:41
and there's some grinding in the
1:42
background i don't know if that's
1:43
getting picked up or not but
1:46
this is a really super smooth wheel
1:49
and i think people are going to be
1:51
really really happy with it
1:54
now we have a bunch of these
1:58
we're building i want to show you that
2:00
in a minute uh
2:01
this is a real open design as i
2:04
mentioned before we might be able to put
2:05
some dovetails i haven't got there yet
2:08
uh and you'll be able to quick change it
2:10
into other machines like a planish and
2:12
hammer
2:13
or a tipping wheel or a few other
2:16
machines so that way you have a common
2:18
seaframe and
2:20
able to utilize a lot of people who've
2:22
got
2:23
a very little space to work with and
2:24
that work really good
2:26
you could put a hinge on it somebody
2:28
mentioned they'd want a hinge and put it
2:30
on the wall and you could hinge it
2:32
against the wall you wouldn't even need
2:33
the arms if that was the case maybe the
2:36
back legs you wouldn't need just the uh
2:38
the front leg so
2:41
another uh inquiry was ray we look we've
2:44
been here class
2:45
and we love the big wheels so
2:50
this is the production wheel off of one
2:52
of my big machines
2:54
this is off of papa bear uh and
2:57
i believe it's a four and a quarter inch
3:00
wide wheel or so
3:01
and this i believe is like a four and a
3:03
half and that's
3:05
a really nice size and some people might
3:07
say well ray
3:08
you know all the other wheels they're
3:10
like 9 or 10 or
3:11
12 inches in diameter and yours is only
3:14
like six or six and a half
3:16
well there's no disadvantage to it and
3:18
there actually is advantages
3:21
the advantage is when you're doing a
3:22
reverse curve you're working the panel
3:24
upside down
3:26
and if there's a tight radius it will
3:28
navigate through that radius a lot
3:30
easier
3:31
these wheels change out really fast i
3:34
have a little
3:34
compression lock on this side you just
3:36
take an allen take that out
3:38
and boom you pull the pin and you'll be
3:41
able to put
3:42
narrow wheels on it if you want to
3:45
sometimes the narrow wheel
3:46
can be advantageous because they're
3:49
trying to make this machine do a lot
3:50
more than
3:52
just one task you can multitask with it
3:55
so narrow wheels could be put on
3:58
and if we adapted it to use
4:02
to these bigger wheels and you see
4:06
that if this was right here this shaft
4:09
would have to drop down
4:11
about an inch or so and it would work
4:14
fine you got plenty of clearance here
4:16
you got clearance underneath
4:18
all desirable features this here
4:21
we're working on that we want to try to
4:23
eliminate these so it's kind of a
4:24
more smoother appearance these are the
4:27
bolts that clamp this together to keep
4:29
this locked
4:31
so that has the ability to to collapse
4:33
all the way if you loosen it up
4:35
and but they do lock really nice
4:38
and the yokes turn 360.
4:42
and so if you've got a panel
4:45
say you have a a fender panel and the
4:48
wheel opening is right here and you want
4:50
to wheel
4:51
that way you can take the wheel opening
4:53
turn this 90 degrees
4:55
and you can wheel across maybe you're
4:57
joining a fender together
4:59
and you can utilize all the potential of
5:03
the machine by
5:04
turning these wheels 90 degrees so
5:08
that's one of the updates uh it's super
5:12
attractive looking
5:13
these haven't been painted yet the yolks
5:15
haven't been painted the yolks are all
5:17
adjustable
5:18
so that the yoke can be tipped like this
5:22
on both sides there's set screws on the
5:24
bottom and also the
5:26
thrust on the wheel can be adjusted by
5:29
turning these set screws
5:31
and that adjusts your thrust and the
5:33
same on the top wheel
5:37
and i'll show you now uh what we're
5:38
doing with the second wheel
5:40
uh frank my volunteer is building the
5:42
second wheel we'll take a walk over here
5:44
and see that wheel
5:46
all right here's wheel number two
5:48
frank's been diligently working on this
5:50
he's you know he's a volunteer so he
5:52
comes in three or four days a week
5:55
sometimes he comes in five days he's got
5:57
board he comes in and he helps out
5:59
and he came in with very minimal
6:02
both mig antiques welding skills and now
6:06
he's getting pretty good if you look
6:07
closely at some of these tig wells i had
6:10
him tig weld this one together
6:12
because with the mig he was really kind
6:14
of snotty with his wells and there was a
6:15
lot of cleanup on
6:17
the first one so it took a lot of extra
6:20
time so i try to stress to make better
6:22
and better wells
6:24
and uh he's doing a lot of welding so
6:26
his welding skills are improving
6:28
and that's all part of the good picture
6:31
and
6:32
frank's happy i'm happy and
6:35
now on this one as far as alignment of
6:39
these
6:39
a back leg the uh the plans include the
6:43
the deluxe plans include the angles and
6:46
the length for the legs and everything
6:48
but it is a little bit of a problem
6:49
lining them all up
6:51
so our intent is to make several of
6:54
these wheels maybe we'll make a half a
6:55
dozen of them
6:56
i've got a lot of this 4x4 steel that
6:59
i've picked up
7:00
and this is number two definitely number
7:03
three and definitely number four is
7:05
going to happen maybe five and six so i
7:06
don't know
7:08
so uh frank said in order to speed
7:11
things up
7:12
why don't we make a little jig to to
7:15
hold these
7:16
legs so that we can weld them very
7:17
accurately so
7:19
today he made up this little uh fixture
7:22
here
7:23
out of angle line we have hanging around
7:26
and
7:26
that's going to set the splay of the
7:28
legs just right on every one
7:31
so you know we're trying to enhance this
7:34
as much as possible
7:35
now if you put
7:39
bigger wheels on it bigger wheels have
7:43
bigger
7:44
contact areas and you might want to
7:47
strengthen up the frame a little bit now
7:50
uh
7:50
you can strengthen the frame a couple
7:52
ways one
7:54
this is quarter inch wall which is more
7:56
than adequate for any automotive use
7:58
especially with that three inch wide
8:00
lower anvil but if you're going to jump
8:02
up to a wider anvil
8:04
it wouldn't hurt to you can jump up to 3
8:07
8 wall thickness on that that will
8:09
strengthen
8:10
and the weakest link on this is right
8:14
here
8:15
and down here and all wheels have to
8:18
have
8:18
elasticity in them if they don't have
8:21
the correct amount of elasticity in them
8:23
you won't be able to navigate through on
8:25
the panel
8:26
on some parts on the edge where you've
8:28
shrunk it might be
8:30
65 000 stick and where you've
8:33
thinned it out in the center of the
8:35
panel which was originally
8:36
60 000 thick might be 45 000 sticks so
8:40
you've got to go from 45 to 65 000
8:43
thick a 20 000 difference and if it's
8:46
too stiff
8:47
it'll have trouble navigating into those
8:50
thicker spots
8:51
it doesn't happen often but if you make
8:53
the wheel over build it you're going to
8:55
have that problem
8:56
so this wheel has very nice features
8:59
about it it
9:01
doesn't have any problem at all
9:04
navigating through and it's not really
9:07
looser and
9:07
it's a nice strong wheel but if you
9:10
wanted to do heavier metals
9:12
and you wanted to put wider
9:15
contact area anvils wider anvils on
9:18
it's very easy to straight to strengthen
9:21
this
9:22
up so one of the ways that i thought
9:25
would be good and it's very simple uh
9:28
and i could add it to the plans i
9:30
suppose
9:31
is a piece like this this would have a
9:34
45
9:35
cut right here and then this
9:39
would come up like this and go down here
9:43
and it would have angle joint right in
9:47
here
9:48
and then an angle joint in here and
9:50
you'd have two cool little
9:51
parallelograms right there that would
9:53
enhance the uh the look of the wheel and
9:57
greatly enhance the strength of the
9:58
wheel because this part would now be in
10:00
compression
10:01
and that would work really really good
10:05
now you could also do it we made these
10:07
little
10:08
pieces here you could make these out a
10:10
half inch steel
10:12
and weld these little pieces in like
10:14
this
10:15
and then put a closure panel on them and
10:18
you could do the same thing down here
10:20
and that would really strengthen that up
10:23
some more if you
10:24
felt that you wanted it don't need it
10:26
but if you felt you wanted it you could
10:28
do it
10:29
so this is coming along pretty good and
10:31
probably another couple weeks we'll have
10:33
this one all painted
10:35
and the intent is to have at least four
10:38
or five of these in the shop
10:40
that the students will be using so now i
10:42
want to show you the mechanisms we've
10:44
been working on
10:46
here is a finished adjust that you saw
10:48
it on the wheel just a minute ago
10:50
but that's the quality this is the
10:52
premium one
10:55
this is going to be a top adjusted a
10:57
premium machine
10:59
on the basic one it'll be a bottom
11:02
adjuster
11:03
and i have it designed in my head but we
11:06
haven't
11:06
made one yet and this is one of the
11:09
smoothest adjusters it's really really
11:11
nice what we do
11:13
is we buy these bronze bushings
11:17
they're they're cast bronze they're all
11:20
machined to a size
11:21
i can't get the proper size i want so we
11:25
have to take them
11:26
and we turn them down to the proper size
11:29
they get inserted in here and these
11:32
allen screws with locks on them
11:34
that squeezes that and that gives you
11:36
infinitely adjustable ability
11:39
to make sure that that's nice and tight
11:41
so this wheel should probably
11:43
this adjuster should give you about a
11:44
hundred years of use before
11:46
you would ever even think of having any
11:48
weir on this
11:50
bushing so that's a nice bronze bushing
11:54
so then we use uh 1 by 14 thread
11:58
this isn't one but this is the ones that
12:00
are on this adjuster is a little bit
12:01
shorter this is one for the
12:03
bigger wheels we got and this is the
12:06
lower holder for the yoke and this is
12:09
where
12:10
it locks with these aluminum and you
12:12
have the ability to go up and down with
12:14
this which
12:15
increases the utility of the machine by
12:19
being able to put different types of
12:21
wheels and
12:22
specialty wheels and all kinds of stuff
12:24
in there
12:25
here is a nice
12:31
adjuster handle and these go on
12:35
with one set screw at the top and all of
12:38
these pieces are all going to be sold
12:42
as complete units just as you see it
12:44
there so you'll be able to buy
12:46
the complete adjuster you'll be able to
12:50
buy
12:51
a completed hand wheel all painted and
12:53
ready to go
12:54
but i'll also sell them as
12:57
you finish them up and we've got some
13:00
photos to take yet i thought it was
13:02
going to have them
13:03
priced out and have them on the uh
13:06
the website at proshaper.com today but
13:10
just been so busy we just didn't have
13:11
time to do it hopefully next week
13:14
we'll be less busy because we've just
13:17
had a couple
13:18
classes back to back and that really
13:20
took a lot of my time
13:22
and next couple weeks i should be
13:25
less busy to be able to concentrate more
13:27
on this
13:29
so here's the the guts
13:32
of the adjuster where we turn them out
13:36
there's the bushing
13:37
installed and this little pin holds it
13:39
so that you don't have any
13:41
action turning it locks the motion up
13:44
and down
13:45
that's a nice little bracket somebody
13:47
criticized me because i only had it 3
13:48
16 which would have been fine i bumped
13:51
it up to a quarter
13:52
so whoever criticized me uh you can have
13:55
a smile now
13:57
so the quarter's probably better the 316
14:00
might have been adequate
14:02
these are the caps we weld on a half
14:05
inch piece of stock here on the top and
14:08
then we thread it to 114
14:10
and then we put these little tabs on
14:12
here these are the
14:14
initial one i welded it here like this
14:16
and i didn't really like the look of it
14:18
and so we got plug welds in here and
14:20
they'll work fine
14:22
and all you gotta do is put a little
14:23
grease on that and that'll last a
14:25
long long time this is what they start
14:28
out like this that gets welded on the
14:30
top like that
14:31
these are all water jet parts so
14:35
let's go over to the other bench where
14:37
we got a big production run what we have
14:39
here
14:40
is the initial three that we did to
14:43
prove out all the processes and stuff
14:45
the anvils are in the works the top
14:47
wheels are in the works
14:49
they'll be all coming together hopefully
14:52
two or three more weeks at the most we
14:54
get it all together
14:56
so uh here's the yolk the
14:59
lower yolk here so let's go over to
15:02
the table we have a whole bunch that
15:04
we're building all right here's
15:05
some of the components for the top
15:07
adjuster in the
15:08
lower yoke holder here we turn them in
15:12
the lathe they get to put a beautiful
15:13
finish on them they're going to get
15:15
painted but
15:16
it's nice to get them all all the same
15:20
and then we have a cnc mill we mount
15:23
them in the cnc mill
15:24
and that positions all these holes that
15:26
are threaded
15:28
and we also have to put that
15:32
slot in there that keeps that top
15:35
adjusted from turning
15:37
that's all milled in the cnc uh
15:41
mill and then we have to turn them
15:44
on the inside that's where it accepts
15:46
the that bronze bushing
15:48
and it gets locked in there so
15:51
those are coming along that's a 10 unit
15:54
run
15:55
and waiting for the waterjet cutter to
15:58
send me some of the parts we need to do
16:00
the yolks together
16:01
with the yolks together and stuff so
16:03
that should be happening next week
16:04
sometime
16:06
so just wanted to keep you updated on
16:08
where we are with the wheels
16:10
and uh we haven't forgotten everybody it
16:13
takes a long time to put them all
16:14
together so i
16:15
think there's probably only a couple of
16:17
three people that probably have them
16:18
together
16:19
and we will get these together and we'll
16:23
this is the
16:23
the deluxe uh adjuster and wheels and
16:26
then we'll get a basic
16:28
uh set adjuster and wheels
16:31
and uh it's it's still all happening so
16:35
be patient thanks for watching my
16:37
youtube videos
16:39
tell other people we need some new
16:40
subscribers we've had a big lull in
16:42
viewership because i wasn't making any
16:44
videos
16:46
but pass the word and thank you very
16:49
much for all the support you give
16:51
it's racheline from pro shaper workshop
16:53
thank you
Jobs & Education