Up next in 10


https://www.proshaper.com
Our Amazon Storefront: https://www.amazon.com/shop/proshaper
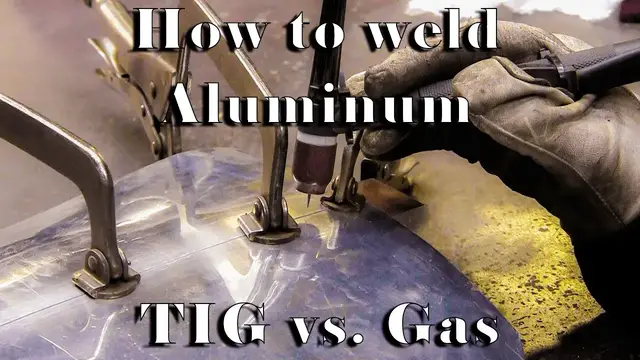
How to weld Aluminum Sheet Tig Vs. Gas
We have a lot going on in the shop these last few months but I think we're finally back to doing 2 videos a week. This video is to compare and contrast the differences between tig welding and gas welding Aluminum sheet. Wray grabbed a scrap piece, cut it down the middle and welded one half of the panel using the TIG welder and the second half using a gas welder. We then proceed to the stress test to see if the welds hold up. Mind you the welds are perfectly fine when you fit the panel to the car. We're just showing through the use of a mallet how much stress the welds can take before they break.
We hope you enjoy this video and if there is anything else you might want to see please let us know!
Email: [email protected]
Website: https://www.proshaper.com
Facebook: https://www.facebook.com/ProShaper/
Instagram: https://www.instagram.com/proshaper/
Twitter: https://twitter.com/ProshaperM
Linkedin: https://www.linkedin.com/company/pros...
Show More Show Less View Video Transcript
0:00
Hi, it's Ray from ProShape-A-Workshop in Chowdton, Massachusetts. Thanks for all the support we've
0:14
been getting on the channel. It's picked up quite a bit. We did a rust removal video and they seem
0:20
to do really good and the numbers are jumping. So we're going to do a TIG versus gas welding
0:26
Comparison tonight they got a piece of oh 63 aluminum. I dragged it out of the the trash bucket
0:33
It's got a little compound in it and what we're gonna do is I'm gonna cut it right in half
0:38
And I'm gonna weld I'm gonna tack it with the take because I like the way that can tack with a table
0:44
It's very easy and then I'm gonna weld half of it with gas
0:48
Half of it with the tag and then we'll compare the results after all right
0:53
I bandsawed the panel in half that makes a beautiful joint. I scribed the line first
0:58
Has a little fuzz from the bandsaw. I took a little file knocked the fuzz off
1:03
I've got a back gas protection with this little bit of 027 roofing copper
1:09
He's got four clamp five six clamps on here And what I'm going to do is I'm going to tic tac this whole thing and that will hold it all nice and level together
1:18
That's super important to get your surfaces the flush So I'm gonna tack it here and here and then I'm gonna start in the middle and work my way out like that
1:27
These tacks here lock the ends because what happens is you as you go out from the center to the end
1:34
It wants to walk over each other and these clamps are restricted, but they can jump the clamp sometimes
1:42
so I Used a little bit of Scotch-Brite on the joint and I'll give it a little scotch brite on the rod here
1:58
I use a magnifier in my helmet. It's a two and a half magnification and it really helps out a lot
2:07
I'm going to start over here. This is 063, 3003. I got a 1100 rod. I got my pig set at 80 amps
2:17
I'll show you the settings later if you want. And I use a mix of helium, argon
2:25
50% helium, 50% argon. It makes a difference. You can do it with straight argon, but it makes you more foolproof if you add that helium element
2:37
All the TIG welding originally of aluminum was done with it. It was called Heli-Oct
2:41
They used helium. And for some reason, they switched over to argon
2:45
I don't know the history of it. So here I'm going to do some tacks. Now when you do these initial tacks, this metal is room temperature and you've got to bring this up. So one of the difficulties is getting your puddle started is you've got to build the heat up
3:01
So you just kind of wandered around, you just barely push the pedal and you create a bunch
3:06
of heat and you make sure that you get heat on both sides of the panel
3:10
Oftentimes, one side of the panel will heat up a lot more than the others so you got to
3:14
pay attention. You get it hot, then you get to where the seam is and you start to see it silvery aluminum
3:23
color or silver color and then you just drop a little ball on there and that will be our
3:59
you saw how we heated that up do the same thing here
5:29
you And now we have eight tacks I'm gonna put one right on the end here too
5:59
Thank you
6:56
I'm pulsing with my pedal a little bit and I'm adding the rod and then pulsing with the pedal
7:05
and I'm trying to get the smallest bead as I can right over here I flubbed it a little bit
7:10
a really really good welder doesn't flub it and it takes years and years of
7:17
practice and most important it takes really good eyesight. Thank you
7:56
The real important thing here is when you're TIG welding is you get the correct heat for
8:13
the job. If you're too hot, you'll see these tiny little boiling bubbles and you're actually overheating
8:21
the aluminum If you too cold you not getting the handshake between the two sides of the panel and it gonna crack This is what you see out in the
8:37
forums and everybody has an opinion on welding will say that TIG welding cracks
8:42
all the time and it will. It will crack if it's not done right. Sometimes you can
8:49
do it right for two feet and then all of a sudden you'll get a crack half an inch long or an inch
8:55
long. You just got to clean it up. That's all redoing. It'll re-weld no problem. So now I have a back
9:02
gas condition in the sense there because I've closed the back door. Now I can just run this
9:07
weld if I want. So I can add a little rod if I need to but that will be a pretty weld on this
9:14
side now because we've got that backside all welded. You always have to be comfortable when you're welding
10:14
So there's our frontside weld. We don't I don't think I have any undercuts on there because I had a lot of drop through
10:21
I got a good amount of weld there. So both of these should grind really nice and planish out really nice
10:29
As you can see there's very minimal distortion. There'll be a little bit of shrinkage every time you weld, but there's very little distortion there
10:40
Now we got half of it welded with TIG. We'll mark that with the marker here TIG
10:48
and then we'll gas weld this side. The gas welding we only have to do on one side because gas welding will
10:54
penetrate right through. There's no openness or anything. You can TIG weld on one side if you're super careful and you've got a back gas condition
11:02
So there's the gas, there's the TIG. Now I got to mix up the flux, get the torch set up and we'll be right back
11:13
I got a water bottle, cut it up, a little bit of water in here
11:18
I got the flux. It's made by Superior Flux and Manufacturing in Cleveland, Ohio
11:26
What's their website? www.superiorflux.com Expiration date on this is 4-18-19
11:38
So it's two years out of date But I don't think it's any problem
11:43
We'll put a little flux in with that water there It's got a silica thing here
11:51
We just want to make a little paste That's too wet I get a little more in there
12:04
This is very corrosive too. It'll corrode everything, all your tools and everything
12:10
So you got to clean it off pretty good. Still a little too wet
12:17
There we go. That should do it. Put that back in there
12:29
this gives off a little fumes when you're when you're working with it now I got to get the torch
12:39
I don't have anything special I've had I have used the hydrogen and oxygen combination before
12:47
and that was exceptional it burns super clean there's no soot at all with the
12:54
Acetylene oxygen you do get a little bit of black soot tiny amount, but you can see it
13:03
So we're gonna get the torch. It's over here All right, I got nothing special. It's it's a nice torch. It's a Smith's torch. I've got Miko. I have
13:13
The Cobra the Dillon torch. I think I got one other one really small
13:18
This is small torch, but it's a general purpose torch. I bought this probably 35 years ago or so
13:24
So what I'm going to do is just put a little heat in here and then put the flux on it
13:41
That's a nightmare with the thing jumping around like that so I want to try to balance
13:45
that out. You can put it on both sides. One side is probably sufficient
13:52
A lot of guys are really good at how they put any flux at all, but it's good to have
13:58
enough flux on you. And you can flux your rod too. That's what she said
14:04
That's my joke. Damn it, Dwight. We're going to clean the rod with the Scotch-Brite
14:10
We'll heat the rod up a little bit. Put a little flux on it
14:31
See if I can take that bounce out of here. Now, for my helmet, I'm just using a standard helmet here, but I have a
14:45
Kent White's lens. I've had that for 30 years or so. They're really nice lens. You can also use
14:55
I've done a study on it, and there's some other ones that work almost as good as this, but as far
15:01
as my experience, Kent White's TM Technologies is probably the best one. It's a little pricey. A lot
15:09
of people balk at the price, but it's well worth it if you want to do gas welding. And then I put
15:14
my little two and a half glass magnifiers in there also so I can see pretty good
15:22
So let's see how I can do here. I'm not the best gas welder by any stretch but I can
15:28
hold my own. I probably learned when I was about 14 or so. I haven't done that much of it
15:35
Got a little bit of a flame there and let me come down on my chair a little and here we go
15:44
Thank you
16:14
Thank you
16:44
There we go doesn look too bad
17:10
And the heat control with the gas torch is pulling the heat away
17:15
I could do about a half an inch at a time and what happens is the heat starts to accumulate
17:20
so you have to pull the heat away let it cool for a second then you bring it introduce your
17:25
heat back again and do another half inch pull it away and you get a nice little rhythm going
17:31
and you have on the TIG you have a control structure that you have to pedal and you can
17:37
you can move the tungsten away as well. The tungsten is an electric torch. This is a gas torch
17:46
And they're similar, very similar. And now we'll let that cool down and then we'll wash it all good
17:56
Let's just flip her over here without burning our hands off. Oh, here are my gloves. Let me get my
18:00
gloves on. We'll flip her over and see if I got good enough penetration with that gas weld. Now
18:05
Now, with a gas weld, if your penetration isn't perfect, it's not the end of the world
18:10
It'll still hold together really well. Doesn't look like I did too well on that
18:17
So it was a little cold on my gas weld. So I could run that again on that side
18:25
Generally, you don't have to, but I don't want to have someone say
18:30
well, you didn't do the gas weld right. So let me just run that on the back side. It should go pretty quick
18:50
Heat that up a little bit. Give it another dose of flux
18:58
Heat this up a little. Thank you
20:30
Now I got the back side all welded. Like I said, generally you don't have to do that
20:39
I had the setting a little bit low. If I was doing this every day
20:44
it would have been a little bit better. So now we gotta clean these wells up
20:51
A really good gas welder would have a much nicer look. I'm probably a much better TIG welder
20:56
than I am a gas welder. I've got a nicer look on there
21:00
So let's let it cool down. We'll clean it up good. We'll grind it
21:05
I'll show you some of the grinding, and then we'll hammer it down in the planishing hammer
21:10
get it flush, and then we'll smooth it all out nice, and then see how much strength we got in that weld
21:17
I'm gonna grind these wells down. I'm not gonna grind them all the way right now
21:21
I'm gonna do a preliminary grind on them, and then I will run it in the air planishing hammer
21:27
squash it down a little bit, And if there's any low spots, there might be a little low spot on my TIG weld side
21:33
It looks pretty good, but there might be. I don't think there's any low on here. We can cold forge some of the material from the bottom up
21:42
So I use 50-grit Norton Blaze. I found these to be the best
21:47
These are row locks. And for the grinder, I've tried every one of these air grinders now
21:55
Harbor Freight came out with their Chief brand, brand which is their top of the line air tool they are an exceptional air tool i i want the
22:03
problem is you can't get them they're oftentimes they're not in the store and they're not on their
22:08
website so i've got two right now but i'll probably buy probably four more to replace some of the
22:15
the huskies and the lesser quality ones that i've got i use wax because the aluminum will pick up so
22:25
I got a little bit of candle wax, nothing special about it. And I'm going to grind with it like this
22:33
Not across it, but with it. This top grind is really easy because it's offering itself up nicely
22:44
So we washed this flux off with hot water in the sink and scrubbed it with a brush
22:50
This is the gas side, this is the tig side. So now we're going to do a preliminary grind on it
22:55
And the object is to grind just the weld not the parent metal
23:17
As you can see I don't have any scratches yet. I will put some scratches in
23:21
But if you go this way across it, you're gonna be biting all the way over here and makes a big mess and it's
23:27
It's just not a really good technique I turn it around or tack it from the other angle because this little lip we want to get rid of this lip and
23:44
We'll fade that right in so at first it's like a mound on top of the
23:49
the parent metal, but then we're going to cut it down so it's just a little like a small angle
23:57
housetop on there and we'll leave that little extra until there's a little bit maybe undercuts
24:02
on here too. So there's the gas side. Now let's do the tig side
24:19
And you want a pretty low angle when you're grinding
24:32
If you go like this you're going to dig a scallop in there really, really easily
24:37
So now we'll do the back side. On the back side I'll take my used disc, which generally you only use the outside of it
24:45
use a little bit of the inside but there's still a lot of good grinding material left on the inside here and that one has a three inch backing pad this
24:55
one has a inch and a half backing pad and then watch how I cut this it's a
25:01
quarter of an inch off the backing pad I just cut it straight like that I turn
25:06
it a little bit and I have it this is a delegated wish here that I bought just
25:13
for cutting these discs Try to maintain that quarter of an inch pretty simple to do and that makes this little hex
25:24
it's out around and stuff but it doesn't make any difference these little edges right here
25:30
at the angle that's what really cuts like crazy so now I'm going to put the wax out here and we'll
25:39
power this up with some air. Let me mark that too. This is gas, gas, and that's TIG
26:09
It's so important to have good abrasives. I just bought I think 52 inch
26:16
Chinese sourced abrasives. It was incredibly low price. I used them once and I says oh my god
26:22
These things just don't do what you're supposed to do. These Norton blazes are just exceptional
26:39
It is a little loud. I want to put some muffs on. I'm going to put another one on
27:09
Now that can be cut down again
27:20
I've got an inch and a quarter backing pad or inch backing pad, and I'll cut that again
27:39
you Let's bring that over to the hammer hammer hammer that down now we got a lower died has a slight crown to it
28:09
I'm going to lower that. There we go
28:45
That's just about flush now. We'll give it another little grind. Usually I clean them up with like 120 and they're absolutely perfect after that
28:53
But we're just going to hit them with the 50 again back over at the grinder table
28:57
We'll do the backside a little bit with the smaller disc. Now normally I grind that with a lot more careful procedure and I'll do it like I said with 120
29:37
it looks perfect and everything but it's getting late so we've got it all welded together
29:44
Now let's see, we can do two tests here. We're going to do a clamp test
29:53
We'll clamp this to the bench like this. I'll bend it right on that weld
30:02
Let's see what happens here. That's the gas side
30:15
Because it's got the compound in it, it won't let me hinge it
30:21
I won't really go that way so much
30:30
Let's try it this way here. It's all looking good
30:42
Straighten it out again. Let's bend it again. Straighten it out again
30:51
Bend it again straighten it out again See any cracks There's a tig side there's a gas side
31:03
No cracks. All right now. Let's go over and hit it with a hammer All right
31:15
We'll hit it with this hammer. This is I call a medium crown
31:20
We'll hit it like we're going to be shaping it It's the gas side
31:27
Right the gas side Has broke look at that Not saying the gas is no good. I wasn't doing the weld that good
31:49
Now it's broke here that's a fatigue break at the edge of the weld. These broke right at the weld
32:12
Like I said I did a bad weld on there was probably cold. So I really won't condemn that gas weld
32:18
Generally the gas weld will go and go and go. If you do the TIG weld, it'll go and go and go too
32:25
But if your procedure is wrong, you're not going to get ideal results
32:30
So you don't condemn the method just because you didn't get a perfect result every single time
32:37
So there you have it. We'll probably do this a couple more times to show the differences between gas and TIG
32:45
and I'd like to get probably some other welders in that are really good at it
32:51
and we'll give them the same test. That would be a great thing for the channel
32:55
So please remember to subscribe. Give us the likes, the comments. Hit that notification bell
33:03
Remember, you can go to the homepage on YouTube and there's like now 257 videos, I think, there
33:11
You go to the homepage, you hit the video drop-down menu and all the videos are there in chronological order
33:19
It's quite a library of information and you can easily get lost for a couple weeks there
33:25
watching all those videos and we really do appreciate it when you do
33:29
So it's Ray from ProShaper Workshop in Charlton, Massachusetts. Thanks for watching
33:45
Thank you
#Autos & Vehicles
#Business & Industrial