Up next in 10



English Wheel Plans:
https://www.proshaper.com/tool-designs/
Our Amazon Storefront:
https://www.amazon.com/shop/proshaper
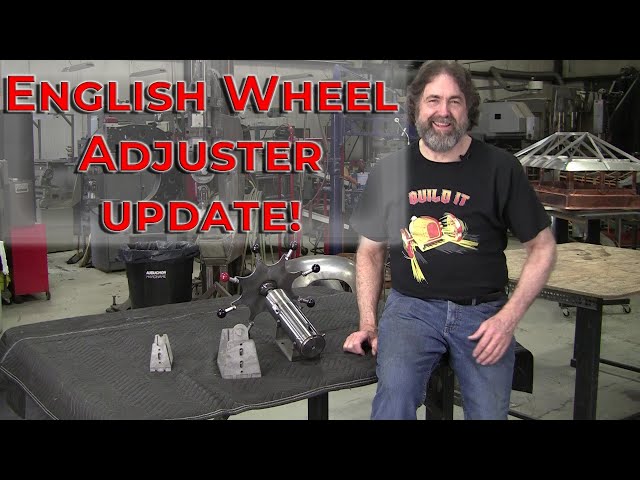
We are in production mode with our English Wheel adjusters. Wray discusses the various options that will soon be available for purchase. We also wanted to announce that our metal shaping classes are back! We understand in the current climate that many still won't be able to attend which is why we provide these videos for you. One of our viewers is from the UK, he doesn't have many tools and has an extremely small workshop. That didn't stop him though. After watching our Bonnet Build videos Praisehim bought our Flexible shape pattern tape and copied the information from a D Type Jaguar. With the knowledge he has gained from the videos he completed nearly all the panels now all he needs to learn is welding. Anything is possible when you put your mind to it!
Email: [email protected]
Website: https://www.proshaper.com
Facebook: https://www.facebook.com/ProShaper/
Instagram: https://www.instagram.com/proshaper/
Twitter: https://twitter.com/ProshaperM
Linkedin: https://www.linkedin.com/company/proshaper/
Show More Show Less View Video Transcript
0:09
hi it's ray from proshape the workshop
0:12
in charlton Massachusetts and we've been
0:15
away for a little while but we're back
0:17
now and hopefully we get some more
0:19
videos made the classes have started
0:21
again and we've been really busy with
0:24
the English wheel project we've sold a
0:27
bunch of the plans we hope to sell a
0:29
whole bunch more and now the next step
0:31
of that is not only building the frame
0:34
the people that bought the plans of
0:35
building the frame which takes some time
0:37
the next step is the yolks and the
0:40
adjuster and all the components you need
0:42
so as you probably know I like high
0:46
quality stuff but you have to balance
0:48
the high quality with the price and I
0:52
went through a lot of juggling to figure
0:54
out how it was the best way to make a
0:57
really high quality components for that
1:00
wheel as you saw the wheel in the
1:02
earlier video I finished it up pretty
1:04
nice and it deserves these very nice
1:07
components so and I'm hoping to sell
1:12
them at different levels maybe just
1:15
drawings and then also unassembled and
1:19
if you finish it yourself type of deal
1:21
and then totally finished well these are
1:24
the production prototypes we've got
1:26
three of them running now and we got a
1:29
bunch of others in the works this is the
1:31
top adjuster I've in them in my history
1:35
of building English wheels I've probably
1:37
had about seven or eight different
1:39
designs for justice this is the first
1:41
one that I've made out of ROM stock and
1:44
I didn't do any shortcuts at all on it
1:49
it's a really high-quality adjuster it's
1:51
very nicely it works very nicely we make
1:56
the the top wheel too you got about an
1:59
inch and a half a travel that's all you
2:02
need the D criteria for a adjuster is to
2:07
limit the any type of play this limits
2:11
the rotational play
2:13
and then we've got a bronze bushing we
2:16
were able to get a bronze bushing we
2:20
have the machine but it's a big large
2:23
diameter one and we cut it and it's
2:26
about an inch and a quarter long or so
2:28
that carries all the load right there
2:30
and it's a it's a really elegant
2:32
solution to a top adjuster or any
2:37
adjuster this is the interface here for
2:42
the upper yoke
2:43
you have a nice live surface that the
2:48
yoke will will seed on and it takes a
2:52
half 20 the cap screw it allows the yoke
2:56
to turn 360 degrees so if you want to
3:00
turn the yoke to 90 degrees or 45
3:03
degrees which you don't do every day but
3:06
it comes in really handy when you have
3:09
to so that's a really nice feature the
3:13
thing is pretty much maintenance-free a
3:15
little bit of dog the oil here and there
3:16
and the thing the last 20 years it's got
3:19
a really nice wheel we make that up here
3:25
and it mounts with right on to the
3:29
English wheel frame and there's these
3:31
holes are a little bit bigger so you can
3:33
you can adjust it around and dial it all
3:37
in to get all your geometry correct
3:39
you can also shim it if you made a
3:41
mistake in the welding you have the
3:43
ability to shim it and there's just a
3:47
lot of nice features of this of this now
3:50
this is how you we get it out of the
3:52
lathe we turn these down and get a nice
3:55
finish on them but on the finished one I
3:58
was going to put wrinkle paint I was
3:59
thinking of putting black wrinkle paint
4:01
but now I'm thinking I'm gonna just put
4:04
silver hammered finish on it
4:06
you could leave it bare but you'd have
4:08
to wax it otherwise there to rust up on
4:10
you so when that's all done there will
4:13
be some lock nuts on here to lock these
4:16
adjusters this is an adjustment for the
4:19
bushing the bushing is infinitely
4:21
adjustable so you should get literally
4:24
lifetimes where at the use out of this
4:26
just as the bushing we're
4:27
it's not a high where item anyways but
4:31
if it wore it down and got a little
4:32
loose you just tighten these here and it
4:34
tightens the bushing so you know this
4:38
will last more than one lifetime so it's
4:43
a nice nice adjuster and now another
4:46
potential on it is it can be mounted on
4:49
the bottom and you just we just provide
4:52
a longer screw thread here and then
4:55
it'll become a bottom adjuster wheel if
4:57
different people prefer the bottom
4:59
adjuster wheel now I want to talk a
5:02
minute about these yolks here this is
5:06
the upper yoke and I've been using a
5:10
water jet cutter for about five or six
5:13
years now in Connecticut and they have
5:16
state of the art don't like I think
5:18
three or four axis cutting heads on that
5:21
water jet cutter it's a major table it's
5:24
a very very expensive water jet cutter
5:26
all water jet cutters are not created
5:28
equal this one you get you know super
5:33
precise 90-degree cuts on it and they
5:37
they give you a spec of plus of minus
5:39
ten thousandths of an inch in my
5:42
practice with them it's more like plus
5:45
or minus one thousandths of an inch
5:48
now I've cut all these pots previously I
5:50
have a plasma cam CNC plasma cutter
5:53
which is a bare-bones machine but it's
5:56
actually a really really nice machine
5:58
and I can cut these on this but I won't
6:01
get anywhere near the the accuracy that
6:03
I can get with the water jet and so it's
6:07
a poison pill thing do you spend all
6:10
your time cleaning it up or do you step
6:14
up and buy a really nice water jet part
6:16
and it's very little cleanup I just ran
6:19
the grinder on these for two seconds
6:21
there might have been a little nub or
6:23
something on it and that cleans them all
6:26
up they're all nice and square I
6:28
provided all the drawings this is the
6:31
top yoke there's the mount hole right
6:33
here and unfortunately that was supposed
6:37
to get six of these because I got three
6:38
of these in the works right now
6:40
the tapa just is and the only sent me
6:42
one so they owe me five more and these
6:45
are this is where your axle goes through
6:48
for the top adjuster top yoke rather and
6:51
it's a one inch axle I haven't cut that
6:55
hole and I have a one-inch reamer and
6:57
I'll just run it through here and this
6:59
is this is about almost perfect now
7:02
so the Rema will just make it absolutely
7:04
perfect and I make these so it also have
7:08
these holes cut and these are the
7:12
correct size for tapping them these will
7:14
get tapped out to a 3/8 I believe 18
7:17
thread or so the coarse thread and that
7:20
allows these to be adjustable up and
7:22
down and then the adjustment on them is
7:27
on the bottom that hole there gets
7:31
threaded with a 5/16 18 and a set screw
7:34
goes in there and these all get welded
7:37
together and this becomes like a machine
7:39
surface so you don't even have to do any
7:42
machining it's all off set boy right out
7:46
of the water judge just a little bit of
7:47
cleanup with the file so these will have
7:50
to be welded together and tapped and of
7:54
course I'm missing the other piece here
7:56
and that will make a really fine
7:59
full-featured upper wheel yoke well now
8:03
this is the lower wheel yoke and this
8:06
could be used also if you wanted to use
8:08
this wheel with larger lower anvils you
8:13
could use this yoke for both the upper
8:15
and lower and all of these components
8:19
I'm going to package them up into a big
8:21
package but also you'll be able to buy
8:25
any of these components separately so if
8:27
you have another wheel that has a yoke
8:31
that's not up to snuff or you want a
8:35
better adjuster you can buy any one of
8:37
these pieces individually so here's the
8:40
the bottom yoke and it's the same deal
8:46
it has this nice machine surface where
8:49
this piece here is
8:52
the active piece that's adjustable and
8:55
that allows you to set the attitude of
8:58
the anvil so you can tilt the anvil or
9:02
make sure that your hand will of contact
9:05
area is running dead center on your top
9:08
wheel so these are really high quality
9:10
pieces I might just sell them just like
9:14
that as a Zapata case they're easily
9:17
mailable and printed and priority mail
9:19
so the shipping won't be that bad you
9:22
can tap them out you can weld them and
9:26
you can you got to make sure they're all
9:29
square when you weld them up and
9:31
everything and you'll end up with a
9:33
really nice piece and then you can paint
9:35
them the color you want and stuff same
9:37
thing with that yolk so keep watching
9:40
the website and you'll see all the
9:43
different options we're still waiting
9:45
for a bunch of stuff for my suppliers
9:47
and we're also going to do a inexpensive
9:52
lower adjuster the lower adjuster
9:55
generally can be made for less money so
9:59
people are very price conscious will
10:01
offer that that will also offer the 360
10:05
turn potential on both upper and lower
10:07
yokes and they'll be bolt on and and
10:14
that that will will you know give you a
10:17
real wide spectrum as far as the pricing
10:20
structure goes so I just wanted to show
10:22
the detail of what that waterjet does is
10:28
that lower yoke for the three-inch
10:32
anvils and you can see it cuts out these
10:34
beautiful square holes like that now
10:37
this is going to be welded here and then
10:42
this gets attached to it and then your
10:45
champ for this edge here and you weld
10:47
these right together it makes a really
10:49
solid solid assembly I've been making my
10:51
yokes like this for probably about 15
10:54
years or so now but previously I cut
10:57
them mostly in my plasma cam cutter the
11:01
CNC plasma cutter but nothing beats this
11:04
water jet
11:06
and you know it has to be a really
11:08
high-quality machine - and to get these
11:10
incredible results so the classes are
11:14
now back on again if anybody's
11:16
interested in taking classes and we've
11:19
got some really cool t-shirts check them
11:21
out right on each one about videos
11:22
teespring t-shirts this is a really nice
11:25
one I love this one and we'll be
11:29
following up with another assembly video
11:31
on the frame we've got the second one in
11:35
play right now but we're going to get a
11:37
third one going and I might do that
11:40
assembly video and we might show some of
11:44
the assembly process and the machining
11:46
process and makes this to make these
11:48
pieces I understand that not everybody
11:51
can come to my classes and with this
11:54
Kovan 19 situation we're all in it could
11:57
be a year and a half before Europeans
12:00
can come back and the australians that
12:02
were coming and i mean i have people
12:04
from all over the world coming plus the
12:06
united states and so there are a lot of
12:11
people watching my videos and one of
12:15
them was a an IT guy from UK
12:19
his name is praise and his first name
12:23
and he's got he had zero experience and
12:27
somehow he got enthralled with a d-type
12:31
jaguar i see on his website on his
12:34
Facebook page he took a ride in one and
12:36
he had an opportunity to buy a
12:39
fiberglass D type Jaguar body which he
12:42
wanted to trance translate it into an
12:45
aluminum Jaguar d-type body so he's now
12:49
in a hiatus on his job because of the
12:52
Kovan 19 he's got some time he's got a
12:56
little tiny workshop and he's been
12:59
watching my videos and this just shows
13:02
you the power of video and he ordered
13:05
some flexible shaped patent tape from me
13:07
and he's got a very small English wheel
13:11
that he bought every thoughts tools are
13:13
very inexpensive and he's building a D
13:16
type Jaguar complete aluminium
13:20
and he's got a lot of it done he's
13:21
working on it every single day
13:23
now the panels are not up to you know
13:26
world class coach building standards but
13:28
they're pretty damn good and he's not
13:31
welded him yet he's got to still learn
13:33
his welding skill sets and he has to do
13:36
a bunch of planishing on him but I was
13:39
gonna have MOC put those pitches in and
13:42
you'll see that my video is not only
13:45
inspire but actually have actual results
13:48
so if if you're getting some kind of
13:51
result like that from watching my videos
13:53
we'd love to hear from you just private
13:56
message me or email me two pitches of
13:59
what you're doing and that'll help
14:01
inspire everybody else so keep watching
14:04
and keep giving us the support we could
14:07
certainly use a lot of support and this
14:09
o'clock comment current climate that
14:12
we're in not everybody can still come to
14:14
the class the the flights are not up to
14:17
snuff yet so any any help that you can
14:21
give us in purchasing tools or our plans
14:25
greatly appreciated and it helps expand
14:30
into new areas I want to do other tools
14:32
I want to finish up a lot of the
14:34
projects that we're working on but it
14:36
takes time and money to do all that
14:38
stuff so thank you very much and hope to
14:41
see you soon
14:43
[Music]
14:47
you
14:48
[Music]
#Jobs & Education